1. Download and install docker toolbox
Download address: http://mirrors.aliyun.com/docker-toolbox/windows/docker-toolbox/
docker toolbox is a tool set, which mainly includes the following contents:
Docker CLI client, used to run the docker engine to create images and containers
Docker Machine. Allows you to run docker engine commands on the command line of windows
Docker Compose. Used to run the Docker Compose command
Kitematic. This is the GUI version of Docker
Docker QuickStart shell. This is a command line environment with docker configured
Oracle VM Virtualbox. Virtual machine
After the download is completed, click Install directly. After the installation is successful, three icons will appear at the table, as shown in the following figure:

Click the Docker QuickStart icon to start the Docker Toolbox terminal.
| user | Password | Entry mode |
|---|---|---|
| docker | tcuser | ssh |
| root | command: sudo - I (executed under docker user) |
Configure Chinese accelerator
Under the current user document, there is a config.json file under machine\machines\default in the. docker folder
Modify the sub node of "HostOptions" in the configuration file
"RegistryMirror": [
    "https://9pwp8psv.mirror.aliyuncs.com"
],
Or in the docker toolbox terminal
#Delete the VM image created by default first
docker-machine rm virtualbox default
#Re create an image of Alibaba accelerator
docker-machine create --engine-registry-mirror=https://9pwp8psv.mirror.aliyuncs.com -d virtualbox default
2. Create a new springboot project
Add a default controller
@RestController
public class DefaultController {

    @RequestMapping("/")
    public String home() {
        return "Hello Docker World ";
    }
}
Start this project to check whether it can be accessed normally under my docker
3. Modify pox.xml to docker compilation
properties property node join:
Set the prefix of docker image "springboot" -- >
<docker.image.prefix>springio</docker.image.prefix>
Modify the build node to
<build>
        <plugins>
            <plugin>
                <groupId>org.springframework.boot</groupId>
                <artifactId>spring-boot-maven-plugin</artifactId>
            </plugin>
            <!-- Docker maven plugin -->
            <plugin>
                <!-- https://mvnrepository.com/artifact/com.spotify/docker-maven-plugin -->
                <groupId>com.spotify</groupId>
                <artifactId>docker-maven-plugin</artifactId>
                <version>1.2.0</version>
                <configuration>
                    <imageName>${docker.image.prefix}/${project.artifactId}</imageName>
                    <dockerDirectory>src/main/docker</dockerDirectory>
                    <resources>
                        <resource>
                            <targetPath>/</targetPath>
                            <directory>${project.build.directory}</directory>
                            <include>${project.build.finalName}.war</include>
                        </resource>
                    </resources>
                </configuration>
            </plugin>
            <!-- Docker maven plugin -->
        </plugins>
    </build>
4. Add Dockerfile
directory structure

Document content
FROM openjdk:8-jdk-alpine
VOLUME /tmp
ADD demo-docker-0.0.1-SNAPSHOT.war app.war
RUN sh -c 'touch /app.war'
RUN echo "Asia/Shanghai" > /etc/timezone
ARG active="prod"
ENV JAVA_OPTS=""
ENV spring.profiles.active="dev"
#ENV spring.profiles.active=${active}
ENTRYPOINT ["sh", "-c","java -Dspring.profiles.active=prod $JAVA_OPTS -Djava.security.egd=file:/dev/./urandom -jar /app.war"]
#ENTRYPOINT ["java","-jar","/app.war"]
Explain this profile:
- 1. Use openjdk 8 alpine version, which is the thin version, or use the full version of openjdk:8-jdk or java:8
- 2. VOLUME specifies that the temporary file directory is / tmp. The effect is to create a temporary file in the host / var/lib/docker directory and link to the container's / tmp. This step is optional. It is necessary to use the file system. /The TMP directory is used to persist to the Docker data folder, because the embedded Tomcat container used by Spring Boot uses / tmp as the working directory by default
- 3. The war/jar file of the project is added to the container as "app.war"
- 4. Execute the linux script and set the file (this sentence has no great significance, mainly in the verification file)
- 5. Change the time zone to Beijing time
- 6. ARG build parameters, temporary variables in Dockerfile file
- 7, 8. JAVA_OPTS, spring.profiles.active is the parameter name, followed by the parameter value. You can directly pass the value to the spring project. For example, you can pass it to the configuration file, receive it with ${spring. Profiles. Active}. You can use "- env --spring.profiles.active=prod" to override the value at startup, or you can override the value in the ENTRYPOINT startup instruction
- 9. Bring in environment variables
- 10. Entry point project start instruction: execute project app.war. In order to shorten the start-up time of Tomcat and the generation process of fast random number, a system attribute is added to point to "/ dev/urandom" as the entry source
5. Add maven editing command for editing
mvn package docker:build
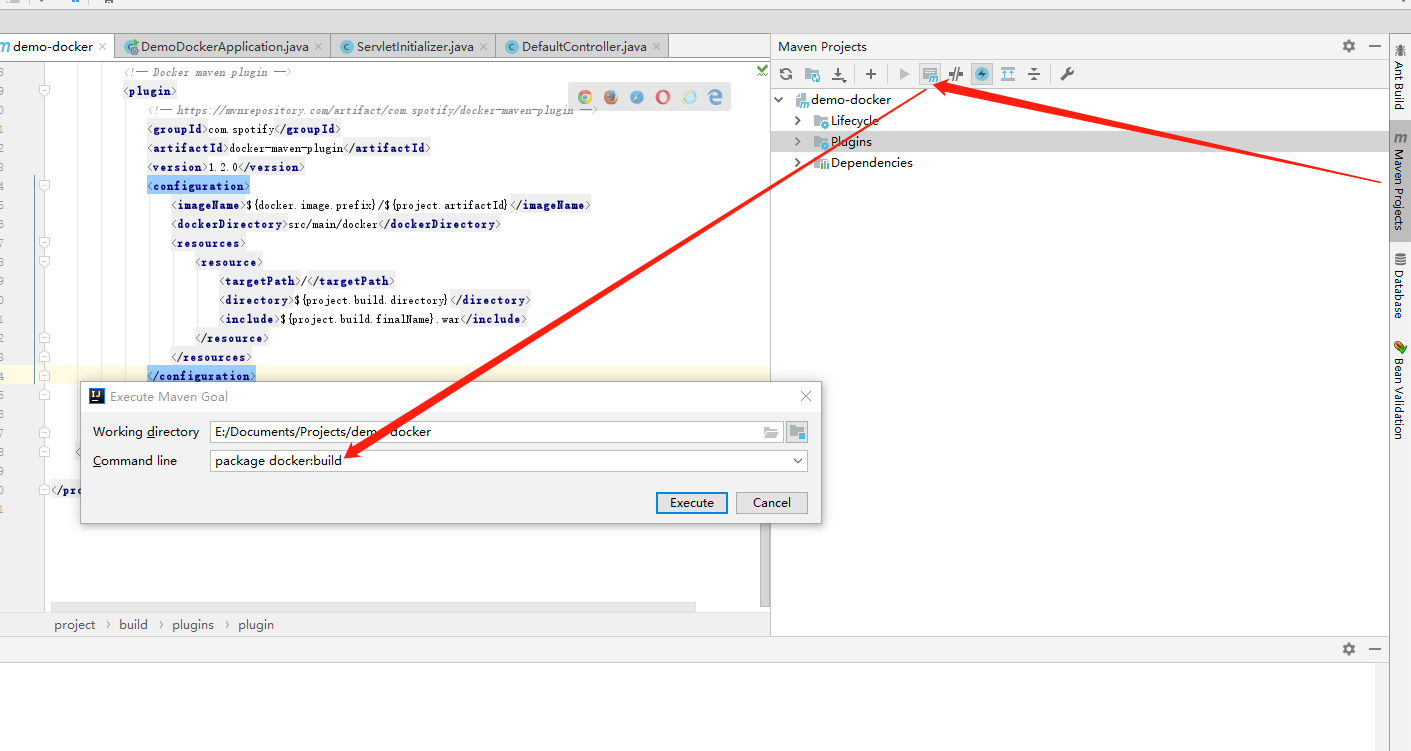
Click execute to start compiling into docker image. Normally, you will see the following steps
[INFO] Building image springio/demo-docker
Step 1/6 : FROM openjdk:8-jdk-alpine

 ---> 2cfb1dc1f0c8
Step 2/6 : VOLUME /tmp

 ---> Using cache
 ---> 0641ab6474fc
Step 3/6 : ADD demo-docker-0.0.1-SNAPSHOT.war app.war

 ---> c01da61fbe6d
Step 4/6 : RUN sh -c 'touch /app.war'

 ---> Running in c8946506f292
Removing intermediate container c8946506f292
 ---> 12383d2f8329
Step 5/6 : ENV JAVA_OPTS=""

 ---> Running in 07d5bebe9e00
Removing intermediate container 07d5bebe9e00
 ---> e8f8f4242553
Step 6/6 : ENTRYPOINT [ "sh", "-c", "java $JAVA_OPTS -Djava.security.egd=file:/dev/./urandom -jar /app.war" ]

 ---> Running in 39ce4bf989ba
Removing intermediate container 39ce4bf989ba
 ---> dca2a0984c5d
ProgressMessage{id=null, status=null, stream=null, error=null, progress=null, progressDetail=null}
Successfully built dca2a0984c5d
Successfully tagged springio/demo-docker:latest
[INFO] Built springio/demo-docker
[INFO] ------------------------------------------------------------------------
[INFO] BUILD SUCCESS
[INFO] ------------------------------------------------------------------------
[INFO] Total time: 14.386 s
[INFO] Finished at: 2019-01-23T16:56:36+08:00
[INFO] Final Memory: 57M/470M
[INFO] ------------------------------------------------------------------------

Process finished with exit code 0
6. Operation project
Enable "Docker Quickstart Terminal" or enter the default virtual machine directly from the "Oracle VM VirtualBox" interface. You do not need to enter the password to enter the root environment
Enter the following command to view the existing image
docker images
Get results

Enter the following command to start the project
docker run -p 8080:8080 -t springio/demo-docker
- a, --attach = [] login container (container started with docker run -d)
- C, -- CPU shares = 0 sets the container CPU weight, which is used in the CPU sharing scenario
-- CAP add = [] add permissions. See http://linux.die.net/man/7/capabilities for the list of permissions
-- cap drop = [] delete permission. See http://linux.die.net/man/7/capabilities for permission list
-- cidfile = "" after running the container, write the PID value of the container in the specified file, a typical monitoring system usage
-- cpuset = "" set which CPUs can be used by the container, and this parameter can be used for exclusive CPU of the container
- d, --detach=false specifies whether the container runs in the foreground or the background
-- device = [] add host device to container, equivalent to device pass through
-- dns = [] dns server of the specified container
-- dns search = [] specifies the dns search domain name of the container and writes it to the / etc/resolv.conf file of the container
- e, --env = [] specifies the environment variable, which can be used in the container
-- entrypoint = "" the entry point of the overlay image
-- env file = [] specifies the environment variable file. The file format is one environment variable per line
-- expose = [] specifies the exposed port of the container, that is, the exposed port of the modified image
- h, --hostname = "" specifies the host name of the container
- i, --interactive=false open STDIN for console interaction
-- link = [] specifies the association between containers, and uses the IP, env and other information of other containers
-- LxC conf = [] specifies the configuration file of the container, only when -- exec driver = LxC is specified
- m, --memory = "" specifies the maximum memory of the container
-- name = "" specifies the container name, which can be used for container management later. The links feature requires a name
-- net="bridge" container network settings, to be detailed
- P, -- publish all = false specifies the port exposed by the container, to be detailed
- p, --publish = [] specifies the port exposed by the container, to be detailed
-- privileged=false specifies whether the container is a privileged container. The privileged container has all capabilities
-- restart = "" specifies the restart strategy after the container stops, to be detailed
-- rm=false specifies that containers are automatically deleted after they stop (containers started with docker run -d are not supported)
-- sig proxy = true sets that the proxy accepts and processes signals, but SIGCHLD, SIGSTOP and SIGKILL cannot be proxied
- t, --tty=false assign tty device, which can support terminal login
- u, --user = "" the user of the specified container
- v, --volume = [] mount the storage volume to the container, and mount it to a directory of the container
-- volumes from = [] mount volumes on other containers to a directory of the container
- w, --workdir = "" specifies the working directory of the container
The startup information is as follows:
  .   ____          _            __ _ _
 /\\ / ___'_ __ _ _(_)_ __  __ _ \ \ \ \
( ( )\___ | '_ | '_| | '_ \/ _` | \ \ \ \
 \\/  ___)| |_)| | | | | || (_| |  ) ) ) )
  '  |____| .__|_| |_|_| |_\__, | / / / /
 =========|_|==============|___/=/_/_/_/
 :: Spring Boot ::        (v2.1.1.RELEASE)

2019-01-23 09:02:49.987  INFO 1 --- [           main] c.e.demodocker.DemoDockerApplication     : Starting DemoDockerApplication v0.0.1-SNAPSHOT on 740b53e853e9 with PID 1 (/app.war started by root in /)
2019-01-23 09:02:50.001  INFO 1 --- [           main] c.e.demodocker.DemoDockerApplication     : No active profile set, falling back to default profiles: default
2019-01-23 09:02:53.582  INFO 1 --- [           main] o.s.b.w.embedded.tomcat.TomcatWebServer  : Tomcat initialized with port(s): 8080 (http)
2019-01-23 09:02:53.685  INFO 1 --- [           main] o.apache.catalina.core.StandardService   : Starting service [Tomcat]
2019-01-23 09:02:53.692  INFO 1 --- [           main] org.apache.catalina.core.StandardEngine  : Starting Servlet Engine: Apache Tomcat/9.0.13
2019-01-23 09:02:53.722  INFO 1 --- [           main] o.a.catalina.core.AprLifecycleListener   : The APR based Apache Tomcat Native library which allows optimal performance in production environments was not found on the java.library.path: [/usr/lib/jvm/java-1.8-openjdk/jre/lib/amd64/server:/usr/lib/jvm/java-1.8-openjdk/jre/lib/amd64:/usr/lib/jvm/java-1.8-openjdk/jre/../lib/amd64:/usr/java/packages/lib/amd64:/usr/lib64:/lib64:/lib:/usr/lib]
2019-01-23 09:02:54.560  INFO 1 --- [           main] o.a.c.c.C.[Tomcat].[localhost].[/]       : Initializing Spring embedded WebApplicationContext
2019-01-23 09:02:54.561  INFO 1 --- [           main] o.s.web.context.ContextLoader            : Root WebApplicationContext: initialization completed in 4389 ms
2019-01-23 09:02:55.178  INFO 1 --- [           main] o.s.s.concurrent.ThreadPoolTaskExecutor  : Initializing ExecutorService 'applicationTaskExecutor'
2019-01-23 09:02:55.671  INFO 1 --- [           main] o.s.b.w.embedded.tomcat.TomcatWebServer  : Tomcat started on port(s): 8080 (http) with context path ''
2019-01-23 09:02:55.681  INFO 1 --- [           main] c.e.demodocker.DemoDockerApplication     : Started DemoDockerApplication in 6.796 seconds (JVM running for 7.909)
Use docker ps to view the running container processes

Table field description
Container? ID means container ID
IMAGE means IMAGE name
COMMAND indicates the COMMAND to run when starting the container
CREATED indicates the creation time of the container
STATUS indicates the state in which the container is running. UP means running, EXITED means stopped
PORTS indicates the port number of the container
NAMES indicates the container name, which is automatically generated by Docker by default. You can also specify it by using the - name option of the docker run command
Several docker commands
Docker start [container? ID]: start one or more containers that have been stopped
Docker stop [container? ID]: stops a running container
Docker restart [container? ID]: restart the container
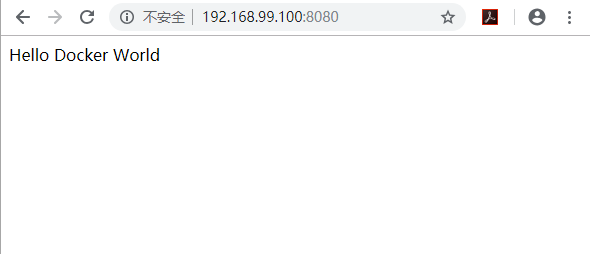
7. Test:
Visit your virtual ip address + the port number specified at startup to access the spring boot project
You can view it in the virtual machine through ifconfig
Enter ifconfig to see that default has three IP addresses of network segments, which are:
docker0: 172.17.0.1, this is docker's bridge.
eth0:10.0.2.15, this network segment is not available in Ubuntu environment. I don't know why there is one more.
eth1:192.168.99.100, the IP address of the host.
In addition, you can also use docker machine env or docker info in local cmd to view the docker environment
The docker inspection [container id] command can view the container operation information
Source: https://www.cnblogs.com/ejiyuan/p/10310207.html