References of previous articles:
Windows play Kubernetes series 1-VirtualBox installation Centos
Windows play Kubernetes series 2-Centos install Docker
Install K8S
yum install -y kubeadm
The corresponding dependency packages will also be installed on kubelet, kubeadm, kubectl and kubernetes CNI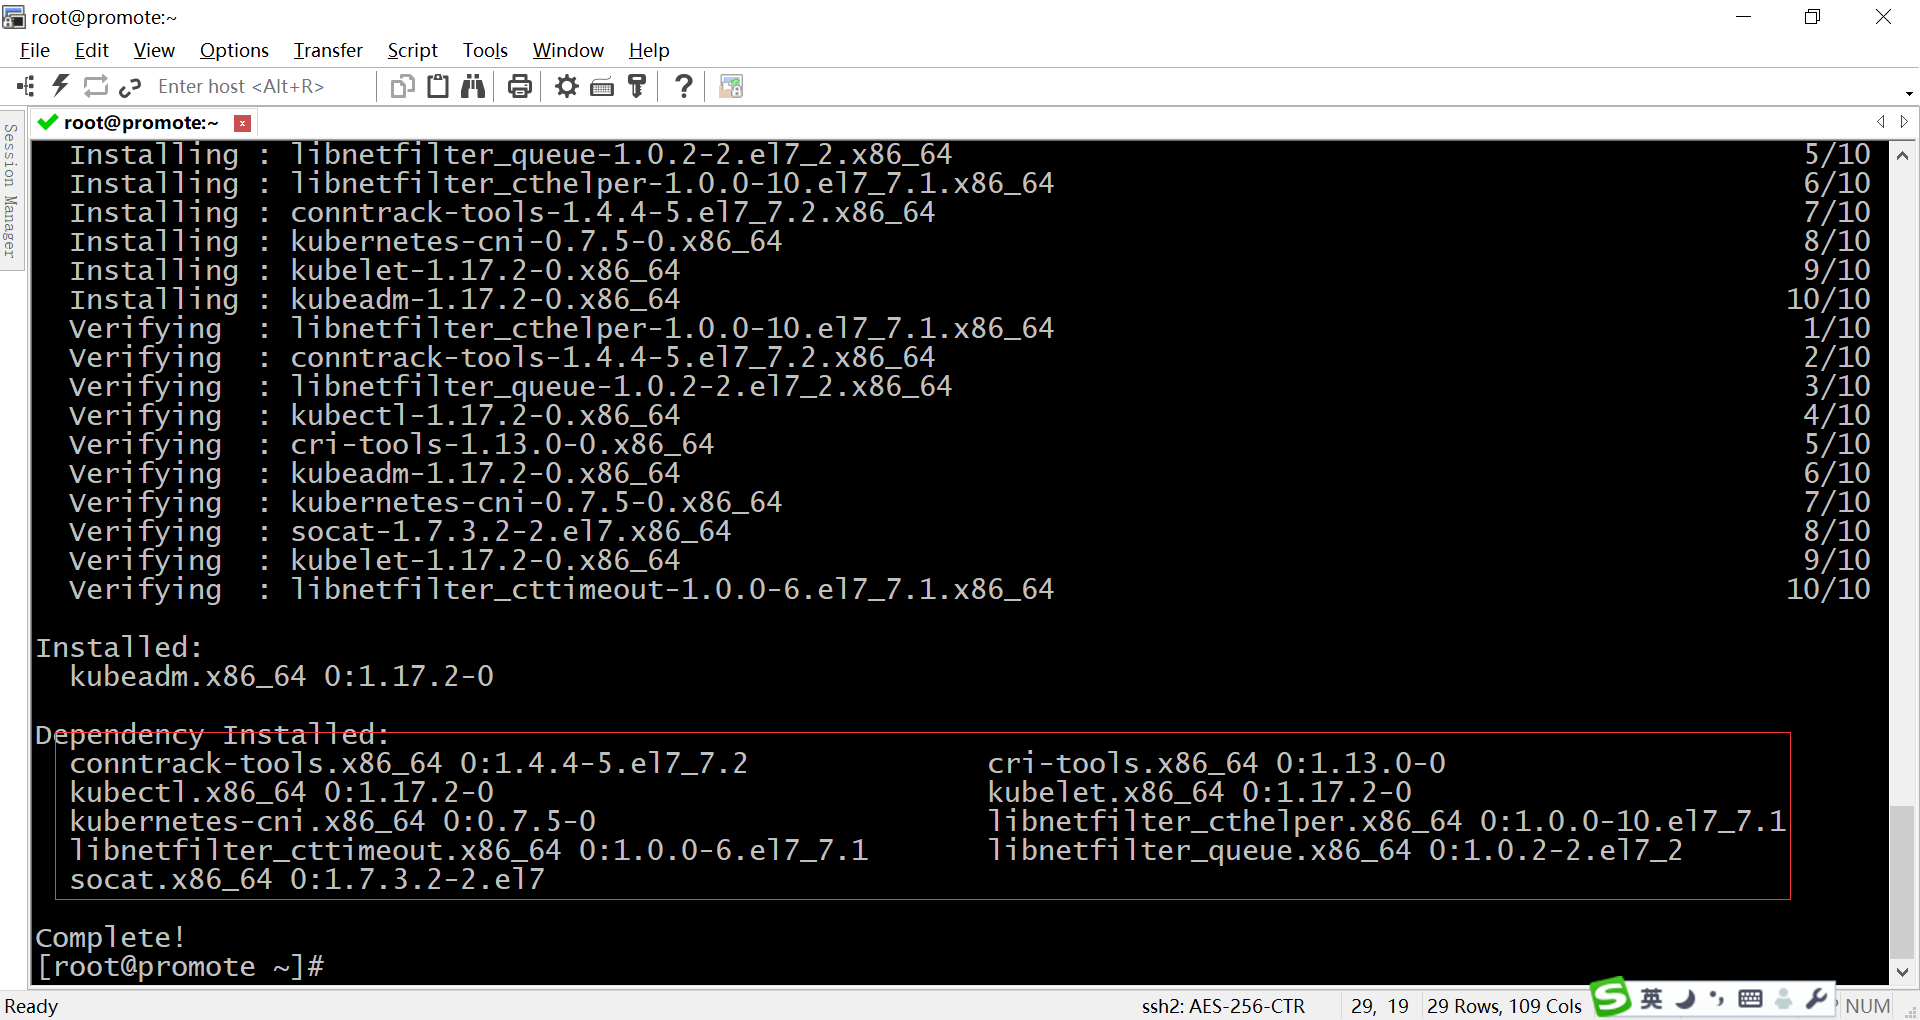
- kubeadm: one click deployment tool of k8 cluster, which simplifies the installation process by deploying all kinds of core components and plug-ins in the form of pod
- Kubelet: the node agent running on each node. The k8 cluster actually operates the container on each node through kubelet. Because it needs to operate all kinds of resources of the host directly, it is not put in the pod or installed in the system in the form of service
- kubectl: the command-line tool of kubernetes, which can complete various operations for k8 by connecting API server
- Kubernetes CNI: the virtual network device of k8 realizes the network communication between pod s by virtualizing a cni0 bridge on the host computer, which is similar to docker0
Shut down virtual machine
Copy work node
Copy out the computing nodes "centos7-k8s-node1" and "centos7-k8s-node2"
MAC address setting needs to pay attention to the following: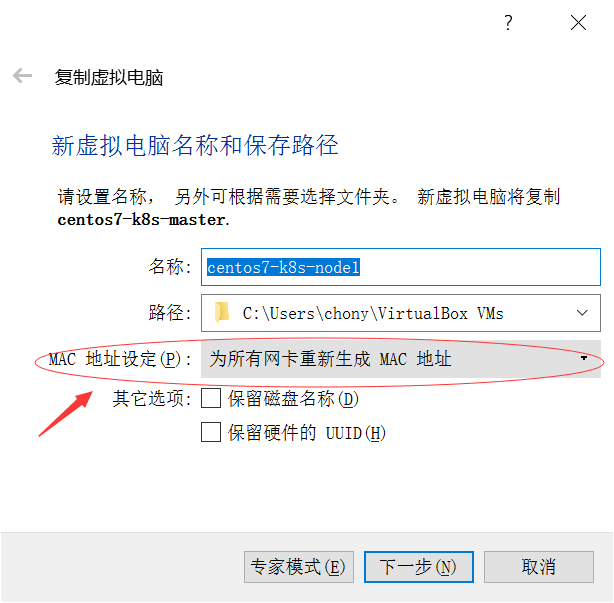
The network settings are as follows:
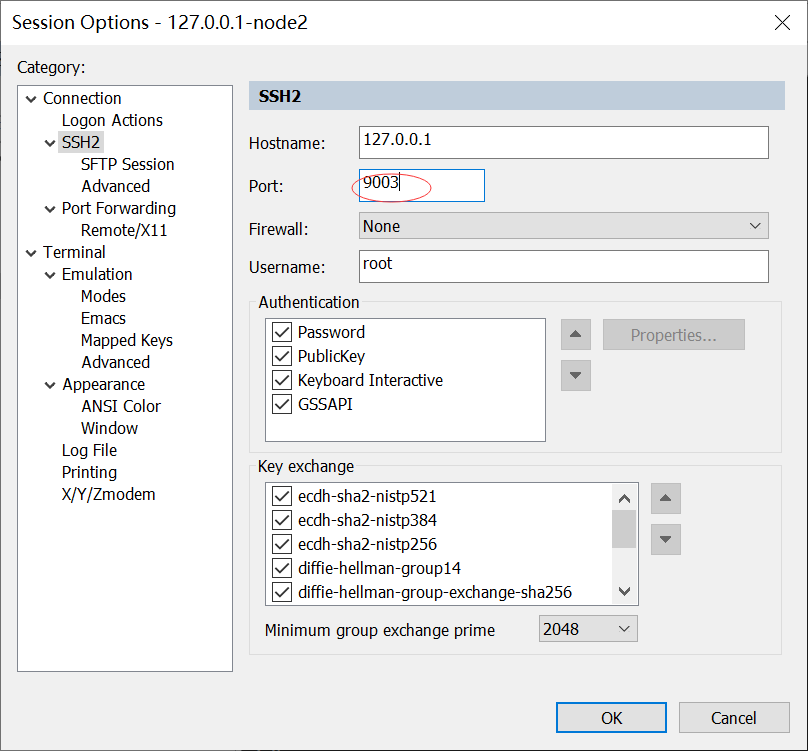
Also copy another node and set the network to 9003 - > 22
The final nodes are as follows:
Add network card 2
Since these three nodes have only one network card, they can not communicate with the host machine, so it is necessary to add network card 2. The settings are as follows, so that virtual machines can also communicate with each other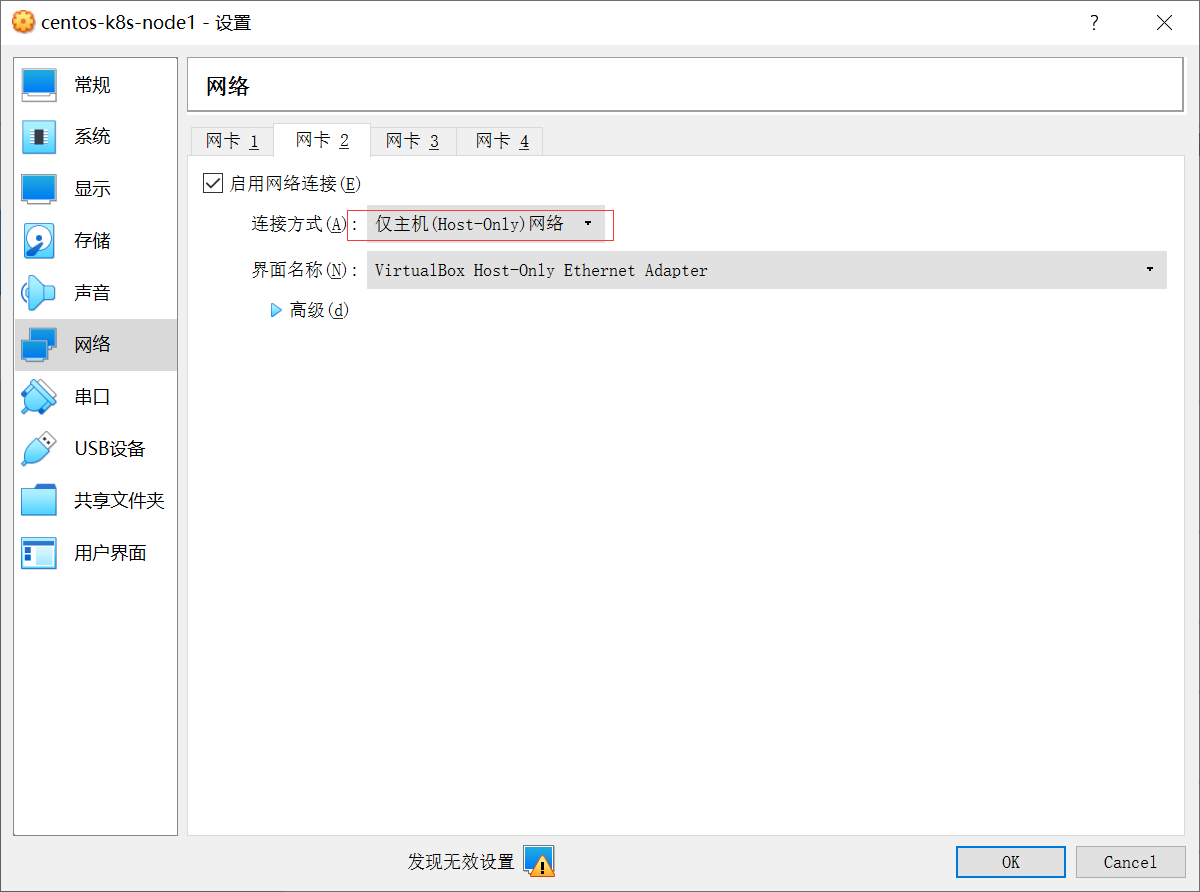
Winscp adds two terminals
Set up virtual network
In the master node, enter the command:
ifconfig
Find the ip addresses of NIC 1 and NIC 2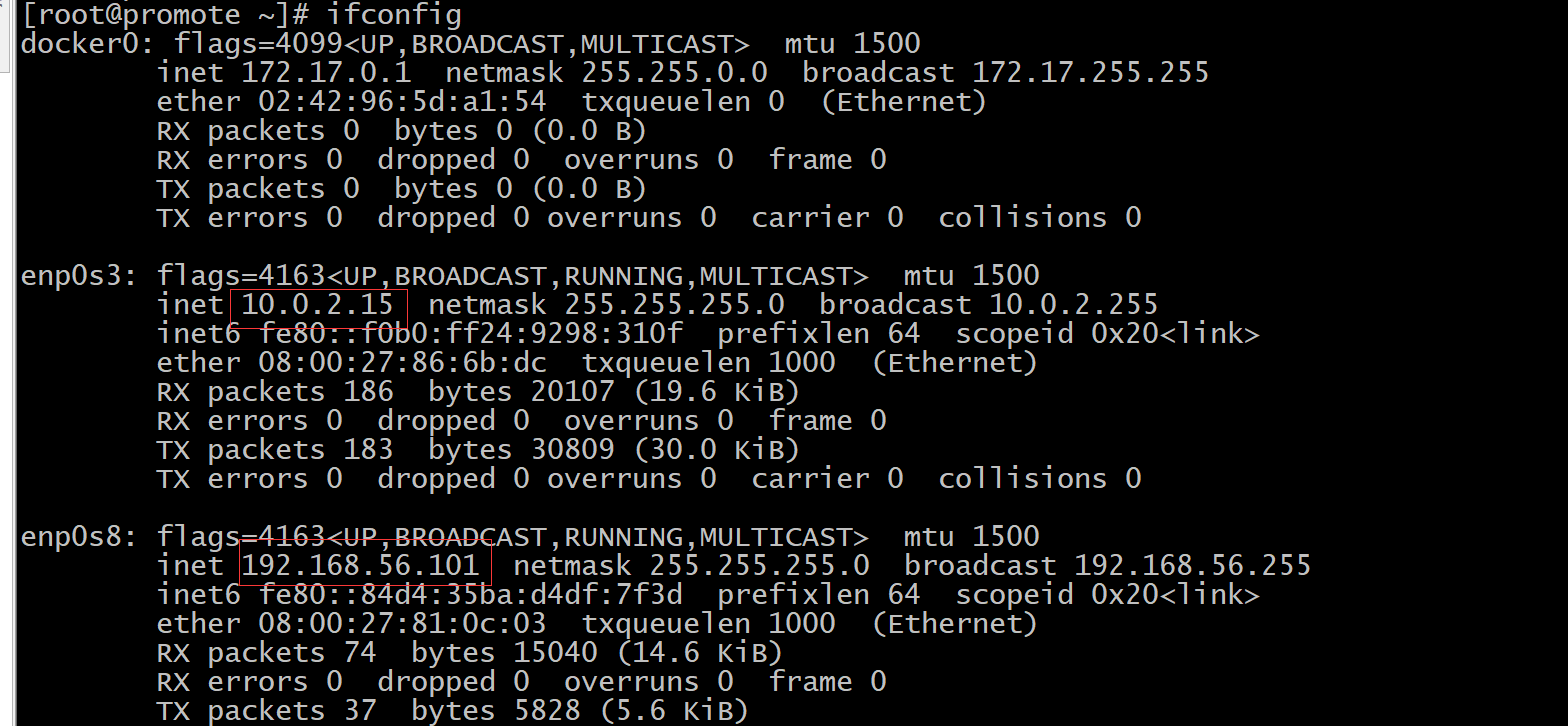
enp0s3 actually corresponds to "network card 1", and enp0s8 is the "network card 2" we just added. The ip information of the three nodes obtained by the author is as follows:
- master: NIC 1-IP: 10.0.2.15, NIC 2-IP:192.168.56.101
- node1: NIC 1-IP: 10.0.2.15, NIC 2-IP:192.168.56.102
- node2: NIC 1-IP: 10.0.2.15, NIC 2-IP:192.168.56.103
Configure the master node as follows:
vi /etc/hostname
Change hostname to master node
vi /etc/hosts
The contents are as follows:
192.168.56.101   master-node
192.168.56.102   work-node1
192.168.56.103   work-node2
Node2 and node3 are set in the same way. The hostname is work-node1, work-node2, and the contents in hosts are the same
Master node initialization K8S
Execute the following code to start the initialization of the master node
kubeadm init --pod-network-cidr=10.244.0.0/16 --apiserver-advertise-address=192.168.56.104
Note that -- pod network CIDR = 10.244.0.0/16 here is the configuration information needed by k8 network plug-ins, which are used to assign subnet segments to node s. The network plug-ins used are flannel, which is the way of configuration. Other plug-ins also have corresponding configuration methods. Option -- apiserver-advertisement-address indicates the IP address of the network card to be bound. Here, you must bind the enp0s8 network card mentioned earlier. Otherwise, the enp0s3 network card will be used by default.
If the following error is reported:
[ERROR FileContent--proc-sys-net-bridge-bridge-nf-call-iptables]: /proc/sys/net/bridge/bridge-nf-call-iptables contents are not set to 1
Then run
echo "1" >/proc/sys/net/bridge/bridge-nf-call-iptables
Run the above initialization command again, and the following errors are found
[ERROR ImagePull]: failed to pull image k8s.gcr.io/kube-apiserver:v1.17.2: output: Error response from daemon: Get https://k8s.gcr.io/v2/: net/http: request canceled while waiting for connection (Client.Timeout exceeded while awaiting headers)
, error: exit status 1
        [ERROR ImagePull]: failed to pull image k8s.gcr.io/kube-controller-manager:v1.17.2: output: Error response from daemon: Get https://k8s.gcr.io/v2/: net/http: request canceled while waiting for connection (Client.Timeout exceeded while awaiting headers)
, error: exit status 1
        [ERROR ImagePull]: failed to pull image k8s.gcr.io/kube-scheduler:v1.17.2: output: Error response from daemon: Get https://k8s.gcr.io/v2/: net/http: request canceled while waiting for connection (Client.Timeout exceeded while awaiting headers)
, error: exit status 1
        [ERROR ImagePull]: failed to pull image k8s.gcr.io/kube-proxy:v1.17.2: output: Error response from daemon: Get https://k8s.gcr.io/v2/: net/http: request canceled while waiting for connection (Client.Timeout exceeded while awaiting headers)
, error: exit status 1
        [ERROR ImagePull]: failed to pull image k8s.gcr.io/pause:3.1: output: Error response from daemon: Get https://k8s.gcr.io/v2/: net/http: request canceled while waiting for connection (Client.Timeout exceeded while awaiting headers)
, error: exit status 1
        [ERROR ImagePull]: failed to pull image k8s.gcr.io/etcd:3.4.3-0: output: Error response from daemon: Get https://k8s.gcr.io/v2/: net/http: request canceled while waiting for connection (Client.Timeout exceeded while awaiting headers)
, error: exit status 1
        [ERROR ImagePull]: failed to pull image k8s.gcr.io/coredns:1.6.5: output: Error response from daemon: Get https://k8s.gcr.io/v2/: net/http: request canceled while waiting for connection (Client.Timeout exceeded while awaiting headers)
, error: exit status 1
This has to go over the wall, but what if there is no wall? It can only be downloaded from the domestic image source:
Download and change tag first
docker pull registry.cn-hangzhou.aliyuncs.com/google_containers/kube-apiserver:v1.17.2

docker tag registry.cn-hangzhou.aliyuncs.com/google_containers/kube-apiserver:v1.17.2 k8s.gcr.io/kube-apiserver:v1.17.2
Run the following command. After running, execute the following command in work-node1 and work-node2:
docker pull registry.cn-hangzhou.aliyuncs.com/google_containers/kube-apiserver:v1.17.2
docker pull registry.cn-hangzhou.aliyuncs.com/google_containers/kube-controller-manager:v1.17.2
docker pull registry.cn-hangzhou.aliyuncs.com/google_containers/kube-scheduler:v1.17.2
docker pull registry.cn-hangzhou.aliyuncs.com/google_containers/kube-proxy:v1.17.2
docker pull registry.cn-hangzhou.aliyuncs.com/google_containers/pause:3.1
docker pull registry.cn-hangzhou.aliyuncs.com/google_containers/etcd:3.4.3-0
docker pull registry.cn-hangzhou.aliyuncs.com/google_containers/coredns:1.6.5
docker tag registry.cn-hangzhou.aliyuncs.com/google_containers/kube-apiserver:v1.17.2 k8s.gcr.io/kube-apiserver:v1.17.2
docker tag registry.cn-hangzhou.aliyuncs.com/google_containers/kube-controller-manager:v1.17.2 k8s.gcr.io/kube-controller-manager:v1.17.2
docker tag registry.cn-hangzhou.aliyuncs.com/google_containers/kube-scheduler:v1.17.2 k8s.gcr.io/kube-scheduler:v1.17.2
docker tag registry.cn-hangzhou.aliyuncs.com/google_containers/kube-proxy:v1.17.2 k8s.gcr.io/kube-proxy:v1.17.2
docker tag registry.cn-hangzhou.aliyuncs.com/google_containers/pause:3.1 k8s.gcr.io/pause:3.1
docker tag registry.cn-hangzhou.aliyuncs.com/google_containers/etcd:3.4.3-0 k8s.gcr.io/etcd:3.4.3-0
docker tag registry.cn-hangzhou.aliyuncs.com/google_containers/coredns:1.6.5 k8s.gcr.io/coredns:1.6.5
Run again
kubeadm init --pod-network-cidr=10.244.0.0/16 --apiserver-advertise-address=192.168.56.104
You can see that after the successful installation, kudeadm has done a lot of work for you, including kubelet configuration, various certificate configuration, kubeconfig configuration, plug-in installation, etc. Note the last line. kubeadm prompts you that if other nodes need to join the cluster, just execute this command. Here are the token information of my three nodes
kubeadm join 192.168.56.104:6443 --token qi6rn1.yd8oidvo10hefayk \
    --discovery-token-ca-cert-hash sha256:29f4541851f0ff1f318e4e103aa67139dd4af85903850451862089379620e8c1
kubeadm also reminds you that to complete the installation, you need to install a network plug-in kubectl apply -f [podnetwork].yaml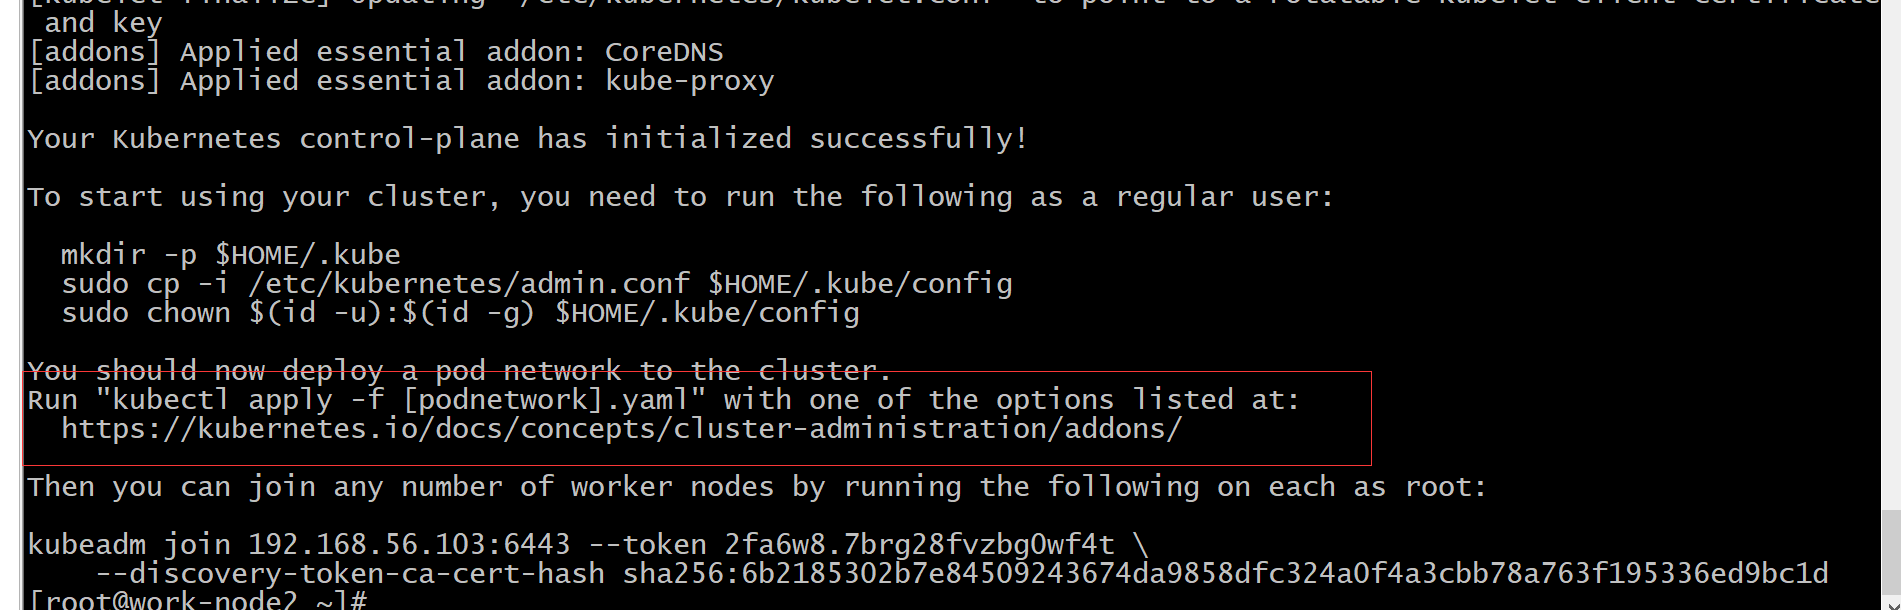
mkdir -p $HOME/.kube
sudo cp -i /etc/kubernetes/admin.conf $HOME/.kube/config
sudo chown $(id -u):$(id -g) $HOME/.kube/config
Start kubelet
After installing kubelet, kubeadm and kubectl, it is required to start kubelet
systemctl enable kubelet && systemctl start kubelet
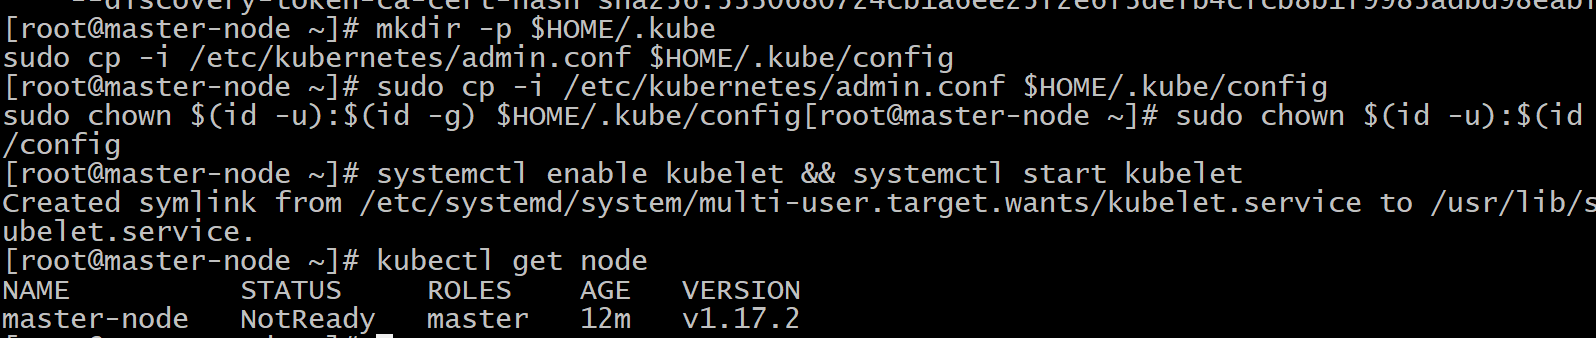
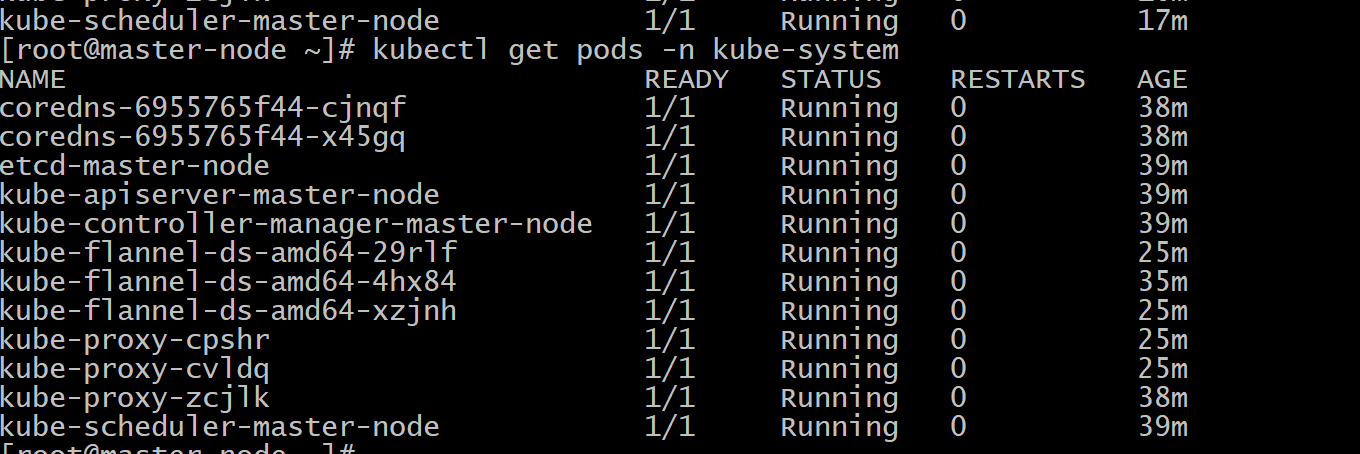
It is found that there is only the master node. We haven't added the calculation node yet. Check the pod situation
kubectl get pods -n kube-system

You can see that both pod s of coredns are in the pending state, because the network plug-in has not been installed. flannel used here
weget https://raw.githubusercontent.com/coreos/flannel/master/Documentation/kube-flannel.yml
kubectl create -f kube-flannel.yml
docker pull quay-mirror.qiniu.com/coreos/flannel:v0.11.0-amd64

docker tag quay-mirror.qiniu.com/coreos/flannel:v0.11.0-amd64 quay.io/coreos/flannel:v0.11.0-amd64
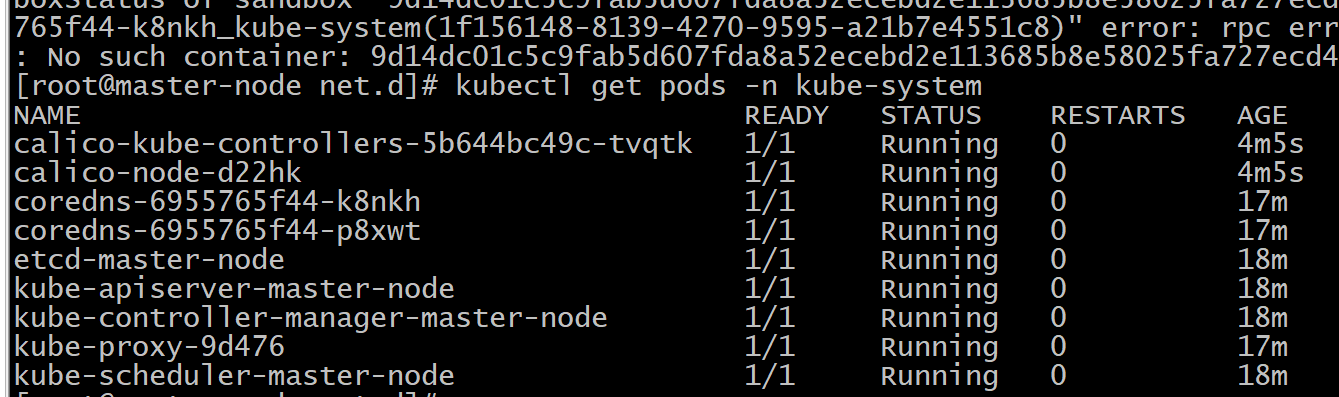
Check the pod status again. It's all running status
kubectl get pods -n kube-system
If Calico is used, the execution code is as follows:
curl https://docs.projectcalico.org/v3.11/manifests/calico.yaml -O
kubectl apply -f calico.yaml
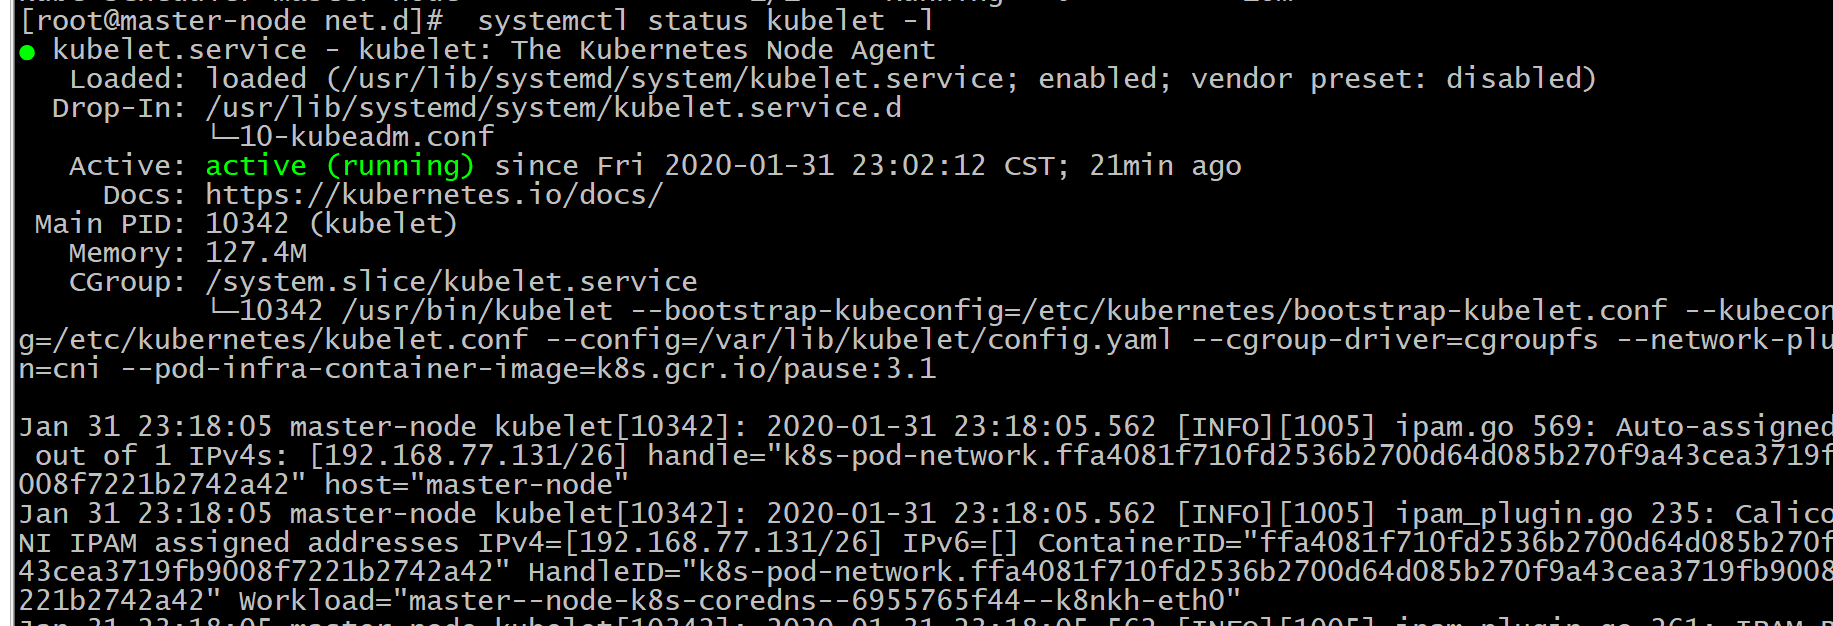
View kubelet status
systemctl status kubelet -l
Master as work node
K8S cluster will not schedule Pod to Master by default, so the Master's resources will be wasted. On the Master node, you can run the following command to make it a work node:
kubectl taint nodes --all node-role.kubernetes.io/master-
Add other nodes to the cluster
On the other two nodes, work-node1 and work-node2, execute the kubeadm join command generated by the master node to join the cluster:
kubeadm join 192.168.56.101:6443 --token vo1jir.ok9bd13hy940kqsf \
    --discovery-token-ca-cert-hash sha256:8b2f5e3e2776610b33ce3020c2a7e8a31fc1be891887949e7df6f65a3c3088b0
Wait a moment, and the following results will appear:
Article reference:
Windows play Kubernetes series 1-VirtualBox installation Centos
Windows play Kubernetes series 2-Centos install Docker
This article is based on the platform of blog one article multiple sending OpenWrite Release!