1. Install docker and docker-compose
Installation of 1.1 docker
The Linux distribution used for this installation is Ubuntu 18.04, and we can refer to docker's Official Documents Install, but there are steps that require minor modifications.
First, delete the old docker version:
$ sudo apt-get remove docker docker-engine docker.io containerd runc
Next, update the APT-GET source information and install related software:
$ sudo apt-get update
$ sudo apt-get install apt-transport-https ca-certificates curl gnupg-agent software-properties-common
Next, add the docker's official GPG certificate:
$ curl -fsSL https://download.docker.com/linux/ubuntu/gpg | sudo apt-key add -
You can then print the certificate you just added using the following command:
$ sudo apt-key fingerprint 0EBFCD88
Note that 1:0EBFCD88 is the last 8 characters of the certificate.
Note 2: The above command can be replaced with sudo apt-key finger 0EBFCD88 or apt-key list 0EBFCD88.
Next, we add the docker software source for APT-GET, but we do not install the official documentation here, because the access to the official software source in China is very slow. We use the docker software source from Tsinghua University here:
sudo add-apt-repository \
   "deb [arch=amd64] https://mirrors.tuna.tsinghua.edu.cn/docker-ce/linux/ubuntu \
   $(lsb_release -cs) \
   stable"
The next step is to officially install docker:
$ sudo apt-get update
$ sudo apt-get install docker-ce docker-ce-cli containerd.io
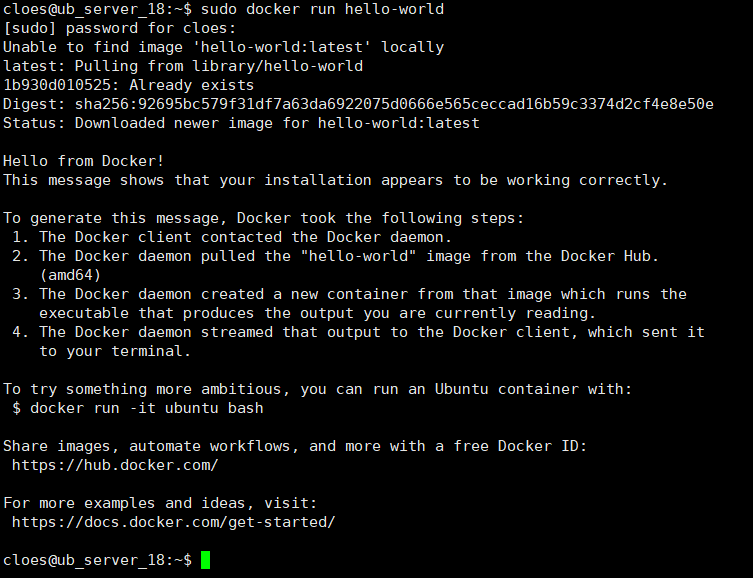
Finally, we can verify that the docker was installed successfully by running the hello-world container:
$ sudo docker run hello-world
The output is as follows:
1.2 Install docker-compose
Because we build PHP development platforms, we need at least three mirrors of PHP, MySQL, Nginx. As business needs increase, we may also need other mirrors such as Redis, Rabbitmq, etc. Managing this series of containers will inevitably cause inconvenience if each container is managed separately, so we need to introduce a simple container orchestration tool, docker-compose.The following is the process of installing docker-compose.
First we can download the docker-compose run file from github, which is actually a single-file run program developed by python.
sudo curl -L "https://github.com/docker/compose/releases/download/1.24.0/docker-compose-$(uname -s)-$(uname -m)" -o /usr/local/bin/docker-compose
We use the command above to download the docker-compose file to the directory/usr/local/bin/. Next, we give the docker-compose executable permission.
sudo chmod +x /usr/local/bin/docker-compose
Then we can verify that docker-compose is installed correctly:
docker-compose -v
Output:

2. Write docker-compose.yml file
We can all define the arrangement of docker containers in the docker-compose.yml file. First, look at the directory structure:
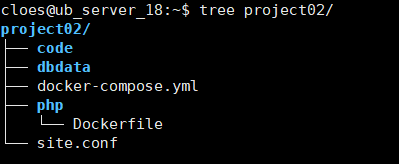
- docker-compose.yml is a container marshalling file
- php/Dockerfile is the build file for the php image
- site.conf is the site configuration file in NGINX
- Code is the php code directory
- dbdata is mysql's data store directory
Below is my docker-compose.yml configuration file:
version: '3'

services:
  web:
    image: nginx:latest
    ports:
      - "8080:80"
    volumes:
      - ./code:/code
      - ./site.conf:/etc/nginx/conf.d/site.conf
    networks:
      - code-network

  php:
    #image: php:7.2-fpm
    build:
      context: ./php
      dockerfile: Dockerfile
    image: my_php
    volumes:
      - ./code:/code
    networks:
      - code-network

  mysql:
    image: mysql:5.7
    ports:
      - 3307:3306
    volumes:
      - ./dbdata:/var/lib/mysql
    environment:
      MYSQL_DATABASE: laravel
      MYSQL_ROOT_PASSWORD: 123456
      SERVICE_TAGS: dev
      SERVICE_NAME: mysql
    networks:
      - code-network


networks:
  code-network:
    driver: bridge
Both web and mysql services use the official image directly from dockerHub, but the official image of PHP can not meet our needs. We make some modifications based on the official php7.2. Here is the Dockerfile of PHP mirror:
FROM php:7.2-fpm

RUN docker-php-ext-install mysqli

RUN sed -i s/deb.debian.org/mirrors.163.com/g /etc/apt/sources.list /etc/apt/sources.list.d/buster.list
RUN sed -i s/security.debian.org/mirrors.163.com/g /etc/apt/sources.list /etc/apt/sources.list.d/buster.list

RUN apt-get update && apt-get install -y apt-utils
RUN apt-get install -y procps

RUN mkdir /code
RUN chown -R www-data:www-data /code
Note: Chown-R www-data:www-data/code in the configuration file above changes the user to which the code folder belongs, but since the code folder is mounted, when the mirror is run later, all the user groups of the files inside the code are www-data:www-data, which is different from our usual situation. Generally, after setting up the code folder, the user groups insideThe newly created file is determined by the user who created it. For example, root creates a file whose user group is root:root, but because it is mounted here, the user group under code becomes www-data:www-data when the file is mounted.
The following is the site configuration file site.conf for Nginx:
server {
    listen       80;
    server_name  php-docker.local;

    #charset koi8-r;
    #access_log  /var/log/nginx/host.access.log  main;

    #log_format ff '/scripts$fastcgi_script_name > $request';
    #access_log  /var/log/nginx/host.access.log  ff;

    #location / {
    #    root   /code;
    #    index  index.php index.html index.htm;
    #}

    #error_page  404              /404.html;

    # redirect server error pages to the static page /50x.html
    #
    error_page   500 502 503 504  /50x.html;
    location = /50x.html {
        root   /usr/share/nginx/html;
    }

    # proxy the PHP scripts to Apache listening on 127.0.0.1:80
    #
    #location ~ \.php$ {
    #    proxy_pass   http://127.0.0.1;
    #}

    # pass the PHP scripts to FastCGI server listening on 127.0.0.1:9000
    #
    location ~ \.php$ {
        root           /code/public/;
        fastcgi_pass   php:9000;
        fastcgi_index  index.php;
        fastcgi_param  SCRIPT_FILENAME  $document_root$fastcgi_script_name;
        #fastcgi_param  SCRIPT_FILENAME  /scripts$fastcgi_script_name;
        include        fastcgi_params;
    }

    location / {
        try_files $uri $uri/ /index.php?$query_string;
    }

    # deny access to .htaccess files, if Apache's document root
    # concurs with nginx's one
    #
    #location ~ /\.ht {
    #    deny  all;
    #}
}
Note: fastcgi_param SCRIPT_FILENAME $document_root$fastcgi_script_name; the middle variable $document_root corresponds to the above configuration root/code/public/;
This way, when the team builds the development environment, we can use the configuration files mentioned above to unify the development environment, and since it runs in a docker, it is very similar to a formal production environment, outlining unnecessary bug s online, and providing convenience for delivery.
2. Run Mirror
With the above configuration file, we can easily set up the development environment. Now we just need to run the following command and the whole development environment will be set up automatically:
$ sudo docker-compose up -d
If you want to see the output debugging information, you can delete -d and select a specific docker-compose.yml file with the -f option:
$ sudo docker-compose -f docker-compose.yml up -d
Output:

3. Debugging skills during container operation
3.1 How to enter a running Docker container
To first find out the id of the container, you can use:
$ sudo docker ps
Output:

We see that my_php has a container id of 4c1a and can log on to my_php using the following command:
$sudo docker exec -it 4c1a bash
3.2 Reconstructing docker image
Sometimes we modify the Dockerfile, like the Dcokerfile file in our php folder above, and we need to call the mirror rebuild command manually in order for docker-compose to rebuild the docker image:
$sudo docker-compose build
4. Profile
From https://github.com/cloes/php-docker Download to the configuration file used in this article.