Problems solved
To solve the problem that the project needs to be restarted after the configuration file changes
After changing the configuration file in git, push the configuration to the corresponding project to complete the configuration update without restarting
Framework
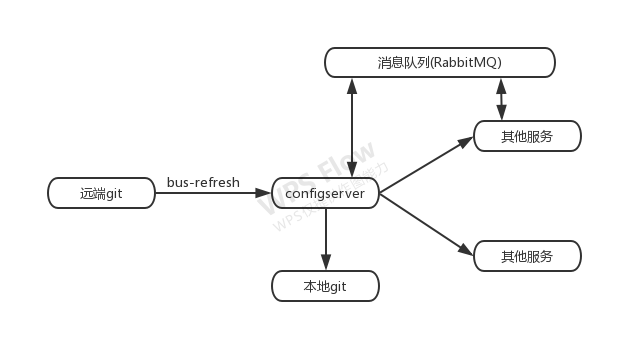
Modify the architecture diagram of config and introduce the use of message queue (rabbitmq is selected here).
After the git configuration file is changed, it is pushed to the config server by calling the bus refresh shortcut library. The config server sends the configuration file to the message queue, and the service listens to the message queue to get the corresponding configuration and pull it to complete the update
Integrate
Installation of RabbitMQ
The relationship between docker and microservice has been mentioned before. Since then, docker has been officially used. RabbitMQ uses docker for installation.
The installation of docker is very simple. No tutorial will be written here.
docker input
docker run -d --hostname my-rabbitmq -p 5672:5672 -p 15672:15672 rabbitmq:3-management
Port 5672 of docker is mapped to native 5672
15672 is the port of the management interface, which is accessed by the browser through ip:15672
Version rabbitmq:3-management with - management refers to mq with management interface
Enter localhost:15672 in the browser
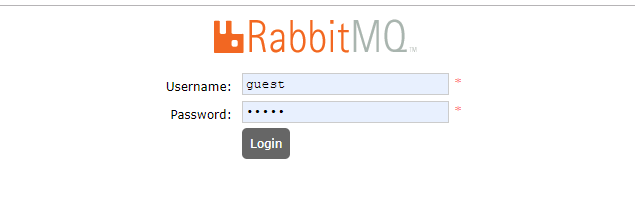
All accounts and passwords are guest
mq is started
bus auto refresh integration
First, config configuration center project
pom introduces dependency
<dependency>
   <groupId>org.springframework.cloud</groupId>
   <artifactId>spring-cloud-starter-bus-amqp</artifactId>
</dependency>
Configuration files join the configuration of mq
spring:
  application:
    name: config
  cloud:
    config:
      server:
        git:
          uri:
          username:
          password:
  rabbitmq:
    host: your-mq-ip
    port: 5672
    username: guest
    password: guest
host is the IP address where docker starts mq
Start config project
At this time, mq's Queues menu will be as shown in the following figure
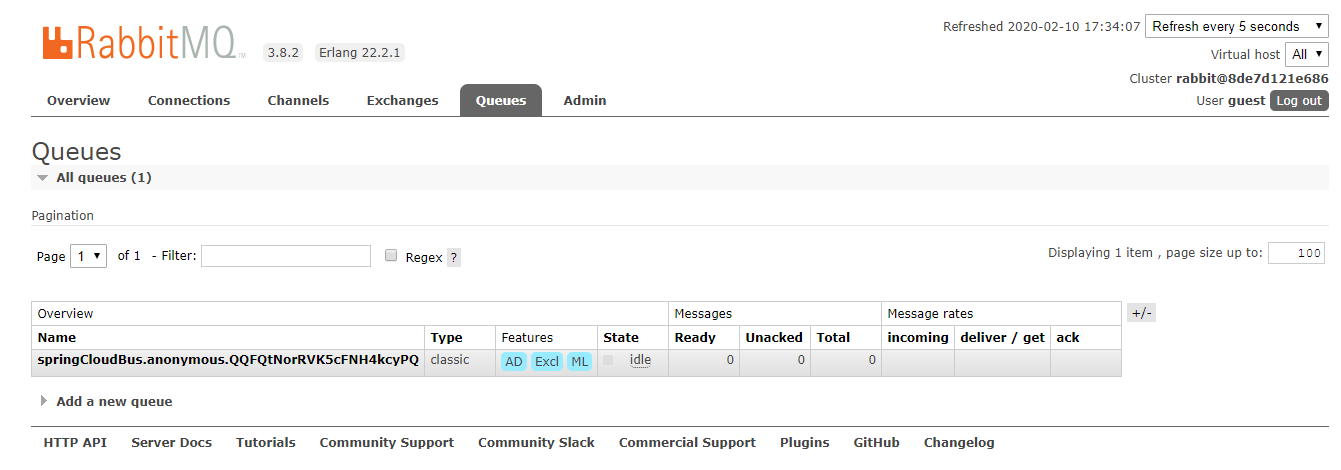
There is a spring cloudbus queue
order project
At this time, to verify the automatic refresh, start another project, order. Also register eureka, and keep the basic configuration
spring:
  application:
    name: order
  cloud:
    config:
      profile: dev
      discovery:
        service-id: CONFIG
        enabled: true
server:
  port: 8081
eureka:
  client:
    service-url:
      defaultZone: http://localhost:8761/eureka/
Others create a new order-dev.yml file in git
spring:
  application:
    name: order
  rabbitmq:
    host:
    port: 5672
    username: guest
    password: guest
  redis:
    host: 49.235.46.206
    port: 6379
env:
  devtest
env is a test field to test whether the modification is successful
pom introduces dependency
<dependency>
   <groupId>org.springframework.cloud</groupId>
   <artifactId>spring-cloud-starter-bus-amqp</artifactId>
</dependency>
Start order project
Now mq has two queues

Test refresh
In order to test whether the configuration file is pulled successfully more intuitively, create a new EnvController file and obtain the env value
@RestController
@RequestMapping("/env")
@RefreshScope //This annotation will automatically refresh the configuration file in real time, and it will not refresh if it is not written
public class EnvController {

    @Value("${env}")  //${} read env field of configuration file
    private String env;

    @GetMapping("/print")
    public String print() {
        return env;
    }
}
After launching the two projects, clear the console of the two projects and test whether the configuration is pulled
First, test whether the order configuration is correct. Enter localhost: 8080 / order-dev.yml

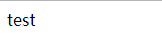
The browser enters http://localhost:8081/env/print , displayed as

At this time, change the env in git from devtest to test, save and input again http://localhost:8081/env/print
It was found that devtest did not change, and the console was still blank
It is found from the top architecture diagram that only the bus refresh interface is needed to push updates, so this interface needs to be accessed
Since the access mode of this interface is POST, use the command line mode to open the computer cmd window and input
curl -v -X POST "http://localhost:8080/actuator/bus-refresh"
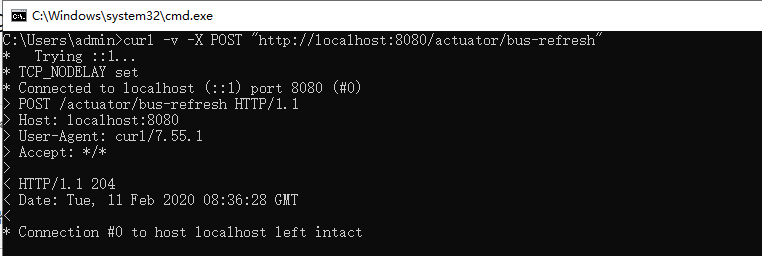
Now config console
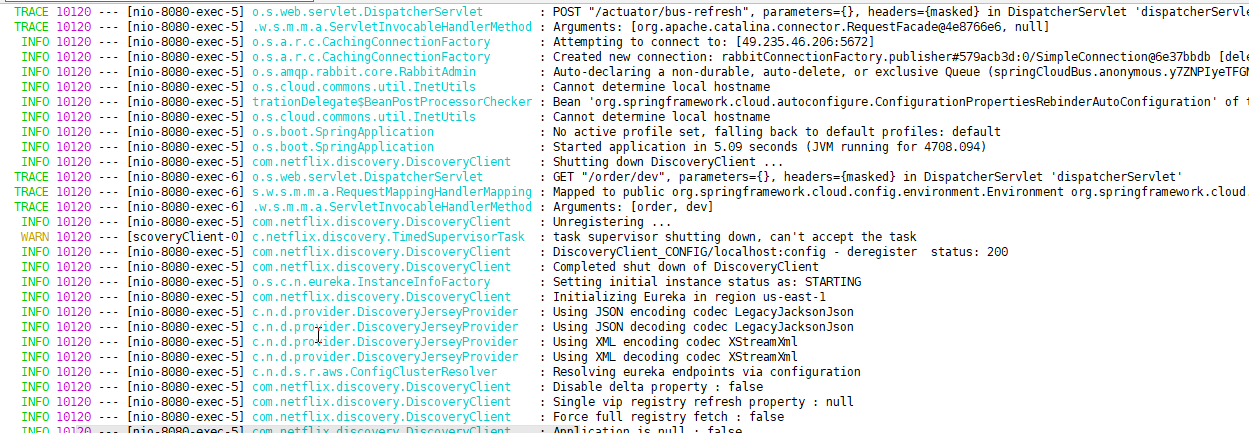
order's console
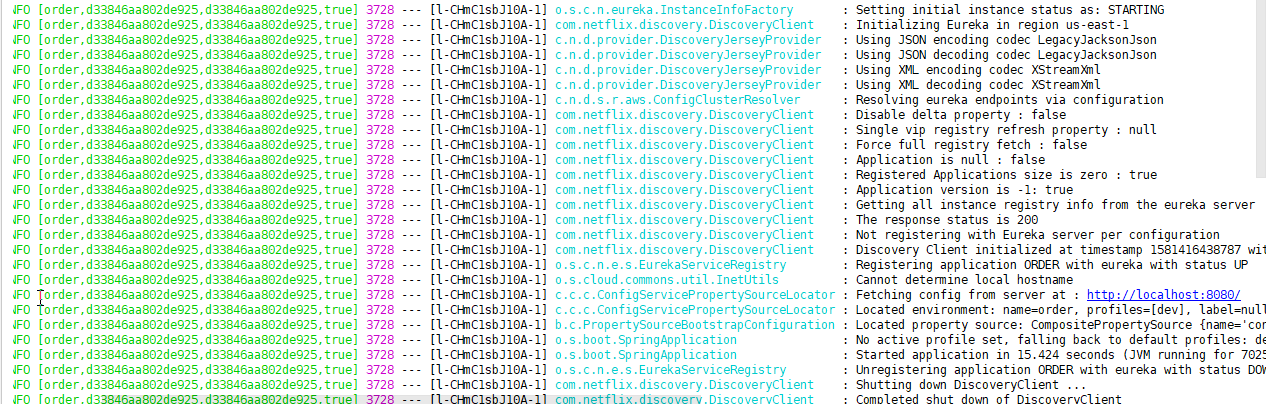
Access at this time http://localhost:8081/env/print
Wenhooks auto refresh
At this time, the configuration can still be refreshed through the provider. Next, the configuration will be refreshed automatically through git's webhooks, that is, after the configuration file in Git is changed, the project will automatically receive the configuration and refresh. In fact, webhooks means that when a file changes, it will automatically access an interface we specify to complete the refresh.
Open git, click settings, click webhooks menu, Add webhook
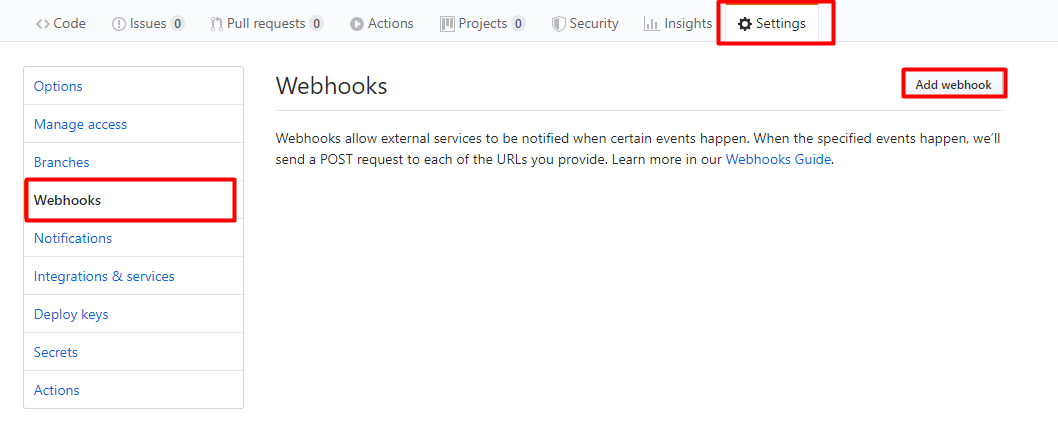
After clicking
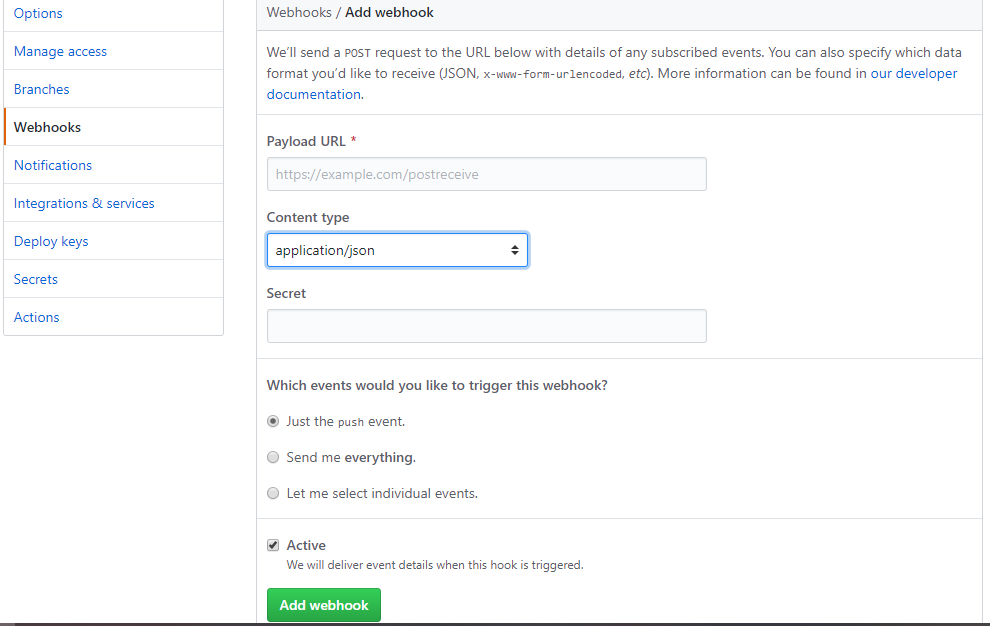
Among them, the Payload URL is the public IP of the project. It's definitely not good to use localhost, nor is the IP address of this machine
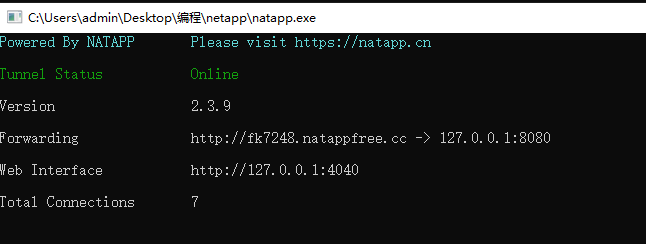
You can use an intranet penetration tool https://natapp.cn/ , you can register a free one, but the address is floating, one at a time
Just write your own address, and then add / monitor, which is git's bus refresh
Mine is
http://fk7248.natappfree.cc/monitor
Content type uses json
Click the green Add webhook
Finally, change the configuration file, plus
bus:
  id: ${spring.application.name}:${spring.cloud.config.profile}:${random.value}
Full profile
spring:
  application:
    name: order
  cloud:
    config:
      profile: dev
      discovery:
        service-id: CONFIG
        enabled: true
    bus:
      id: ${spring.application.name}:${spring.cloud.config.profile}:${random.value}
server:
  port: 8081
eureka:
  client:
    service-url:
      defaultZone: http://localhost:8761/eureka/
That's fine

