1. Preface
Recently, I've been sorting out the CommandBuffer blog, and my previous knowledge has been confusing.
It's nothing new, but I think sometimes it's cheaper than adding a camera to turn RT, at least without sorting in depth.
This article uses two examples to illustrate how CommandBuffer is used, but before that, it briefly summarizes the official CommandBuffer case.
2. Official Cases
The case addresses are as follows:
https://blogs.unity3d.com/cn/2015/02/06/extending-unity-5-rendering-pipeline-command-buffers/
There is a Demo download link at the end of the article.
The demo contains three examples.
The first example, BlurryRefraction, is similar to the new camera rendering RT, rendering the screen and blurring it before rendering transparent objects.shader is then thrown into the corresponding UV space, and the converted code is as simple as Grab.
The second example is DeferredCustomLights, where the container model of light is similar to the decal container model of the third example, which is built for space culling, and the light part is drawn directly from GBuffer's data.
The third example, DeferredDecals, is similar to the second, where the container model is directly a square and the square is projected in a three-way way way that is somewhat like a terrain.
3. Learning Cases
3.1 - Create a standard ball in a delayed rendering environment
Overall, there are lots of pits. unity's pbr block interacts with the pipeline itself, so commandBuffer inserts in both the lighting and GBuffer phases.
In fact, there are still some problems with the final lighting, so temporarily come to the conclusion that don't try to draw material objects with delayed lighting directly.
But if the normal vf shader has not too many problems, just insert it before the screen effects.
All in all, it can be counted as a practice.
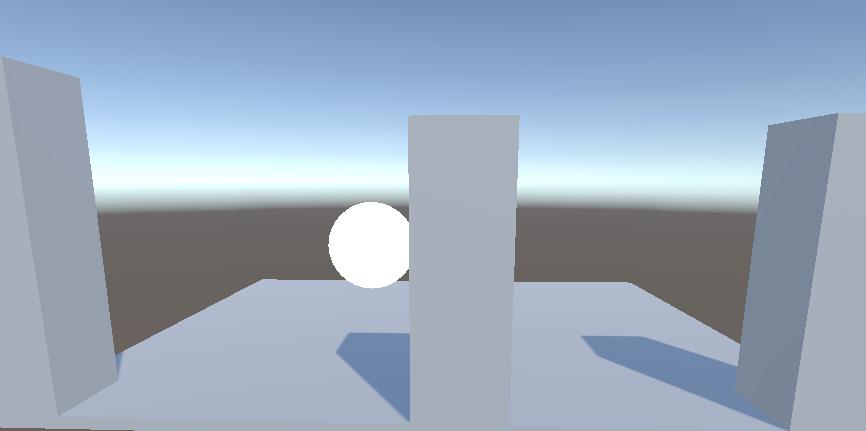
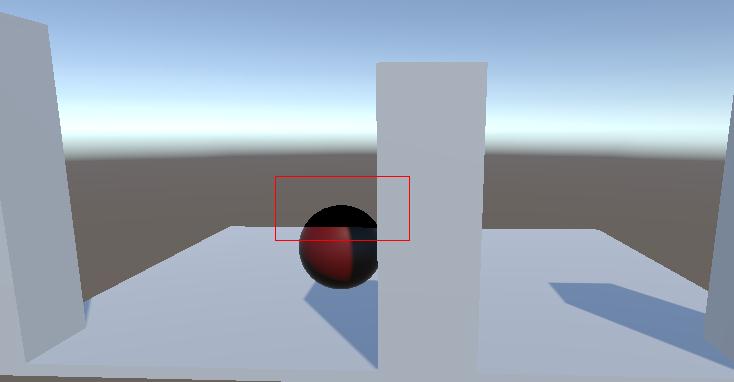
This is the completion effect.
So from scratch, the general idea is to draw a ball after GBuffer.
Initial code:
void OnEnable()
{
    mCacheCommandBuffer = new CommandBuffer();
    mCacheCommandBuffer.name = "TestCommandBuffer";
    mCacheCommandBuffer.DrawRenderer(testRenderer, testMaterial, 0, -1);
    Camera.main.AddCommandBuffer(CameraEvent.AfterGBuffer, mCacheCommandBuffer);
}
Release:
void OnDisable()
{
    Camera.main.RemoveCommandBuffer(CameraEvent.AfterGBuffer, mCacheCommandBuffer);
    mCacheCommandBuffer.Dispose();
}
Dispose is called after RemoveCommandBuffer when released.
2019/07/27 Supplement: Later I looked at the RenderingCommandBuffers example again. No need to call Disposeh or Release manually when releasing, just need to
RemoveCommandBuffer is fine.
DrawRenderer has many more degrees of freedom than DrawMesh, but the disadvantage is that it can be tricky to encounter multidimensional submaterials.
The fourth parameter here is the pass corresponding to the shader, and if -1 is filled in, all pass are drawn.
Draw as follows
(Direct drawing must be problematic)
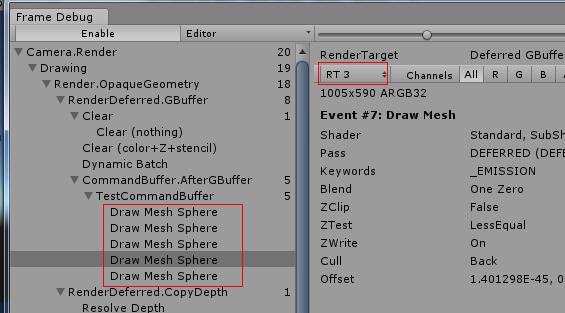
Open the FrameDebugger to see the problem and draw all pass es in the standard, which is not what you want.
Here's a look at the pass for standard. The third pass is for delayed illumination, followed by a pass 3.
There is also a problem with the incorrect self-luminescence information of RT3.
Four RTs in unity's GBuffer are RT0-diffuse, RT1-highlight, RT2-screen normal, and RT3-autoluminescence.
Looking through the standard shader source, we found that the indirect lighting information may be missing and the indirect lighting information may not be initialized correctly
But found such a thing
void fragDeferred(
    VertexOutputDeferred i,
    out half4 outGBuffer0 : SV_Target0,
    out half4 outGBuffer1 : SV_Target1,
    out half4 outGBuffer2 : SV_Target2,
    out half4 outEmission : SV_Target3          // RT3: emission (rgb), --unused-- (a)
#if defined(SHADOWS_SHADOWMASK) && (UNITY_ALLOWED_MRT_COUNT > 4)
    , out half4 outShadowMask : SV_Target4       // RT4: shadowmask (rgba)
#endif
)
{
    //...
}
That is, you can define the output GBuffer yourself, and you can specify that only one GBuffer should be output
void frag(
    v2f i,
    out half4 outEmission : SV_Target3
)
{
    outEmission = 0;
}
Sometimes this works fine because many of the Blit s in CommandBuffer don't copy (I probably can't).
Draw more than once:
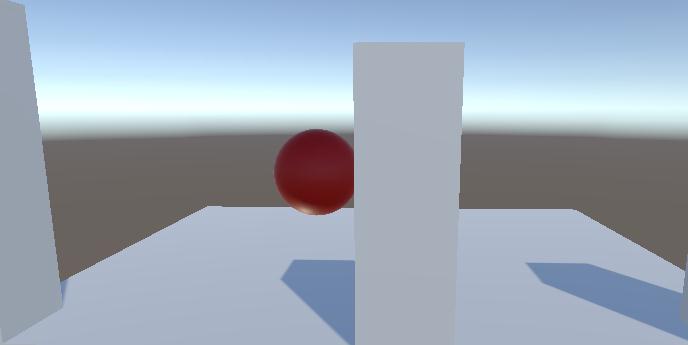
mCacheCommandBuffer.DrawRenderer(testRenderer, testMaterial, 0, 3);
mCacheCommandBuffer.DrawRenderer(testRenderer, testMaterial_fix, 0, -1);
Camera.main.AddCommandBuffer(CameraEvent.AfterGBuffer, mCacheCommandBuffer);
The solution is to fix it, but there will be no light where it comes into contact with the sky box.
Looking at the FrameDebugger, make sure there's a problem with the lighting, and after stepping over some pits, find that you can draw again at AfterLighting.
void OnEnable()
{
    mCacheCommandBuffer = new CommandBuffer();
    mCacheCommandBuffer.name = "TestCommandBuffer";

    mCacheCommandBuffer.DrawRenderer(testRenderer, testMaterial, 0, 3);

    Camera.main.AddCommandBuffer(CameraEvent.AfterGBuffer, mCacheCommandBuffer);

    mCacheCommandBuffer2 = new CommandBuffer();
    mCacheCommandBuffer2.name = "TestCommandBuffer2";
    mCacheCommandBuffer2.DrawRenderer(testRenderer, testMaterial, 0, 0);
    Camera.main.AddCommandBuffer(CameraEvent.AfterLighting, mCacheCommandBuffer2);
}
However, there are still many problems, such as only supporting parallel light, and the highlight position is wrong.It should be the problem of initializing light.
Therefore, this example can only be regarded as a practice, and drawing of such objects is not recommended.
3.2 - Fuzzy the excavation model using CommandBuffer
Others have done this before and find this case interesting. I try it myself.
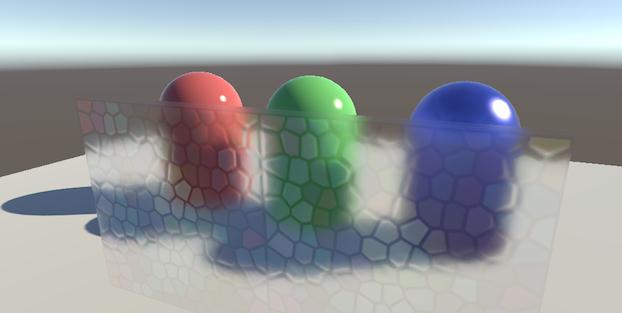
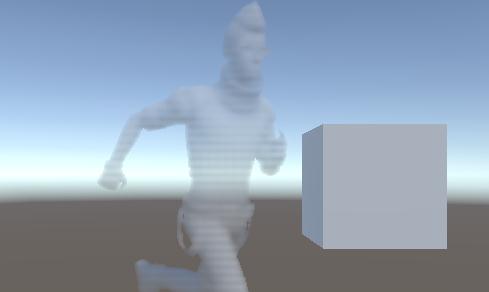
The results are as follows
This is the completion effect, which can be achieved by using Stencil to dig holes to simulate translucency, but can cause visual discomfort if the gradient is slower.
This visual discomfort can be alleviated by stencil marking the hero's position on the screen and then by making another Gaussian blur over the hero's dig.
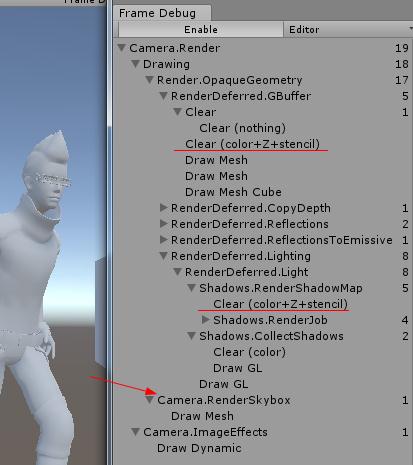
Making Stencil directly on the original model will result in Stencil data being cleared during the shadow phase.
(Added in December 14, 2018: There is an interface in the unity cameras: Camera.main.clearStencilAfterLightingPass, which you can also try)
But without rushing to change CommandBuffer's position, switch to forward rendering to see if Stencil is not cleared
You can see that even if Stencil works, Stencil in the area where it was dug was also dug.So there's another way to override this bad Stencil.
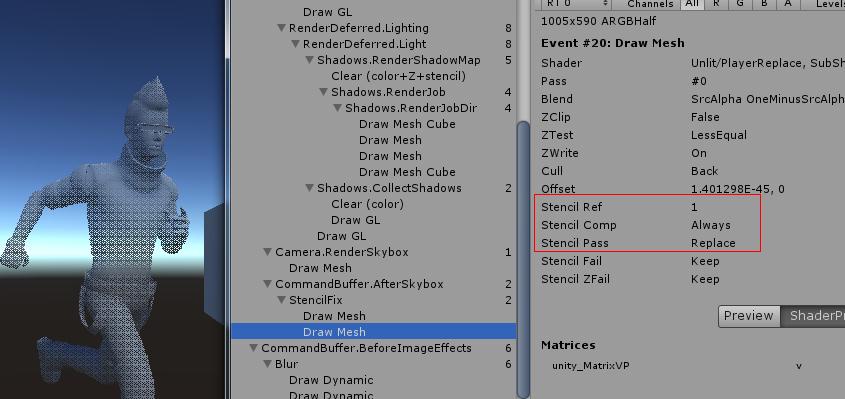
My idea is to overwrite the old one by drawing Renderer after RenderSkybox with a normal Stencil and an alpha-0 protagonist Renderer.
That is, two CommandBuffer s are needed
mStencilFixCommandBuffer = new CommandBuffer();
mStencilFixCommandBuffer.name = "StencilFix";

for (int i = 0; i < playerRenderers.Length; i++)
{
    var item = playerRenderers[i];
    mStencilFixCommandBuffer.DrawRenderer(item, playerReplaceMaterial, 0, -1);
}

Camera.main.AddCommandBuffer(CameraEvent.AfterSkybox, mStencilFixCommandBuffer);
Camera.main.AddCommandBuffer(CameraEvent.BeforeReflections, mBlurCommandBuffer);
You can see that the correct Stencil is already drawn (and of course you can use this method to modify the depth, GBuffer)
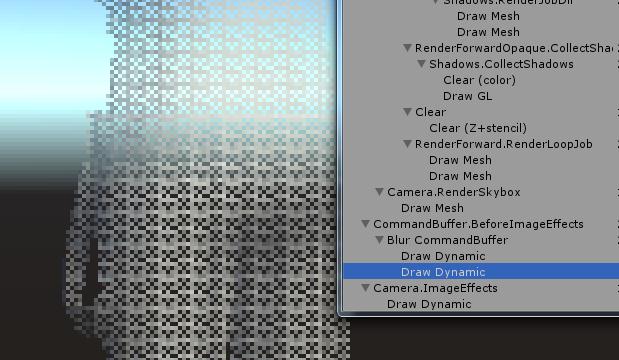
Then there's the problem of fuzzy sampling, in CommandBuffer you can't insert Lambda's CPU code to execute asynchronous content
So here are a few RTs to switch back and forth to repeat sampling, referring to the first example in the official CommandBuffer, which also requires two RTs to switch back and forth.
A new RT in CommandBuffer is recommended as follows, rather than using RenderTexture:
mBlurTempRT1 = Shader.PropertyToID("BlurTempRT1");
mBlurCommandBuffer.GetTemporaryRT(mBlurTempRT1, -1, -1, 0);
Of course, the RT object can not be removed for this purpose, it can only be operated by index.
Here the second and third parameters of the GetTemporaryRT method specify the resolution, -1 is the default, -2 is the half-size resolution, -3 is 1/3, and so on.
At this point I encountered a second pit where Stencil information could not be copied separately through the channel. Stencil information could only be read when Blit ting with the ameraTarget.
Reading Stencil information is like this, you must have Stencil in the target channel of Blit (to be verified), for example, the following is problematic:
mBlurCommandBuffer.Blit(BuiltinRenderTextureType.CameraTarget, mBlurTempRT1, mat);
mBlurCommandBuffer.Blit(mBlurTempRT1, BuiltinRenderTextureType.CameraTarget);
Correct usage:
mBlurCommandBuffer.Blit(BuiltinRenderTextureType.CameraTarget, mBlurTempRT1);

for (int i = 0; i < sampleNum - 1; i++)
{
    mBlurCommandBuffer.Blit(mBlurTempRT1, BuiltinRenderTextureType.CameraTarget, blurMaterial);
    mBlurCommandBuffer.Blit(BuiltinRenderTextureType.CameraTarget, mBlurTempRT1);
}

mBlurCommandBuffer.Blit(mBlurTempRT1, BuiltinRenderTextureType.CameraTarget, blurMaterial);
So the fuzzy iteration here does this (the understanding here is unclear, and the code can be optimized)
The end result is achieved
At this point, I wanted to make a 3D model display of the UI panel for CommandBuffer, but I still had some problems later.
So create a new camera.
Test project address: https://gitee.com/Hont/CommandBufferExample
(unity 2017.4)