Deployment of kubernates
I. Interface Deployment
1. Create
Click the Create button in the upper right corner
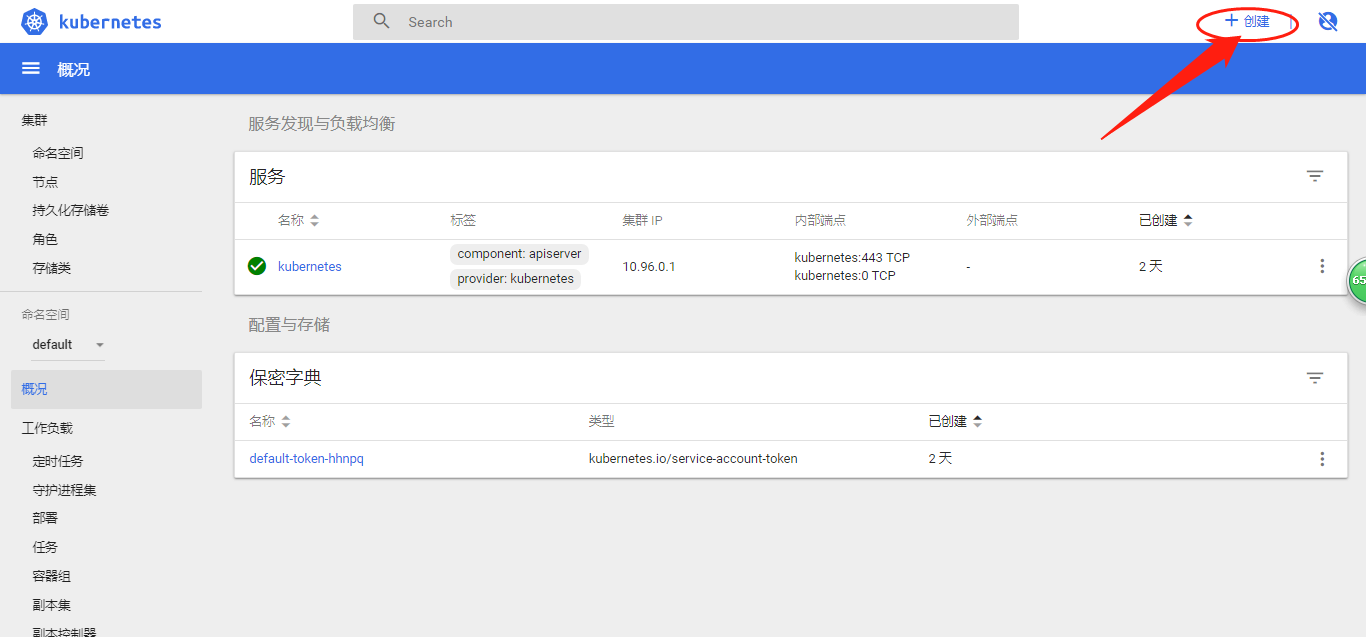
2. Setting the parameters created
Choosing the way to create can input yaml configuration, upload yaml files and interface configuration.
Interface Creation 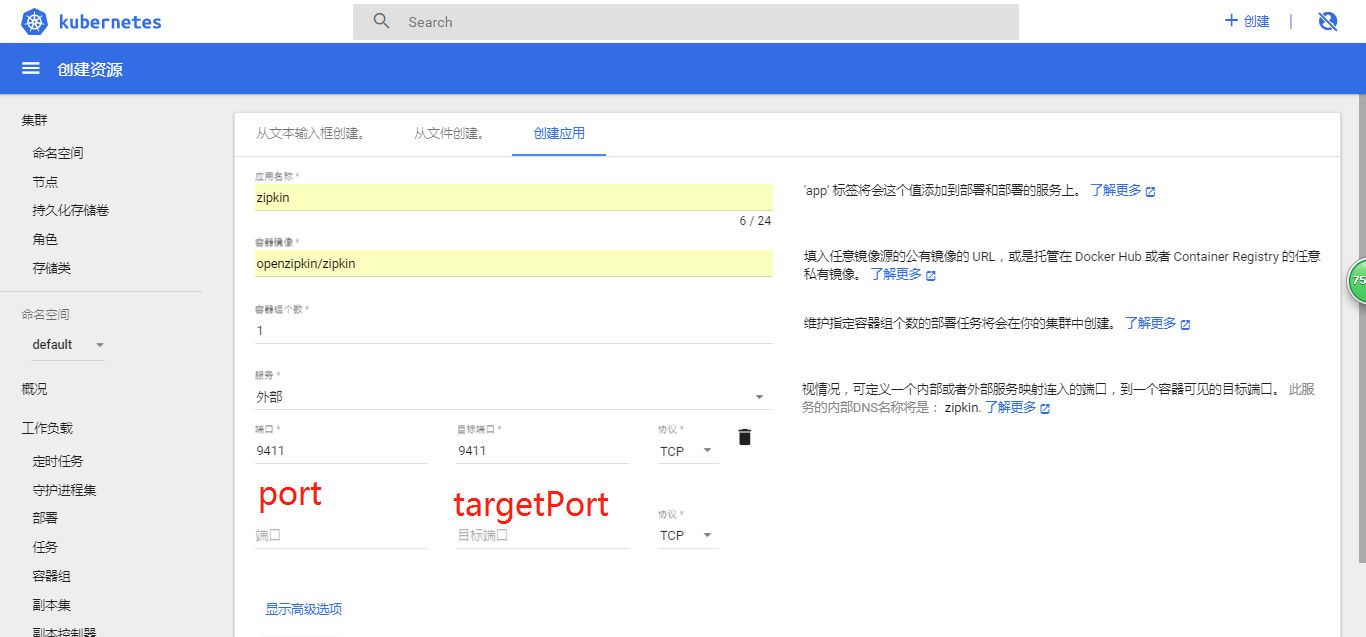
apply name
This is the name of the deployment pod
- Vessel Mirror
Enter the mirror address of the container to be deployed
- Number of container groups
This parameter is k8s to ensure the number of pods running. If 3 is specified, it creates three pods and continuously monitors them. If a Pod does not respond, Replication Controller replaces it, keeping the total number at 3. If the previously unresponsive od is restored and there are now four Pods, Replication Controller will keep one of the terminations to a total of 3.
- Services
Choosing internal or external services will make external requests of the cluster inaccessible to pod, while external services will expose nodePort to make external machines accessible. There are three types of ports in the service:
1)nodePort
Ports accessible to external machines.
For example, if a Web application needs to be accessed by other users, then it needs to configure type=NodePort and nodePort=30001, then other machines can access the service through browser access scheme://node:30001, for example. http://node:30001.
For example, MySQL databases may not need to be accessed from outside, but only by internal services, so there is no need to set up NodePort.
2)targetPort
The port of the container (the most fundamental port entry) is the same as the port exposed when making the container (EXPOSE in DockerFile), for example, the official nginx of docker.io exposes port 80.
3)port
Ports accessed between services in kubernetes, although the mysql container exposed port 3306 (see https://github.com/docker-library/mysql/ DockerFile), but other containers in the cluster need to access the service through port 33306, and the external machine cannot access the mysql service because it does not configure the NodePort type.
- Confidential Dictionary
User name and password are needed to retrieve the image of private server. In k8s, this is achieved by configuring secret dictionary.
Secret in K8s is an object that contains a small amount of sensitive information such as password, token, or secret key. This information may be stored in a pod definition or docker image, stored in a Secret object, which can be controlled when used, and can reduce the risk of information leakage.
There are many ways to create a confidential dictionary. I configure it through the command line.
kubectl create secret docker-registry regsecret --docker-server=repo.gildata.com --docker-username=chenyang --docker-password=xxxx --docker-email=chenyang@gildata.com

This line of command is to create a secure dictionary named regsecret, - - docker-server is the warehouse address, - - docker-username is the user account, - - docker-password is the account password, - - docker-email user mailbox.
After this configuration, we can see the confidentiality dictionary on the k8s interface: 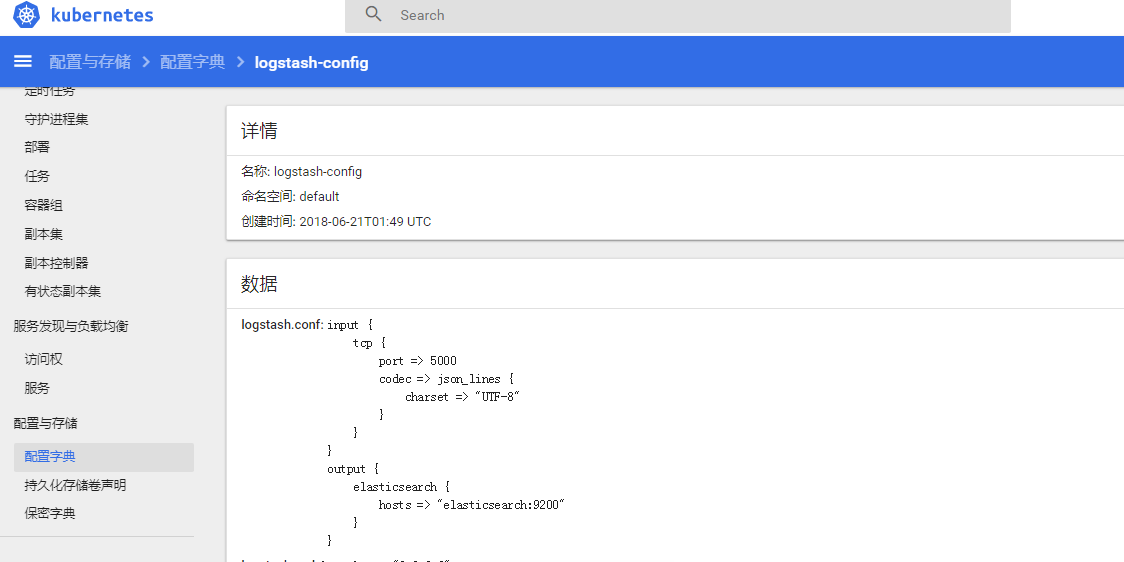
When selecting on the interface, you can click the following advanced button to select the corresponding confidential dictionary: 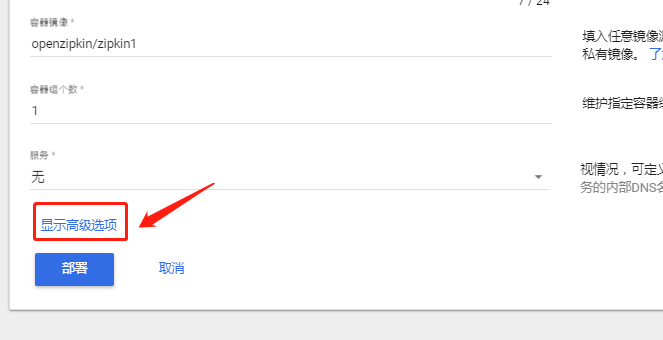
Select the Secret Dictionary you just created: 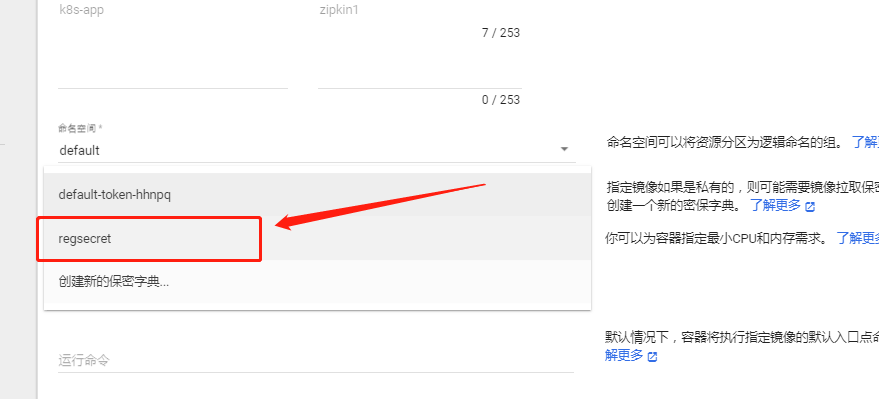
So the mirror of the private warehouse can be retrieved.
(2) yaml configuration
1) Deployment configuration of zipkin:
apiVersion: extensions/v1beta1
kind: Deployment
metadata:
  name: zipkin
spec:
  replicas: 1
  template:
    metadata:
      labels:
        k8s-app: zipkin
    spec:
      containers:
      - name: zipkin
        image: openzipkin/zipkin
        ports:
          - containerPort: 9411
            hostPort: 9411
I use Deployment to manage pods directly here. Deployment provides a declarative method for Pod and ReplicaSet to replace the previous Replication Controller for convenient management applications. Typical application scenarios include:
- Define Deployment to create Pod and ReplicaSet
- Rolling upgrade and rollback applications
- Expansion and Compression
- Suspend and continue Deployment
Submitting this configuration file to the yaml file box of the k8s management interface or directly to the local yaml file is very similar.
Appendix: Introduction of all options for configuration of k8s pod:
 # The complete content of the pod definition file in yaml format:
 apiVersion: v1          #Required, version number, such as v1
 kind: Pod             #Yes, Pod.
 metadata:             #Required, metadata
   name: string          #Necessary, Pod name
   namespace: string       #Necessary, the namespace to which Pod belongs
   labels:             #Custom Label
     - name: string       #Custom tag name
   annotations:          #Custom Annotation List
     - name: string
 spec:                #Necessary, detailed definition of container in Pod
   containers:           #Mandatory, Container List in Pod
   - name: string        #Required, container name
     image: string       #Required, the mirror name of the container
     imagePullPolicy: [Always | Never | IfNotPresent]  #The strategy of getting mirrors Alawys means downloading mirrors IfnotPresent means preferring local mirrors, otherwise downloading mirrors, Nerver means using only local mirrors.
     command: [string]       #Container startup command list, if not specified, using the startup command used when packaging
     args: [string]         #Start command parameter list for container
     workingDir: string      #Working catalogue of containers
     volumeMounts:         #Storage volume configuration mounted inside the container
     - name: string         #Referring to the name of the shared storage volume defined by pod, you need the volume name defined in the volume [] section
       mountPath: string     #The absolute mount path of the volume in the container should be less than 512 characters
       readOnly: boolean     #Is it read-only mode?
     ports:              #List of port library numbers to be exposed
     - name: string         #Port number name
       containerPort: int    #The port number that the container needs to listen on
       hostPort: int        #The port number that the container host needs to listen on is the same as Container by default.
       protocol: string      #Port protocol, support TCP and UDP, default TCP
     env:              #List of environmental variables to be set before the container runs
     - name: string        #Name of environment variable
       value: string       #Values of environmental variables
     resources:          #Resource Limitation and Request Settings
       limits:           #Setting of resource constraints
         cpu: string       #The Cpu limit, in core numbers, will be used for the docker run --cpu-shares parameter
         memory: string      #Memory limitation, in Mib/Gib units, will be used for docker run --memory parameters
       requests:         #Resource Request Settings
         cpu: string       #Cpu request, initial available number of container startup
         memory: string      #Clear memory, initial available number of container startup
     livenessProbe:        #For the settings of health checking for each container in Pod, the container will be restarted automatically after several times of non-response detection. The checking methods are exec, httpGet and tcpSocket. Only one of them can be set for a container.
       exec:             #Inspection mode in Pod container is set to exec mode
         command: [string]   #Commands or scripts that need to be developed in exec mode
       httpGet:            #To set the method of health inspection for each container in Pod as HttpGet, Path and port should be formulated.
         path: string
         port: number
         host: string
         scheme: string
         HttpHeaders:
         - name: string
           value: string
       tcpSocket:            #Set the health inspection mode of each container in Pod to tcpSocket mode
          port: number
        initialDelaySeconds: 0   #The first detection time after the container is started in seconds
        timeoutSeconds: 0      #Time-out of waiting response for container health check detection, unit second, default 1 second
        periodSeconds: 0       #Regular detection time settings for container monitoring and inspection, unit seconds, default 10 seconds
        successThreshold: 0
        failureThreshold: 0
        securityContext:
          privileged: false
     restartPolicy: [Always | Never | OnFailure] #Pod's restart strategy, Always says that once the operation is terminated in any way, kubelet will restart. OnFailure says that only Pod exits with a non-zero exit code will restart. Nerver says that the Pod will not be restarted again.
     nodeSelector: obeject     #Setting NodeSelector means dispatching the Pod to a node containing the label, specified in key: value format
     imagePullSecrets:         #The secret name used when the Pull image is mirrored, specified in key: secret key format
     - name: string
     hostNetwork: false        #Whether to use the host network mode, default to false, if set to true, means to use the host network
     volumes:              #Define a list of shared storage volumes on this pod
     - name: string          #Shared volume names (there are many types of volumes)
       emptyDir: {}          #The storage volume of type emtyDir is a temporary directory with the same life cycle as Pod. Null value
       hostPath: string        #A storage volume of type hostPath that represents the directory where Pod is mounted on the host machine
         path: string        #Pod's host directory, which will be used for mount's directory during the same period
       secret:             #Storage volumes of type secret mount clusters and defined secre objects inside containers
         scretname: string
         items:
         - key: string
           path: string
       configMap:          #Storage volumes of type configMap mount predefined configMap objects into the container
         name: string
         items:
         - key: string
           path: string
2) service configuration
After the pod is successfully deployed, you need to configure the service for the pod.
Kubernete Service is an abstraction that defines a set of Pod policies, which we sometimes call macro services. These pods marked by services are (generally) determined by label Selector.
For example, let's assume that the background is a graphics processing background with three copies. These replicas can be replaced by each other, and the front desk does not need to care which background Pod is used. When the pod carrying the request of the front desk changes, the front desk does not need to wait until these changes, or track these replicas of the back desk, which are located and tracked through services.
Simply put, service is a bridge to request to pod. Requests do not need to care which pod they will request. These are invisible to users and requests. Users will not feel that this is a cluster. When a request comes, service will be automatically assigned to which pod.
yaml configuration file for service:
apiVersion: v1
kind: Service
metadata:
 name: zipkin
 labels:
   k8s-app: zipkin
spec:
 type: LoadBalancer
 ports:
 - port: 9411
   targetPort: 9411
   nodePort: 30002
 selector:
  k8s-app: zipkin
2) ConfigMap configuration
ConfigMap is used to save key-value pairs of configuration data. It can be used to save individual attributes or configuration files. ConfigMap is similar to secret, but it can handle strings that do not contain sensitive information more easily.
Simply put, the k8s configuration file is placed in its own configuration dictionary, as opposed to the docker-compose configuration file under the file directory.
Here is the ConfigMap configuration
apiVersion: v1
kind: ConfigMap
metadata:
  name: logstash-config
  namespace: default
data:
  logstash.yml: |
    http.host: "0.0.0.0"
    path.config: /usr/share/logstash/pipeline
  logstash.conf: |
    input {
        tcp {
            port => 5000
            codec => json_lines {
                charset => "UTF-8"
            }
        }
    }
    output {
        elasticsearch {
            hosts => "elasticsearch:9200"
        }
    }
logstash-config denotes the name of the configuration dictionary.
Each key-value pair in data generates a file with key as the file name and value as the content.
Similarly, after clicking upload, the corresponding configuration dictionary will be generated in the configuration dictionary menu. As shown in the figure: 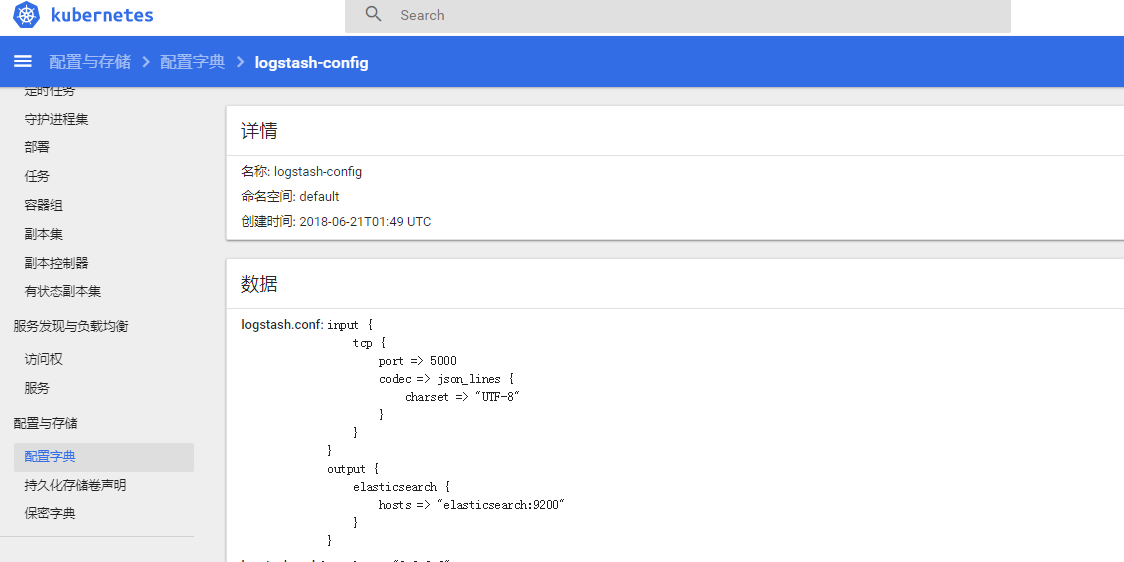
This configuration dictionary can then be referenced in deployment:
apiVersion: extensions/v1beta1
kind: Deployment
metadata:
  name: logstash
spec:
  replicas: 1
  template:
    metadata:
      labels:
        k8s-app: logstash
    spec:
      containers:
      - name: logstash
        image: docker.elastic.co/logstash/logstash:6.2.3
        ports:
          - containerPort: 5000
            hostPort: 5000
        env:
          - name: ES_JAVA_OPTS
            value: "-Xmx256m -Xms256m"
        volumeMounts:
          - name: logstash-volume1   #The volume name in volume
            mountPath: /usr/share/elasticsearch/config   #Deposit address of configuration file inside container
          - name: logstash-volume2   #The volume name in volume
            mountPath: /usr/share/logstash/pipeline     #Deposit address of configuration file inside container
        imagePullSecrets:
          - name: regsecret   #  Secret dictionary
      volumes:
      - name: logstash-volume1  #This is the name of the now self-defined volume for easy reference in volume Mounts
        configMap:
          name: logstash-config   #This is the previous configuration dictionary.
          items:
          - key: logstash.yml  #Configure the key in the dictionary
            path: config
      - name: logstash-volume2   #This is the name of the now self-defined volume for easy reference in volume Mounts
        configMap:
          name: logstash-config   #This is the previous configuration dictionary.
          items:
          - key: logstash.conf   #Configure the corresponding ke in the dictionary
            path: pipeline
3, deployment
After configuring, click Deployment, and then look at the overview. The status diagrams are green, and the status of the container group is running, so the deployment is successful, as shown in the figure: 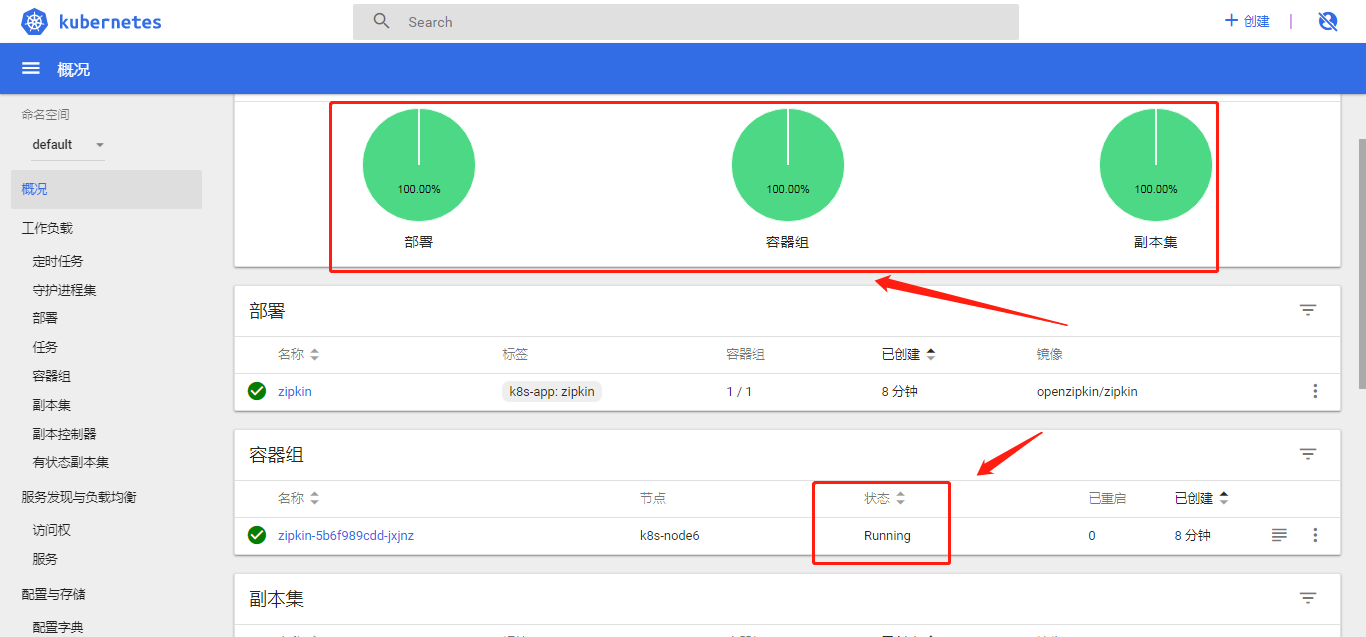
You can access Zipkin, enter http://10.106.0.51:32552 32552 here is nodePort: 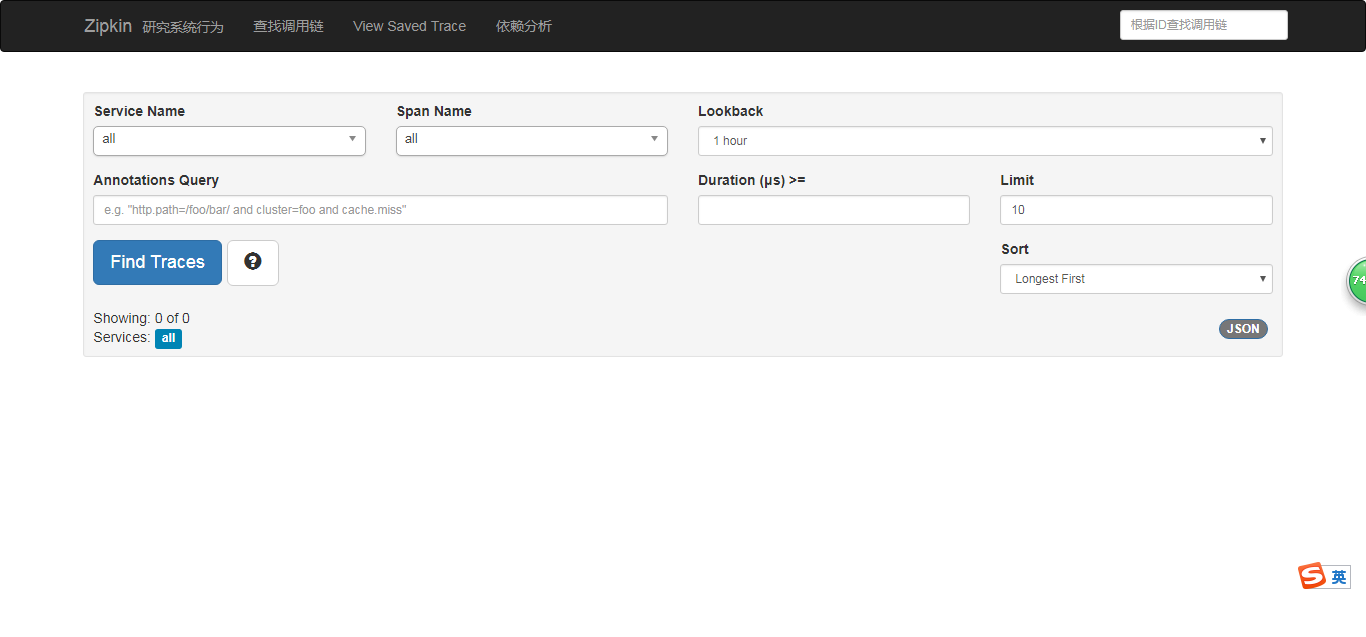
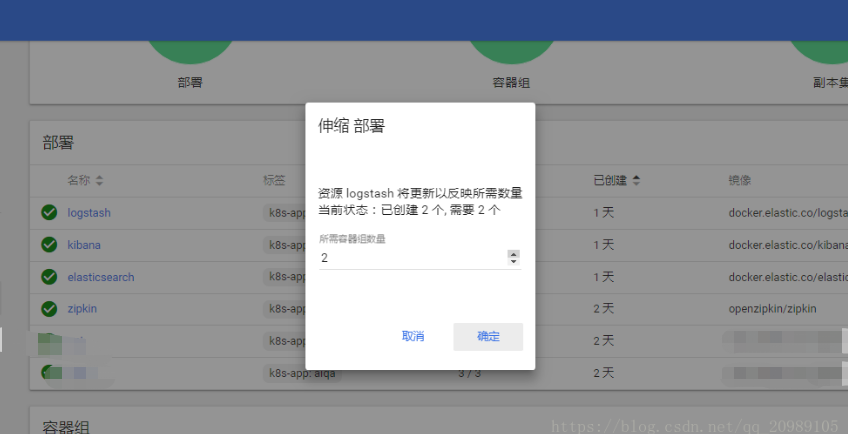
When you need to adjust the number of node s at a later stage, you can adjust the number in deployment, as shown in the figure: 
The second step: 