If there are many picture resources in a project, there will be special picture servers to store pictures. You can observe that the links of pictures on some large websites have special servers, which can improve the performance very well. There are many image server solutions. Through the storage services, vsftp, FastDFS and so on provided by the cloud manufacturers who spend money, here is an open source project - zimg.
- Zimg is an image storage and processing server. You can use the URL parameter to get compressed and scaled images from zimg.
- Zimg has excellent concurrent I / O, distributed storage and timely processing capabilities. You no longer need to use nginx in the image server. In the benchmark, zimg can process more than 3000 image download tasks and more than 90000 HTTP echo requests per second at a high concurrency level. Higher performance than PHP or other image processing servers.
- For small and medium-sized drawing bed service
- Official website: http://zimg.buaa.us
1, installation
Environment: linux
It is recommended to use docker for installation. It can be done with one click. Manual installation is too cumbersome.
# Pull zimg image
$ docker pull iknow0612/zimg
# Start zimg container
$ docker run -it -d -p 4869:4869 -v /data/zimg/:/zimg/bin/img --name my_zimg iknow0612/zimg sh app.sh
After startup, test it on the browser. Visit http: / / server ip:4869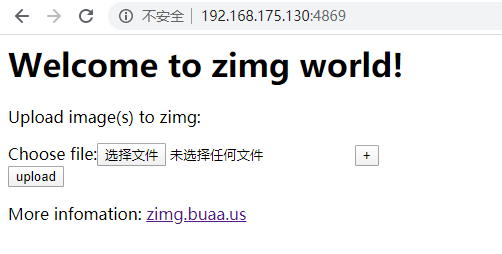
Select a picture to upload:
zimg will return the MD5 encrypted relative path of the picture after uploading the picture. If you want to get the picture, you need to access it through http: http: / / server ip:4869 / MD5 of the picture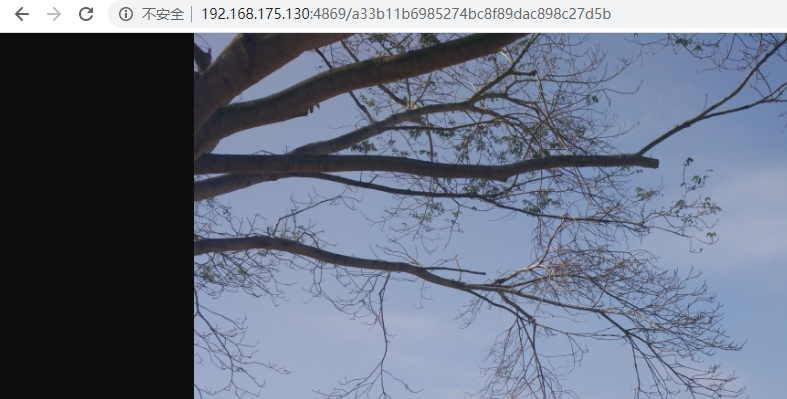
Explain:
- If it is uploaded directly on the front-end browser page, the returned result is in html format
- If the post request is initiated, the json format will be returned
{"ret":true,"info":{"md5":"5f189d8ec57f5a5a0d3dcba47fa797e2","size":29615}}
2. Simple description of zimg
Disclaimer: I actually installed zimg in docker.
The directory of zimg is introduced. First, enter the zimg container through the following command:
$ docker exec -ti zimg container id /bin/bash

- conf: configuration file
- img: image storage directory
- log: Journal
- Script: script files
- www: two html page files
Enter conf, where zimg.yua is the configuration file
For a detailed description of zimg, you can go to Official documents , which is very detailed
3. zimg and java
The basic example is to send a post request and write the byte data of the picture into six.
@Test
	public void test() throws IOException {
		URL url = new URL("http://192.168.175.130:4869/update");
		File file = new File("C:\\Users\\lr\\Desktop\\t.png");
		String name = file.getName();
		String fileType = name.substring(name.lastIndexOf(".") + 1);

		HttpURLConnection connection = null;
		InputStream response = null;
		try {
			connection = (HttpURLConnection) url.openConnection();
			connection.setConnectTimeout(10000);
			connection.setReadTimeout(10000);
			// Set the type of uploaded picture, otherwise error will be reported
			connection.setRequestProperty("content-type", fileType);
			connection.setRequestMethod("POST");
			connection.setDoOutput(true);
			connection.connect();
			OutputStream out = connection.getOutputStream();
			out.write(getFileBytes(file));

			response = connection.getInputStream();
			int len = -1;
			String ret = "";
			byte[] b = new byte[100];
			while ((len = response.read(b)) != -1) {
				ret += new String(b,0,len);
			}
			System.out.println(ret);
		} catch (MalformedURLException e) {
			e.printStackTrace();
		} catch (IOException e) {
			e.printStackTrace();
		} finally {
			if (response != null)
				try {
					response.close();
				} catch (IOException e) {
					e.printStackTrace();
				}
			if (connection != null) {
				connection.disconnect();
				connection = null;
			}
		}

	}

	private byte[] getFileBytes(File file) {
		FileInputStream in = null;
		ByteArrayOutputStream bos = null;
		try {
			in = new FileInputStream(file);
			bos = new ByteArrayOutputStream();
			int len = -1;
			byte[] b = new byte[1024];
			while((len = in.read(b)) != -1) {
				bos.write(b, 0, len);
			}
			return bos.toByteArray();
		} catch (FileNotFoundException e) {
			e.printStackTrace();
		} catch (IOException e) {
			e.printStackTrace();
		}finally {
			if(in !=null) {
				try {
					in.close();
				} catch (IOException e) {
					e.printStackTrace();
				}
			}

			if(bos != null) {
				try {
					bos.close();
				} catch (IOException e) {
					e.printStackTrace();
				}
			}
		}
		return null;
	}
Result:

