Message queuing hasn't been used recently, but I can't help but study it.
springboot integrates ActiveMQ
1. docker deployment ActiveMQ
1.1 search ActiveMQ
docker search activemq

1.2 download the image of ActiveMQ
docker pull webcenter/activemq

1.3 starting the image of ActiveMQ
docker run -it -d \ # Background operation
-p 61616:61616 \ # tcp port for java
-p 8161:8161 \ # Background management system port
--name myactivemq \ # alias
webcenter/activemq # Image name (now last)

1.4 open the background management interface to view
The background access address is: your ip address: 8161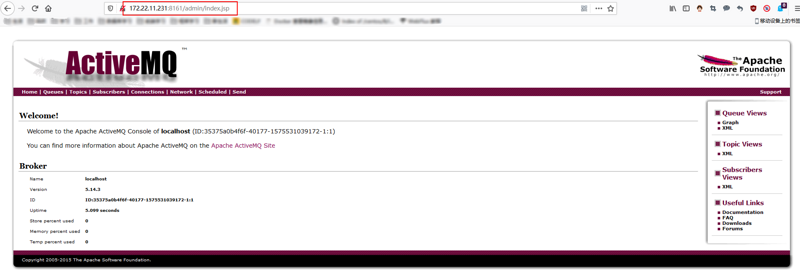
2. Using springboot to build a message provider
2.1 configuration of pom.xml
Create a new springboot project, and then add the activemq dependency to the pom.xml file.
<dependency>
    <groupId>org.springframework.boot</groupId>
    <artifactId>spring-boot-starter-activemq</artifactId>
</dependency>
2.2 add application.yml configuration information
server:
  port: 8080 # Port number
spring:
  activemq:
    broker-url: tcp://172.22.11.231:61616 ා own MQ server address, use your own
  jms:
    pub-sub-domain: false # false = Queue true = Topic

# Self defined queue name
myqueue: boot-activemq-queue
2.3 create a new BeanConfig.java to define the message queue
import org.apache.activemq.command.ActiveMQQueue;
import org.springframework.beans.factory.annotation.Value;
import org.springframework.context.annotation.Bean;
import org.springframework.jms.annotation.EnableJms;
import org.springframework.stereotype.Component;

import javax.jms.Queue;

/**
 * @EnableJms Used to declare support for JMS annotations
 * @author zhouxiaoxi
 */
@Component
@EnableJms
public class BeanConfig {

    /**
     * Get the queue name in the configuration file
     */
    @Value("${myqueue}")
    private String myqueue;

    /**
     * Define the queue for messages
     * @return
     */
    @Bean
    public Queue queue() {
        return new ActiveMQQueue(myqueue);
    }

}
2.4 creating a message provider
import org.springframework.jms.core.JmsMessagingTemplate;
import org.springframework.web.bind.annotation.RequestMapping;
import org.springframework.web.bind.annotation.RestController;

import javax.annotation.Resource;
import javax.jms.Queue;

/**
 * @author 10166815
 */
@RestController
public class ProviderController {

    /**
     * Inject message queue
     */
    @Resource
    private Queue queue;

    /**
     * Injection of spring boot encapsulated tool class
     */
    @Resource
    private JmsMessagingTemplate jmsTemplate;

    @RequestMapping("send")
    public void send(String name) {
        //Method 1: add a message to the message queue
        //The Queue queue we created before is used here
        jmsTemplate.convertAndSend(queue, name);
        //Method 2: in this way, you do not need to create a queue manually. The system will create a queue named test by itself
        //If you use manual queue creation here, you need to write the @ EnableJms annotation to the startup class
        //Here you can get the queue name in the configuration file and assign it to the first parameter
        //jmsMessagingTemplate.convertAndSend("test", name);
    }

}
2.4 start the project and test with postman
Now go to the control interface and check the Queue, and you will find that there is no message
Open postman, input the address, and configure the parameters to access:
Check the Queue again and a message appears:
3. Using springboot to build consumers
You can create a new springboot project to be a consumer
3.1 configuration of pom.xml
Create a new springboot project, and then add the activemq dependency to the pom.xml file.
<dependency>
    <groupId>org.springframework.boot</groupId>
    <artifactId>spring-boot-starter-activemq</artifactId>
</dependency>
3.2 add application.yml configuration information
server:
  port: 8081 # Port number
spring:
  activemq:
    broker-url: tcp://172.22.11.231:61616 ා own MQ server address, use your own
  jms:
    pub-sub-domain: false # false = Queue true = Topic

# Self defined queue name
myqueue: boot-activemq-queue
3.3 create consumers
import org.springframework.jms.annotation.JmsListener;
import org.springframework.stereotype.Component;

import javax.jms.JMSException;
import javax.jms.TextMessage;

/**
 * @author 10166815
 */
@Component
public class ConsumerController {

    /**
     * Use JmsListener to configure the queue consumers listen to, where name is the received message
     * @param textMessage
     * @return
     */
    @JmsListener(destination = "${myqueue}")
    public void handleMessage(TextMessage textMessage) throws JMSException {
        System.out.println("Successful acceptance name: " + textMessage.getText());
    }

}
3.4 start the project and check whether the console outputs the information
The console prints out messages
The control page also shows that the message is processed
At this point, the spring boot simple integration of ActiveMQ is over.