Introduction to service governance
Let's think about a problem first
Through the operations in the previous chapter, we can realize the invocation between microservices. However, we hard code the network address (ip, port) of the service provider into the code, which has many problems:
- Once the service provider address changes, you need to modify the code manually;
- Once there are multiple service providers, the load balancing function cannot be realized;
- Once there are more and more services, it is difficult to maintain the call relationship manually;
So how to solve it? At this time, we need to dynamically implement service governance through the registry.
What is service governance
Service governance is the core and basic module in micro service architecture. It is used to realize the automatic registration and discovery of various micro services.
- Service registration: in the service governance framework, a registry will be built, and each service unit registers the details of its own services with the registry. And form a list of services in the registration center. The service registration center needs to monitor whether the services in the list are available in the way of heartbeat. If they are not available, the unavailable services need to be removed from the service list.
- Service discovery: the service caller consults the service from the service registry, obtains the instance list of all services, and implements the implementation of specific services
Example access.
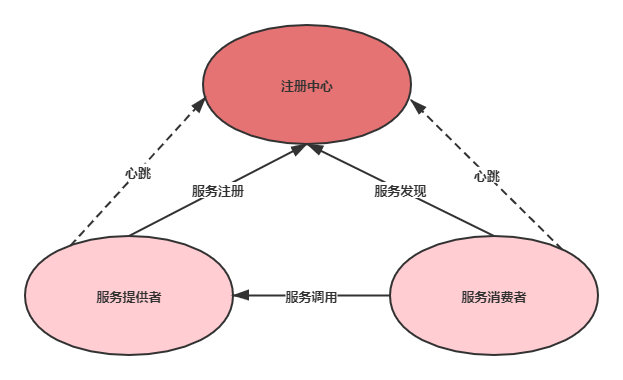
Through the above call graph, we can find that in addition to microservices, another component is the service registry, which is a very important component of microservice architecture and plays a role of coordinator in microservice architecture. The registry generally includes the following functions:
1. Service discovery:
- Service registration: save the information of service provider and service caller
- Service subscription: the service caller subscribes to the information of the service provider, and the registry pushes the information of the provider to the subscriber
2. Service configuration:
- Configure subscription: service providers and service callers subscribe to micro service related configurations
- Configuration distribution: actively push the configuration to service providers and service callers
3. Service health test:
- Check the health of the service provider. If any abnormality is found, perform service rejection
Common registry
-
Zookeeper
zookeeper is a distributed service framework and a sub project of Apache Hadoop. It is mainly used to solve some data management problems often encountered in distributed applications, such as unified naming service, state synchronization service, cluster management, management of distributed application configuration items, etc. -
Eureka
Eureka is an important component of Springcloud Netflix. Its main function is to do service registration and discovery. But now the source is closed. -
Consul
Consul is an open source tool developed based on GO language. It is mainly for distributed and service-oriented systems and provides the functions of service registration, service discovery and configuration management. Consul's functions are very practical, including service registration / discovery, health check, Key/Value storage, multi data center and distributed consistency assurance. Consul itself is only a binary executable file, so the installation and deployment are very simple. You only need to download it from the official website and execute the corresponding startup script. -
Nacos
Nacos is a dynamic service discovery, configuration management and service management platform that is easier to build cloud native applications. It's Spring
As one of the Cloud Alibaba components, it is responsible for service registration, discovery and service configuration. You can think of it as nacos=eureka+config.
Introduction to nacos
nacos is dedicated to helping you discover, configure, and manage microservices. nacos provides a set of easy-to-use feature sets to help you quickly realize dynamic service discovery, service configuration, service metadata and traffic management. From the above introduction, we can see that the role of nacos is a registry to manage the registered micro services. More about nacos View this address.
nacos usage
Build nacos environment
Step 1: install nacos
Download address: https://nacos.io/zh-cn/docs/what-is-nacos.html
 download zip Format, and then decompress it
Step 2: start nacos
#Switch directory
cd nacos/bin
#Command start
startup.cmd -m standalone
Step 3: access nacos
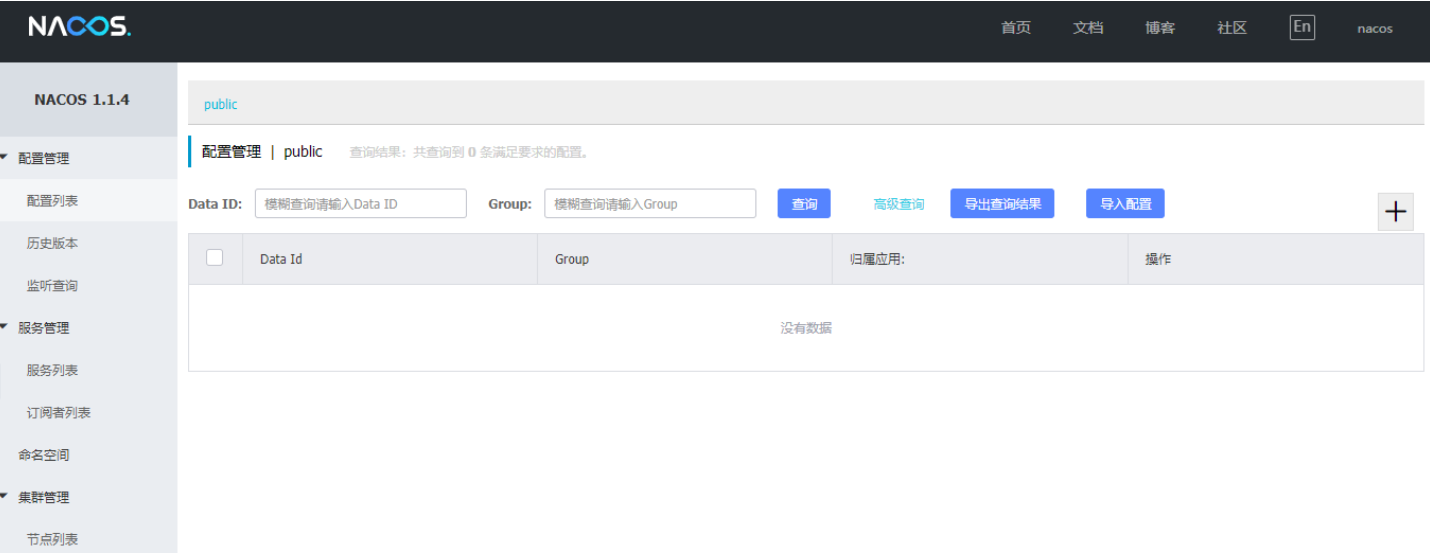
Open browser input http://localhost:8848/nacos , you can access the service. The default password is nacos/nacos
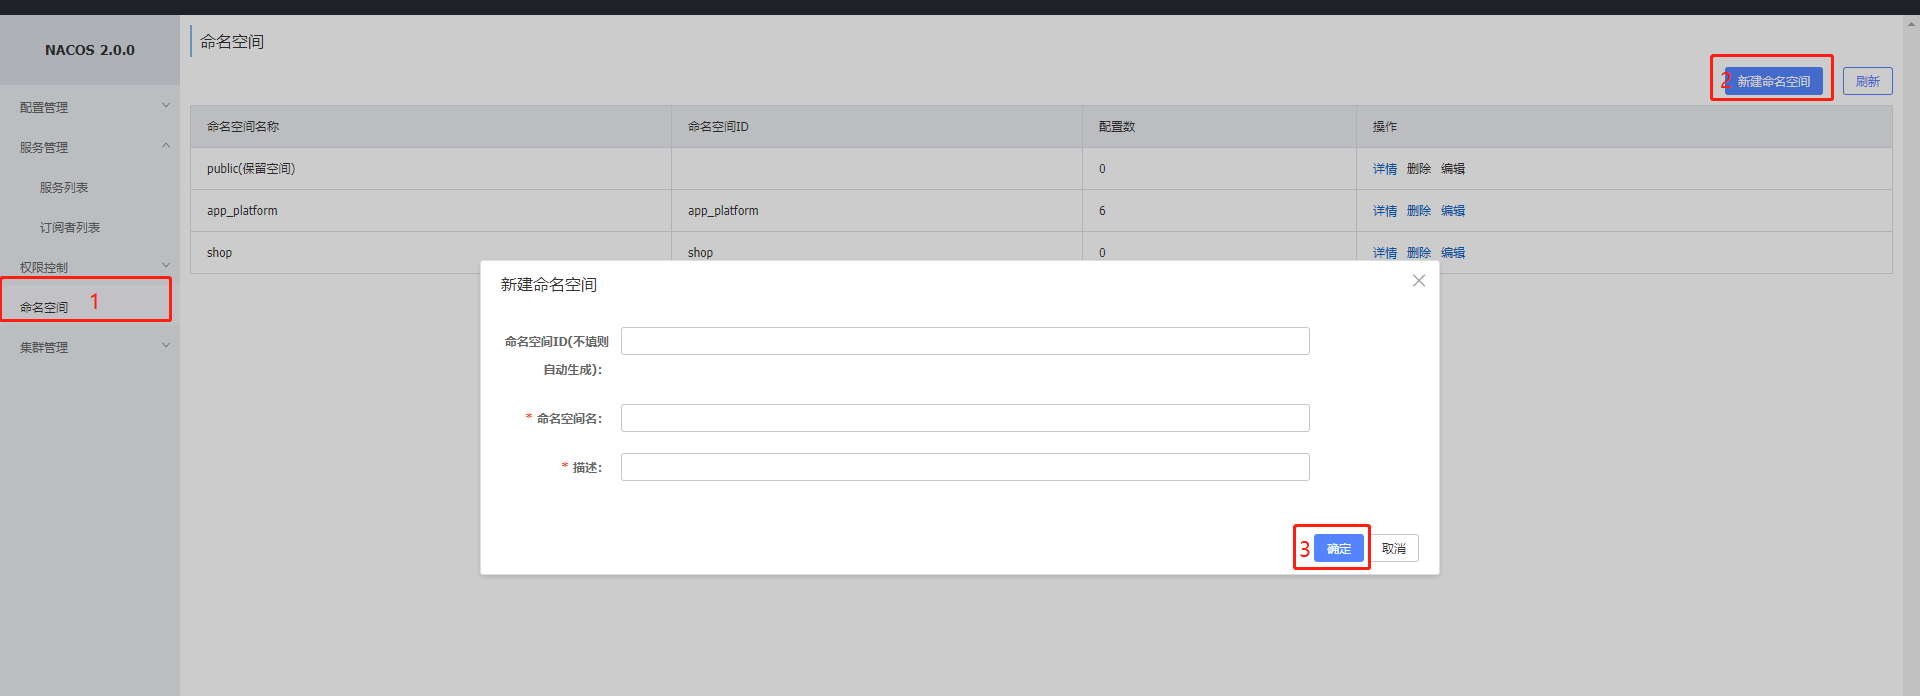
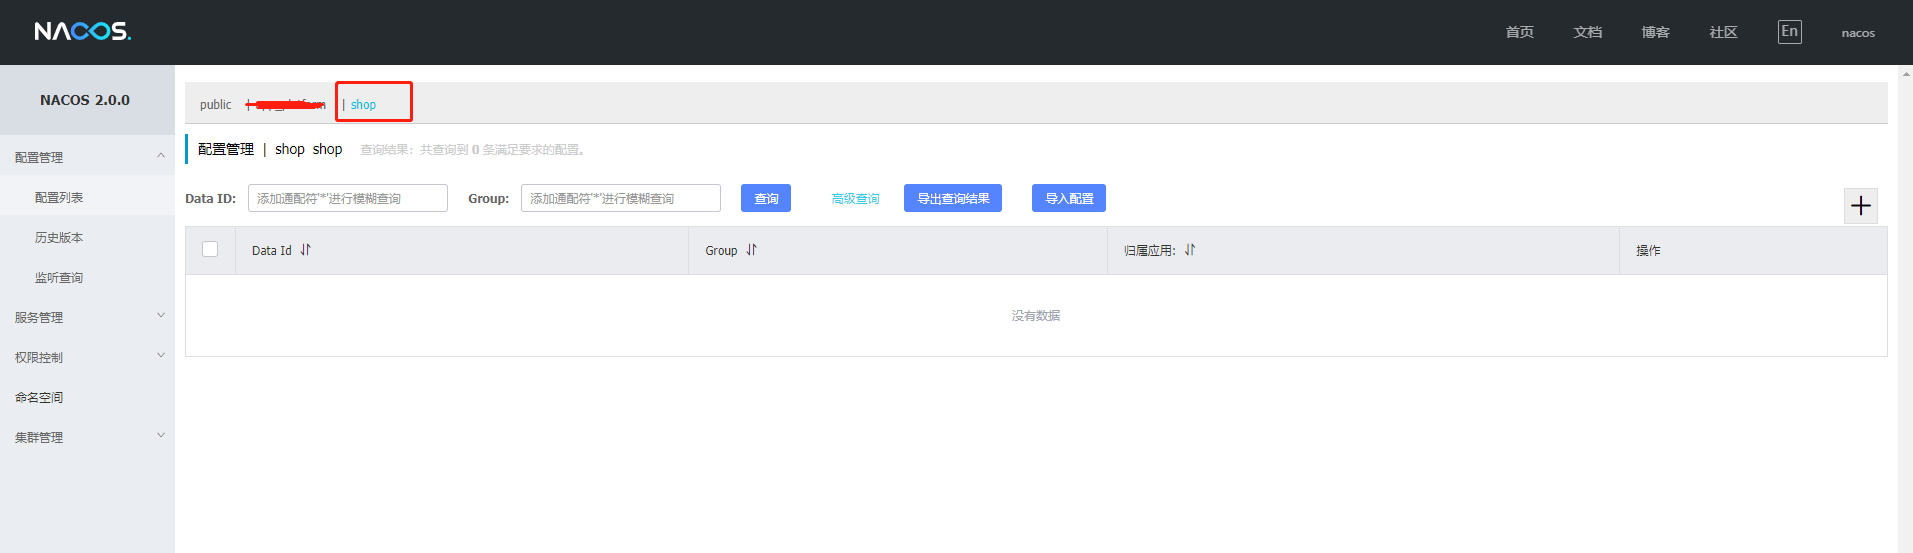
Step 4: create namespace shop
Registration of goods and services
Step 1: add nacos dependency in pom.xml
<?xml version="1.0" encoding="UTF-8"?>
<project xmlns="http://maven.apache.org/POM/4.0.0"
         xmlns:xsi="http://www.w3.org/2001/XMLSchema-instance"
         xsi:schemaLocation="http://maven.apache.org/POM/4.0.0 http://maven.apache.org/xsd/maven-4.0.0.xsd">
    <parent>
        <artifactId>springcloud-alibaba</artifactId>
        <groupId>org.skystep</groupId>
        <version>1.0-SNAPSHOT</version>
    </parent>
    <modelVersion>4.0.0</modelVersion>

    <artifactId>shop-product</artifactId>

    <dependencies>
        <dependency>
            <groupId>org.springframework.boot</groupId>
            <artifactId>spring-boot-starter-web</artifactId>
        </dependency>
        <dependency>
            <groupId>org.skystep</groupId>
            <artifactId>shop-common</artifactId>
            <version>1.0-SNAPSHOT</version>
        </dependency>
        <!--add to nacos client-->
        <dependency>
            <groupId>com.alibaba.cloud</groupId>
            <artifactId>spring-cloud-starter-alibaba-nacos-discovery</artifactId>
        </dependency>
    </dependencies>

</project>
Step 2: add the @ EnableDiscoveryClient annotation on the main class
package org.skystep;

import org.springframework.boot.SpringApplication;
import org.springframework.boot.autoconfigure.SpringBootApplication;
import org.springframework.cloud.client.discovery.EnableDiscoveryClient;

/**
 * @author Yao mianwei
 * @version 1.0.0
 * @ClassName ProductApplication
 * @Description Product entry function
 * @createTime 2021 19:15:00, September 22
 */
@SpringBootApplication
@EnableDiscoveryClient // Add @ EnableDiscoveryClient annotation
public class ProductApplication {
    public static void main(String[] args) {
        SpringApplication.run(ProductApplication.class, args);
    }
}
Step 3: add the address of the nacos service in application.yml
server:
  port: 8073
spring:
  application:
    name: service-prodcut
  datasource:
    driver-class-name: com.mysql.cj.jdbc.Driver
    url: jdbc:mysql://192.168.1.41:30401/shop?serverTimezone=UTC&useUnicode=true&characterEncoding=utf-8&useSSL=true
    username: root
    password: root
  jpa:
    properties:
      hibernate:
        hbm2ddl:
          auto: update
        dialect: org.hibernate.dialect.MySQL5InnoDBDialect
  ## Add nacos configuration
  cloud:
    nacos:
      discovery:
        server-addr: 192.168.1.41:30400
        namespace: shop
Step 4: start the service and observe whether there is a registered commodity micro service in the control panel of nacos
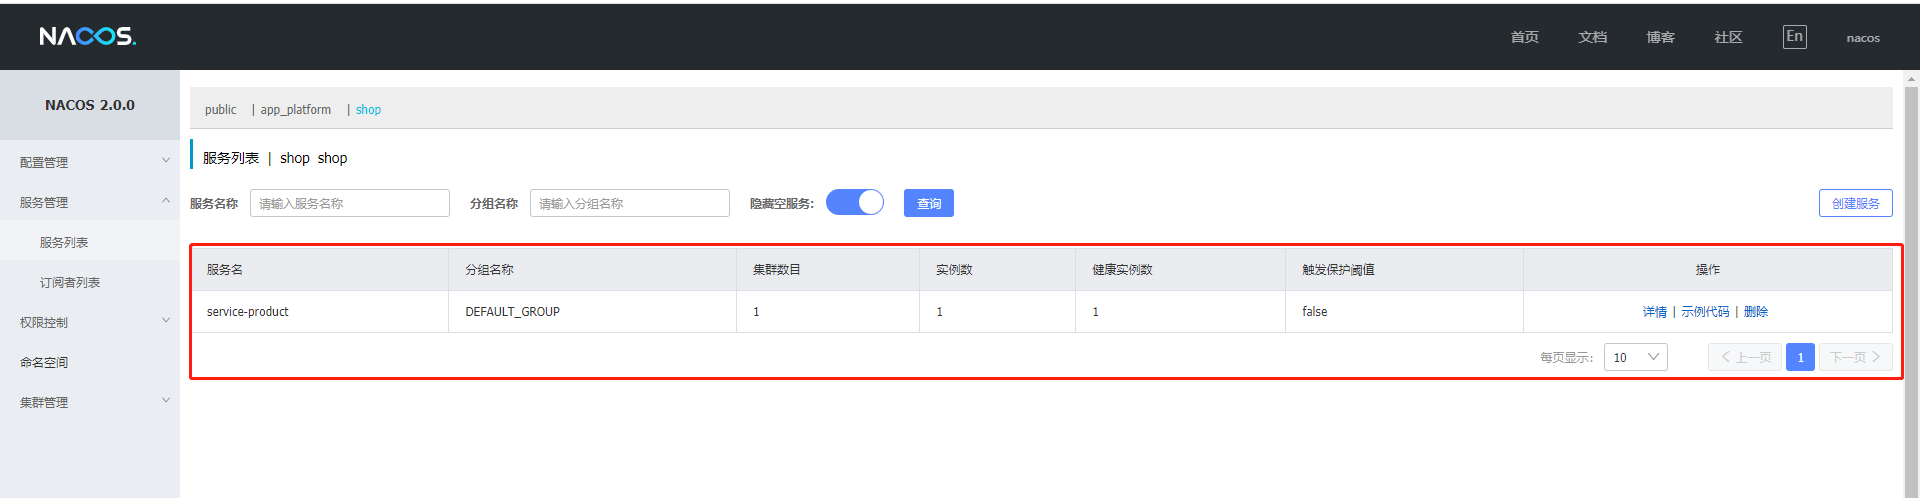
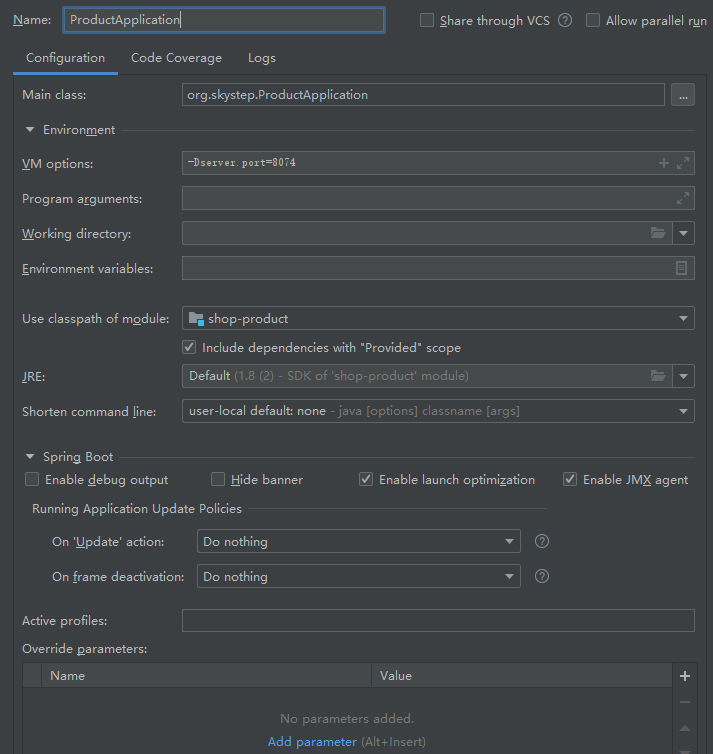
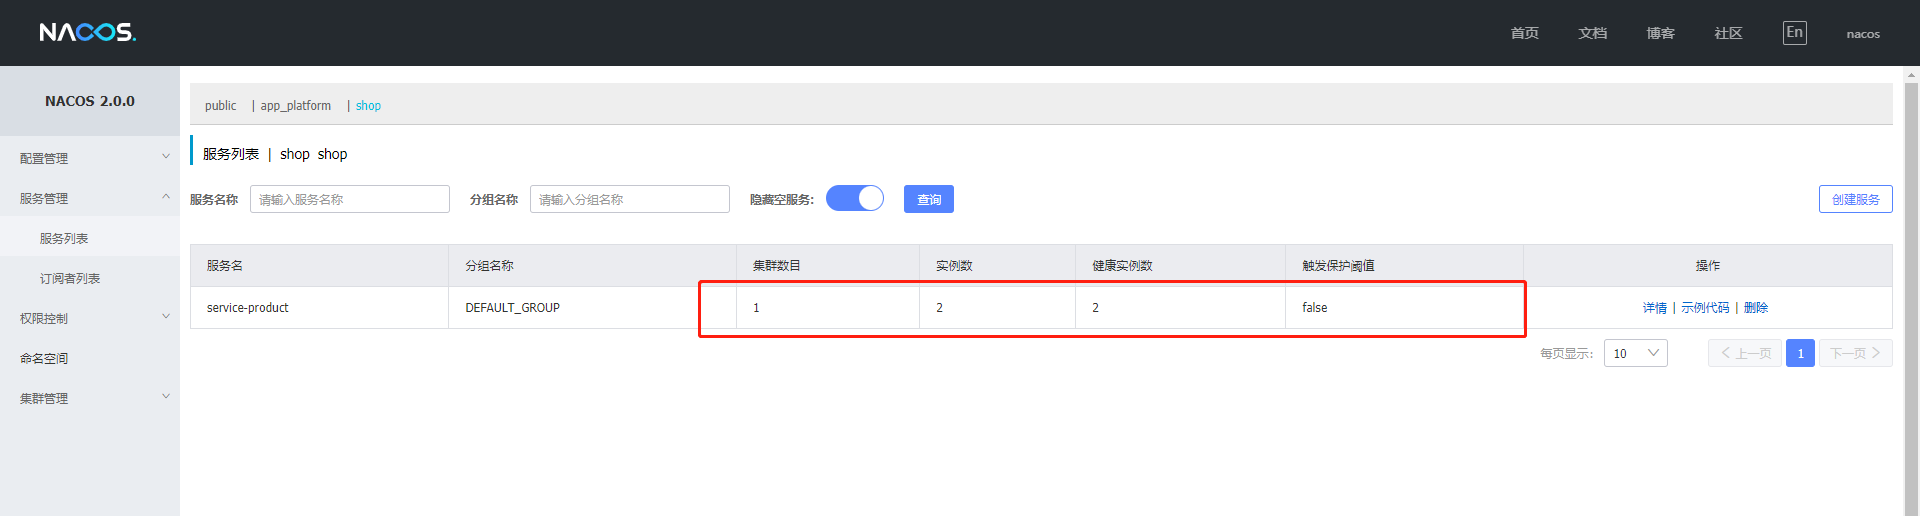
Step 5: start a shop product micro service through idea, set its port to 8074, and start the service
Order service registration
Step 1: add nacos dependency in pom.xml
<?xml version="1.0" encoding="UTF-8"?>
<project xmlns="http://maven.apache.org/POM/4.0.0"
         xmlns:xsi="http://www.w3.org/2001/XMLSchema-instance"
         xsi:schemaLocation="http://maven.apache.org/POM/4.0.0 http://maven.apache.org/xsd/maven-4.0.0.xsd">
    <parent>
        <artifactId>springcloud-alibaba</artifactId>
        <groupId>org.skystep</groupId>
        <version>1.0-SNAPSHOT</version>
    </parent>
    <modelVersion>4.0.0</modelVersion>

    <artifactId>shop-order</artifactId>

    <dependencies>
        <dependency>
            <groupId>org.springframework.boot</groupId>
            <artifactId>spring-boot-starter-web</artifactId>
        </dependency>
        <dependency>
            <groupId>org.skystep</groupId>
            <artifactId>shop-common</artifactId>
            <version>1.0-SNAPSHOT</version>
        </dependency>
        <!--add to nacos client-->
        <dependency>
            <groupId>com.alibaba.cloud</groupId>
            <artifactId>spring-cloud-starter-alibaba-nacos-discovery</artifactId>
        </dependency>
    </dependencies>

</project>
Step 2: add the @ EnableDiscoveryClient annotation on the main class
package org.skystep;

import org.springframework.boot.SpringApplication;
import org.springframework.boot.autoconfigure.SpringBootApplication;
import org.springframework.cloud.client.discovery.EnableDiscoveryClient;
import org.springframework.cloud.openfeign.EnableFeignClients;
import org.springframework.context.annotation.Bean;
import org.springframework.web.client.RestTemplate;

/**
 * @author Yao mianwei
 * @version 1.0.0
 * @ClassName OrderApplication
 * @Description Order entry class
 * @createTime 2021 09:29:00, September 23
 */
@SpringBootApplication
@EnableDiscoveryClient // Add the @ EnableDiscoveryClient annotation on the main class
public class OrderApplication {
    public static void main(String[] args) {
        SpringApplication.run(OrderApplication.class, args);
    }

    @Bean
    public RestTemplate getRestTemplate() {
        return new RestTemplate();
    }
}
Step 3: add the address of the nacos service in application.yml
server:
  port: 8073
spring:
  application:
    name: service-order
  datasource:
    driver-class-name: com.mysql.cj.jdbc.Driver
    url: jdbc:mysql://192.168.1.41:30401/shop?serverTimezone=UTC&useUnicode=true&characterEncoding=utf-8&useSSL=true
    username: root
    password: root
  jpa:
    properties:
      hibernate:
        hbm2ddl:
          auto: update
        dialect: org.hibernate.dialect.MySQL5InnoDBDialect
  cloud:
    nacos:
      discovery:
        server-addr: 192.168.1.41:30400
        namespace: shop
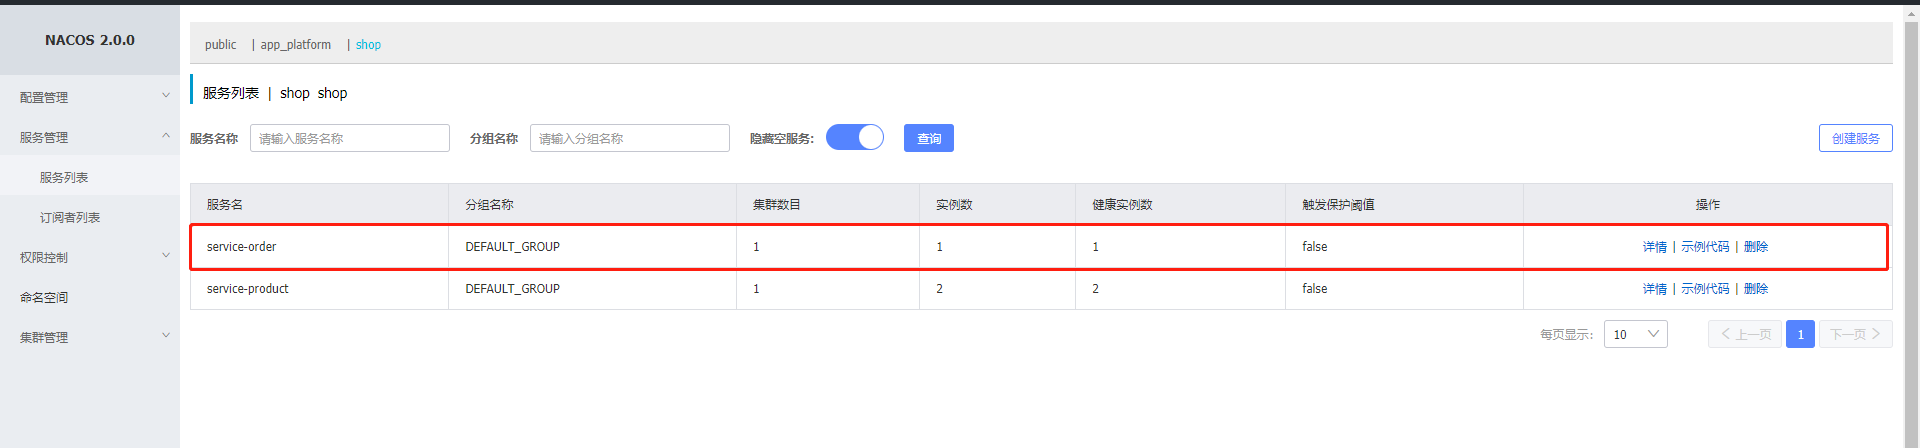
Step 4: start the service and observe whether there is a registered order micro service in the control panel of nacos
Inter service call
Get the service instance to implement the micro service call and modify the OrderController
package org.skystep.controller;

import com.alibaba.fastjson.JSON;
import lombok.extern.slf4j.Slf4j;
import org.skystep.common.entity.Order;
import org.skystep.common.entity.Product;
import org.skystep.service.OrderService;
import org.skystep.service.ProductService;
import org.springframework.beans.factory.annotation.Autowired;
import org.springframework.cloud.client.ServiceInstance;
import org.springframework.cloud.client.discovery.DiscoveryClient;
import org.springframework.web.bind.annotation.GetMapping;
import org.springframework.web.bind.annotation.PathVariable;
import org.springframework.web.bind.annotation.RestController;
import org.springframework.web.client.RestTemplate;

/**
 * @author Yao mianwei
 * @version 1.0.0
 * @ClassName OrderController
 * @Description TODO
 * @createTime 2021 09:41:00, September 23
 */
@RestController
@Slf4j
public class OrderController {
    @Autowired
    private RestTemplate restTemplate;

    @Autowired
    private OrderService orderService;

    @Autowired
    private DiscoveryClient discoveryClient;

    @GetMapping("/order/prod/{pid}")
    public Order order(@PathVariable("pid") Integer pid) {
        log.info(">>When the customer places an order, it needs to call the commodity micro service to query the commodity information");

        // Get the list of service instances with the name service product, and select the 0 to call the service
        ServiceInstance serviceInstance =
                discoveryClient.getInstances("service-product").get(0);
        String url = serviceInstance.getHost() + ":" +
                serviceInstance.getPort();
        log.info(">>from nacos The microservice address obtained in is:" + url);

        Product product = restTemplate.getForObject(
                "http://" + url + "/product/" + pid, Product.class);

        log.info(">>Commodity information,Query results:" + JSON.toJSONString(product));
        Order order = new Order();
        order.setUid(1);
        order.setUsername("Test user");
        order.setPid(product.getPid());
        order.setPname(product.getPname());
        order.setPprice(product.getPprice());
        order.setNumber(1);
        orderService.createOrder(order);
        return order;
    }
}
This kind of implementation needs to obtain the service instance by itself. If you want to realize random call, you need to implement the call strategy by yourself, that is, custom load balancing
List<ServiceInstance> instances = discoveryClient.getInstances("serviceproduct");
int index = new Random().nextInt(instances.size());
ServiceInstance serviceInstance = instances.get(index);
String url = serviceInstance.getHost() + ":" +
serviceInstance.getPort();
log.info(">>from nacos The microservice address obtained in is:" + url);
load balancing
Generally speaking, load balancing is to allocate the load (work tasks, access requests) to multiple operating units (servers, components) for execution. According to the location of load balancing, it is generally divided into server load balancing and client load balancing. Server side load balancing refers to the service provider side, such as the common nginx load balancing, while client side load balancing refers to the side of the service request, that is, which instance has been selected to process the request before sending the request.

In the microservice invocation relationship, we generally choose client load balancing, that is, one side of the service invocation determines which provider executes the service.
Load balancing based on Ribbon
Ribbon is a component of Spring Cloud, which allows us to easily handle load balancing with an annotation
Step 1: add @ LoadBalanced annotation on the generation method of RestTemplate
@Bean
@LoadBalanced
public RestTemplate restTemplate() {
return new RestTemplate();
}
Step 2: modify the method called by the core code
//Directly use the microservice name to obtain the service address from nacos
String url = "service-product";
//Call commodity microservices through restTemplate
Product product = restTemplate.getForObject(
"http://" + url + "/product/" + pid, Product.class);
log.info(">>Commodity information, query results:" + JSON.toJSONString(product));
Ribbon supported load balancing
Ribbon has built-in multiple load balancing strategies, and the top-level interface of internal load balancing is com.netflix.loadbalancer.IRule.
- BestAvailableRule
Select a server with the smallest concurrent request. Select a server with the smallest concurrent request
- AvailabilityFilteringRule
Filter out the back-end servers marked as circuit tripped because of continuous connection failure, and filter out the back-end servers with high concurrency (active connections exceed the configured threshold)
- WeightedResponseTimeRule
Assign a weight according to the corresponding time. The longer the corresponding time, the smaller the weight, and the lower the possibility of being selected.
- RetryRule
On machine retry mechanism for the selected load balancing policy.
- RoundRobinRule
Select server for polling mode
- RandomRule
Select a server at random
- ZoneAvoidanceRule
Select server by judging the performance of the region where the server is located and the availability of the server
We can adjust the Ribbon's load balancing policy by modifying the configuration. The specific code is as follows
service-product: # The name of the calling provider
  ribbon:
    NFLoadBalancerRuleClassName: com.netflix.loadbalancer.RandomRule
In terms of code implementation, the higher the degree of coupling is, because we place the request implementation of service invocation in the controller.
Implementation of service invocation based on Feign
What is Feign
Feign is a declarative pseudo Http client provided by Spring Cloud. It makes calling remote services as simple as calling local services. You only need to create an interface and add an annotation. Nacos is well compatible with feign. Feign integrates Ribbon by default, so using Fegin under Nacos can achieve the effect of load balancing by default.
Use of Feign
Step 1: add Fegin dependencies
<?xml version="1.0" encoding="UTF-8"?>
<project xmlns="http://maven.apache.org/POM/4.0.0"
         xmlns:xsi="http://www.w3.org/2001/XMLSchema-instance"
         xsi:schemaLocation="http://maven.apache.org/POM/4.0.0 http://maven.apache.org/xsd/maven-4.0.0.xsd">
    <parent>
        <artifactId>springcloud-alibaba</artifactId>
        <groupId>org.skystep</groupId>
        <version>1.0-SNAPSHOT</version>
    </parent>
    <modelVersion>4.0.0</modelVersion>

    <artifactId>shop-order</artifactId>

    <dependencies>
        <dependency>
            <groupId>org.springframework.boot</groupId>
            <artifactId>spring-boot-starter-web</artifactId>
        </dependency>
        <dependency>
            <groupId>org.skystep</groupId>
            <artifactId>shop-common</artifactId>
            <version>1.0-SNAPSHOT</version>
        </dependency>
        <dependency>
            <groupId>com.alibaba.cloud</groupId>
            <artifactId>spring-cloud-starter-alibaba-nacos-discovery</artifactId>
        </dependency>
        <!--openfeign-->
        <dependency>
            <groupId>org.springframework.cloud</groupId>
            <artifactId>spring-cloud-starter-openfeign</artifactId>
        </dependency>
    </dependencies>

</project>
Step 2: add Fegin's Annotation on the main class
package org.skystep;

import org.springframework.boot.SpringApplication;
import org.springframework.boot.autoconfigure.SpringBootApplication;
import org.springframework.cloud.client.discovery.EnableDiscoveryClient;
import org.springframework.cloud.openfeign.EnableFeignClients;
import org.springframework.context.annotation.Bean;
import org.springframework.web.client.RestTemplate;

/**
 * @author Yao mianwei
 * @version 1.0.0
 * @ClassName OrderApplication
 * @Description Order entry class
 * @createTime 2021 09:29:00, September 23
 */
@SpringBootApplication
@EnableDiscoveryClient
@EnableFeignClients // Open Feign
public class OrderApplication {
    public static void main(String[] args) {
        SpringApplication.run(OrderApplication.class, args);
    }

    @Bean
    public RestTemplate getRestTemplate() {
        return new RestTemplate();
    }
}
Step 3: create a service and use Fegin to implement microservice invocation
package org.skystep.service;

import org.skystep.common.entity.Product;
import org.springframework.cloud.openfeign.FeignClient;
import org.springframework.web.bind.annotation.GetMapping;
import org.springframework.web.bind.annotation.PathVariable;

/**
 * @author Yao mianwei
 * @version 1.0.0
 * @ClassName ProductService
 * @Description TODO
 * @createTime 2021 19:30:00, September 23
 */

@FeignClient("service-product")
public interface ProductService {

    @GetMapping(value = "/product/{pid}")
    Product findByPid(@PathVariable("pid") Integer pid);

}
Step 4: modify the controller code and start validation
package org.skystep.controller;

import com.alibaba.fastjson.JSON;
import lombok.extern.slf4j.Slf4j;
import org.skystep.common.entity.Order;
import org.skystep.common.entity.Product;
import org.skystep.service.OrderService;
import org.skystep.service.ProductService;
import org.springframework.beans.factory.annotation.Autowired;
import org.springframework.web.bind.annotation.GetMapping;
import org.springframework.web.bind.annotation.PathVariable;
import org.springframework.web.bind.annotation.RestController;

/**
 * @author Yao mianwei
 * @version 1.0.0
 * @ClassName OrderController
 * @Description TODO
 * @createTime 2021 09:41:00, September 23
 */
@RestController
@Slf4j
public class OrderController {
    @Autowired
    private OrderService orderService;

    @Autowired
    private ProductService productService;

    @GetMapping("/order/prod/{pid}")
    public Order order(@PathVariable("pid") Integer pid) {
        log.info(">>When the customer places an order, it needs to call the commodity micro service to query the commodity information");
        // Code coupling is reduced and code reading is higher
        Product product = productService.findByPid(pid);
        log.info(">>Commodity information,Query results:" + JSON.toJSONString(product));
        Order order = new Order();
        order.setUid(1);
        order.setUsername("Test user");
        order.setPid(product.getPid());
        order.setPname(product.getPname());
        order.setPprice(product.getPprice());
        order.setNumber(1);
        orderService.createOrder(order);
        return order;
    }

}
Step 5: restart the order micro service to see the effect