Preface
Previously, you learned drag and drop events for HTML5 and used drag and drop components in development.To clarify the logic of the whole, a small example is given.
The effect is also simple: elements can be dragged arbitrarily in the container, and when elements are moved into the container, there will be related style changes that have reached a better display effect.
The example basically uses all the events of the drag-and-drop event and shows them as concisely as possible.This record is hereby made.
(vii) Read more series of articles / Read the original text
Introduction to drag and drop events
As you can see from the name, the drag-and-drop event consists of two parts: drag and release.
Dragging consists of two parts, the related events of the dragged element and the related events of the element container.
1. Events related to dragged elements:
| Event Name | Explain |
|---|---|
| dragstart | Triggered when the element begins to be dragged |
| drag | Trigger repeatedly when an element is dragged |
| dragend | Triggered when the drag operation is complete |
2. Container related events:
| Event Name | Explain |
|---|---|
| dragenter | Triggered when the dragged element enters the screen space occupied by the destination element, the browser's default behavior generally needs to be cancelled. |
| dragover | When a dragged element is triggered inside a destination element, you generally need to cancel the browser's default behavior. |
| dragleave | Triggered when the dragged element leaves the destination element without dropping it |
3. Release events:
| Event Name | Explain |
|---|---|
| drop | Triggered when the dragged element is dropped in the destination element, the browser's default behavior generally needs to be cancelled. |
Effect Display
For illustration purposes, first look at the effect of the code implementation.Please go to Github repository Download demo.html and demo.js locally, then open the HTML file with Chrome with the initial effect as follows:
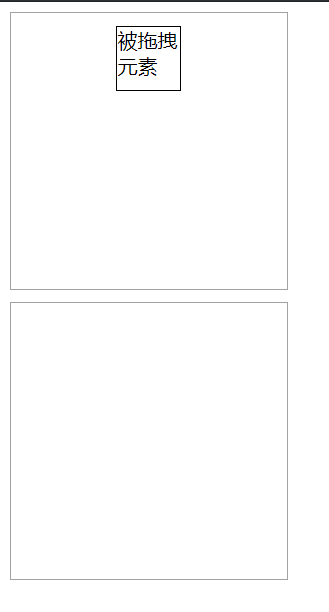
Drag and drop the draggable elements in the diagram into the container below. The effect of this process is shown below.Arrows indicate the direction of dragging and boxes represent dynamically changing container styles.

Finally, release the mouse and place the element in the container below. The whole process is complete.

code implementation
First, write html code.Because elements can be dragged arbitrarily between two containers, these two containers need to listen for the four events drapenter, dragover, dragleave, drop.
The draggable attribute of the dragged element needs to be specified as true before it can be dragged.Also, in order to record some information, you need to listen for dragstart events.
<body>
  <script src="./demo.js"></script>
  <div
    class="container"
    ondragenter="onDragEnter(event)"
    ondragover="onDragOver(event)"
    ondragleave="onDragLeave(event)"
    ondrop="onDrop(event)"
  >
    <div id="target" draggable="true" ondragstart="onDragStart(event)">
      //Dragged Element
    </div>
  </div>
  <div
    class="container"
    ondragenter="onDragEnter(event)"
    ondragover="onDragOver(event)"
    ondragleave="onDragLeave(event)"
    ondrop="onDrop(event)"
  ></div>
</body>
To make the dragging effect more visible, achieve the effect display - > Part 2, when dragging an element into a new container, the new container shows the shadow effect.Write a shadow effect style:
<style>
  .container {
    width: 200px;
    height: 200px;
    padding: 10px;
    border: 1px solid #aaaaaa;
    margin-bottom: 10px;
    transition: box-shadow .3s ease;
  }

  #target {
    width: 50px;
    height: 50px;
    border: 1px solid black;
    margin: 0 auto;
  }

  .container.active {
    border-bottom-width: 0;
    box-shadow: 0 10px 6px -6px #777;
  }
</style>
Finally, write demo.js code.For logic, see the comment information in the code:
let target = null,
  container = null

// Find container classes for dragged elements
function findParentContainer(node) {
  if(!node || node === document) {
    return null
  }

  if(node.classList.contains('container')) {
    return node
  }

  return findParentContainer(node.parentNode)
}

// Mark the element's native container class when it begins to be dragged
function onDragStart(event) {
  target = event.target
  container = findParentContainer(target)
}

// When an element enters the destination container, it can be placed if it is not the original container
// Change the style at this time to better show the user
function onDragEnter(event) {
  event.preventDefault()
  if(event.target !== container) {
    event.target.classList.add('active')
  }
}

// Triggered when an element is inside the destination container
function onDragOver(event) {
  event.preventDefault()
}

// Elements leave the destination container and related styles need to be removed
function onDragLeave(event) {
  event.preventDefault()
  event.target.classList.remove('active')
}

// Elements are placed in the destination container, DOM nodes are added, and related styles are removed
function onDrop(event) {
  event.preventDefault()
  event.target.appendChild(target)
  event.target.classList.remove('active')
  target = null
  container = null
}
Reference Links
- Code address: Github
- HTML5 Drag and Drop
- HTML5 Native Drag/Drop
More Series Articles
Collection/Subscription on GitHub
Front End Knowledge System
- JavaScript basics comb (top)
- JavaScript basics comb (next)
- Sorting up the ES6 Difficulties
- Talk about the execution order of promise/async/await and the BUG of V8 engine
- Source implementation of common examinations in front-end interviews
- Flex Getting Started and Fighting
- ......
Design Mode Manual
- Singleton mode
- Policy Mode
- proxy pattern
- Iterator mode
- Subscription-Publishing Mode
- Bridge mode
- Memento
- Template mode
- Abstract Factory Mode
- ......
Webpack4 Progressive Tutorial
- webpack4 series of tutorials (2): Compiling ES6
- webpack4 Series Tutorial (3): Multi-page Solution - Extracting Common Code
- webpack4 series tutorials (4): Single page solution--code splitting and lazy loading
- webpack4 Series Tutorial (5): Processing CSS
- webpack4 Series Tutorials (8): JS Tree Shaking
- webpack4 series of tutorials (12): Working with third-party JavaScript Libraries
- Webpack 4 Series Tutorials (15): Development Modes and webpack-dev-server
- ......