Live broadcast at 21:00 p.m. on November 7, 2019.
I. Kubernetes environment configuration
https://github.com/easzlab/kubeasz
https://github.com/opsnull/follow-me-install-kubernetes-cluster
2. Build BaseImage and service image through dockerfile
Basic image construction of container service
FROM harbor.qa.com.cn/public/centos:6.9
LABEL vendor=OC \
      sgplm-ep.is-production="" \
      sgplm-ep.version="1.0.2" \
      sgplm-ep.release-date="2018-10-24"

COPY sysctl.conf /etc/sysctl.conf
RUN rpm -ivh http://dl.fedoraproject.org/pub/epel/6/x86_64/epel-release-6-8.noarch.rpm && yum -y update && yum install -y \
    iperf \
    mtr \
    python-devel \
    python-markupsafe \
    python-pip \
    openssl-devel \
    swig \
    python-setuptools \
    wget \
    ssmtp \
    man \
    openssh-clients \
    subversion \
    git \
    libtool \
    cmake \
    openssl-devel \
    lua-filesystem \
    yum-utils \
    rpm-build \
    patch \
    make \
    gcc \
    gcc-c++ \
    iftop \
    telnet \
    vim-enhanced \
    lua-socket \
    tree \
    bc \
    iotop \
    logrotate \
    rsync \
    haproxy \
    vixie-cron \
    && yum clean all \
    && /bin/cp -f /usr/share/zoneinfo/Asia/Shanghai /etc/localtime && echo 'Asia/Shanghai' >/etc/timezone \
    && useradd -s /sbin/nologin redis \
    && echo '10 00 * * * sync && echo 1 > /proc/sys/vm/drop_caches >/dev/null 2>&1' >> /var/spool/cron/root \
    && echo '23 30 * * * find /data/logs/ ! -path "/data/logs/redis/*" -mtime +5 -name "*.log.*" -exec rm -f {} \; >/dev/null 2>&1' >> /var/spool/cron/root && /etc/init.d/crond restart \
    && mkdir /tmp/pkgs && cd /tmp/pkgs && wget http://172.31.0.19:8555/jdk-8u144-linux-x64.tar.gz \
    && tar zxvf jdk-8u144-linux-x64.tar.gz -C /usr/local/ \
    && mv /usr/local/jdk1.8.0_144/ /usr/local/jdk1.8 && echo -e 'export JAVA_HOME="/usr/local/jdk1.8" \nPATH=$JAVA_HOME/bin:$PATH \nexport PATH\nCLASSPATH=$JAVA_HOME/lib/dt.jar:$JAVA_HOME/lib/tools.jar\nexport CLASSPATH' >>/etc/profile.d/java.sh && source /etc/profile.d/java.sh \
    && wget http://172.31.0.19:8555/libzmq.tar.gz && tar zxf libzmq.tar.gz -C /usr/local/ && cd /usr/local/libzmq \
    && if [ ! -d cmake-build ];then mkdir cmake-build;fi && cd cmake-build && cmake .. && make -j 4 && make test && make install && ldconfig \
    && cd - && temp=`find / -name libzmq.so.5.1.3 | grep cmake-build/lib | tail -n 1` && ln -s $temp /usr/lib/ && ldconfig \
    && wget http://172.31.0.19:8555/go1.8.3.linux-amd64.tar.gz && tar -C /usr/local -xzf go1.8.3.linux-amd64.tar.gz \
    && mkdir /home/gospace \
    && echo -e 'export PATH=$PATH:/usr/local/go/bin \nexport GOPATH=/home/gospace \nexport GOROOT=/usr/local/go/' >>/etc/profile.d/go.sh \
    && source /etc/profile.d/go.sh && export PKG_CONFIG_PATH=/usr/local/lib/pkgconfig/ && go get "github.com/pebbe/zmq4" \
    #&& temp=`find / -name libzmq.so.5.1.3 | grep cmake-build/lib` && ln -s $temp /usr/lib/ && ldconfig \
    && wget http://172.31.0.19:8555/apache-maven-3.5.0-bin.tar.gz && tar zxf apache-maven-3.5.0-bin.tar.gz -C /usr/local/ \
    && ln -s /usr/local/apache-maven-3.5.0 /usr/local/maven3 \
    && echo -e 'export M3_HOME=/usr/local/maven3 \nexport PATH=${M3_HOME}/bin:${PATH}' >> /etc/profile.d/maven3.sh && source /etc/profile.d/maven3.sh \
    && rm -rf /tmp/pkgs/*

CMD [ "bash" ]
sysctl.conf
net.ipv4.ip_forward = 0
net.ipv4.conf.default.rp_filter = 1
net.ipv4.conf.default.accept_source_route = 0
kernel.sysrq = 0
kernel.core_uses_pid = 1
net.ipv4.tcp_syncookies = 1
kernel.msgmnb = 65536
kernel.msgmax = 65536
#kernel.shmmax = 4294967295
#kernel.shmall = 268435456
kernel.printk = 2
net.ipv6.conf.all.disable_ipv6 = 1
net.ipv4.conf.all.promote_secondaries = 1
net.ipv4.conf.default.promote_secondaries = 1
net.ipv6.neigh.default.gc_thresh3 = 4096
net.ipv4.neigh.default.gc_thresh3 = 4096
kernel.softlockup_panic = 1
kernel.watchdog_thresh = 60
net.ipv4.tcp_keepalive_time = 30
net.ipv4.tcp_keepalive_probes = 3
net.ipv4.tcp_keepalive_intvl = 10
net.ipv4.tcp_fin_timeout = 30
net.ipv4.tcp_max_tw_buckets = 180000
kernel.core_pattern = /var/core/%e.%p-%c-%t.core
vm.swappiness = 0
vm.overcommit_memory = 1
net.core.somaxconn= 1024
net.ipv4.tcp_tw_reuse = 0
net.ipv4.tcp_tw_recycle = 0
net.ipv4.tcp_max_syn_backlog = 8192
net.ipv4.tcp_max_tw_buckets = 262144
net.netfilter.nf_conntrack_max = 655350
net.netfilter.nf_conntrack_tcp_timeout_established = 300
Edit dockerfile, prepare related files, and execute Build
docker build -t harbor.qa.com.cn/public/sgplm-ep:v1.2 .
Container service (GO) built with baseimage
FROM harbor.qa.com.cn/public/sgplm-ep:v1.2
LABEL vendor=OC \
      sgplm-signalproxy.is-production="" \
      sgplm-signalproxy.version="1.1" \
      sgplm-signalproxy.release-date="2019-06-06"
MAINTAINER SignalingTeam "@s.com.cn"

RUN mkdir -p /usr/local/signalproxy/cert /data/logs/signalproxy
COPY signalproxy conf.json /usr/local/signalproxy/
COPY cert /usr/local/signalproxy/cert
Container service (JAVA) built with baseimage
FROM harbor.qa.com.cn/public/sgplm-ep:v1.2
LABEL vendor=OC \
      sgplm-dispatcher.is-production="" \
      sgplm-dispatcher.version="<build_tag>" \
      sgplm-dispatcher.release-date="2019-06-06"
MAINTAINER SignalingTeam "@s.com.cn"

RUN mkdir -p /usr/local/dispatcher/ /data/logs/dispatcher
COPY dispatcher /usr/local/dispatcher/dispatcher-etcd.jar
COPY keyStore.p12 logback-spring.xml application.properties /usr/local/dispatcher/
III. Kubernetes deploys Jenkins and configures dynamic slave (docker in docker)
Create a new Deployment: (jenkins2.yaml)
apiVersion: extensions/v1beta1
kind: Deployment
metadata:
  name: jenkins2
  namespace: ops
spec:
  template:
    metadata:
      labels:
        app: jenkins2
    spec:
      terminationGracePeriodSeconds: 10
      serviceAccount: jenkins2
      containers:
      - name: jenkins
        image: jenkins/jenkins:lts
        imagePullPolicy: IfNotPresent
        ports:
        - containerPort: 8080
          name: web
          protocol: TCP
        - containerPort: 50000
          name: agent
          protocol: TCP
        resources:
          limits:
            cpu: 2
            memory: 2Gi
          requests:
            cpu: 2
            memory: 2048Mi
        livenessProbe:
          httpGet:
            path: /login
            port: 8080
          initialDelaySeconds: 60
          timeoutSeconds: 5
          failureThreshold: 12
        readinessProbe:
          httpGet:
            path: /login
            port: 8080
          initialDelaySeconds: 60
          timeoutSeconds: 5
          failureThreshold: 12
        volumeMounts:
        - name: jenkinshome
          subPath: jenkins2
          mountPath: /var/jenkins_home
        env:
        - name: LIMITS_MEMORY
          valueFrom:
            resourceFieldRef:
              resource: limits.memory
              divisor: 1Mi
        - name: JAVA_OPTS
          value: -Xmx$(LIMITS_MEMORY)m -XshowSettings:vm -Dhudson.slaves.NodeProvisioner.initialDelay=0 -Dhudson.slaves.NodeProvisioner.MARGIN=50 -Dhudson.slaves.NodeProvisioner.MARGIN0=0.85 -Duser.timezone=Asia/Shanghai
      securityContext:
        fsGroup: 1000
      volumes:
      - name: jenkinshome
        persistentVolumeClaim:
          claimName: jenkinspvc

---
apiVersion: v1
kind: Service
metadata:
  name: jenkins2
  namespace: ops
  labels:
    app: jenkins2
spec:
  selector:
    app: jenkins2
  type: NodePort
  ports:
  - name: web
    port: 8080
    targetPort: web
    nodePort: 30302
  - name: agent
    port: 50000
    targetPort: agent
Resource objects are placed under a namespace named ops, so we need to add and create a namespace:
kubectl create namespace ops
Here we use an image called jenkins/jenkins:lts. This is the official Docker image of jenkins. Then there are some environment variables. Of course, we can customize an image according to our own needs. For example, we can package some plug-ins in the custom image. Please refer to the document: https://github.com/jenkinsci/docker, we can use the default official image here. Another thing we need to pay attention to is that we use the /The var/jenkins_home directory is attached to a PVC object named opspvc, so we also need to create a corresponding PVC object in advance. Of course, we can also use our previous StorageClass object to create automatically: (pvc.yaml)
apiVersion: v1
kind: PersistentVolume
metadata:
  name: jenkinspv
spec:
  capacity:
    storage: 50Gi
  accessModes:
  - ReadWriteMany
  persistentVolumeReclaimPolicy: Delete
  nfs:
    server: 172.31.0.41
    path: /data/jenkins2

---
kind: PersistentVolumeClaim
apiVersion: v1
metadata:
  name: jenkinspvc
  namespace: ops
spec:
  accessModes:
    - ReadWriteMany
  resources:
    requests:
      storage: 50Gi
Create the PVC objects you need:
kubectl create -f pvc.yaml
In addition, we also need to use a serviceAccount with relevant permissions: jenkins 2. Here, jenkins is only given some necessary permissions. Of course, if you are not familiar with the permissions of serviceAccount, it is OK to bind a cluster admin role permission to this sa. Of course, this has certain security risks: (rbac.yaml)
apiVersion: v1
kind: ServiceAccount
metadata:
  name: jenkins2
  namespace: ops

---

kind: ClusterRole
apiVersion: rbac.authorization.k8s.io/v1beta1
metadata:
  name: jenkins2
rules:
  - apiGroups: ["extensions", "apps"]
    resources: ["deployments"]
    verbs: ["create", "delete", "get", "list", "watch", "patch", "update"]
  - apiGroups: [""]
    resources: ["services"]
    verbs: ["create", "delete", "get", "list", "watch", "patch", "update"]
  - apiGroups: [""]
    resources: ["pods"]
    verbs: ["create","delete","get","list","patch","update","watch"]
  - apiGroups: [""]
    resources: ["pods/exec"]
    verbs: ["create","delete","get","list","patch","update","watch"]
  - apiGroups: [""]
    resources: ["pods/log"]
    verbs: ["get","list","watch"]
  - apiGroups: [""]
    resources: ["secrets"]
    verbs: ["get"]

---
apiVersion: rbac.authorization.k8s.io/v1beta1
kind: ClusterRoleBinding
metadata:
  name: jenkins2
  namespace: ops
roleRef:
  apiGroup: rbac.authorization.k8s.io
  kind: ClusterRole
  name: jenkins2
subjects:
  - kind: ServiceAccount
    name: jenkins2
    namespace: ops
Create rbac related resource objects:
kubectl create -f rbac.yaml
Change the owner of the nfs service shared directory before creating resources
chown -R 1000 /data/k8s/jenkins2
In order to facilitate our testing, we use the form of NodePort to expose Jenkins' web services, which is fixed as port 30302. In addition, we need to expose an agent port, which is mainly used for communication between Jenkins' master and slave
When the resources are ready, we directly create the Jenkins service:
kubectl create -f jenkins2.yaml
After creation, it may take a while to pull the image. Then we can check the status of Pod:
kubectl get pods -n ops

NAME                        READY     STATUS    RESTARTS   AGE
jenkins2-6fd324fg31-poqtr   1/1       Running   0          2m
If there is a problem with the pod status, use the instructions kubectl describe pod Jenkins 2-6fd324fg31-poqtr - N ops and kubectl logs - f Jenkins 2-6fd324fg31-poqtr - N OPS to troubleshoot the problem
After the service is started successfully, we can access the jenkins service according to the IP:30302 port of any node. You can install and configure according to the prompt information: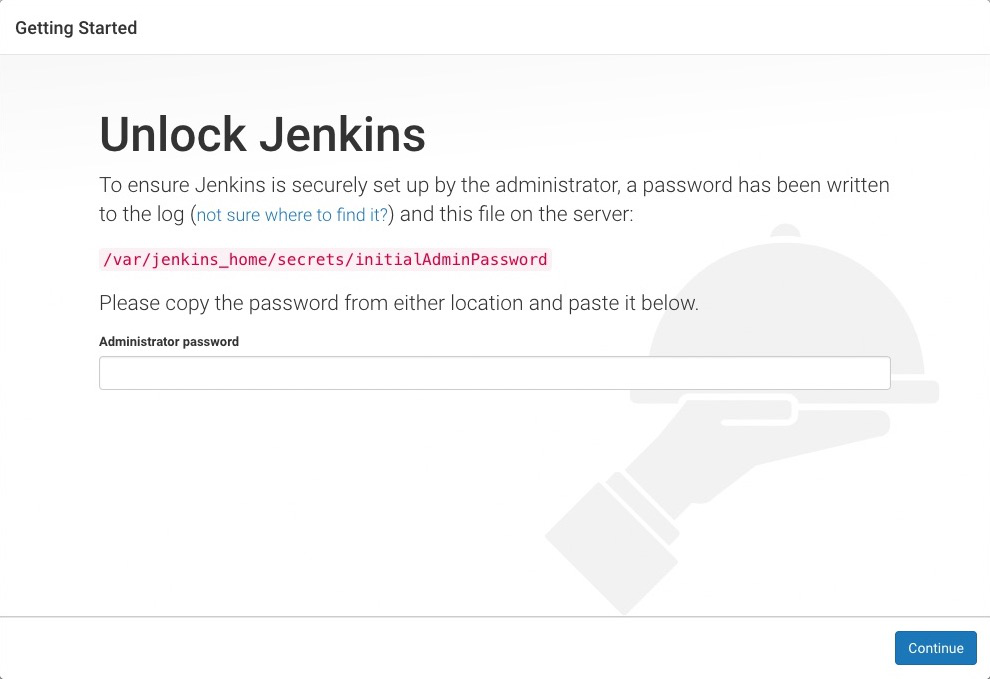
The initialized password can be viewed in the logs of jenkins container or directly in the shared data directory of nfs:
cat /data/k8s/jenkins2/secrets/initAdminPassword
Then choose to install the recommended plug-in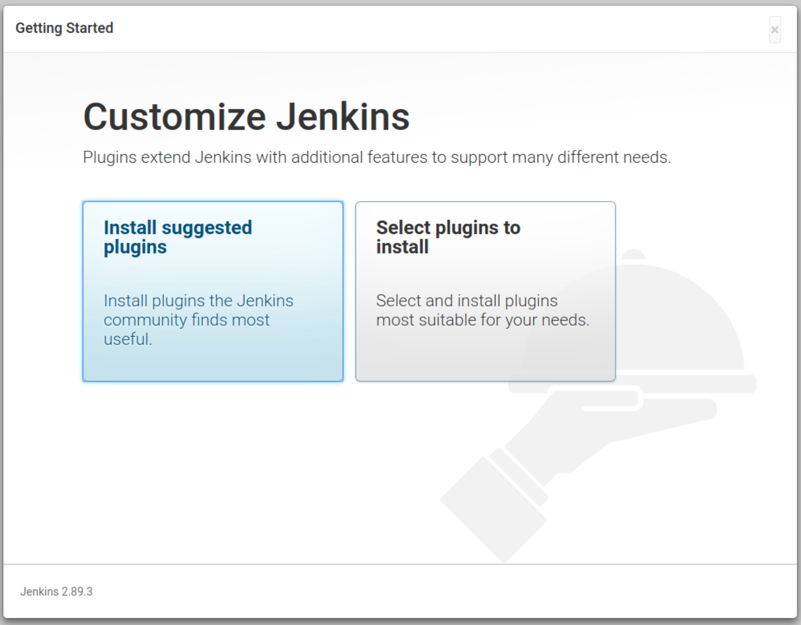
After the installation, add the administrator account to enter the jenkins main interface:
Configuration process
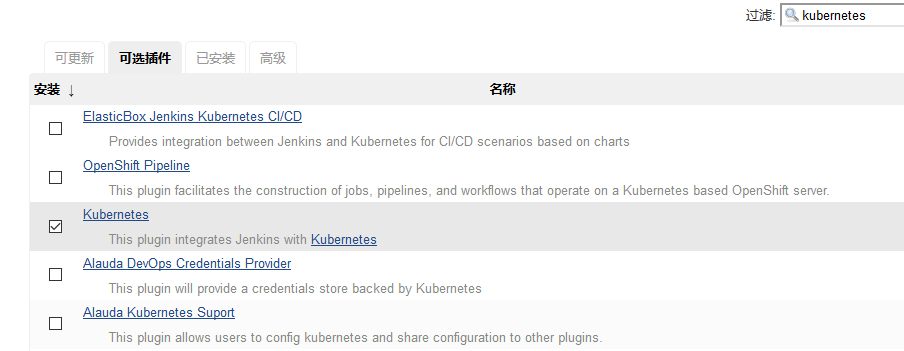
Step 1. We need to install kubernets plugin. Click Manage Jenkins - > Manage plugins - > available - > kubernets plugin and check install
Step 2. After installation, click Manage Jenkins - > configure system - > Add a new cloud - > select Kubernetes, and fill in the configuration information of Kubernetes and Jenkins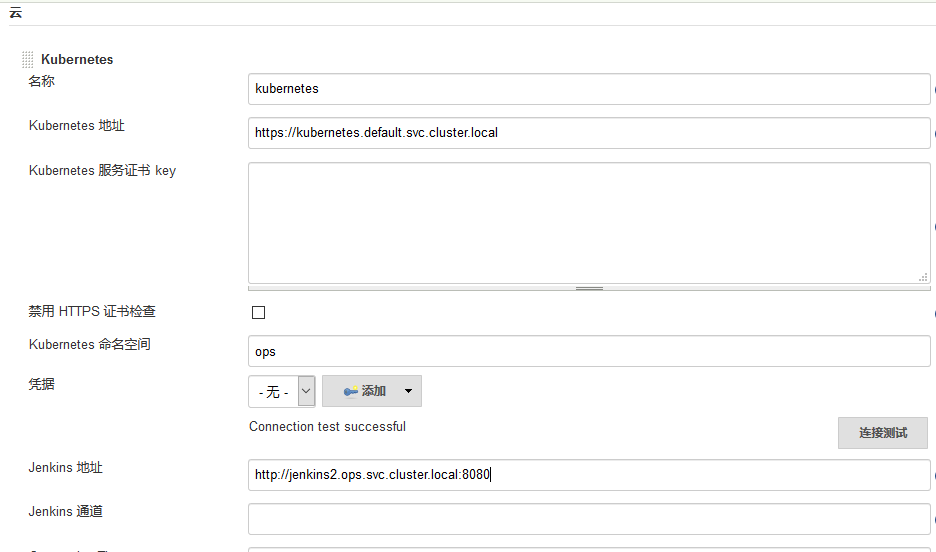
Note the namespace. Here we fill in ops, and then click Test Connection. If the Connection test successful prompt appears to prove that Jenkins can communicate with Kubernetes normally, then the Jenkins URL address below: Http://jenkins 2.kube-ops.svc.cluster.local: 8080, where the format is: service name.namespace.svc.cluster.local:8080, according to the Jenkins created above Fill in the service name of. Here is the name jenkins created before. If it is created with the above, it should be jenkins 2
In addition, it should be noted that if the Test Connection fails here, it is likely to be a permission issue. Here, we need to add the secret corresponding to the service account of jenkins created by us to the Credentials here.
Step 3. Configure the Pod Template, which is actually to configure the Pod Template that Jenkins Slave runs. We also use Kube ops for the namespace, and Labels are very important here. We need to use this value for later Job execution. Then we use the image of zhangchuan/jenkins:jnlp, which is customized on the basis of the official jnlp image and added kubectl and other commonly used tools.
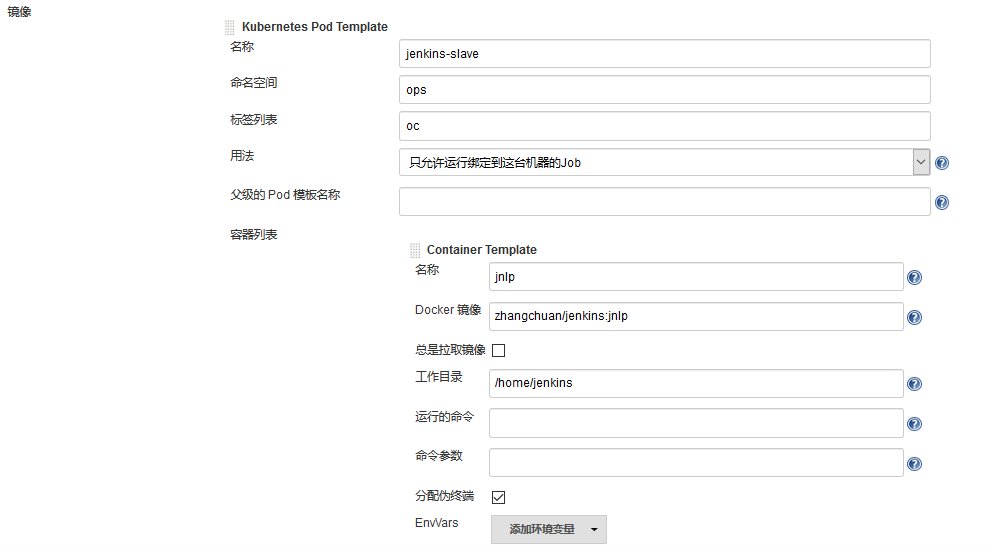
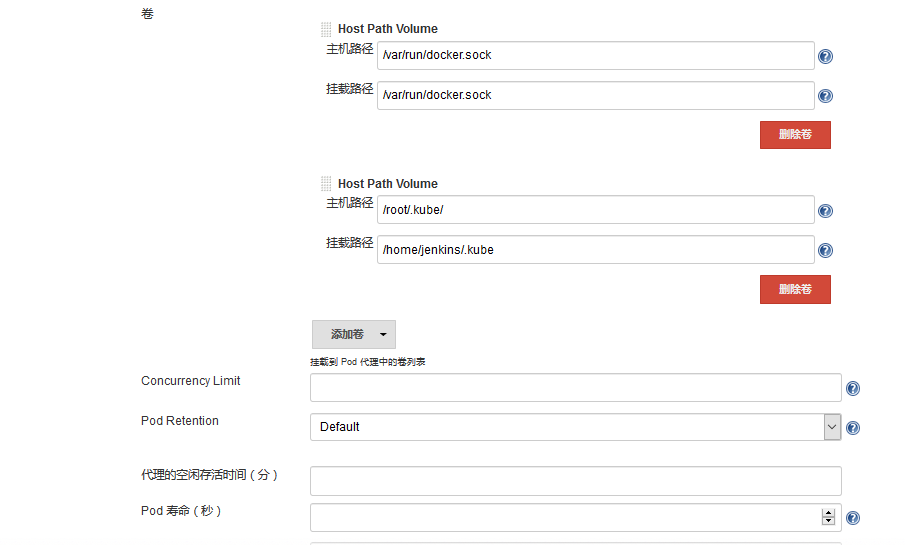
Note here that we need to mount two host directories below: one is / var/run/docker.sock, which is used for containers in Pod to share the Docker of the host. This is what we call the way of docker in docker. We have already printed the Docker binary file into the above image, and the other directory is / root/.kube directory. We will Four directories are attached to the / home/jenkins/.kube directory of the container. This is to enable us to use kubectl tool to access our Kubernetes cluster in the container of Pod. It is convenient for us to deploy Kubernetes application in Slave Pod later.
Because there is no configuration permission in Jenkins Slave Pod, you need to configure the ServiceAccount. Click the following advanced button in the Slave Pod configuration to add the corresponding ServiceAccount: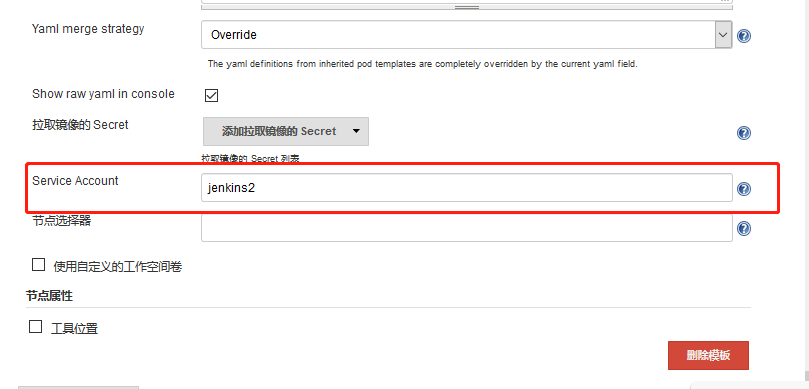
At this point, the Kubernetes plug-in configuration is complete.
test
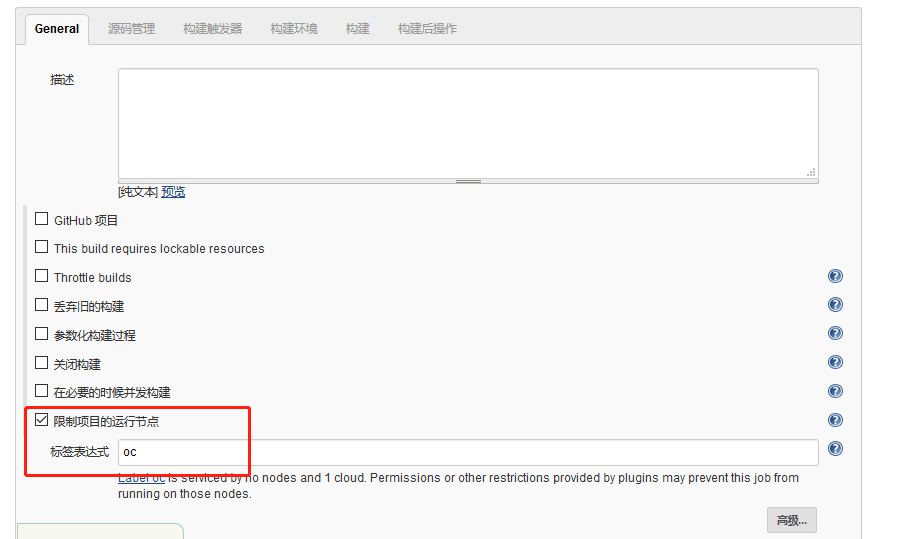
On the Jenkins home page, click create a task, create a test task, enter the task name, and then we choose to build a free style software project type task:
Note that the following Label Expression should be filled with oc, which is the Label in the Slave Pod we configured earlier. These two places must be consistent
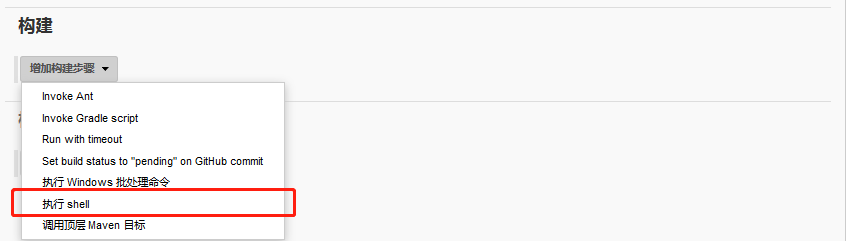
Select execute shell in the build area
.........
Link to completed installation documents: https://pan.baidu.com/s/1GZfOl7Ry3J-2xlqRY3N6OA Extraction code: iwy9