catalogue
1. Operate on the master01 node
6, Deploying Woker Node components
1. Operate on the master01 node
3. Operate on the master1 node
5. Operate on the master01 node
7.node02 node deployment (method 1)
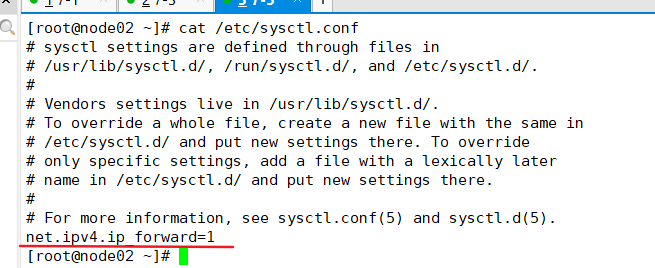
If the k8s previously deployed is suspended in the middle, resulting in the failure of the flannel (or Docker) network, you can configure the ipv4 forwarding function to solve the problem
cat >> /etc/sysctl.conf << EOF
net.ipv4.ip_forward=1
EOF
5, Deploy master components
1. Operate on the master01 node
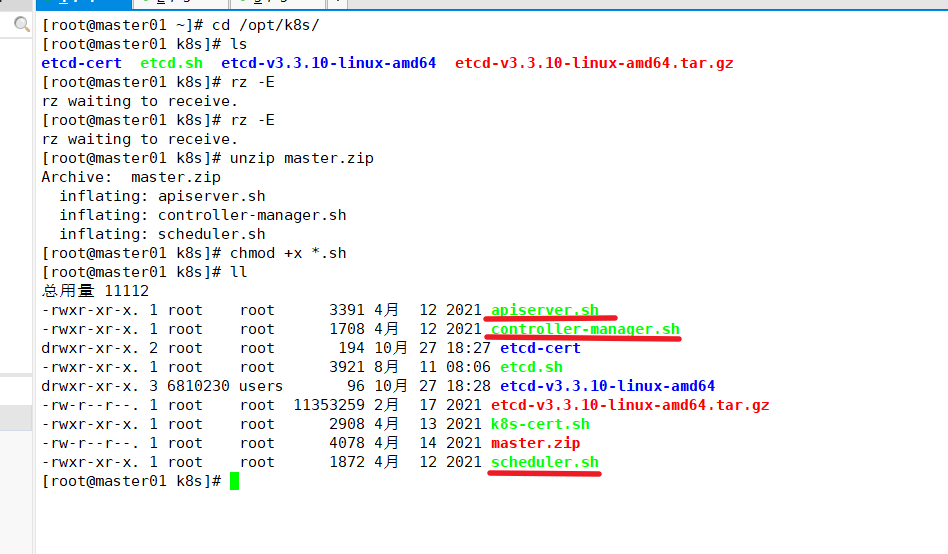
Upload master.zip and k8s-cert.sh to / opt/k8s directory, and unzip the master.zip package
cd /opt/k8s/
unzip master.zip

chmod +x *.sh
Create kubernetes working directory
mkdir -p /opt/kubernetes/{cfg,bin,ssl}
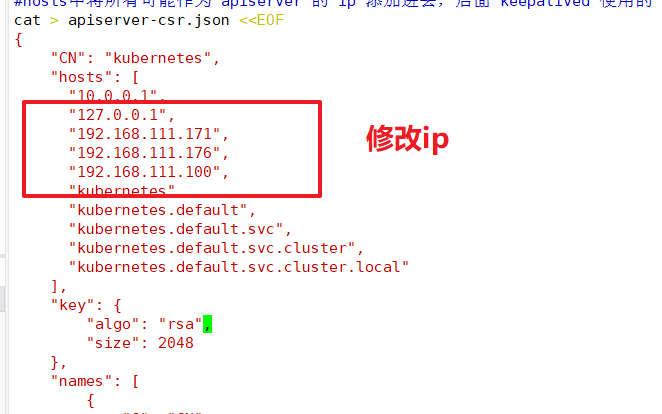
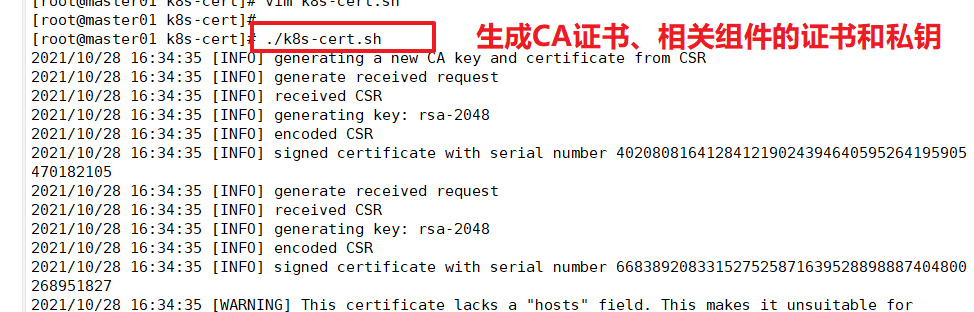
Create a directory for generating CA certificates, certificates for related components, and private keys
mkdir /opt/k8s/k8s-cert
mv /opt/k8s/k8s-cert.sh /opt/k8s/k8s-cert
cd /opt/k8s/k8s-cert/
./k8s-cert.sh               #Generate CA certificate, certificate and private key of related components

ls *pem


The controller manager and Kube scheduler are set to only call the apiserver of the current machine and use 127.0.0.1:8080 communication, so no certificate is required
Copy the CA certificate, apiserver related certificate and private key to the ssl subdirectory of kubernetes. Working directory
cp ca*pem apiserver*pem /opt/kubernetes/ssl/
Upload kubernetes-server-linux-amd64.tar.gz to / opt/k8s / directory and decompress the kubernetes compressed package
cd /opt/k8s/
tar zxvf kubernetes-server-linux-amd64.tar.gz

Copy the key command files of the master component to the bin subdirectory of the kubernetes. Working directory
cd /opt/k8s/kubernetes/server/bin
cp kube-apiserver kubectl kube-controller-manager kube-scheduler /opt/kubernetes/bin/
ln -s /opt/kubernetes/bin/* /usr/local/bin/

Create a bootstrap token authentication file, which will be called when apiserver starts. Then, it is equivalent to creating a user in the cluster, and then you can authorize him with RBAC
cd /opt/k8s/

vim token.sh
#!/bin/bash
#Get the first 16 bytes of random number, output it in hexadecimal format, and delete the spaces in it
BOOTSTRAP_TOKEN=$(head -c 16 /dev/urandom | od -An -t x | tr -d ' ')
#Generate the token.csv file in the format of Token serial number, user name, UID and user group
cat > /opt/kubernetes/cfg/token.csv <<EOF
${BOOTSTRAP_TOKEN},kubelet-bootstrap,10001,"system:kubelet-bootstrap"
EOF

chmod +x token.sh
./token.sh

cat /opt/kubernetes/cfg/token.csv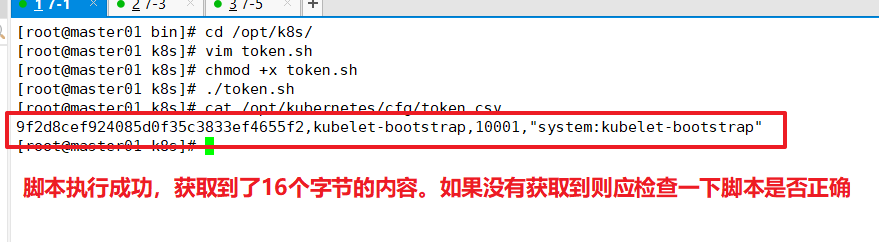
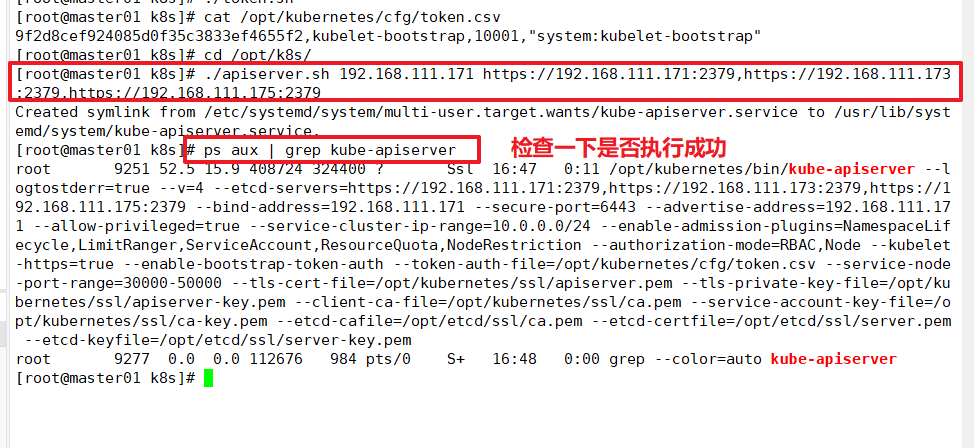
When the binary file, token and certificate are ready, start the apiserver service
cd /opt/k8s/

./apiserver.sh 192.168.111.171 https://192.168.111.171:2379,https://192.168.111.173:2379,https://192.168.111.175:2379


#Check whether the process started successfully
ps aux | grep kube-apiserver
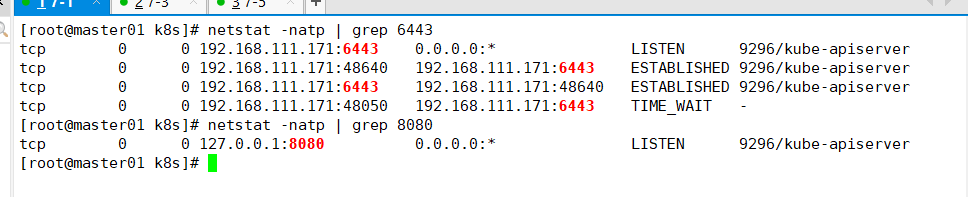
k8s provides services through kube- apiserver, which runs on a single master node. By default, there are two ports 6443 and 8080
The secure port 6443 is used to receive HTTPS requests and authenticate based on Token files or client certificates
The local port 8080 is used to receive HTTP requests. Non authenticated or authorized HTTP requests access APIServer through this port
netstat -natp | grep 6443

netstat -natp | grep 8080
Check the version information (you must ensure that apiserver starts normally, otherwise you cannot query the server version information)
kubectl version

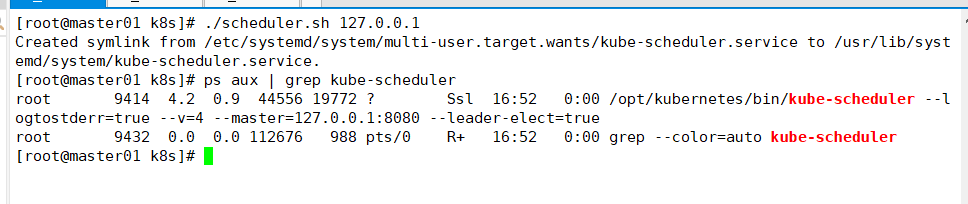
Start scheduler service
cd /opt/k8s/
./scheduler.sh 127.0.0.1

ps aux | grep kube-scheduler
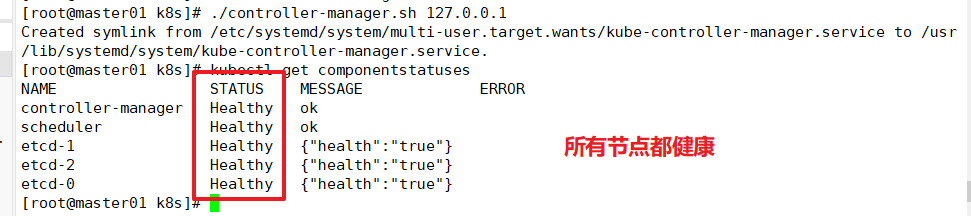
Start the controller manager service
cd /opt/k8s/
./controller-manager.sh 127.0.0.1
View node status
kubectl get componentstatuses
or
kubectl get cs
6, Deploying Woker Node components
1. Operate on the master01 node
Copy kubelet and Kube proxy to node node
cd /opt/k8s/kubernetes/server/bin
scp kubelet kube-proxy root@192.168.111.173:/opt/kubernetes/bin/
scp kubelet kube-proxy root@192.168.111.175:/opt/kubernetes/bin/
2. Operate on node01 node
Upload node.zip to the / opt directory, unzip the node.zip package, and obtain kubelet.sh and proxy.sh
cd /opt/
unzip node.zip

3. Operate on the master1 node
Create a directory for generating configuration files for kubelet
mkdir /opt/k8s/kubeconfig
Upload the kubeconfig.sh file to the / opt/k8s/kubeconfig directory
kubeconfig.sh file contains cluster parameters (CA certificate, API Server address), client parameters (certificate and private key generated above), and cluster context parameters (cluster name and user name). Kubenetes components (such as kubelet and Kube proxy) can switch to different clusters and connect to apiserver by specifying different kubeconfig files at startup
cd /opt/k8s/kubeconfig
chmod +x kubeconfig.sh

Generate kubelet's configuration file
cd /opt/k8s/kubeconfig
./kubeconfig.sh 192.168.111.171 /opt/k8s/k8s-cert/

ls
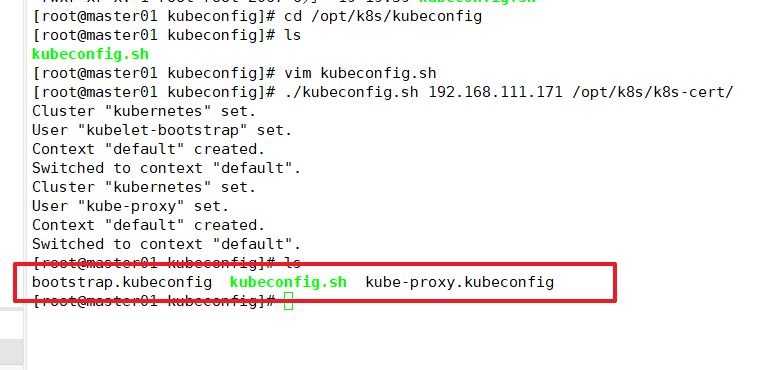
Copy the configuration files bootstrap.kubeconfig and kube-proxy.kubeconfig to the node node
cd /opt/k8s/kubeconfig
scp bootstrap.kubeconfig kube-proxy.kubeconfig root@192.168.111.173:/opt/kubernetes/cfg/
scp bootstrap.kubeconfig kube-proxy.kubeconfig root@192.168.111.175:/opt/kubernetes/cfg/
RBAC is authorized to bind the preset user kubelet bootrapper with the built-in clusterrole system: node bootrapper to enable it to initiate CSR requests
kubectl create clusterrolebinding kubelet-bootstrap --clusterrole=system:node-bootstrapper --user=kubelet-bootstrap
kubelet uses TLS Bootstrapping mechanism to automatically complete the registration to kube -apiserver. It is very useful when there are a large number of node nodes or automatic capacity expansion in the later stage.
After the TLS authentication is enabled for the Master apiserver, if the kubelet component of the node wants to join the cluster, it must use the valid certificate issued by the CA to communicate with the apiserver. When there are many node nodes, signing the certificate is very cumbersome. Therefore, Kubernetes introduces TLS bootstrapping mechanism to automatically issue client certificates. Kubelet will automatically apply for certificates from apiserver as a low authority user, and kubelet's certificates are dynamically signed by apiserver.
Kubelet is started for the first time. It initiates the first CSR request by loading the user Token and apiserver CA certificate in bootstrap.kubeconfig. This Token is pre built into the token.csv of apiserver node. Its identity is kubelet bootstrap user and system: kubelet bootstrap user group: if you want the first CSR request to succeed (that is, it will not be rejected by apiserver 401), You need to create a ClusterRoleBinding to bind the kubelet bootstrap user to the built-in ClusterRole of system:node - bootstrapper (which can be queried through kubectl get clusterroles), so that it can initiate CSR authentication requests.
The certificate during TLS bootstrapping is actually signed by the Kube controller manager component, that is, the validity period of the certificate is controlled by the Kube controller manager component; The Kube controller manager component provides an -- experimental cluster signing duration parameter to set the validity time of the signed certificate: the default is 8760h0m0s, which is changed to 87600h0m0s, that is, TLS bootstrapping can be performed after 10 years to sign the certificate.
That is to say, when kubelet accesses the API Server for the first time, it uses the token for authentication. After passing, the Controller Manager will generate a certificate for kubelet, and the certificate will be used for authentication in future accesses.
View roles
kubectl get clusterroles | grep system:node-bootstrapper

View authorized roles
kubectl get clusterrolebinding
4. Operate on node01 node
Start the kubelet service using the kubelet.sh script
cd /opt/
chmod +x kubelet.sh
./kubelet.sh 192.168.111.173

Check kubelet service startup
ps aux | grep kubelet

No certificate has been generated at this time
ls /opt/kubernetes/ssl/

5. Operate on the master01 node
Check the CSR request initiated by kubelet of node1 node. Pending means waiting for the cluster to issue a certificate to the node
kubectl get csr

Request via CSR
kubectl certificate approve node-csr-qTmgz9S260ZWb5VO_x0oYetEUqzNiNAnuwVTsZS7QXg
Check the CSR request status again. Approved and issued indicate that the CSR request has been authorized and the certificate has been issued
kubectl get csr

View the cluster node status and successfully join node1 node
kubectl get nodes

6. Operate on node01 node
The certificate and kubelet.kubeconfig file are automatically generated

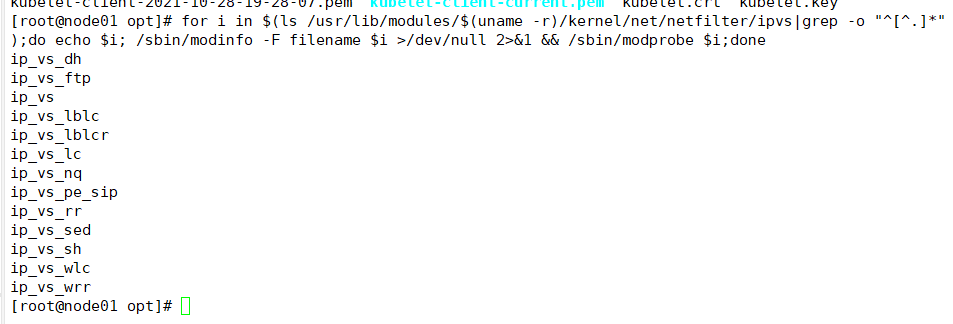
Load ip_vs module
for i in $(ls /usr/lib/modules/$(uname -r)/kernel/net/netfilter/ipvs|grep -o "^[^.]*");do echo $i; /sbin/modinfo -F filename $i >/dev/null 2>&1 && /sbin/modprobe $i;done
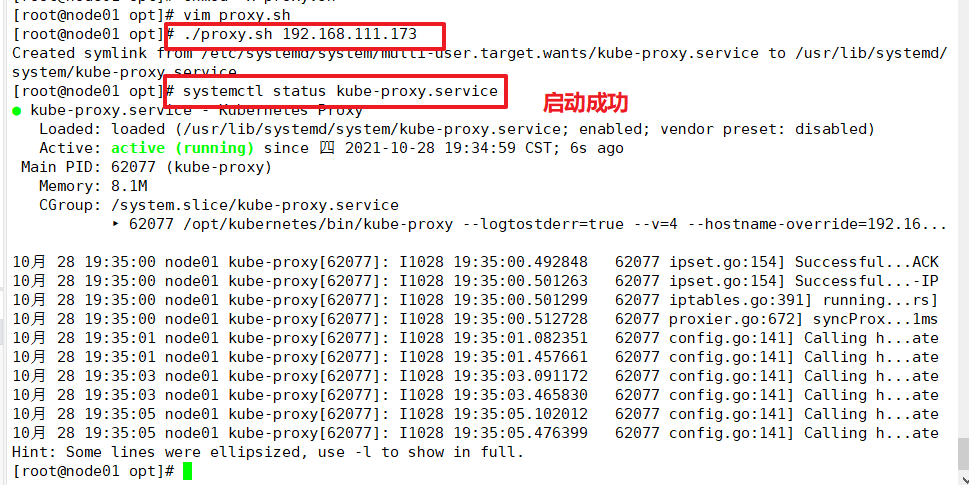
Use the proxy.sh script to start the proxy service
cd /opt/
chmod +x proxy.sh
./proxy.sh 192.168.111.173

systemctl status kube-proxy.service
7.node02 node deployment (method 1)
Copy kubelet.sh and proxy.sh files on node1 node to node2 node
cd /opt/
scp kubelet.sh proxy.sh root@192.168.111.175:/opt/
node02 node deployment
Start the kubelet service using the kubelet.sh script
cd /opt/
chmod +x kubelet.sh
./kubelet.sh 192.168.111.175
Operate on the master01 node
Start the kubelet service using the kubelet.sh script
kubectl get csr

Request via CSR
kubectl certificate approve node-csr-7bDpWFqqtvBpuqHIiZVryIGnoUONdTatGFRKdOTBCCA
Check the CSR request status again. Approved and issued indicate that the CSR request has been authorized and the certificate has been issued
kubectl get csr

View cluster node status
kubectl get nodes

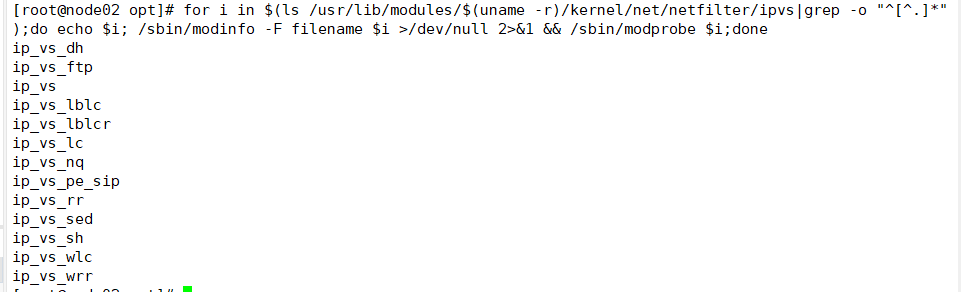
Load ip_vs module
for i in $(ls /usr/lib/modules/$(uname -r)/kernel/net/netfilter/ipvs|grep -o "^[^.]*");do echo $i; /sbin/modinfo -F filename $i >/dev/null 2>&1 && /sbin/modprobe $i;done
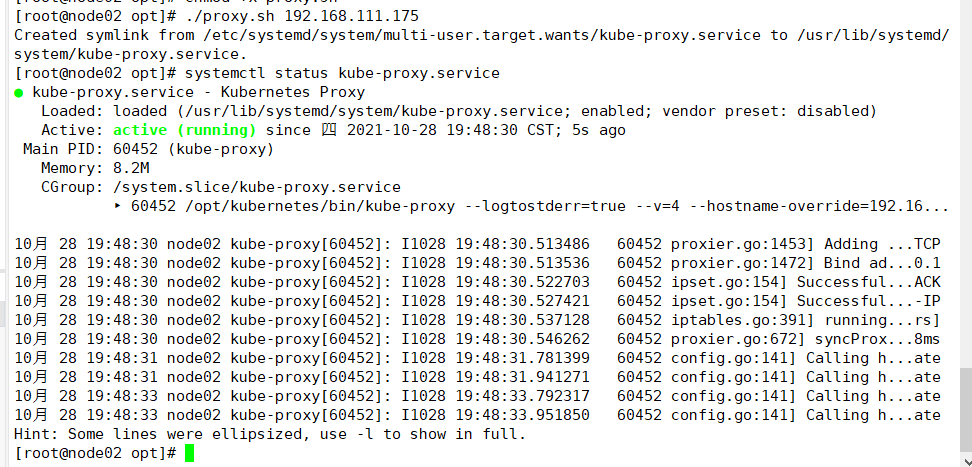
Use the proxy.sh script to start the proxy service
cd /opt/
chmod +x proxy.sh
./proxy.sh 192.168.111.175

systemctl status kube-proxy.service
Create a mirror and view it
kubectl create deployment nginx-test --image=nginx:1.14

kubectl get pod

View container details
kubectl get pod -o wide #View container details

Check whether you can enter the container at the node node
docker ps -a

docker exec -it d14bcf3f8fb7
