Preface
We are familiar with the bastion machine (springboard machine). In order to ensure the security of the server, we add a bastion machine. All ssh connections are completed through the bastion machine. The bastion machine also needs to have identity authentication, authorization, access control, audit and other functions.
Jumpserver is the first fully open-source bastion machine in the world, and it is a professional operation and maintenance audit system conforming to 4A.
Jumpserver uses Python / Django for development, adopts distributed architecture, supports cross regional deployment of multiple computer rooms, provides API s for central nodes, and deploys login nodes for each computer room, which can be horizontally expanded without concurrent access restrictions.
Jumpserver now supports the management of SSH, Telnet, RDP and VNC protocol assets.
Component description
Jumpserver consists of four components. The functions of each component are as follows:
- Jumpserver is the management background. Administrators can perform asset management, user management, asset authorization and other operations through the Web page. Users can perform asset login, file management and other operations through the Web page
- Coco is SSH Server and Web Terminal Server. Users can use their own account to access SSH protocol and Telnet protocol assets through SSH or Web Terminal
- Luna is the front-end page of the Web Terminal Server. Users log in to the required components using the Web Terminal mode
- Guacamole is the asset component of RDP protocol and VNC protocol. Users can connect the RDP protocol and VNC protocol assets through Web Terminal (only through Web Terminal temporarily)
Port specification
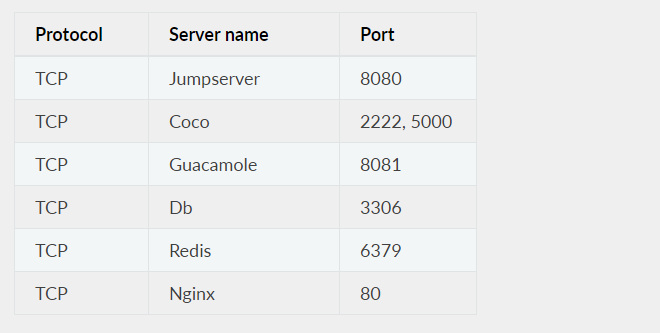
The listening ports of each component are as follows:
- Jumpserver default port is 8080/tcp configuration file jumpserver/config.yml
- The default SSH port of Coco is 2222/tcp, and the default Web Terminal port is 5000/tcp. The configuration file is located in coco/config.yml
- The default port of Guacamole is 8081/tcp, and the configuration file is / config/tomcat8/conf/server.xml
- Nginx default port is 80/tcp
- Redis default port is 6379/tcp
- The default port of Mysql is 3306/tcp
In this blog post, Jumpserver will be deployed in a one-stop way. In fact, it is recommended to take a reference Official documents Deploy Jumpserver.
I. environmental preparation
- System: CentOS 7
- IP: 192.168.20.6
- Database: mariadb
- Reverse proxy: nginx
II. Start to install Redis and mariadb
[root@jumpserver ~]# yum -y install wget gcc epel-release git
#Install dependency package
#Download Network yum source
[root@jumpserver ~]# wget -O /etc/yum.repos.d/CentOS-Base.repo http://mirrors.aliyun.com/repo/Centos-7.repo
[root@jumpserver ~]# wget -O /etc/yum.repos.d/epel.repo http://mirrors.aliyun.com/repo/epel-7.repo
[root@jumpserver ~]# yum makecache
//Install Redis. Jumpserver uses Redis for cache and cell broke
[root@jumpserver ~]# yum -y install redis
[root@jumpserver ~]# systemctl enable redis
[root@jumpserver ~]# systemctl start redis
# Install Mysql. If you do not use Mysql, you can skip Mysql installation and configuration. sqlite3, mysql, postgres, etc. are supported
[root@jumpserver ~]# yum -y install mariadb*
[root@jumpserver ~]# systemctl enable mariadb
[root@jumpserver ~]# systemctl start mariadb
#After starting the database, create a library and add an authorized user, set the password to 123.com
[root@jumpserver ~]# mysql -uroot -e "create database jumpserver default charset 'utf8'; grant all on jumpserver.* to 'jumpserver'@'127.0.0.1' identified by '123.com'; flush privileges;"
III. install Nginx reverse agent and configure Python 3 virtual environment
#Install Nginx as a proxy server to integrate Jumpserver with various components
[root@jumpserver conf.d]# vim /etc/yum.repos.d/nginx.repo
[nginx]
name=nginx repo
baseurl=http://nginx.org/packages/centos/7/$basearch/
gpgcheck=0
enabled=1
[root@jumpserver ~]# yum -y install nginx
[root@jumpserver ~]# systemctl enable nginx
#Installing Python 3.6
[root@jumpserver ~]# yum -y install python36 python36-devel
# Configure and load Python 3 virtual environment
[root@jumpserver ~]# cd /opt
[root@jumpserver opt]# python3 -m venv py3   # py3 is the name of virtual environment, which can be customized
#Enter Python 3.6 virtual environment
[root@jumpserver opt]# source /opt/py3/bin/activate    # To exit the virtual environment, you can use the deactivate command
# The following prompt indicates that the virtual environment configuration is successful
(py3) [root@jumpserver opt]#
IV. deployment of Jumpserver service
# Download Jumpserver
(py3) [root@jumpserver opt]# cd /opt
(py3) [root@jumpserver opt]# wget https://github.com/jumpserver/jumpserver/archive/1.4.7.tar.gz
(py3) [root@jumpserver opt]# tar zxf 1.4.7.tar.gz
(py3) [root@jumpserver opt]# mv jumpserver-1.4.7 jumpserver
# Installation depends on RPM package
(py3) [root@jumpserver opt]# yum -y install $(cat /opt/jumpserver/requirements/rpm_requirements.txt)
# Install Python library dependencies
(py3) [root@jumpserver opt]# pip install --upgrade pip setuptools
(py3) [root@jumpserver opt]# pip install -r /opt/jumpserver/requirements/requirements.txt
# Modify Jumpserver configuration file
(py3) [root@jumpserver opt]# cd /opt/jumpserver
(py3) [root@jumpserver jumpserver]# cp config_example.yml config.yml
#Generate secret key token
(py3) [root@jumpserver jumpserver]# SECRET_KEY=`cat /dev/urandom | tr -dc A-Za-z0-9 | head -c 50`
(py3) [root@jumpserver jumpserver]# echo "SECRET_KEY=$SECRET_KEY" >> ~/.bashrc
(py3) [root@jumpserver jumpserver]# BOOTSTRAP_TOKEN=`cat /dev/urandom | tr -dc A-Za-z0-9 | head -c 16`
(py3) [root@jumpserver jumpserver]# echo "BOOTSTRAP_TOKEN=$BOOTSTRAP_TOKEN" >> ~/.bashrc
(py3) [root@jumpserver jumpserver]# sed -i "s/SECRET_KEY:/SECRET_KEY: $SECRET_KEY/g" /opt/jumpserver/config.yml
(py3) [root@jumpserver jumpserver]# sed -i "s/BOOTSTRAP_TOKEN:/BOOTSTRAP_TOKEN: $BOOTSTRAP_TOKEN/g" /opt/jumpserver/config.yml
(py3) [root@jumpserver jumpserver]# sed -i "s/# DEBUG: true/DEBUG: false/g" /opt/jumpserver/config.yml
(py3) [root@jumpserver jumpserver]# sed -i "s/# LOG_LEVEL: DEBUG/LOG_LEVEL: ERROR/g" /opt/jumpserver/config.yml
(py3) [root@jumpserver jumpserver]# sed -i "s/# SESSION_EXPIRE_AT_BROWSER_CLOSE: False/SESSION_EXPIRE_AT_BROWSER_CLOSE: true/g" /opt/jumpserver/config.yml
(py3) [root@jumpserver jumpserver]# sed -i "s/DB_PASSWORD: /DB_PASSWORD: 123.com/g" /opt/jumpserver/config.yml
(py3) [root@jumpserver jumpserver]# echo -e "3[31m your secret key is $secret key \ 033 [0m"
 //Your secret key is z6buvxtzrpc73pnrp4qnwn1emwnyrgzewkvjqivxc6cxfpkdu
(py3) [root@jumpserver jumpserver]# echo -e "3[31m your bootstrap \ token is $bootstrap \ token \ 033 [0m"
 //Your bootstrap? Token is aGXZtXKnhP3StNA3
(py3) [root@jumpserver jumpserver]# cat config.yml           # Confirm whether there is any error in the content
# SECURITY WARNING: keep the secret key used in production secret!
# In the encryption key production environment, please change it to a random string. Do not disclose it. PS: pure number is not allowed
# $ cat /dev/urandom | tr -dc A-Za-z0-9 | head -c 49;echo
SECRET_KEY: Z6bUvXTZRpc73pnRp4qNwn1eMWNYrgzbEWkVJqIVXc6cXfpKDU

# SECURITY WARNING: keep the bootstrap token used in production secret!
# Pre shared Token coco and guacamole are used to register service accounts, instead of using the original registration acceptance mechanism
BOOTSTRAP_TOKEN: aGXZtXKnhP3StNA3

# Development env open this, when error occur display the full process track, Production disable it
# More logs can be seen when an error is encountered after DEBUG mode is turned on.
DEBUG: false

# DEBUG, INFO, WARNING, ERROR, CRITICAL can set. See https://docs.djangoproject.com/en/1.10/topics/logging/
# log level
LOG_LEVEL: ERROR
# LOG_DIR:

# Session expiration setting, Default 24 hour, Also set expired on on browser close
# The expiration time of browser Session is 24 hours by default, or it can be set to expire when the browser is closed
# SESSION_COOKIE_AGE: 3600 * 24
SESSION_EXPIRE_AT_BROWSER_CLOSE: true

# Database setting, Support sqlite3, mysql, postgres ....
# Database settings
# See https://docs.djangoproject.com/en/1.10/ref/settings/#databases

# SQLite setting:
# Using single file sqlite database
# DB_ENGINE: sqlite3
# DB_NAME:

# MySQL or postgres setting like:
# Using Mysql as a database
DB_ENGINE: mysql
DB_HOST: 127.0.0.1
DB_PORT: 3306
DB_USER: jumpserver
DB_PASSWORD: 123.com
DB_NAME: jumpserver

# When Django start it will bind this host and port
# ./manage.py runserver 127.0.0.1:8080
# Runtime binding port
HTTP_BIND_HOST: 0.0.0.0
HTTP_LISTEN_PORT: 8080

# Use Redis as broker for celery and web socket
# Redis configuration
REDIS_HOST: 127.0.0.1
REDIS_PORT: 6379
# REDIS_PASSWORD:
# REDIS_DB_CELERY: 3
# REDIS_DB_CACHE: 4

# Use OpenID authorization
# Using OpenID for authentication settings
# BASE_SITE_URL: http://localhost:8080
# AUTH_OPENID: false  # True or False
# AUTH_OPENID_SERVER_URL: https://openid-auth-server.com/
# AUTH_OPENID_REALM_NAME: realm-name
# AUTH_OPENID_CLIENT_ID: client-id
# AUTH_OPENID_CLIENT_SECRET: client-secret

# OTP settings
# OTP/MFA configuration
# OTP_VALID_WINDOW: 0
# OTP_ISSUER_NAME: Jumpserver
# Running Jumpserver
(py3) [root@jumpserver jumpserver]# cd /opt/jumpserver
(py3) [root@jumpserver jumpserver]# ./jms start all -d
#Running in the background, you can change start to status, stop
#Set jumpserver startup
(py3) [root@jumpserver jumpserver]# wget -O /usr/lib/systemd/system/jms.service https://demo.jumpserver.org/download/shell/centos/jms.service
(py3) [root@jumpserver jumpserver]# chmod 755 /usr/lib/systemd/system/jms.service
(py3) [root@jumpserver jumpserver]# systemctl enable jms
V. install docker to deploy coco and guacamole
(py3) [root@jumpserver jumpserver]# yum install -y yum-utils device-mapper-persistent-data lvm2
(py3) [root@jumpserver jumpserver]# yum-config-manager --add-repo http://mirrors.aliyun.com/docker-ce/linux/centos/docker-ce.repo
(py3) [root@jumpserver jumpserver]# yum makecache fast
(py3) [root@jumpserver jumpserver]# rpm --import https://mirrors.aliyun.com/docker-ce/linux/centos/gpg
(py3) [root@jumpserver jumpserver]# yum -y install docker-ce    #Install docker Community Edition
(py3) [root@jumpserver jumpserver]# systemctl enable docker
#Using daocloud image acceleration
(py3) [root@jumpserver jumpserver]# curl -sSL https://get.daocloud.io/daotools/set_mirror.sh | sh -s http://f1361db2.m.daocloud.io
(py3) [root@jumpserver jumpserver]# systemctl restart docker

#Start the coco and guacamole containers, and "- e core? Host" specifies the service port of Jumpserver
#"Bootstrap" is the bootstrap "token value in Jumpserver/config.yml
(py3) [root@jumpserver jumpserver]# docker run --name jms_koko -d -p 2222:2222 -p 127.0.0.1:5000:5000 -e CORE_HOST=http://192.168.20.2:8080 -e BOOTSTRAP_TOKEN=$BOOTSTRAP_TOKEN --restart=always jumpserver/jms_koko:1.5.4

(py3) [root@jumpserver jumpserver]# docker run --name jms_guacamole -d -p 127.0.0.1:8081:8080 -e JUMPSERVER_SERVER=http://192.168.20.2:8080 -e BOOTSTRAP_TOKEN=$BOOTSTRAP_TOKEN --restart=always jumpserver/jms_guacamole:1.5.4
Vi. download the Web terminal front end
Luna needs Nginx to run access access( https://github.com/jumpserver/luna/releases) download the corresponding version of release package, direct decompression, no compilation required
(py3) [root@jumpserver jumpserver]# cd /opt
(py3) [root@jumpserver opt]# wget https://demo.jumpserver.org/download/luna/1.4.7/luna.tar.gz
(py3) [root@jumpserver opt]# tar zxf luna.tar.gz
(py3) [root@jumpserver opt]# chown -R root:root luna
7. Configure Nginx to integrate all components
(py3) [root@jumpserver opt]# deactivate      #Exit Python 3 virtual environment
#There may be some problems with nginx installed in yum, so I choose the source code to reinstall it
[root@jumpserver ~]# tar zxf nginx-1.14.0.tar.gz -C /usr/src[root@jumpserver ~]# cd /usr/src/nginx-1.14.0/
[root@jumpserver nginx-1.14.0]# ./configure --prefix=/usr/local/nginx && make && make install
[root@jumpserver nginx-1.14.0]# cd /usr/local/nginx/conf/
[root@jumpserver conf]# vim nginx.conf    #The modified configuration file of nginx is as follows, which can be copied and used directly
worker_processes  1;
events {
    worker_connections  1024;
}

http {
    include       mime.types;
    default_type  application/octet-stream;
    sendfile        on;
    keepalive_timeout  65;
    server {
        listen       80;
        server_name  localhost;
        client_max_body_size 100m;  # Video and file upload size limit

    location /luna/ {
        try_files $uri / /index.html;
        alias /opt/luna/;  # luna path. If you want to modify the installation directory, you need to modify it here
    }

    location /media/ {
        add_header Content-Encoding gzip;
        root /opt/jumpserver/data/;  # Recording location. If you want to modify the installation directory, you need to modify it here
    }

    location /static/ {
        root /opt/jumpserver/data/;  # Static resources. If you want to modify the installation directory, you need to modify it here
    }

    location /koko/ {
        proxy_pass       http://localhost:5000;
        proxy_buffering off;
        proxy_http_version 1.1;
        proxy_set_header Upgrade $http_upgrade;
        proxy_set_header Connection "upgrade";
        proxy_set_header X-Real-IP $remote_addr;
        proxy_set_header Host $host;
        proxy_set_header X-Forwarded-For $proxy_add_x_forwarded_for;
        access_log off;
    }

    location /guacamole/ {
        proxy_pass       http://localhost:8081/;
        proxy_buffering off;
        proxy_http_version 1.1;
        proxy_set_header Upgrade $http_upgrade;
        proxy_set_header Connection $http_connection;
        proxy_set_header X-Real-IP $remote_addr;
        proxy_set_header Host $host;
        proxy_set_header X-Forwarded-For $proxy_add_x_forwarded_for;
        access_log off;
    }

    location /ws/ {
        proxy_pass http://localhost:8070;
        proxy_buffering off;
        proxy_http_version 1.1;
        proxy_set_header Upgrade $http_upgrade;
        proxy_set_header Connection "upgrade";
        proxy_set_header X-Real-IP $remote_addr;
        proxy_set_header Host $host;
        proxy_set_header X-Forwarded-For $proxy_add_x_forwarded_for;
        access_log off;
    }

    location / {
        proxy_pass http://localhost:8080;
        proxy_set_header X-Real-IP $remote_addr;
        proxy_set_header Host $host;
        proxy_set_header X-Forwarded-For $proxy_add_x_forwarded_for;
    }
        error_page   500 502 503 504  /50x.html;
        location = /50x.html {
            root   html;
        }
    }
}

[root@jumpserver /]# ln -sf /usr/local/nginx/sbin/nginx /usr/local/sbin/
[root@jumpserver ~]# nginx -t       #Check the configuration file for errors
[root@jumpserver ~]# nginx       #Start nginx service
VIII. Client access to nginx
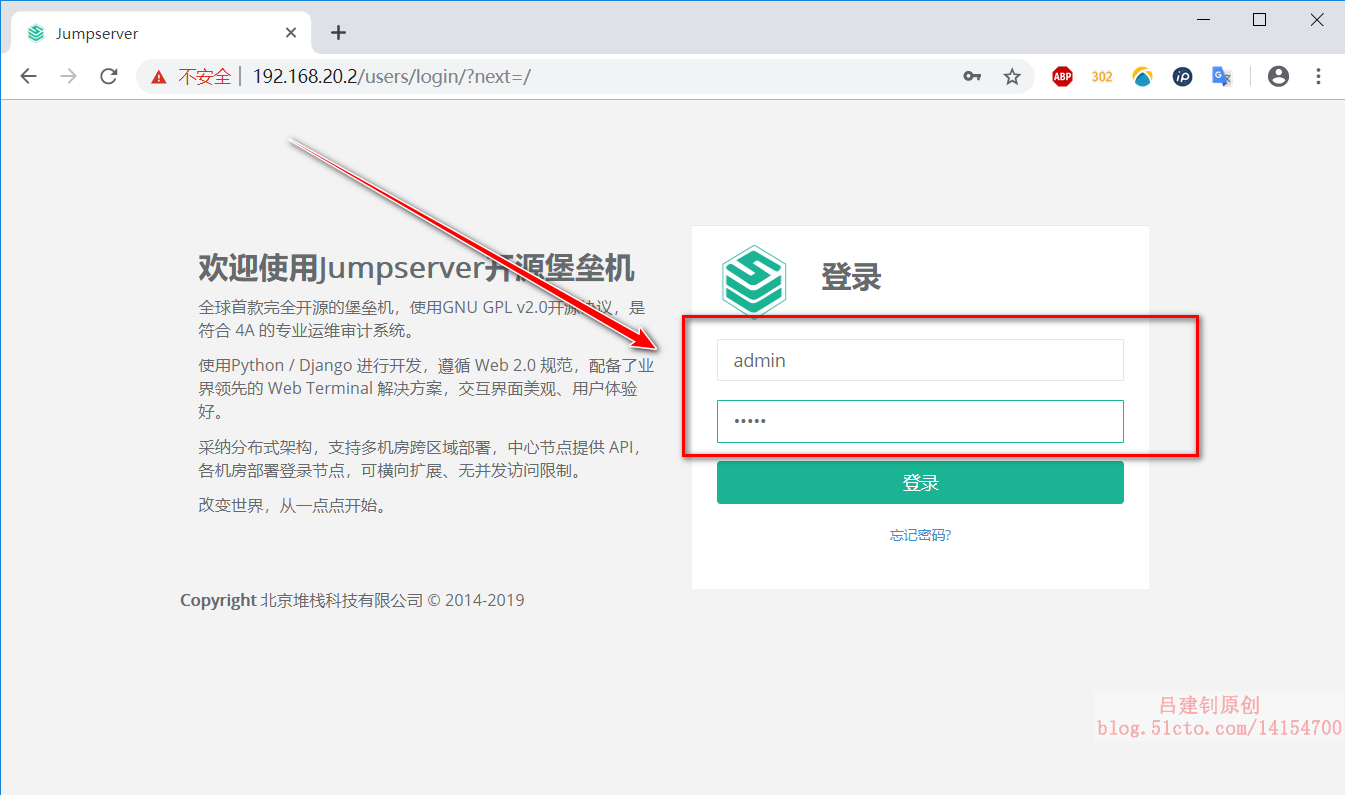
1. The client can directly access port 80 of Jumpserver, as follows (the default user name and password are "admin"):
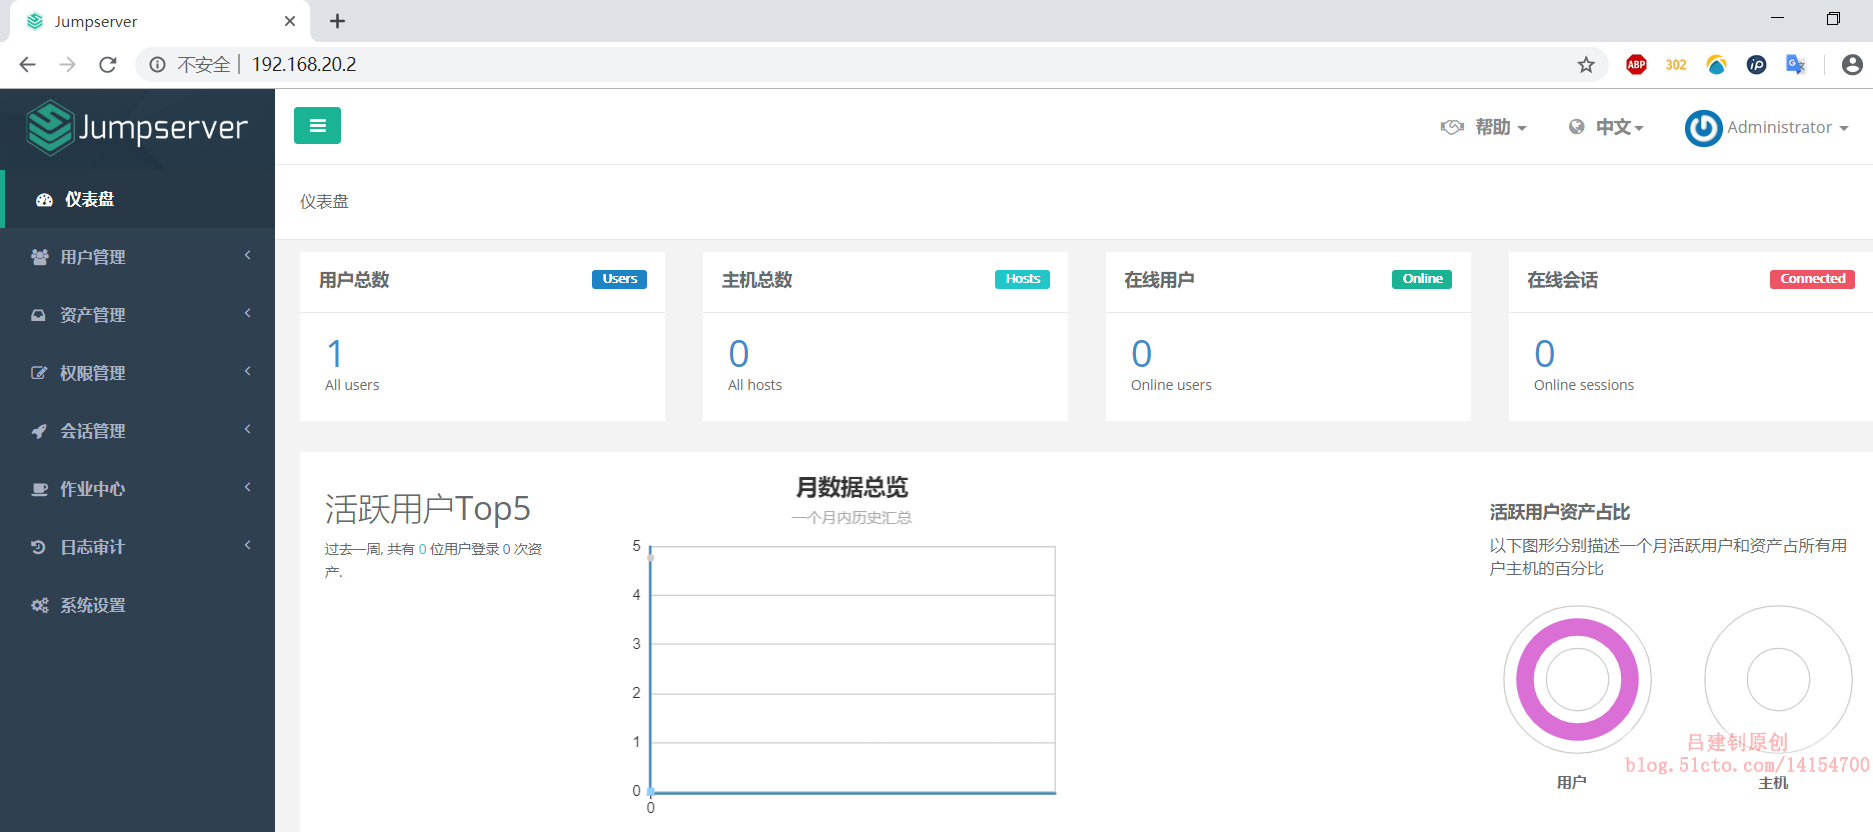
2. After login, you can see the following interface:
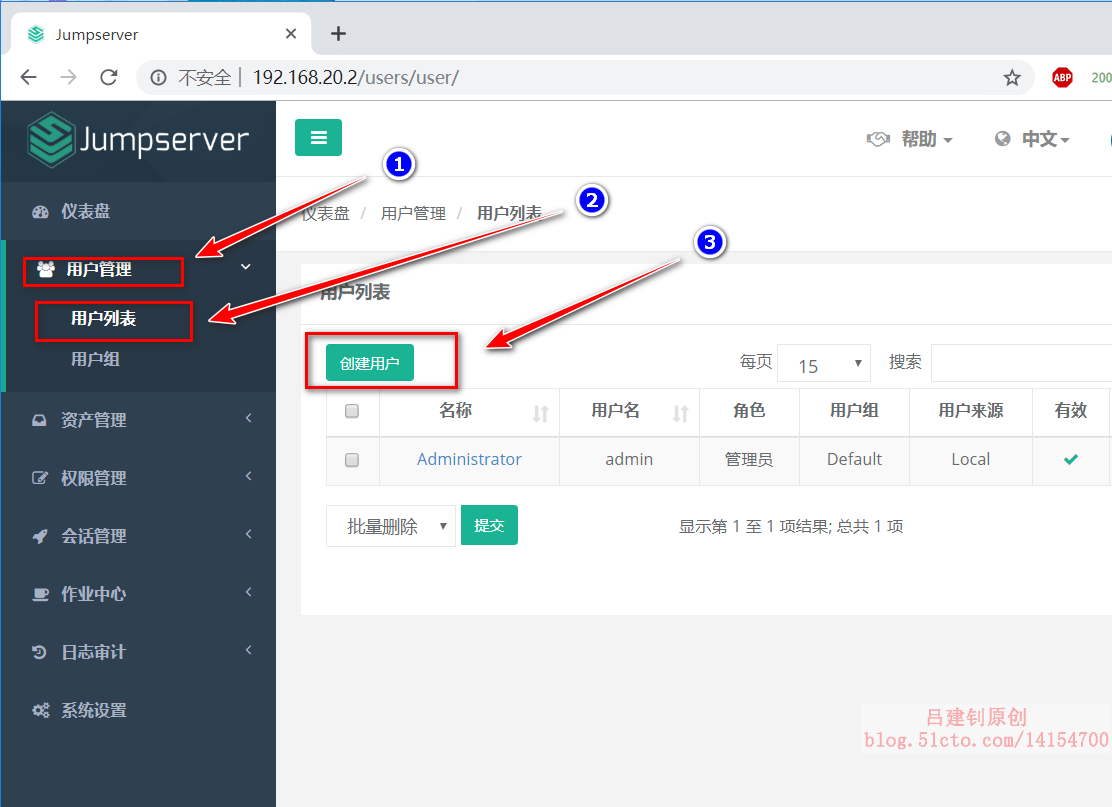
3. Create user test. The operation is as follows:
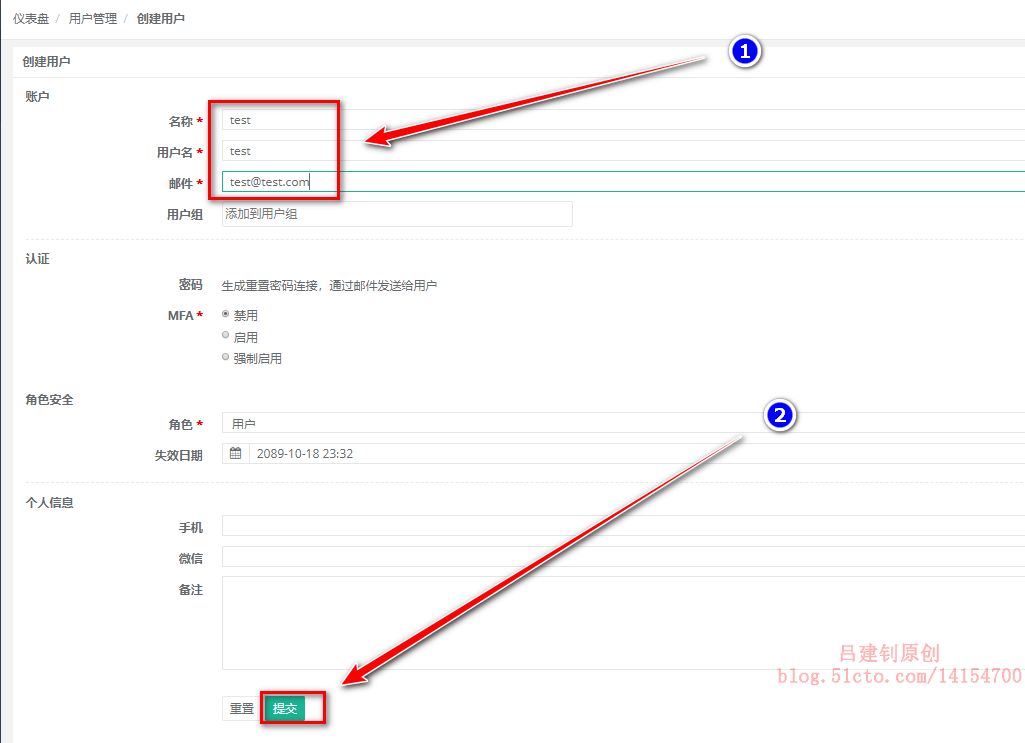
After submission, the display is as follows:
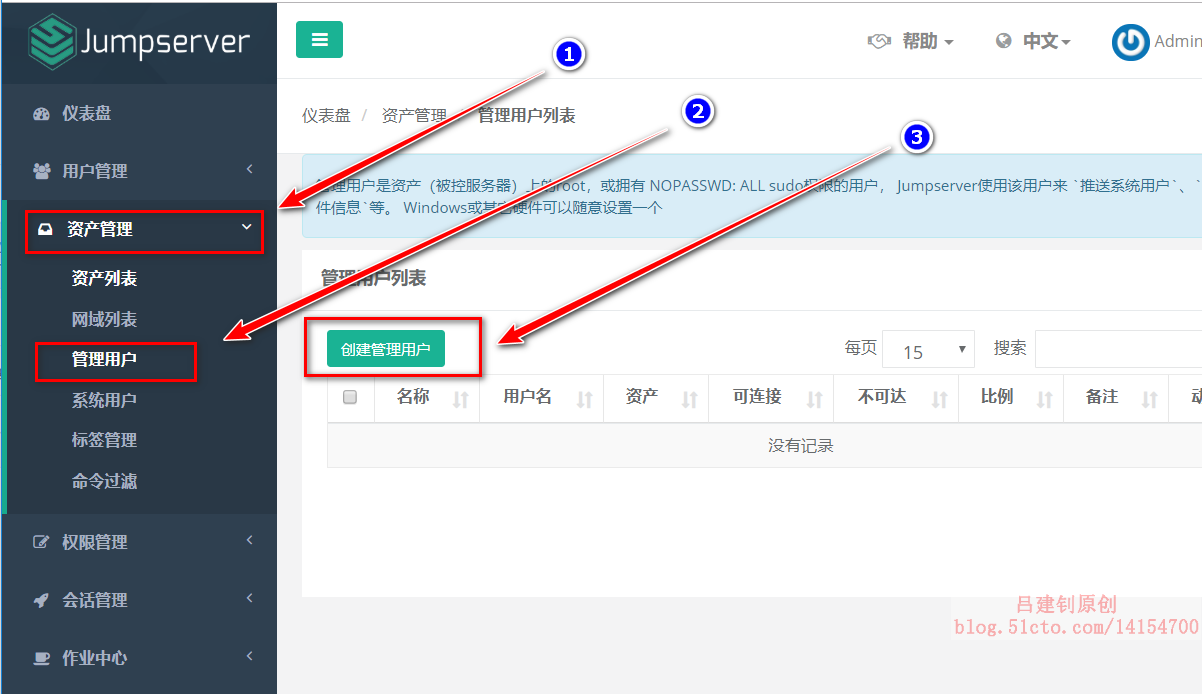
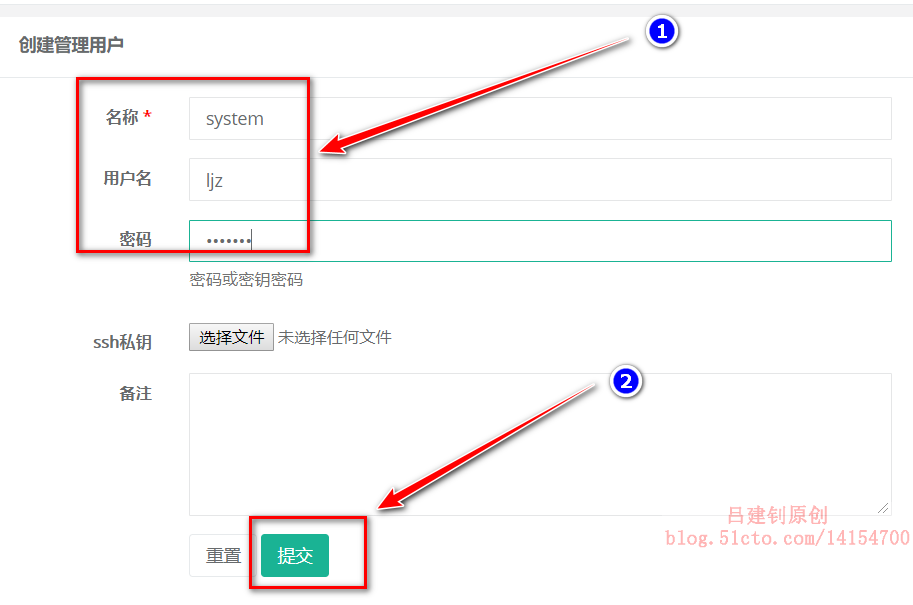
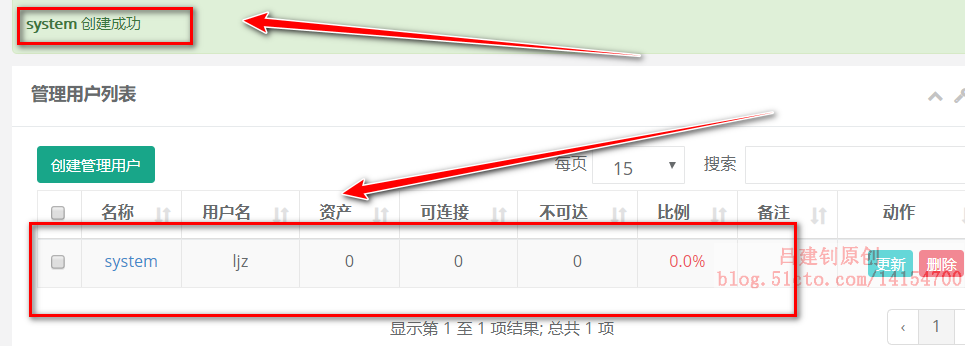
4. Create management user
Management user name: system, user: ljz, the operation is as follows:
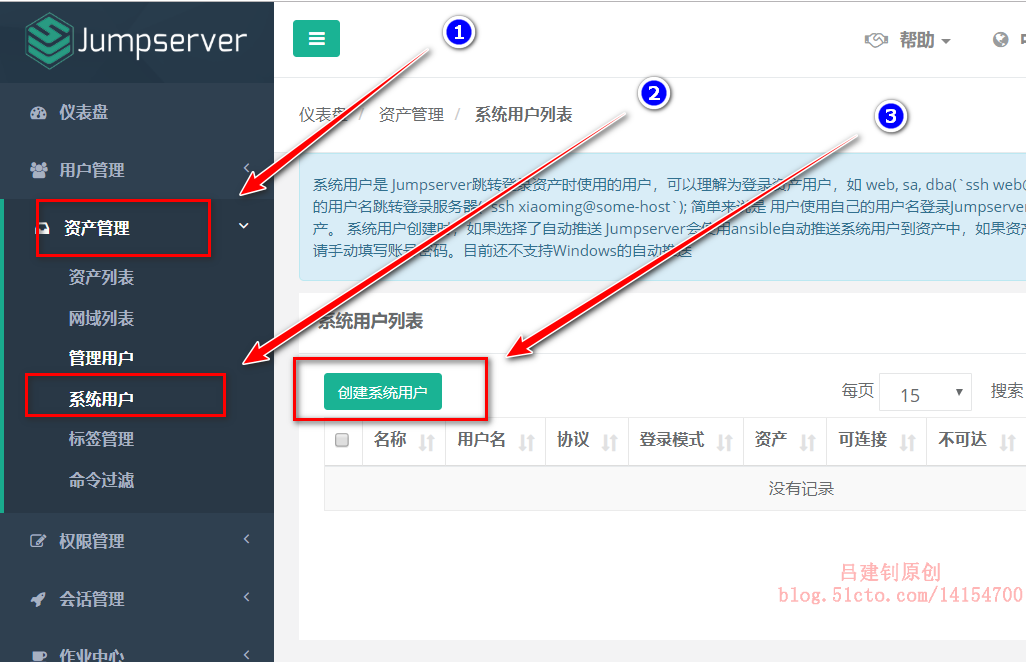
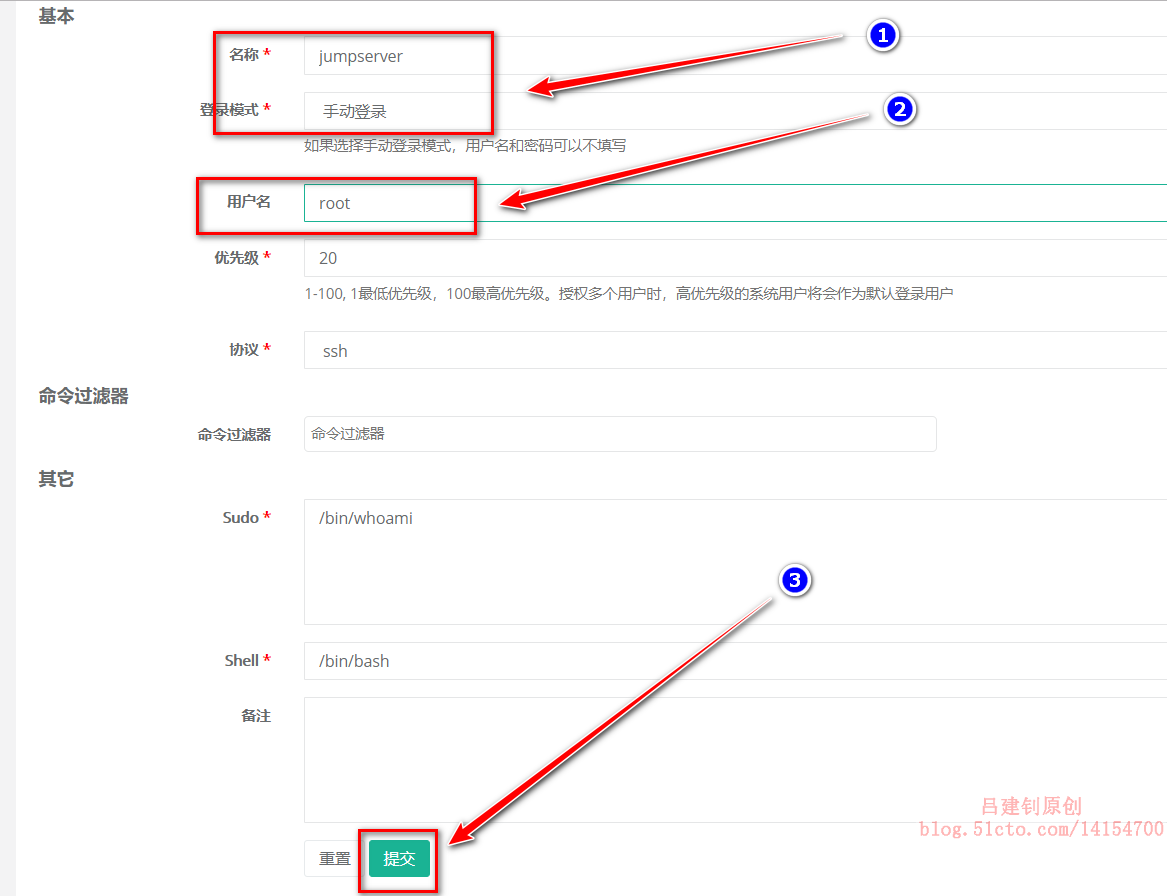
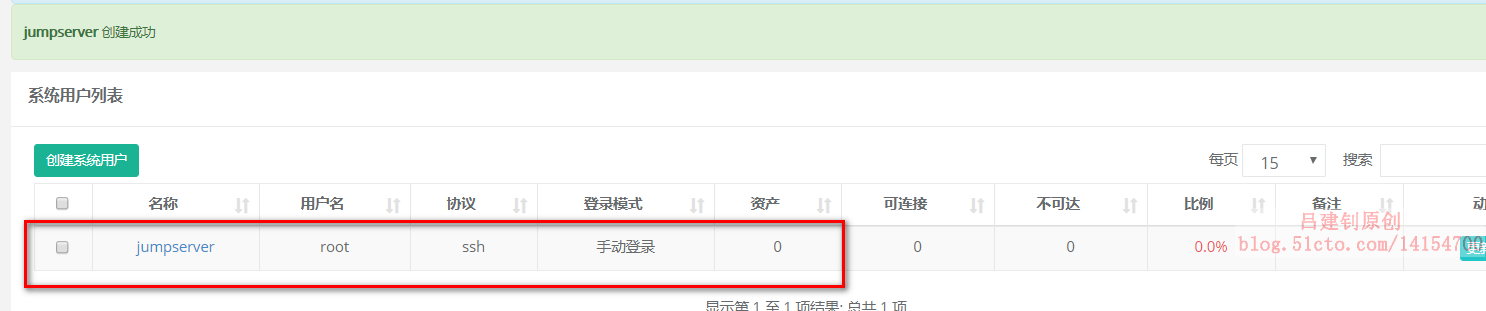
5. Create system user
System user name: jumpserver; user: root
Note: the user name should be root as far as possible. Select Manual login. This user is used to connect back-end assets.
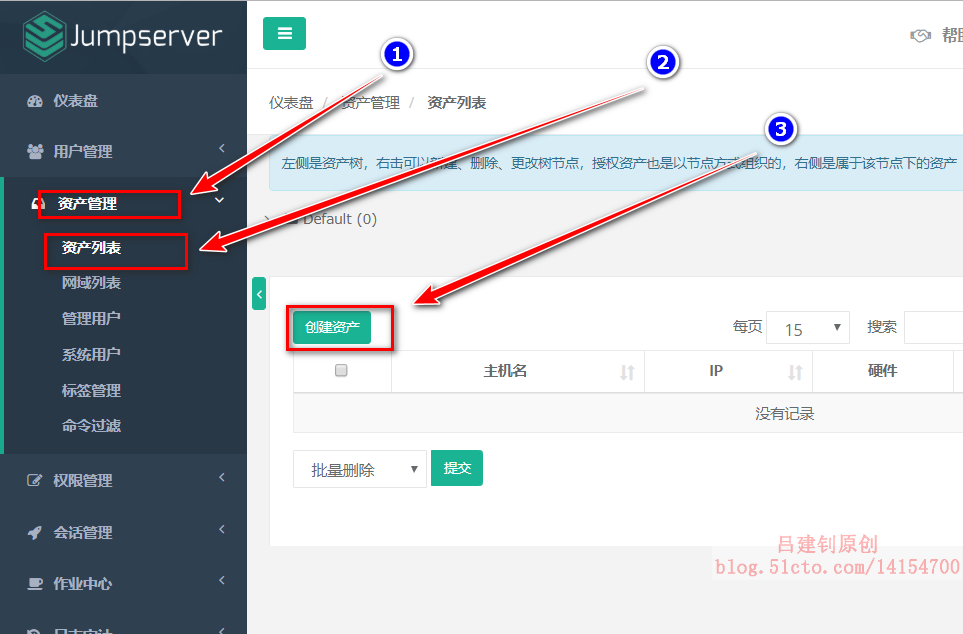
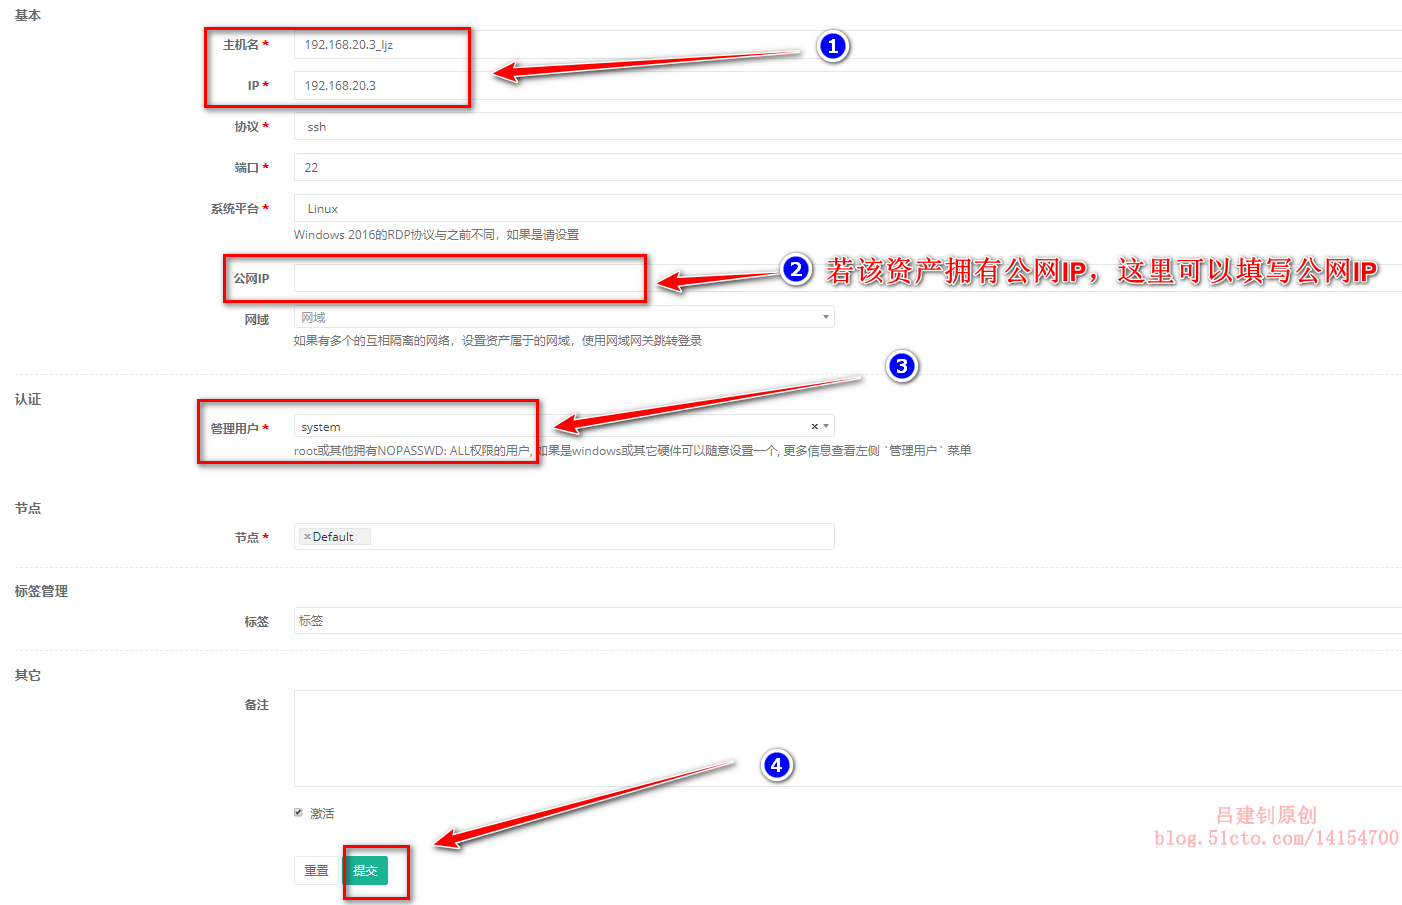
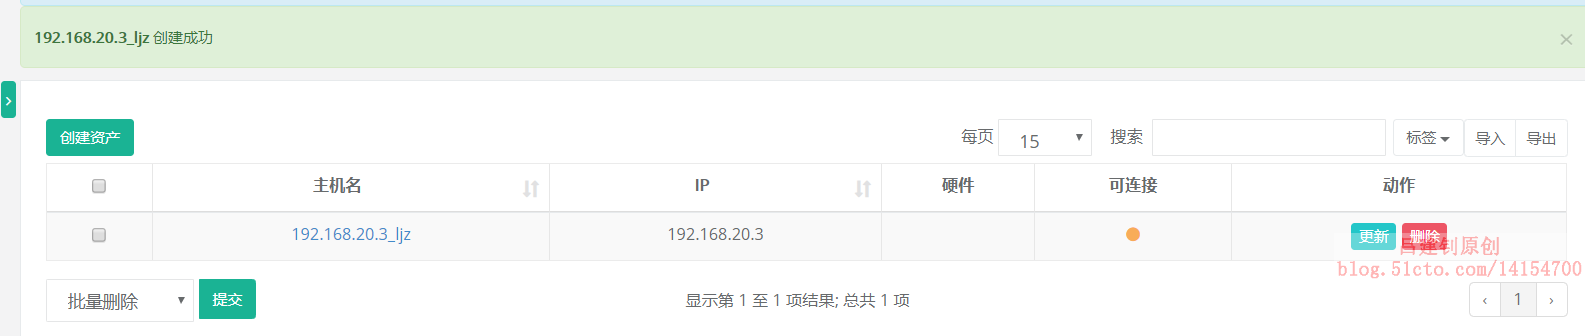
6. Create assets
Before performing the following operations, you need to prepare a Centos server for testing. Here I open a test server with IP of 192.168.20.3.
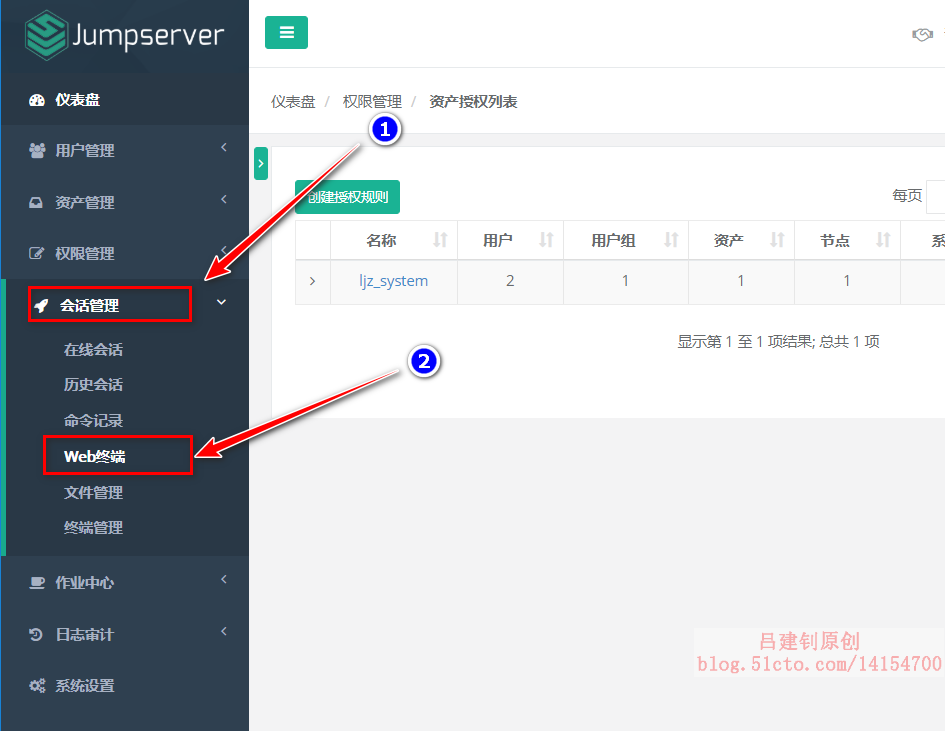
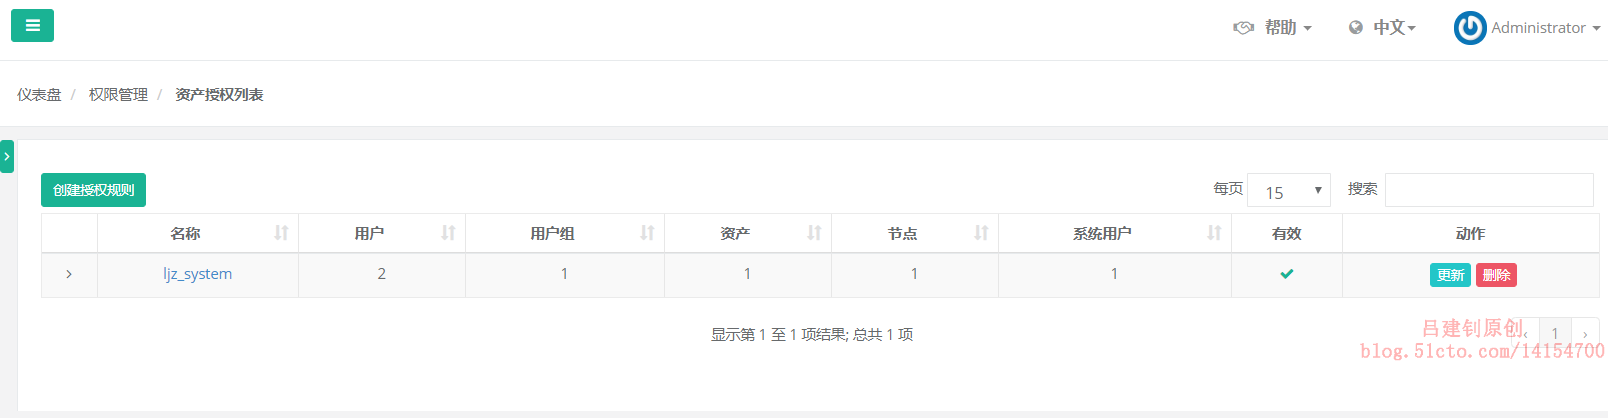
7. Create authorization rules

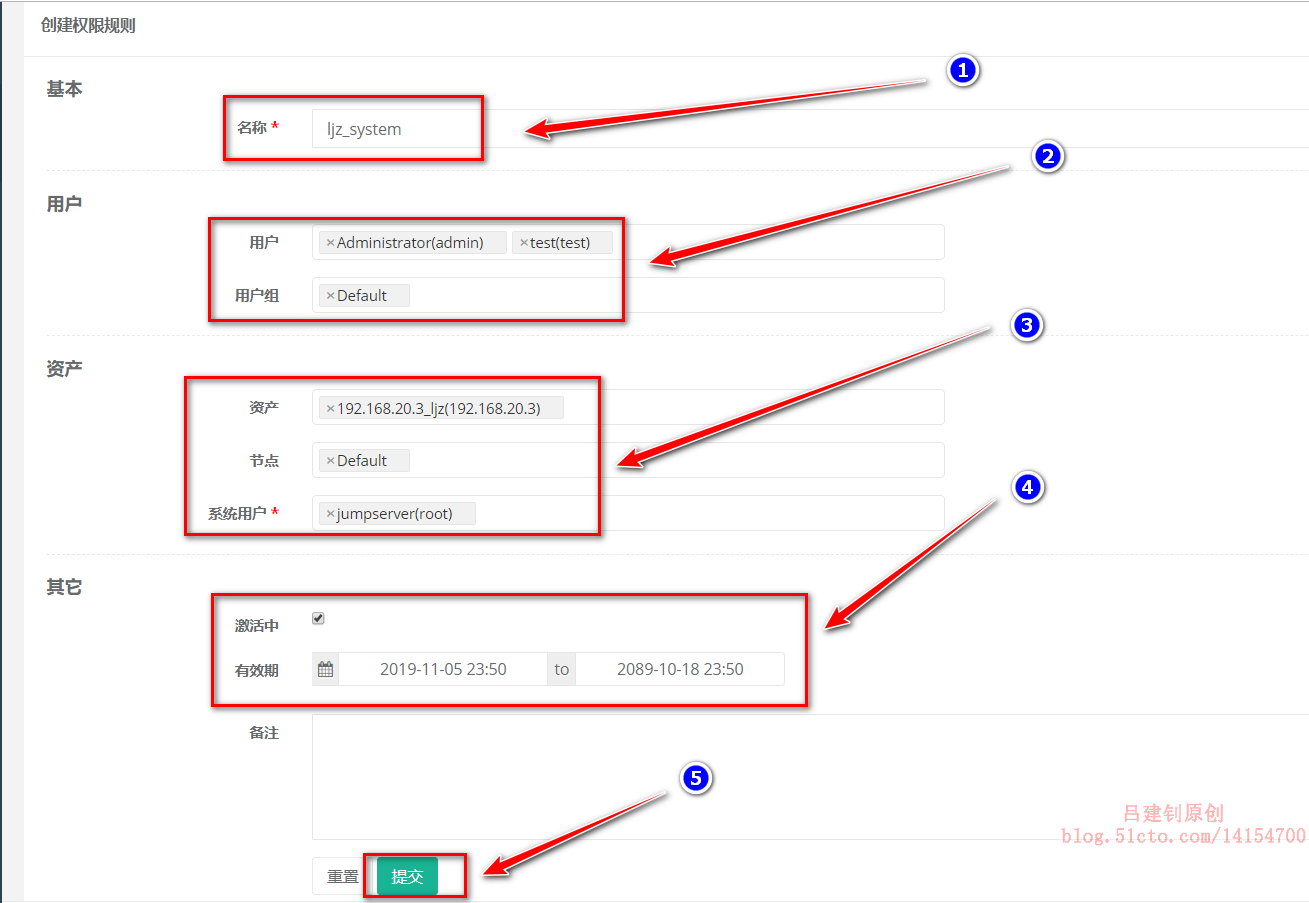
After creation, it is displayed as follows:
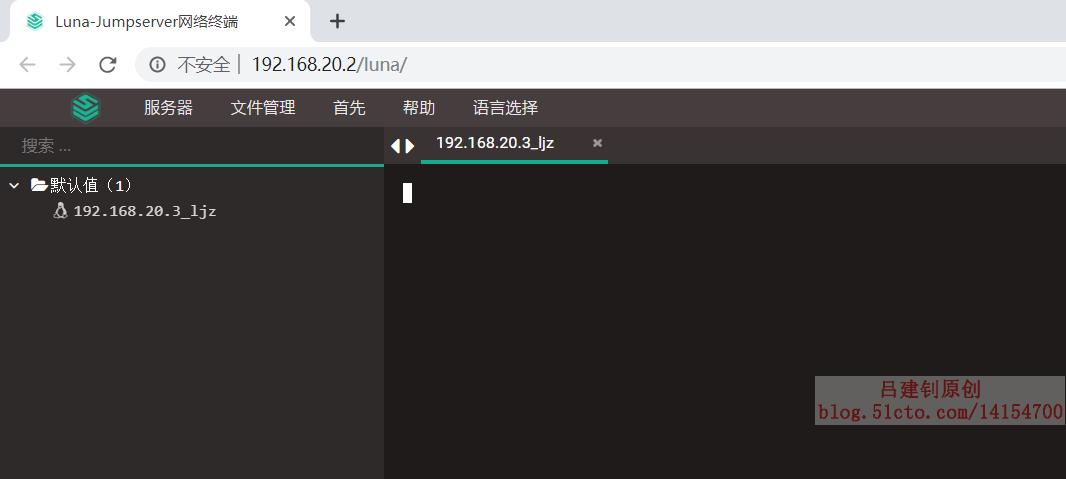
8. Connect to back-end assets for testing