Introduction to Jumpserver
Official site: www.jumpserver.org
Jumpserver is the world's first fully open source fortress, using the GNU GPL v2.0 open source protocol, is a flavor security audit system compliant with 4A.
Jumpserver is developed using Python/Django, follows the Web 2.0 specification, adopts a distributed architecture, supports multi-room cross-regional deployment, supports horizontal expansion, and has no concurrent limit on the number of assets.
Jumpserver now supports SSH, Telnet, RDP, VNC protocol assets.
Jumpserver Core Features List
Authentication Authentication
Account Management Account
Authorization Control Authorization
Security Audit
Asset Management CMDB
Jumpserver Environment Requirements
Hardware configuration: 2 CPU cores, 4G memory, 50G hard disk (minimum standard)
Operating system: Linux distribution x86_64
Python = 3.6x
MySQL Server >= 5.6
Mariadb Server >= 5.5.56
Redis
Jumpserver Deployment
1. Installation Dependent Environment
yum install wget gcc-c++ epel-release git -y
2. Install python36
[root@Jumpserver ~]# yum install python36.x86_64 python36-devel.x86_64 -y
[root@Jumpserver ~]# python36 -V
Python 3.6.8
3. Set up python virtual environment
[root@Jumpserver ~]# python36 -m venv /opt/py3
4. Load python3 virtual environment
Each jumpserver operation requires the following command to load the py3 virtual environment
Seeing the following prompt will represent a successful entry into the virtual environment. After running jumpserver, you will now run the above source command. All of the following commands are run in the virtual environment
[root@Jumpserver ~]# source /opt/py3/bin/activate
(py3) [root@Jumpserver ~]#

#The python virtual environment is automatically loaded when you enter the jumpserver directory, so you do not need to enter the jumpser operation source command every time you enter it
(py3) [root@Jumpserver ~]# echo "source /opt/py3/bin/activate" > /opt/jumpserver/.env
5. Get the Jumpserver code
(py3) [root@Jumpserver ~]# cd /opt/
(py3) [root@Jumpserver opt]# git clone --depth=1 https://github.com/jumpserver/jumpserver.git
Cloning into 'jumpserver'...
remote: Enumerating objects: 1156, done.
remote: Counting objects: 100% (1156/1156), done.
remote: Compressing objects: 100% (1028/1028), done.
remote: Total 1156 (delta 193), reused 632 (delta 64), pack-reused 0
Receiving objects: 100% (1156/1156), 6.96 MiB | 13.00 KiB/s, done.
Resolving deltas: 100% (193/193), done.
6. Install jumpserver dependent RPM packages
(py3) [root@Jumpserver opt]# cd /opt/jumpserver/requirements/
(py3) [root@Jumpserver requirements]# yum install $(cat rpm_requirements.txt) -y
(py3) [root@Jumpserver requirements]# pip install --upgrade pip
(py3) [root@Jumpserver requirements]# pip install -r requirements.txt
Install redis
Jumpserver wants to use redis
You can install using yum, or you can compile the installation. Here I use compile to install redis
1. Install redis
[root@Jumpserver src]# wget http://download.redis.io/releases/redis-5.0.5.tar.gz
[root@Jumpserver redis-5.0.5]# make
[root@Jumpserver redis-5.0.5]# cd src/
[root@Jumpserver src]# make install PREFIX=/usr/local/redis
[root@Jumpserver src]# mkdir /usr/local/redis/etc
[root@Jumpserver src]# cd /usr/local/src/redis-5.0.5
[root@Jumpserver redis-5.0.5]# cp -rf redis.conf /usr/local/redis/etc/
2. Modify the configuration file
cat << EOF > /usr/local/redis/etc/redis.conf
daemonize yes
port 6379
bind IP address
protected-mode yes
pidfile "/usr/local/redis/run/redis.pid"
loglevel notice
logfile "/usr/local/redis/logs/redis.log"
save 900 1
stop-writes-on-bgsave-error yes
rdbcompression yes
rdbchecksum  yes
dbfilename dump.rdb
dir "/usr/local/redis/data/rdb/"
timeout 0
tcp-keepalive 300
EOF
3. Create a directory and start redis
#Create pid file directory, log directory, redis persistent directory
[root@Jumpserver redis-5.0.5]# mkdir -p /usr/local/redis/{run,logs}
[root@Jumpserver redis-5.0.5]# mkdir -p /usr/local/redis/data/rdb/

#Start redis
[root@Jumpserver redis-5.0.5]# /usr/local/redis/bin/redis-server /usr/local/redis/etc/redis.conf
Install Mariadb
Jumpserver uses databases and you can choose MySQL or Mariadb.Mariadb versions that need to be equal to or greater than 5.56 and MySQL versions that need to be equal to or greater than 5.6
Here I choose to deploy Mariadb using yum
1. Check if the Mariadb version meets the standards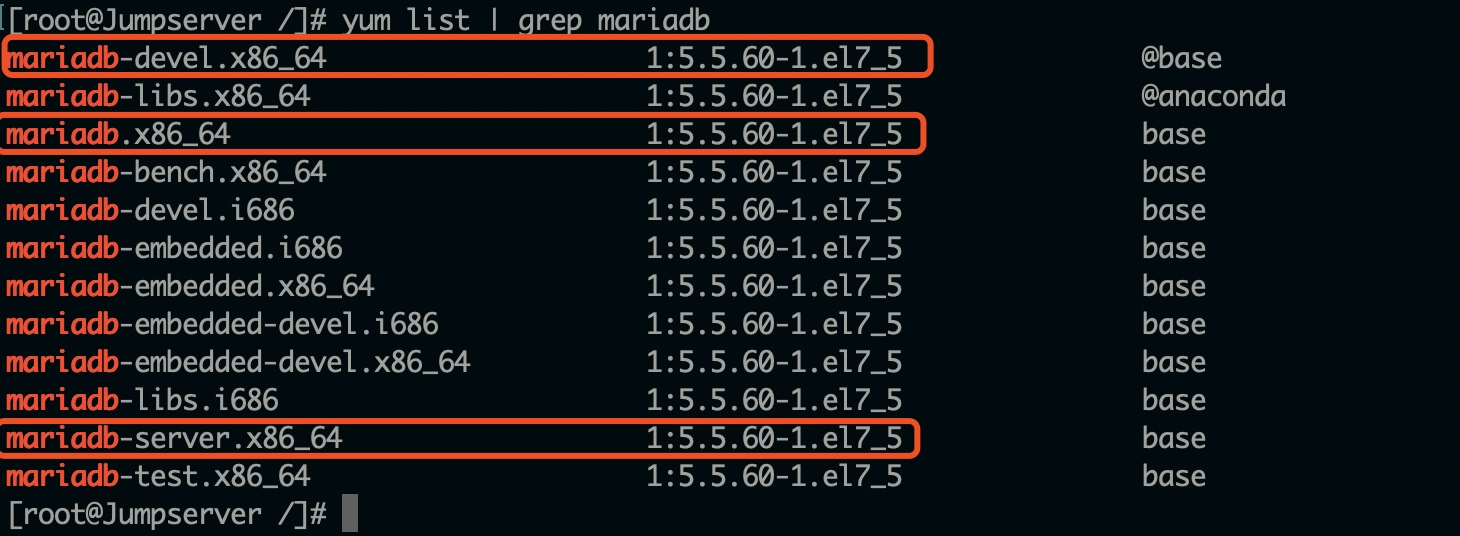 

2. Install Mariadb
[root@Jumpserver /]# yum install mariadb.x86_64 mariadb-devel.x86_64 mariadb-server.x86_64 -y
3. Start Mariadb
[root@Jumpserver /]# systemctl enable mariadb
[root@Jumpserver /]# systemctl start mariadb
4. Modify Mariadb database root password
[root@Jumpserver /]# mysql -uroot -p
Enter password:     #Connect to the database for the first time and return directly
MariaDB [(none)]> set password for 'root'@localhost=password('xxxxxxxx');
MariaDB [(none)]> flush privileges;
5. Create database Jumpserver and authorize
MariaDB [(none)]> grant all on jumpserver.* to 'jumpserver'@'127.0.0.1' identified by 'xxxxxxxx';
MariaDB [(none)]> flush privileges;
Modify Jumpserver configuration file
[root@Jumpserver /]# cp -rf /opt/jumpserver/config_example.yml /opt/jumpserver/config.yml
[root@Jumpserver /]# grep -Ev "#|^$" /opt/jumpserver/config.yml
SECRET_KEY: PwbiQAk0sQCStkR7FwauW3bYCBwJUqPEI4iVs6xyYczfEOWtH       #Encryption key, which can be generated using commands in the configuration file
BOOTSTRAP_TOKEN: PleasgeChangeSameWithJumpserver.                   #Pre-shared Token coco and guacamole are used to register service accounts instead of using the original registration acceptance mechanism
DB_ENGINE: mysql                                                    #Use MySQL database
DB_HOST: 127.0.0.1                                                  #Database Connection Address
DB_PORT: 3306                                                       #Database Connection Port
DB_USER: jumpserver                                                 #Database Connection User
DB_PASSWORD: xxxxxxxx                                               #Database Connection Password
DB_NAME: jumpserver                                                 #Database Name
HTTP_BIND_HOST: 0.0.0.0                                             #Address bound by the Jumpserver runtime, 0.0.0 means that all addresses are bound
HTTP_LISTEN_PORT: 8080                                              #Ports bound by the Jumpserver runtime
REDIS_HOST: xxx.xxx.xx.xxx                                          #Jumpserver Connect redis Host Address
REDIS_PORT: 6379                                                    #Jumpserver connects redis host port
Start Jumpserver
#Make sure you enter the py3 virtual environment before starting jumpserver, -d option for background boot
[root@Jumpserver jumpserver]# source /opt/py3/bin/activate
(py3) [root@Jumpserver jumpserver]# cd /opt/jumpserver/
(py3) [root@Jumpserver jumpserver]# ./jms start -d
Test Access
Access address: http://xxxxx:8080/auth/login/?next=/
Account password defaults to admin/admin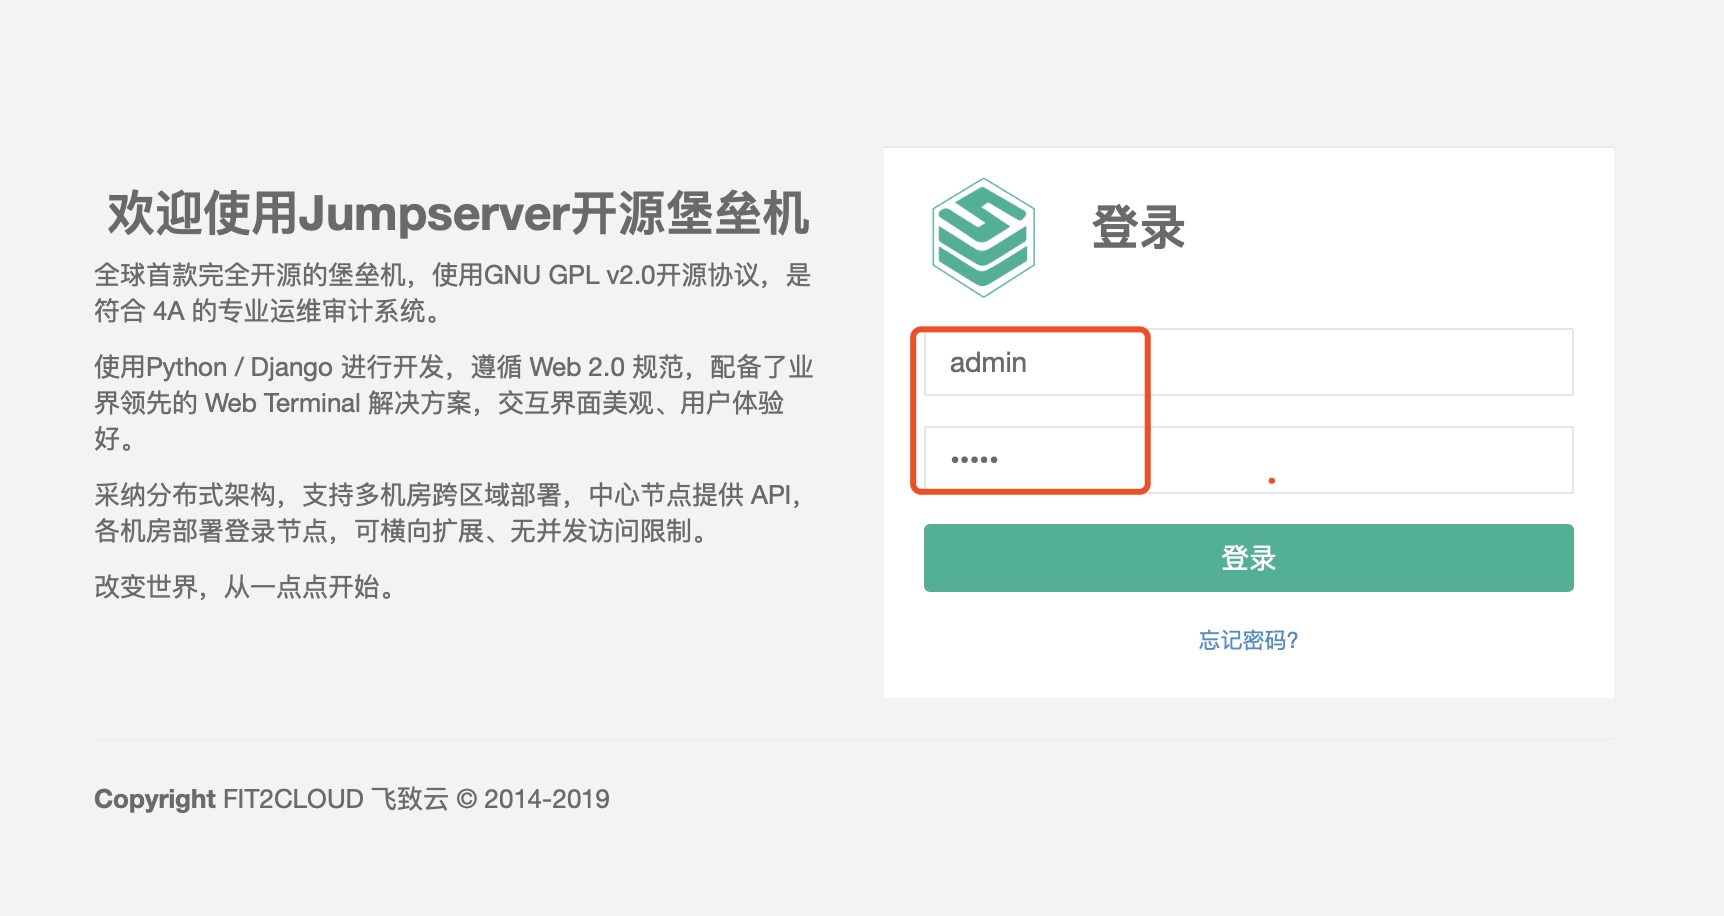 
 

The interface after successful login is still beautiful
Jumpserver Plugin Installation
Jumpserver itself is powerful enough, but it's complemented by the following components.
The components are as follows:
Coco:Coco is SSH Server and Web Terminal Server.Users can access authorized assets directly by logging into SSH or Web Terminal with their own account.You don't need to know the server's account and password. Coco has now been replaced by koko.
Luna:luna is a front-end page for Web Terminal Server, a plug-in that users need to log in using Web Terminal.
Guacamole: Guacamole is a Windows component that allows users to connect to Windows assets through Web Terminals (temporarily only accessible through Web Terminals)
Each component listens on the following ports:
Jumpserver: 8080/tcp

Redis: 6379/tcp

MySQL/Mariadb: 3306/tcp

Nginx: 80/tcp

Koko: SSH 2222/tcp,Web Terminal For 5000/tcp

Guacamole: 8081/tcp
Koko Component Deployment
1.Koko component deployment
[root@Jumpserver ~]# source /opt/py3/bin/activate
(py3) [root@Jumpserver ~]# cd /opt/
(py3) [root@Jumpserver opt]# wget https://github.com/jumpserver/koko/releases/download/1.5.2/koko-master-6d4e69b-linux-amd64.tar.gz
(py3) [root@Jumpserver opt]# tar xf koko-master-6d4e69b-linux-amd64.tar.gz
(py3) [root@Jumpserver opt]# chown -R root:root kokodir
2. Modify Koko Profile
(py3) [root@Jumpserver opt]# cd kokodir/
(py3) [root@Jumpserver kokodir]# cp -rf config_example.yml config.yml

#The Koko configuration file is as follows:
(py3) [root@Jumpserver kokodir]# grep -Ev "#|^$" /opt/kokodir/config.yml
CORE_HOST: http://127.0.0.1:8080
BOOTSTRAP_TOKEN: PleasgeChangeSameWithJumpserver.           #Bootstrap Token, pre-shared secret key to register service account s and terminal s used by coco, consistent with BOOTSTRAP_TOKEN in jumpserver configuration file, can be deleted after registration is complete
3. Start Koko
#Restart Jumpserver first
(py3) [root@Jumpserver jumpserver]# ./jms restart

#Start koko in the foreground first. If the foreground is OK, use the nohup & command to start in the background
(py3) [root@Jumpserver kokodir]# nohup ./koko &

#View koko ko process
(py3) [root@Jumpserver kokodir]# ps -ef|grep koko
root     24694 23736  0 04:44 pts/1    00:00:00 ./koko
root     24734 23736  0 04:45 pts/1    00:00:00 grep --color=auto koko
(py3) [root@Jumpserver kokodir]# ss -anplt | grep koko
LISTEN     0      128         :::5000                    :::*                   users:(("koko",pid=24694,fd=7))
LISTEN     0      128         :::2222                    :::*                   users:(("koko",pid=24694,fd=8))
Luna component deployment
(py3) [root@Jumpserver /]# cd /opt/
(py3) [root@Jumpserver opt]# wget https://github.com/jumpserver/luna/releases/download/1.5.2/luna.tar.gz
(py3) [root@Jumpserver opt]# tar xf luna.tar.gz
(py3) [root@Jumpserver opt]# chown -R root:root luna
Guacamole Component Deployment
Guacamole deployed here using docker
1. Install docker
1)Uninstall older versions docker
yum remove docker \
                  docker-common \
                  docker-selinux \
                  docker-engine

2)Set up yum Warehouse
yum install -y yum-utils \
  device-mapper-persistent-data \
  lvm2

yum-config-manager \
    --add-repo \
    https://download.docker.com/linux/centos/docker-ce.repo

3)install docker-ce Edition
yum list docker-ce --showduplicates | sort -r    #List docker versions
yum install docker-ce-18.06.3.ce -y              #Select the latest version to install

4)modify docker pull Accelerated Files for Mirroring
mkdir /etc/docker
vim /etc/docker/daemon.json
{
 "registry-mirrors": ["http://hub-mirror.c.163.com"]
}

5)start-up docker
systemctl start docker
systemctl enable docker
2. Start Guacamole with docker
docker run --name jms_guacamole -d -p 127.0.0.1:8081:8081 \
-e JUMPSERVER_SERVER=http://127.0.0.1:8080 \
-e BOOTSTRAP_TOKEN=PleasgeChangeSameWithJumpserver \
jumpserver/jms_guacamole:1.5.2
Explanation of parameters:
docker run: Start a container
 --name: Specify the container name
 -d: Background startup container
 -p: Map port 127.0.0.1 of container listening to port 8081 of host machine
 -e: Set environment variables
 -e JUMPSERVER_SERVER=http://127.0.0.1:8080: Set the value http://127.0.0.1:8080 to JUMPSERVER_SERVER
 -e BOOTSTRAP_TOKEN=PleasgeChangeSameWithJumpserver: Set the value PleasgeChangeSameWithJumpserver to -e BOOTSTRAP_TOKEN
 Jumpserver/jms_u guacamole:1.5.2: Download the name and version of the image
 

Configure Nginx to integrate components
1. Install Nginx
1)Preparing the installation environment
[root@Jumpserver ~]# yum install gcc-c++ libtool pcre-devel openssl-devel zlib-devel -y
[root@Jumpserver ~]# useradd -d /home/nginx -M -s /sbin/nologin nginx
[root@Jumpserver ~]# id nginx
uid=1001(nginx) gid=1001(nginx) groups=1001(nginx)

2)Download and install Nginx
[root@Jumpserver ~]# cd /usr/local/src/
[root@Jumpserver src]# wget http://nginx.org/download/nginx-1.15.10.tar.gz
[root@Jumpserver src]# tar xf nginx-1.15.10.tar.gz -C /usr/local/src/
[root@Jumpserver src]# cd /usr/local/src/nginx-1.15.10
[root@Jumpserver nginx-1.15.10]# ./configure --prefix=/usr/local/nginx \
--sbin-path=/usr/local/nginx/sbin/nginx \
--conf-path=/usr/local/nginx/conf/nginx.conf \
--pid-path=/usr/local/nginx/logs/nginx.pid \
--error-log-path=/usr/local/nginx/logs/error.log \
--http-log-path=/usr/local/nginx/logs/access.log \
--with-pcre \
--user=nginx \
--group=nginx \
--with-file-aio \
--with-http_gzip_static_module \
--with-http_stub_status_module \
--with-http_v2_module \
--with-threads \
--with-http_realip_module \
--with-http_ssl_module

[root@Jumpserver nginx-1.15.10]# make && make install
[root@Jumpserver nginx-1.15.10]# echo $?
0
2. Configure Nginx
[root@Jumpserver /]# mv /usr/local/nginx/conf/nginx.conf /usr/local/nginx/conf/nginx.conf.defaults
[root@Jumpserver /]# vim /usr/local/nginx/conf/nginx.conf
#Global Field Configuration
user  nginx nginx;
worker_processes  auto;
error_log logs/error.log info;
pid logs/nginx.pid;
worker_rlimit_nofile 65535;
events {
    use epoll;
    worker_connections  65535;
    multi_accept on;
}

http {
    include       mime.types;
    default_type  application/octet-stream;
    charset utf-8;
    server_tokens off;

#Define Nginx cache settings
    client_header_buffer_size 4096;
    large_client_header_buffers 4 128k;
    client_header_timeout 15;
    client_body_timeout 15;
    send_timeout 65;
    client_max_body_size 10m;
    open_file_cache max=65535 inactive=60s;
    open_file_cache_valid 30s;
    open_file_cache_min_uses 1;
    open_file_cache_errors on;
    server_names_hash_bucket_size 128;

#Define the Nginx log access format
   log_format  main  '$remote_addr" "$remote_user" "[$time_local]" "$request"'
                     ' "$status" "$body_bytes_sent" "$http_referer"'
                     ' "$http_user_agent" "$http_x_forwarded_for" "$gzip_ratio"'
                     ' "$upstream_addr" "$request_time" "$upstream_response_time" "$http_host"';
    access_log  logs/access.log  main;

#Network Connection Function
    sendfile        on;
    autoindex       on;
    tcp_nopush      on;
    tcp_nodelay     on;
    keepalive_timeout  65;
    types_hash_max_size 2048;
    reset_timedout_connection on;

#Compression Configuration
    gzip on;
    gzip_min_length 1k;
    gzip_buffers 16 64K;
    gzip_http_version 1.1;
    gzip_comp_level 6;
    gzip_types text/plain application/x-javascript text/css application/xml application/javascript;
    gzip_vary on;
    gzip_proxied any;
    underscores_in_headers on;
    proxy_ignore_client_abort on;

    include /usr/local/nginx/conf/conf.d/*.conf;
}
3. Create Nginx files and integrate functionality
[root@Jumpserver /]# mkdir /usr/local/nginx/conf/conf.d
[root@Jumpserver /]# vim /usr/local/nginx/conf/conf.d/jumpserver.conf
server {
    listen 80;

    client_max_body_size 100m;          #Video recording and file upload size limit

    location /luna/ {
        try_files $uri / /index.html;
        alias /opt/luna/;               #luna path, if you modify the installation directory, you need to modify it here
    }

    location /media/ {
        add_header Content-Encoding gzip;
        root /opt/jumpserver/data/;     #Recording location, if you change the installation directory, you need to change it here
    }

    location /static/ {
        root /opt/jumpserver/data/;     #Static resource, if you modify the installation directory, you need to modify it here
    }

    location /socket.io/ {
        proxy_pass       http://localhost:5000/socket.io/;
        proxy_buffering off;
        proxy_http_version 1.1;
        proxy_set_header Upgrade $http_upgrade;
        proxy_set_header Connection "upgrade";
        proxy_set_header X-Real-IP $remote_addr;
        proxy_set_header Host $host;
        proxy_set_header X-Forwarded-For $proxy_add_x_forwarded_for;
        access_log off;
    }

    location /coco/ {
        proxy_pass       http://localhost:5000/coco/;
        proxy_set_header X-Real-IP $remote_addr;
        proxy_set_header Host $host;
        proxy_set_header X-Forwarded-For $proxy_add_x_forwarded_for;
        access_log off;
    }

    location /guacamole/ {
        proxy_pass       http://localhost:8081/;
        proxy_buffering off;
        proxy_http_version 1.1;
        proxy_set_header Upgrade $http_upgrade;
        proxy_set_header Connection $http_connection;
        proxy_set_header X-Real-IP $remote_addr;
        proxy_set_header Host $host;
        proxy_set_header X-Forwarded-For $proxy_add_x_forwarded_for;
        access_log off;
    }

    location / {
        proxy_pass http://localhost:8080;
        proxy_set_header X-Real-IP $remote_addr;
        proxy_set_header Host $host;
        proxy_set_header X-Forwarded-For $proxy_add_x_forwarded_for;
    }
}
4. Start the check and start Nginx_
[root@Jumpserver /]# /usr/local/nginx/sbin/nginx -t
nginx: the configuration file /usr/local/nginx/conf/nginx.conf syntax is ok
nginx: configuration file /usr/local/nginx/conf/nginx.conf test is successful
[root@Jumpserver /]# /usr/local/nginx/sbin/nginx -c /usr/local/nginx/conf/nginx.conf
5. Enter the URL and log in
http://IP
Default account password: admin/admin