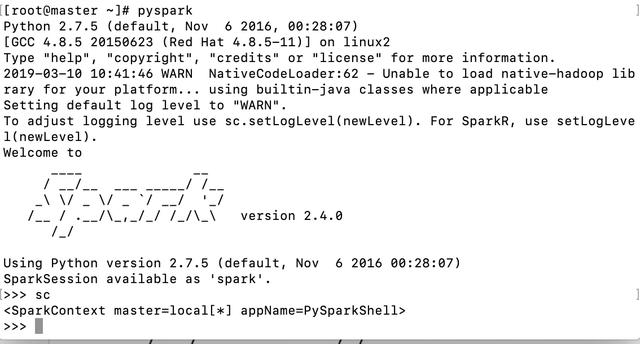
Build our Spark platform from scratch
1. Preparing the centeros environment
In order to build a real cluster environment and achieve a highly available architecture, we should prepare at least three virtual machines as cluster nodes. So I bought three Alibaba cloud servers as our cluster nodes.
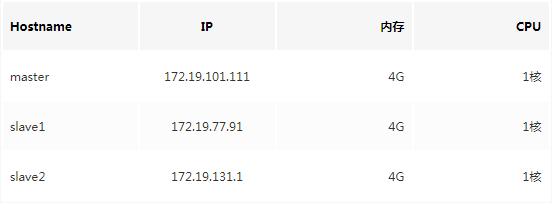
Notice that the master node is the master node, and the slave node is the slave node as the name implies, and naturally it is the node that works for the master node. In fact, in our cluster, master and slave are not so clearly distinguished, because in fact, they are all "working hard". Of course, when building a cluster, we still need to clarify this concept.
2. Download jdk
- 1. Download jdk1.8 tar.gz package
wget https://download.oracle.com/otn-pub/java/jdk/8u201-b09/42970487e3af4f5aa5bca3f542482c60/jdk-8u201-linux-x64.tar.gz
- 2. Decompression
tar -zxvf jdk-8u201-linux-x64.tar.gz
After decompression, you will get

- 3. Configure environment variables
Modify profile
vi /etc/profile
Add as follows
export JAVA_HOME=/usr/local/java1.8/jdk1.8.0_201export JRE_HOME=${JAVA_HOME}/jreexport CLASSPATH=.:${JAVA_HOME}/lib:${JRE_HOME}/libexport PATH=${JAVA_HOME}/bin:$PATH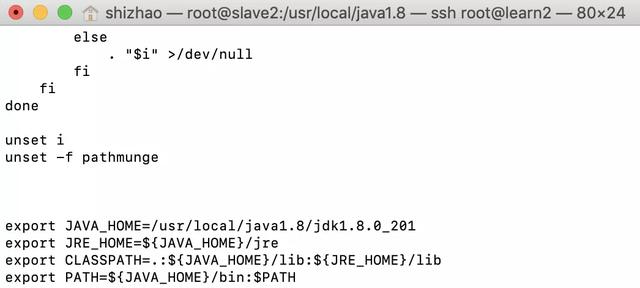
source to make it effective
source /etc/profile
Check whether it is effective
java -version

See the content as shown in the figure to indicate success.
The above operation is exactly the same as the three virtual machines. The above operation is exactly the same as the three virtual machines. The above operation is exactly the same as the three virtual machines.
3. Install zookeeper
- Download zookeeper package
wget https://mirrors.tuna.tsinghua.edu.cn/apache/zookeeper/zookeeper-3.4.13/zookeeper-3.4.13.tar.gz

- decompression
tar -zxvf zookeeper-3.4.13.tar.gz

- Enter the zookeeper configuration directory
cd zookeeper-3.4.13/conf
- Copy profile template
cp zoo_sample.cfg zoo.cfg

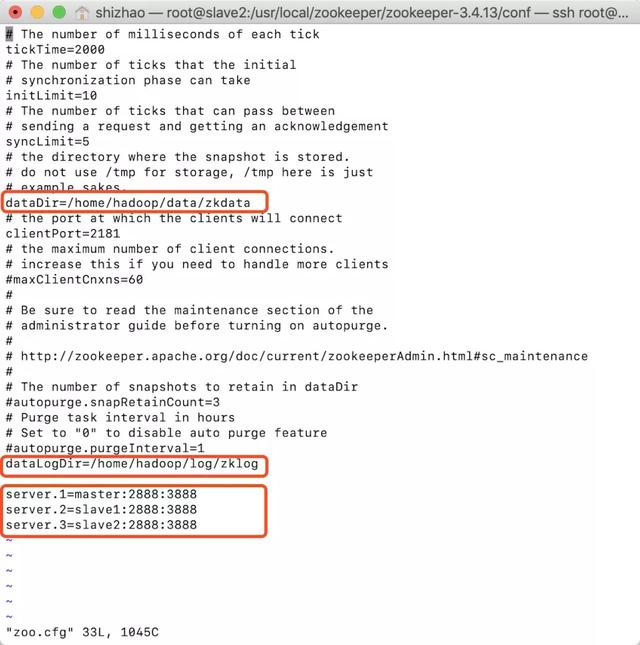
- Modify the content of zoo.cfg after copying
dataDir=/home/hadoop/data/zkdatadataLogDir=/home/hadoop/log/zklogserver.1=master:2888:3888server.2=slave1:2888:3888
- Configure environment variables
export ZOOKEEPER_HOME=/usr/local/zookeeper/zookeeper-3.4.13export PATH=$PATH:$ZOOKEEPER_HOME/bin

- Make environment variables effective
source /etc/profile
- Note the sentence in the previous configuration file and configure the data directory
dataDir=/home/hadoop/data/zkdata
- We create the directory manually and enter it
cd /home/hadoop/data/zkdata/echo 3 > myid

- You need to pay special attention to this
echo 1 > myid
- This is for this configuration, so in the master, we echo 1, echo 2 for slave1, and echo 3 for slave2
server.1=master:2888:3888server.2=slave1:2888:3888server.3=slave2:2888:3888

- Start test after configuration
zkServer.sh start

- Check whether the startup is successful after startup
zkServer.sh status

The above three virtual machines must be operated! Only echo is different the above three virtual machines must be operated! Only echo is different the above three virtual machines must be operated! Only echo is different
- View status after starting in master

- View status after starting in salve1

The Mode in this is different. This is the election mechanism of zookeeper. As for how this mechanism works, here is the following table. There will be special instructions later. So far, the zookeeper cluster has been built
4. Install hadoop
- 1. Download hadoop-2.7.7.tar.gz through wget
wget http://mirror.bit.edu.cn/apache/hadoop/common/hadoop-2.7.7/hadoop-2.7.7.tar.gz
- 2. Decompress after downloading
Extract a hadoop-2.7.7 directory
tar -zxvf hadoop-2.7.7

- 3. Configure hadoop environment variables
Modify profile
vi /etc/profile
- Add hadoop environment variable
export HADOOP_HOME=/usr/local/hadoop/hadoop-2.7.7export PATH=$PATH:$HADOOP_HOME/bin:$HADOOP_HOME/sbin:

- Make environment variables effective
source /etc/profile
- After configuration, check whether it is effective
hadoop version

- Enter hadoop-2.7.7/etc/hadoop
- Edit core-site.xml
vi core-site.xml
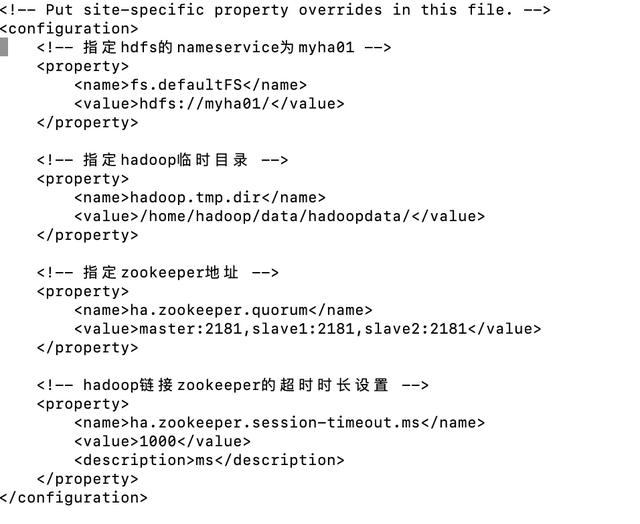
- Add configuration
<configuration> <!-- Appoint hdfs Of nameservice by myha01 --> <property> <name>fs.defaultFS</name> <value>hdfs://Myha01 / < value > < / property > <! -- specify the temporary directory of Hadoop -- < property > < name > hadoop.tmp.dir < / name > < value > / home / Hadoop / data / Hadoop data / < value > < property > <! -- specify the address of zookeeper -- < property > < name > ha. Zookeeper. Quorum < / name > < value > Master: 2181, slave1:2181, slave2: 2181 < / value > / property >< ! -- timeout time setting of Hadoop link zookeeper -- > < property > < name > ha. Zookeeper. Session timeout. MS < / name > < value > 1000 < / value > < description > MS < / description > < property > < configuration >
- Copy mapred-site.xml.template
cp mapred-site.xml.template mapred-site.xml

- Edit mapred-site.xml
vi mapred-site.xml
- Add the following
<configuration> <!-- Appoint mr The framework is yarn mode --> <property> <name>mapreduce.framework.name</name> <value>yarn</value> </property> <!-- Appoint mapreduce jobhistory address --> <property> <name>mapreduce.jobhistory.address</name> <value>master:10020</value> </property> <!-- Task history server's web address --> <property> <name>mapreduce.jobhistory.webapp.address</name> <value>master:19888</value> </property></configuration>
- Edit hdfs-site.xml
vi hdfs-site.xml
- Add the following
<configuration> <!-- Specify number of copies --> <property> <name>dfs.replication</name> <value>1</value> </property> <!-- To configure namenode and datanode Working directory for-Data storage directory --> <property> <name>dfs.namenode.name.dir</name> <value>/home/hadoop/data/hadoopdata/dfs/name</value> </property> <property> <name>dfs.datanode.data.dir</name> <value>/home/hadoop/data/hadoopdata/dfs/data</value> </property> <!-- Enable webhdfs --> <property> <name>dfs.webhdfs.enabled</name> <value>true</value> </property> <!--Appoint hdfs Of nameservice by myha01,Need and core-site.xml Consistent in dfs.ha.namenodes.[nameservice id]For in nameservice Each of NameNode Sets a unique identifier. Configure a comma separated NameNode ID List. This will be DataNode Identify as all NameNode. For example, if you use"myha01"Act as nameservice ID,And use"nn1"and"nn2"Act as NameNodes Identifier --> <property> <name>dfs.nameservices</name> <value>myha01</value> </property> <!-- myha01 There are two below NameNode,Namely nn1,nn2 --> <property> <name>dfs.ha.namenodes.myha01</name> <value>nn1,nn2</value> </property> <!-- nn1 Of RPC Mailing address --> <property> <name>dfs.namenode.rpc-address.myha01.nn1</name> <value>master:9000</value> </property>

- Edit yarn-site.xml
vi yarn-site.xml
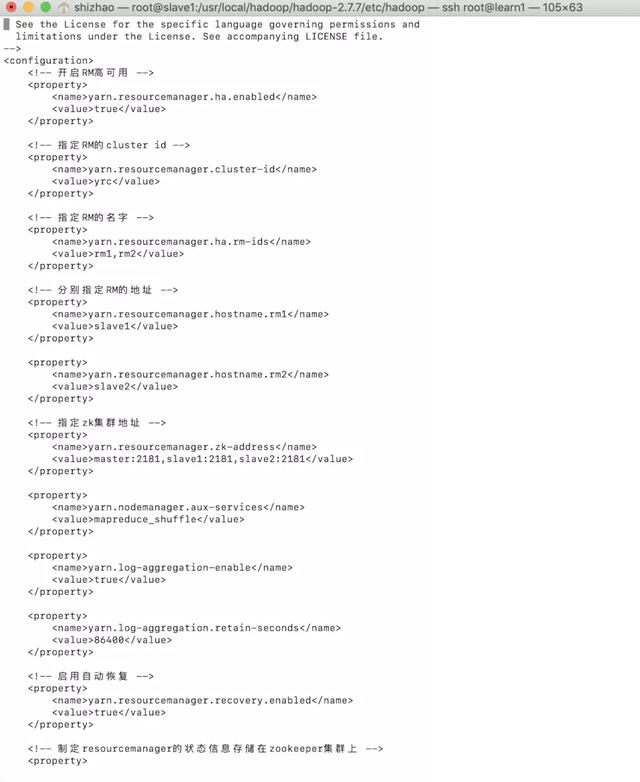
- Add the following
<configuration> <!-- open RM High availability --> <property> <name>yarn.resourcemanager.ha.enabled</name> <value>true</value> </property> <!-- Appoint RM Of cluster id --> <property> <name>yarn.resourcemanager.cluster-id</name> <value>yrc</value> </property> <!-- Appoint RM Name --> <property> <name>yarn.resourcemanager.ha.rm-ids</name> <value>rm1,rm2</value> </property> <!-- Assign separately RM Address --> <property> <name>yarn.resourcemanager.hostname.rm1</name> <value>slave1</value> </property> <property> <name>yarn.resourcemanager.hostname.rm2</name> <value>slave2</value> </property> <!-- Appoint zk Cluster address --> <property> <name>yarn.resourcemanager.zk-address</name> <value>master:2181,slave1:2181,slave2:2181</value> </property> <property> <name>yarn.nodemanager.aux-services</name> <value>mapreduce_shuffle</value> </property> <property> <name>yarn.log-aggregation-enable</name> <value>true</value> </property> <property> <name>yarn.log-aggregation.retain-seconds</name> <value>86400</value> </property> <!-- Enable automatic recovery --> <property> <name>yarn.resourcemanager.recovery.enabled</name> <value>true</value> </property> <!-- Formulate resourcemanager The status information of is stored in zookeeper Cluster --> <property> <name>yarn.resourcemanager.store.class</name> <value>org.apache.hadoop.yarn.server.resourcemanager.recovery.ZKRMStateStore</value> </property></configuration>
- Last edit salves
masterslave1slave2

The above operation is exactly the same as the three virtual machines. The above operation is exactly the same as the three virtual machines. The above operation is exactly the same as the three virtual machines.
- Then you can start hadoop
- First, start the journal node on three nodes. Remember to operate on all three nodes
hadoop-daemon.sh start journalnode
- After the operation is completed, use the jps command to view. You can see

- Where QuorumPeerMain is zookeeper, and JournalNode is the content I started
- Then format the namenode of the master node
hadoop namenode -format

- Pay attention to the red box
- After formatting, check the contents in / home / Hadoop / data / Hadoop data directory

- The contents in the directory are copied to slave1. Slave1 is our standby node. We need it to support the high availability mode. When the master is down, slave1 can continue to work instead of slave1.
cd..scp -r hadoopdata/ root@slave1:hadoopdata/

- This ensures that the primary and secondary nodes keep the same formatting
Then you can start hadoop
- Start HDFS at the master node first
start-dfs.sh

- Then start start-yarn.sh. Note that start-yarn.sh needs to be started in slave2
start-yarn.sh

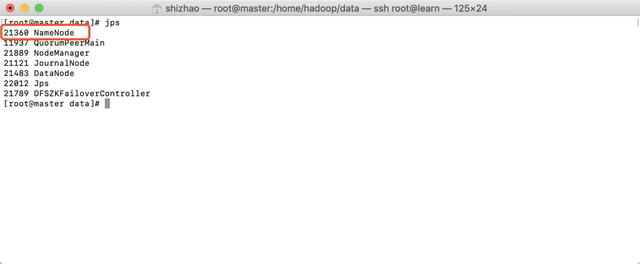
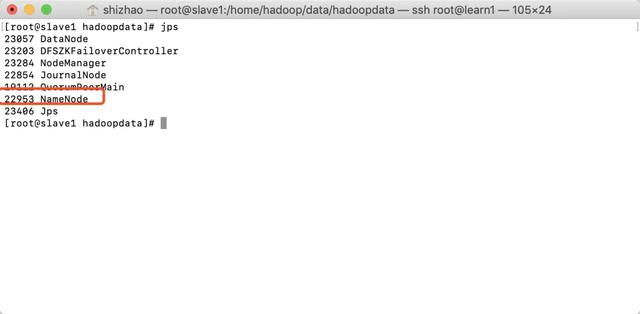
- View three hosts with jps
master
slave1
slave2
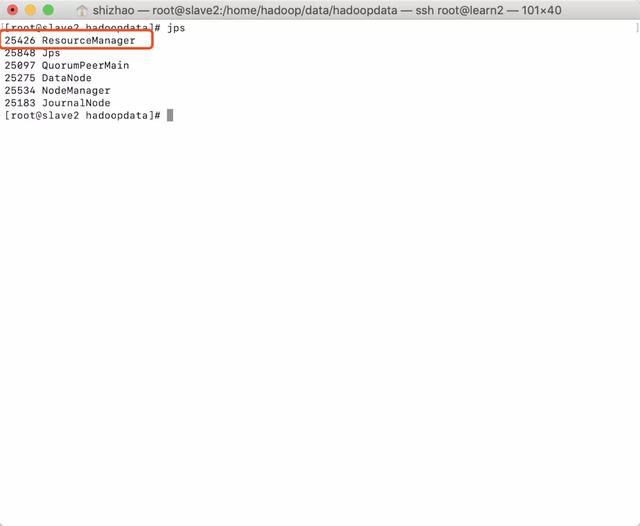
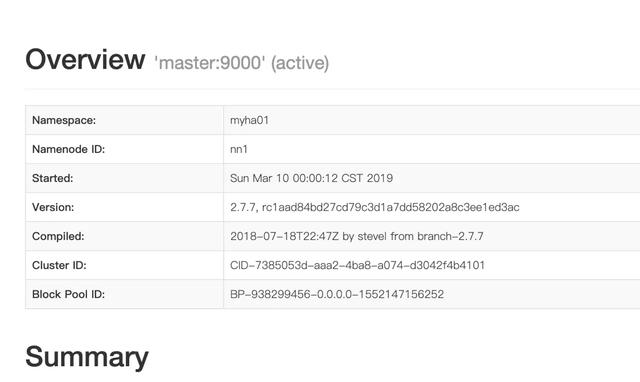
- It is noted that both master and slave1 have namenode. In fact, only one of them is in active state and the other is in standby state. How to confirm? We can enter master:50700 in the browser to access
- Enter slave1:50700 in the browser to access
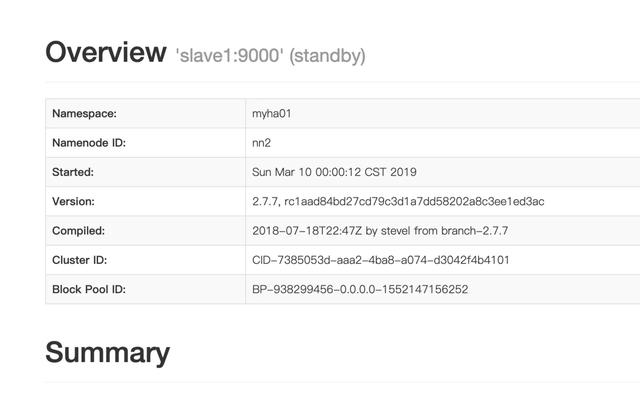
- Another way is to view the two nodes we have configured
hdfs haadmin -getServiceState nn1hdfs haadmin -getServiceState nn2

5. spark installation
- Download spark
wget http://mirrors.shu.edu.cn/apache/spark/spark-2.4.0/spark-2.4.0-bin-hadoop2.7.tgz
- decompression
tar -zxvf spark-2.4.0-bin-hadoop2.7.tgz

- Enter the configuration directory of spark
cd spark-2.4.0-bin-hadoop2.7/conf
- Copy the configuration file spark-env.sh.template
cp spark-env.sh.template spark-env.sh
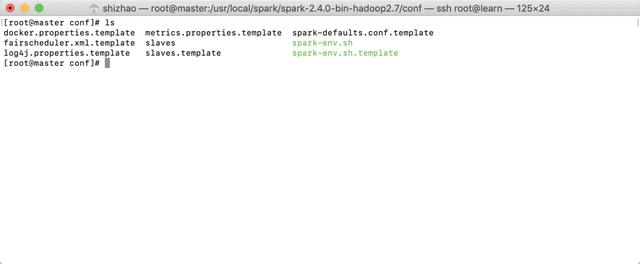
Edit spark-env.sh
vi spark-env.sh
- add to the content
export JAVA_HOME=/usr/local/java1.8/jdk1.8.0_201export HADOOP_HOME=/usr/local/hadoop/hadoop-2.7.7export HADOOP_CONF_DIR=/usr/local/hadoop/hadoop-2.7.7/etc/hadoopexport SPARK_DAEMON_JAVA_OPTS="-Dspark.deploy.recoveryMode=ZOOKEEPER -Dspark.deploy.zookeeper.url=master:2181,slave1:2181,slave2:2181 -Dspark.deploy.zookeeper.dir=/spark"export SPARK_WORKER_MEMORY=300mexport SPARK_WORKER_CORES=1
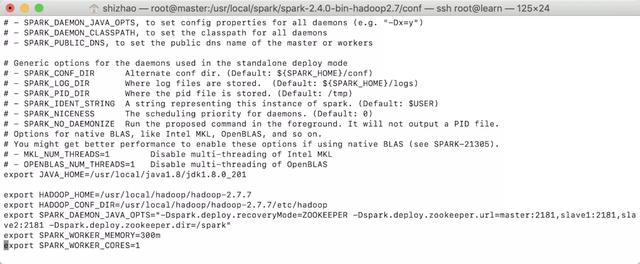
Please copy the java environment variables and hadoop environment variables from the system environment variables. After that, spark'work'memory is the memory that spark runs. Spark'work'cores is the CPU core used by spark
The above operation is exactly the same as the three virtual machines. The above operation is exactly the same as the three virtual machines. The above operation is exactly the same as the three virtual machines.
- Configure system environment variables
vi /etc/profile
- add to the content
export SPARK_HOME=/usr/local/spark/spark-2.4.0-bin-hadoop2.7export PATH=$PATH:$SPARK_HOME/bin
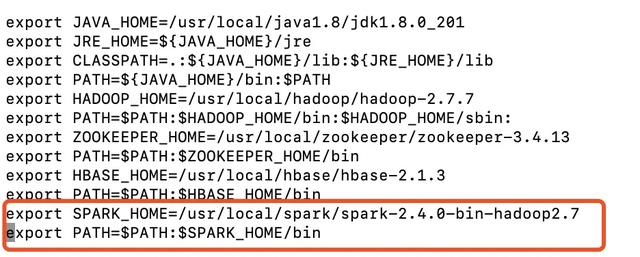
- Copy the slave.template file
cp slaves.template slaves
- Make environment variables effective
source /etc/profile
- Edit slaves
vi slaves
- add to the content
masterslave1slave2
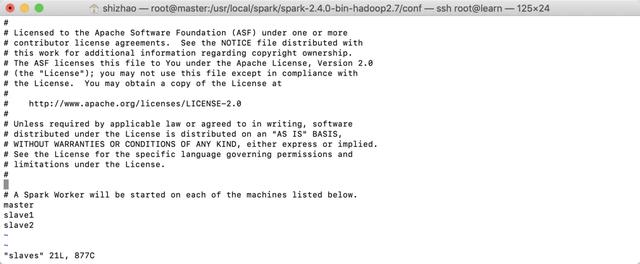
- Finally, we start spark. Note that even if the environment variable of spark is configured, because start-all.sh conflicts with start-all.sh of hadoop, we must enter the start directory of spark to start all operations.
- Enter the startup directory
cd spark-2.4.0-bin-hadoop2.7/sbin
- Execution start
./start-all.sh

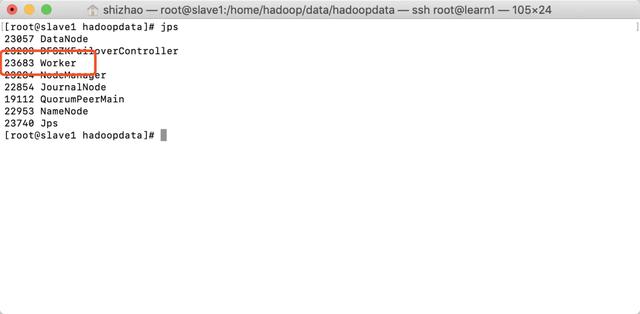
- After execution, use jps to view the status of three nodes
- master:
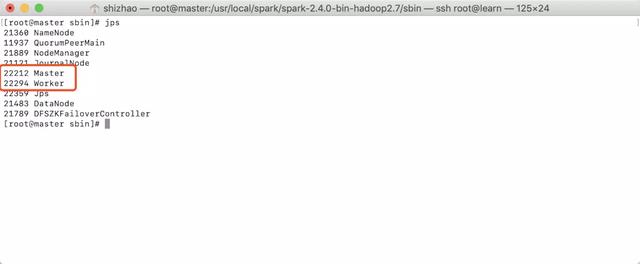
- slave1:
- slave2:
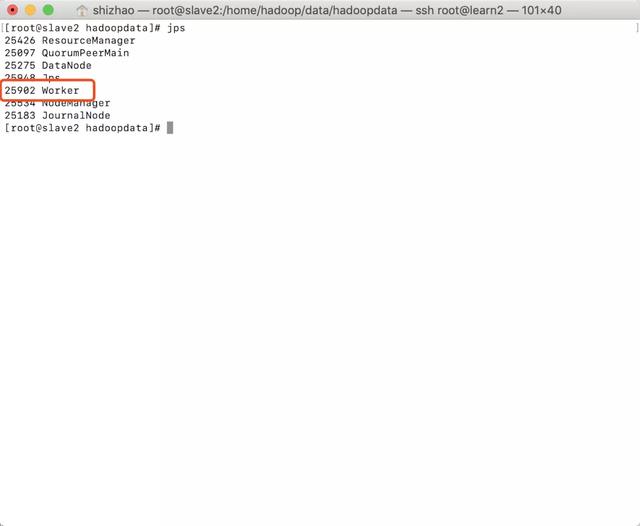
Note that there are spark worker processes in all three nodes, and only master processes in master.
Visit master:8080
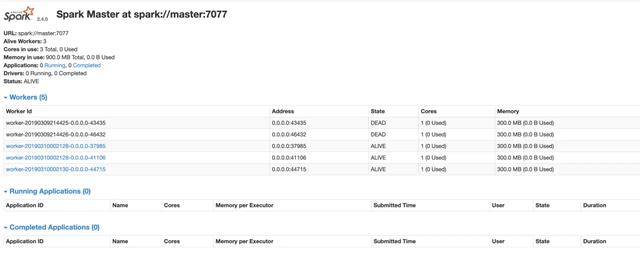
Now we have a formal spark environment.
6. Try using
Since we have configured environment variables, you can type spark shell to start directly.
spark-shell
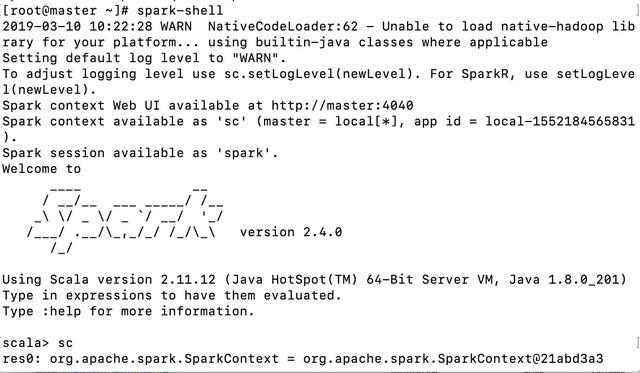
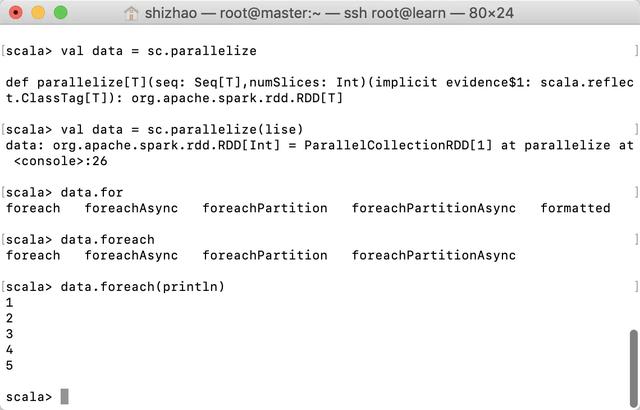
Here we go to spark shell
Then code
val lise = List(1,2,3,4,5)val data = sc.parallelize(lise)data.foreach(println)
`
Or we can go to spark python
pyspark
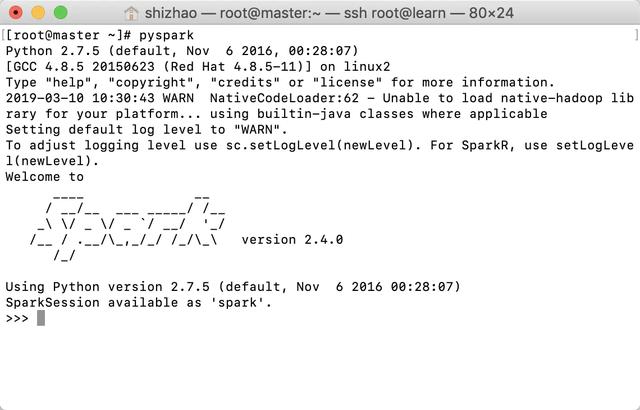
View sparkContext
