ELK Log Platform System Installation
1. Download elk
wget   https://artifacts.elastic.co/downloads/elasticsearch/elasticsearch-5.6.0.tar.gz
wget   https://artifacts.elastic.co/downloads/logstash/logstash-5.6.0.rpm
wget   https://artifacts.elastic.co/downloads/kibana/kibana-5.6.0-x86_64.rpm
II. jdk Installation
[root@host-47-98-97-124 tools]# yum install jdk-8u91-linux-x64.rpm  -y
[root@host-47-98-97-124 tools]# java -version
java version "1.8.0_91"
Java(TM) SE Runtime Environment (build 1.8.0_91-b14)
Java HotSpot(TM) 64-Bit Server VM (build 25.91-b14, mixed mode)
3. Elastic search cluster installation
Note: Installation at two nodes elasticsearch and jdk

3.1 Software installation
[root@host-47-98-97-124 ~]# wget https://artifacts.elastic.co/downloads/elasticsearch/elasticsearch-5.6.0.tar.gz
[root@host-47-98-97-124 ~]# tar axf elasticsearch-5.6.0.tar.gz -C /usr/local/
[root@host-47-98-97-124 ~]# mv /usr/local/elasticsearch-5.6.0  /usr/local/elasticsearch

3.2 Establish ES Users and groups
[root@host-47-98-97-124 ~]# groupadd elasticsearch
[root@host-47-98-97-124 ~]# useradd elasticsearch -g elasticsearch

3.3 Create data directories and log directories
[root@host-47-98-97-124 ~]# mkdir /usr/local/elasticsearch/data
[root@host-47-98-97-124 ~]# mkdir /usr/local/elasticsearch/logs
[root@host-47-98-97-124 ~]# chown -R elasticsearch:elasticsearch /usr/local/elasticsearch/


3.4 modify jvm Spatial allocation (default 2) g)
[root@host-47-98-97-124 ~]# vi /usr/local/elasticsearch/config/jvm.options
//Note: Since the memory of Aliyun ECS server is only 2g in size, it is necessary to modify the jvm space size.
-Xms512m
-Xmx512m

3.5 modify elasticsearch.yml To configure
[root@host-47-98-97-124 ~]# vi /usr/local/elasticsearch/config/elasticsearch.yml

47.98.97.124
[root@host-47-98-97-124 ~]# egrep -Ev "^$|^#" /usr/local/elasticsearch/config/elasticsearch.yml
cluster.name: es-cluster
node.name: es-node1
path.data: /usr/local/elasticsearch/data
path.logs: /usr/local/elasticsearch/logs
network.host: 0.0.0.0
network.publish_host: 47.98.97.124
http.port: 9200
discovery.zen.ping.unicast.hosts: ["47.98.97.124", "47.106.141.17"]
node.max_local_storage_nodes: 2

47.106.141.17
[root@host-47-106-141-17 ~]# egrep -Ev "^$|^#" /usr/local/elasticsearch/config/elasticsearch.yml
cluster.name: es-cluster
node.name: es-node2
path.data: /usr/local/elasticsearch/data
path.logs: /usr/local/elasticsearch/logs
network.host: 0.0.0.0
network.publish_host: 47.106.141.17
http.port: 9200
discovery.zen.ping.unicast.hosts: ["47.98.97.124", "47.106.141.17"]
node.max_local_storage_nodes: 2

//Note:
1.In order to be able to access us using the extranet es Service, network.host: 0.0.0.0
2.Aliyun server defaults to a security group policy, if you modify the security group policy
3.Close the firewall. systemctl stop firewalld
//Only by satisfying these three conditions can es visit the outside world
4.https://www.ibm.com/support/knowledgecenter/zh/SSFPJS_8.5.6/com.ibm.wbpm.main.doc/topics/rfps_esearch_configoptions.html

3.6 Modify system parameter configuration

max number of threads [2048] for user [elasticsearch] is too low, increase to at least [4096]
*          soft    nproc     4096
root       soft    nproc     unlimited

max file descriptors [65535] for elasticsearch process is too low, increase to at least [65536]

//Provisional entry into force: [root@host-47-98-97-124 ~] # ulimit-n 165536
//Permanent Entry into Force: [root@host-47-98-97-124~] # vi/etc/security/limits.conf
root soft nofile 165535
root hard nofile 165535
* soft nofile 165535
* hard nofile 165535
//Restart will take effect, the proposed permanent effect

max virtual memory areas vm.max_map_count [65530] is too low, increase to at least [262144]
[root@host-47-98-97-124 ~]# echo "vm.max_map_count=262144" >>/etc/sysctl.conf
[root@host-47-98-97-124 ~]# sysctl -p

3.7 start-up elasticsearch service
[root@host-47-98-97-124 ~]# su elasticsearch
[elasticsearch@host-47-98-97-124 root]$ /usr/local/elasticsearch/bin/elasticsearch -
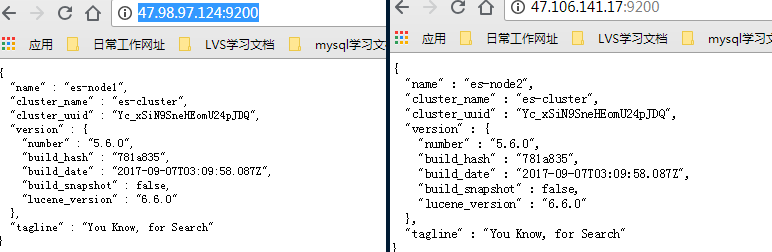
IV. Browser Testing
5. head Plug-in Installation (Single Node Installation)
5.1 Install git and download head plug-in
[root@host-47-98-97-124 ~]# yum instal git -y
[root@host-47-98-97-124 ~]#  git clone git://github.com/mobz/elasticsearch-head.git
Cloning into 'elasticsearch-head'...
remote: Counting objects: 4224, done.
remote: Total 4224 (delta 0), reused 0 (delta 0), pack-reused 4224
Receiving objects: 100% (4224/4224), 2.16 MiB | 556.00 KiB/s, done.
Resolving deltas: 100% (2329/2329), done.

5.2 Install node, npm, grunt

[root@host-47-98-97-124 ~]#  wget https://nodejs.org/dist/v8.9.4/node-v8.9.4-linux-x64.tar.xz --no-check-certificate
 The downloaded jar package is in xz format. The general linux may not be recognized, and xz needs to be installed.
[root@host-47-98-97-124 ~]# yum install xz -y
[root@host-47-98-97-124 ~]# xz -d node-v8.9.4-linux-x64.tar.xz
[root@host-47-98-97-124 ~]# tar -axf  node-v8.9.4-linux-x64.tar
[root@host-47-98-97-124 ~]# vi /etc/profile
export NODE_HOME=/root/node-v8.9.4-linux-x64
export PATH=$PATH:$NODE_HOME/bin
[root@host-47-98-97-124 ~]# source /etc/profile

At this point, you can test whether the node is valid:
[root@host-47-98-97-124 ~]# echo $NODE_HOME
/root/node-v8.9.4-linux-x64
[root@host-47-98-97-124 ~]# node -v
v8.9.4
[root@host-47-98-97-124 ~]# npm -v
5.6.0

Grunt is a very convenient build tool, which can be packaged, compressed, tested, executed, and so on. The head plug-in in the version after 5.0 is launched through grunt. So you need to install grunt
[root@host-47-98-97-124 ~]# npm install -g grunt-cli
/root/node-v8.9.4-linux-x64/bin/grunt -> /root/node-v8.9.4-linux-x64/lib/node_modules/grunt-cli/bin/grunt
+ grunt-cli@1.2.0
added 16 packages in 8.227s
[root@host-47-98-97-124 ~]# grunt -version
grunt-cli v1.2.0

5.3 npm installation dependency
 To the elastic search-head directory, run the command:
[root@host-47-98-97-124 ~]# cd elasticsearch-head/
[root@host-47-98-97-124 elasticsearch-head]# npm install
 If the speed is slow or the installation fails, you can use the domestic mirror:
[root@i-tviv8vaw elasticsearch-head]# npm install -g cnpm --registry=https://registry.npm.taobao.org

5.4 Modify the head source code

Since the head code is still version 2.6, there are many limitations to direct execution, such as inability to access across machines. Therefore, users need to modify two places:

 Modify the server listener address, add the hostname attribute, and set it to ___________*
 [root@host-47-98-97-124 elasticsearch-head]# vi /root/elasticsearch-head/Gruntfile.js
connect: {
        server: {
                options: {
                        hostname: '*',
                        port: 9100,
                        base: '.',
                        keepalive: true
                }
        }
}

Modify Connection Address
[root@host-47-98-97-124 elasticsearch-head]# vi /root/elasticsearch-head/_site/app.js
 Before modification
this.base_uri = this.config.base_uri || this.prefs.get("app-base_uri") || "http://localhost:9200";
After modification
this.base_uri = this.config.base_uri || this.prefs.get("app-base_uri") || "http://47.98.97.124:9200";
Note: Modify localhost to your elastic search server address

5.5 Modify Elastic search configuration file
[root@host-47-98-97-124 elasticsearch-head]# vi /usr/local/elasticsearch/config/elasticsearch.yml
http.cors.enabled: true
http.cors.allow-origin: "*"
Note:
http.cors.enabled: true if HTTP port is enabled, this property specifies whether cross-source REST requests are allowed
 http.cors.allow-origin: "*" If the value of http.cors.enabled is true, this property specifies where REST requests are allowed to come from.

5.6 Run head
 Start with the elastic search service
 Then in the head directory, execute the packages that have been downloaded since npm install:
npm install Finally, start nodejs
grunt server

[root@host-47-98-97-124 elasticsearch-head]# pwd
/root/elasticsearch-head
[root@host-47-98-97-124 elasticsearch-head]# npm install
[root@host-47-98-97-124 elasticsearch-head]# nohup grunt server &

If an error is reported:
npm ERR! code ELIFECYCLE
npm ERR! errno 1
npm ERR! phantomjs-prebuilt@2.1.16 install: `node install.js`
npm ERR! Exit status 1
npm ERR!
npm ERR! Failed at the phantomjs-prebuilt@2.1.16 install script.
npm ERR! This is probably not a problem with npm. There is likely additional logging output above.

Solution:
[root@host-47-98-97-124 elasticsearch-head]# npm install phantomjs-prebuilt@2.1.16 --ignore-scripts
 Reference url: https://blog.csdn.net/z1035075390/article/details/73247412
[root@host-47-98-97-124 elasticsearch-head]# nohup grunt server &
[1] 20027

5.7 test
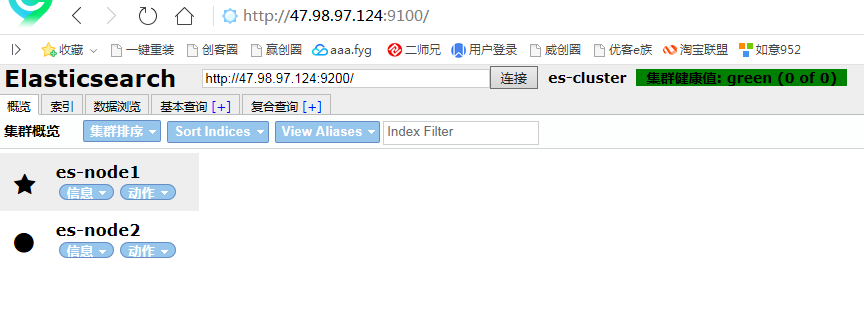
It's strange to find that using Google Browser to display the status of the cluster is not connected, and using 360 browser to display the status of the cluster is normal!!!
5. logstash Installation
Official website: https://www.elastic.co/guide/en/logstash/5.6/index.html

5.1 install logstash
[root@host-47-98-97-124 elk]# yum install logstash-5.6.6.rpm -y
[root@host-47-98-97-124 elk]# rpm -qc logstash
/etc/logstash/jvm.options
/etc/logstash/log4j2.properties
/etc/logstash/logstash.yml
/etc/logstash/startup.options

5.2 inspect jvm space
[root@host-47-98-97-124 elk]# vi /etc/logstash/jvm.options
//Note: Prevent the log stash service from starting successfully due to too little physical memory

5.3  Test: Write data to standard output
[root@host-47-98-97-124 elk]# /usr/share/logstash/bin/logstash -e 'input { stdin {} } output { stdout {codec => rubydebug } }'
The stdin plugin is now waiting for input:
hello,world!
{
      "@version" => "1",
          "host" => "host-47-98-97-124",
    "@timestamp" => 2018-07-21T15:10:46.140Z,
       "message" => "zhangjunchao"
}

//Note: https://www.elastic.co/guide/en/logstash/5.6/running-logstash-command-line.html

//Test: Write the data into elastic search, and you can query the data by accessing the head plug-in
[root@host-47-98-97-124 elk]#  /usr/share/logstash/bin/logstash -e 'input { stdin{} } output { elasticsearch {hosts => ["47.98.97.124:9200"]} stdout{codec => rubydebug} }'
The stdin plugin is now waiting for input:
hello,word!
{
      "@version" => "1",
          "host" => "host-47-98-97-124",
    "@timestamp" => 2018-07-21T15:27:32.858Z,
       "message" => "zhangjunchao"
}

Note:
1. The - e parameter is used on the command line, which allows Logstash to accept settings directly from the command line. This is especially fast to help us repeatedly test whether the configuration is correct without writing the configuration file.
2. Reasonable setting of JVM memory size of logstash, i.e. / etc/logstash/jvm.options
3. Logstash's incoming data is not called line, but event. logstash can process multi-line data.
4. Logstash 5.6.0, the elastic search plug-in in Output plugins, defining hosts is quite different from the previous version. Specifically, we can refer to the official logstash 5.1.2 version to define the rules of elastic search parameter definition.
6. kibana Installation
6.1 install kibana
[root@host-47-98-97-124 elk]# yum install kibana-5.6.0-x86_64.rpm -y
[root@host-47-98-97-124 elk]# rpm -qc kibana
/etc/kibana/kibana.yml

6.2 To configure kibana
[root@host-47-98-97-124 elk]# vi /etc/kibana/kibana.yml
[root@host-47-98-97-124 elk]# egrep -Ev "^#|^$" /etc/kibana/kibana.yml
server.port: 5601
server.host: "0.0.0.0"  #Aliyun's access to the public network must be changed to 0.0.0.0
elasticsearch.url: "http://47.98.97.124:9200"
kibana.index: ".kibana"   #Creating a kibana index does not require special storage of kibana's data
elasticsearch.username: "admin"
elasticsearch.password: "admin"

//Note:
1.Aliyun's access to the public network must be changed to 0.0.0.0
2.Aliyun must configure security group, release access ports and use public network access. IP

 6.3 Background boot kibana service
 [root@host-47-98-97-124 elk]# /usr/share/kibana/bin/kibana &

6.4  Start login
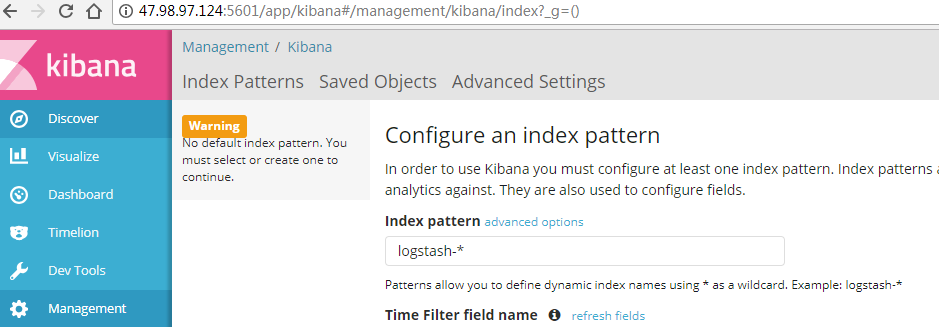
So far, kibana has been preliminarily installed!