1. Introduction to Docker-Compose
Compose is a tool for defining and running container docker applications.With Compose, you can use YAML files to fit all the services your application needs.Then, with one command, you can create and start all services from the YAML file pairing.Then you need to understand the basic syntax of YAML files.
Basic syntax for YAML files:
- Case sensitive;
- Use indentation to represent hierarchical relationships;
- Indentation does not allow tab s, only spaces;
- The number of indented spaces is not important as long as the elements of the same level are left-aligned.
- "#" denotes a comment;
Docker-Compose is a container organization tool.Using a.yml or.yaml file, write the deployment method, file mapping, container port mapping of all containers in one configuration file, and execute the docker-compose up command like a script, install and deploy containers one by one.
Dockerfile allows users to manage a single application container; Compose allows users to define a set of associated application containers in a template (in YAML format);
Docker Compose divides managed containers into three layers:
- project;
- service;
- Containers;
All yml files in the docker compose runtime directory form a project that contains multiple services, each of which defines the mirror, parameters, and dependencies on which the container runs.A service can include multiple container instances.
docker-compose is the docker container organization tool, which mainly solves the management of multiple containers that depend on each other.
2. Installation and use of docker-compose tools
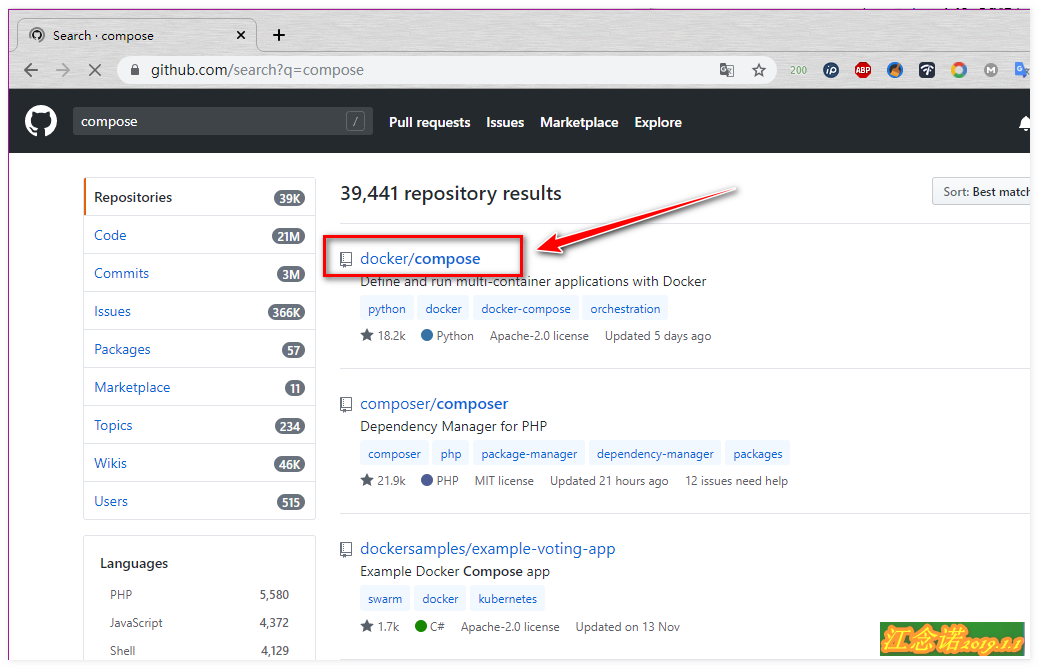
If you want to use docker-compose as a container orchestration tool, the host must be docker-based, for reference docker detailed installation tutorial .Once the docker environment has been resolved, you can download the docker-compose command and go to the GitHub website Download as shown in the following figure: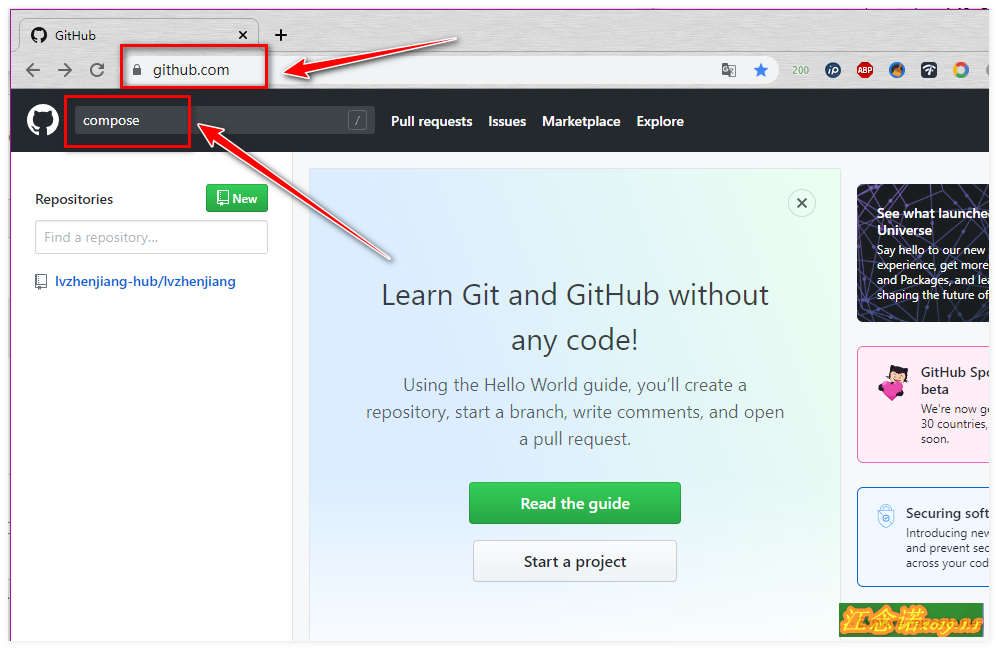

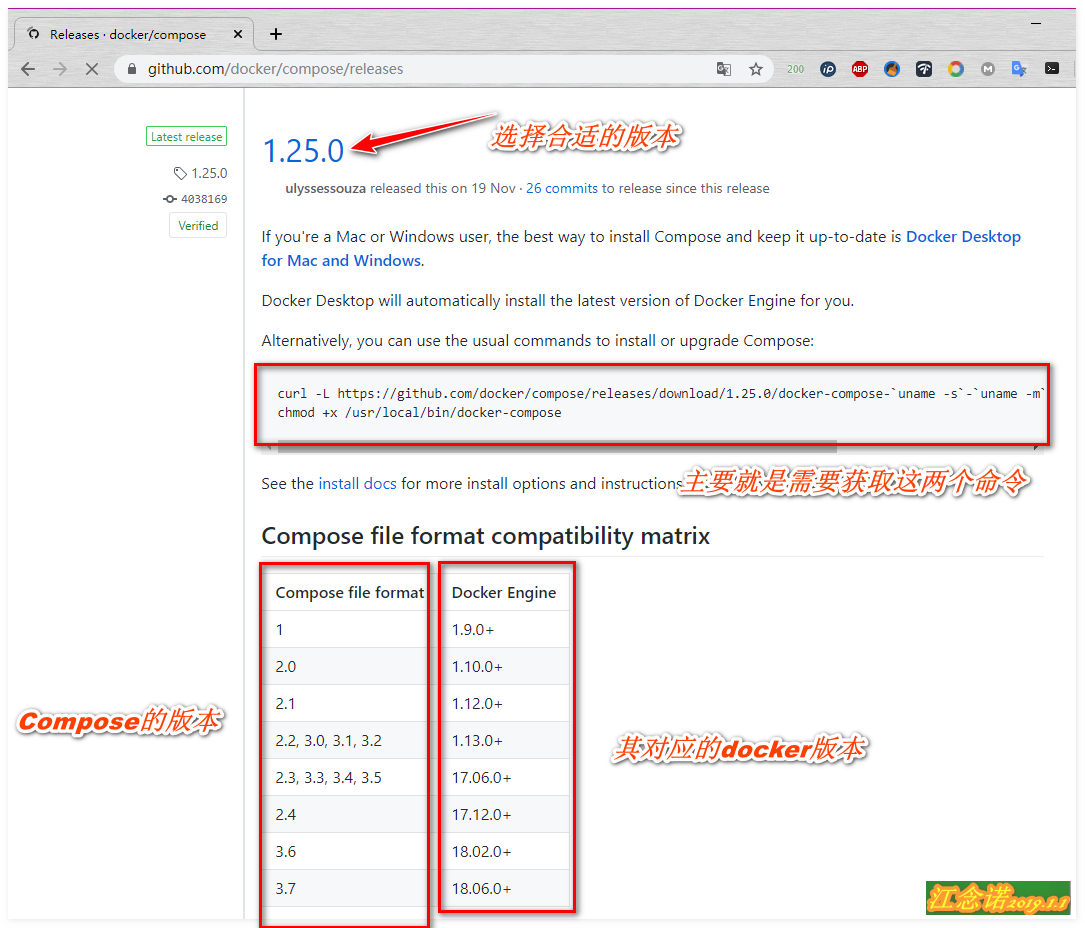
When downloading the compose tool, first check the docker version on your machine!
[root@docker ~]# Docker-v //View docker version information
Docker version 18.09.0, build 4d60db4
//This time using version 18.9.0
If the docker version is too low, you can look for other versions of the docker-compose tool yourself.After selecting the appropriate version, execute the commands found on the github website.
[root@docker ~]# curl -L https://github.com/docker/compose/releases/download/1.25.0/docker-compose-`uname -s`-`uname -m` -o /usr/local/bin/docker-compose
[root@docker ~]# chmod +x /usr/local/bin/docker-compose
If the network speed is not good, you can use the following commands:
[root@docker ~]# curl -L https://get.daocloud.io/docker/compose/releases/download/1.25.0/docker-compose-`uname -s`-`uname -m` > /usr/local/bin/docker-compose
[root@docker ~]# chmod +x /usr/local/bin/docker-compose
//Download with Dow Cloud Accelerator
[root@docker ~]# Docker-compose-v //View version information for the tool
docker-compose version 1.25.0, build 0a186604
3. Writing.yml Documents
(1) Build a simple Nginx service.yml file
[root@docker ~]# vim /root/.vimrc
set tabstop=2
[root@docker ~]# source /root/.vimrc
//Because the tab key is used more often, the number of spaces represented by a tab key is set beforehand.
[root@docker ~]# mkdir compose_test
[root@docker ~]# cd compose_test/
//Create a test directory to store the docker-compose.yml file
//It is recommended that there be only one docker-compose.yml file in a directory
[root@docker compose_test]# vim docker-compose.yml //Write a docker-compose.yml file
version: "3"                             //Specify the version of the grammar
services:                                //Define Services
  nginx:
    container_name: web_nginx           //Running Container Name
    image: nginx                                   //Mirror used
    restart: always                                //Start with docker service startup
    ports:
      - 90:80                                         //Mapped Port
    volumes:
      - /root/compose_test/webserver:/usr/share/nginx/html           //Directories mounted locally and containers
//Write a file with indentation in mind
[root@docker compose_test]# docker-compose up -d
//Use the docker-compose.yml file in the current directory to generate the appropriate container
//The'-d'option indicates running in the background. If not specified, running in the foreground by default will occupy the terminal
[root@docker compose_test]# docker ps //View running containers
CONTAINER ID        IMAGE               COMMAND                  CREATED             STATUS              PORTS                NAMES
c674041cc65b        nginx               "nginx -g 'daemon of..."   8 minutes ago       Up 8 minutes        0.0.0.0:90->80/tcp   web_nginx
[root@docker compose_test]# echo "hello world" > webserver/index.html
//Create Test Page
[root@docker compose_test]# curl 127.0.0.1:90
hello world
//Access Test
[root@docker compose_test]# docker-compose stop
//Stop the container specified in the file from the.yml file
[root@docker compose_test]# docker ps
CONTAINER ID        IMAGE               COMMAND             CREATED             STATUS              PORTS               NAMES
//View effects
[root@docker ~]# docker-compose -f /root/compose_test/docker-compose.yml up -d
//You can use the'-f'option to specify containers defined in the yml file startup file
(2) compose+dockerfile to build a mirror
[root@localhost ~]# MKDIR compose & & CD compose //Create a test directory and enter
[root@localhost compose]# vim Dockerfile //Create dockerfile
FROM nginx:latest
ADD html /usr/share/nginx/html
[root@localhost compose]# vim docker-compose.yml //Write YML file
version: "3"
services:
  nginx:
    build: .                                //This specifies the path of the dockerfile, which can be written as relative or absolute
    container_name: mynginx                    //Generated container name
    image: mynginx                                    //Mirror name generated using dockerfile
    restart: always
    ports:
      - 70:80
[root@localhost compose]# mkdir html
[root@localhost compose]# Echo "hello world" > html/index.html//Create web page directory
[root@localhost compose]# docker-compose build //is to mirror the dockerfile file
[root@localhost compose]# Docker-compose up-d // Generate container directly, previous command can be ignored
[root@localhost compose]# curl 127.0.0.1:70
hello world
//Test results
(3) Using.yml file to build blog platform
[root@localhost ~]# MKDIR WordPress & & CD WordPress //Create test directory
[root@localhost wordpress]# vim docker-compose.yml //Write YML file
version: "3.1"
services:
  wordprss:
    image: wordpress                          //Specify the mirror to use
    restart: always
    ports:
      - 8080:80                                          //Specify mapped ports
    environment:                                       //Modify environment variables inside containers
      WORDPRESS_DB_HOST: db
      WORDPRESS_DB_USER: wordpress
      WORDPRESS_DB_PASSWORD: 123.com
      WORDPRESS_DB_NAME: wordpress
  db:
    image: mysql:5.7
    restart: always
    environment:
      MYSQL_DATABASE: wordpress
      MYSQL_USER: wordpress
      MYSQL_PASSWORD: 123.com
      MYSQL_ROOT_PASSWORD: 123.com
[root@localhost wordpress]# Docker-compose up-d //Generate the appropriate container and run in the background
[root@localhost wordpress]# Netstat-anpt | grep 8080 //Make sure the port is listening
tcp6       0      0 :::8080                 :::*                    LISTEN      5546/docker-proxy
[root@localhost wordpress]# docker ps | grep word //Make sure the container is running
81dd5fe032a6        wordpress           "docker-entrypoint.s..."   7 minutes ago       Up 7 minutes        0.0.0.0:8080->80/tcp   wordpress_wordprss_1
702b530d7679        mysql:5.7           "docker-entrypoint.s..."   7 minutes ago       Up 7 minutes        3306/tcp, 33060/tcp    wordpress_db_1
[root@localhost wordpress]# echo "net.ipv4.ip_forward = 1" >> /etc/sysctl.conf
[root@localhost wordpress]# sysctl -p
net.ipv4.ip_forward = 1
Now you can access the test page.Figure: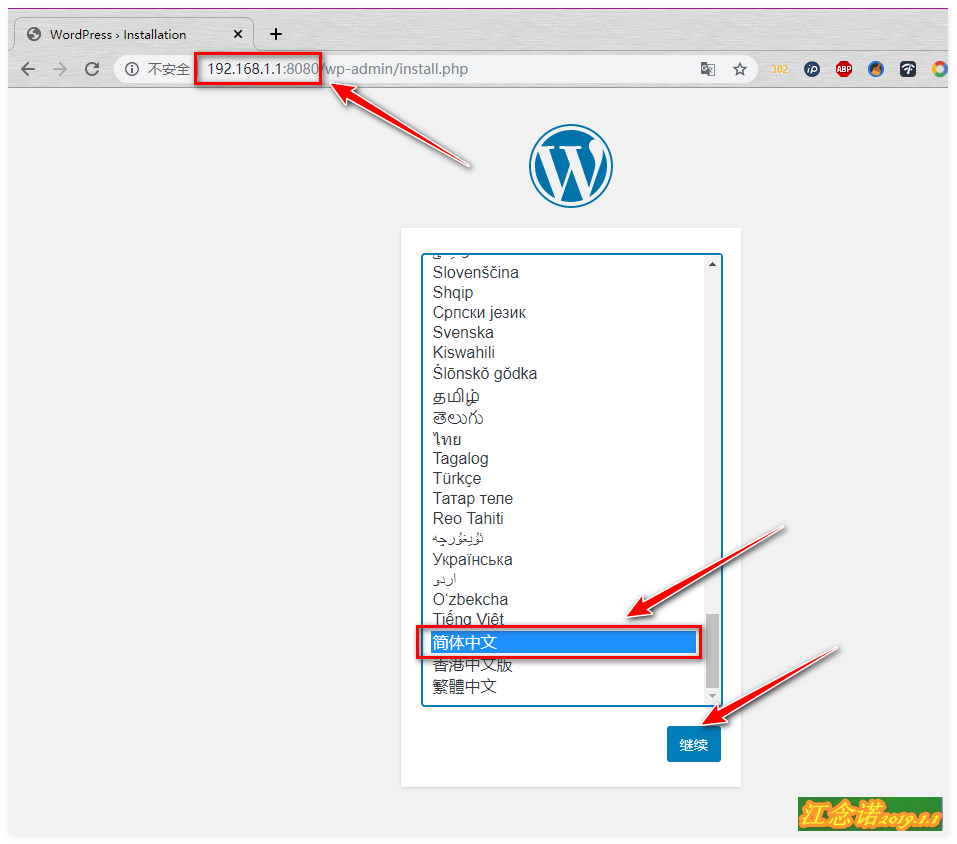
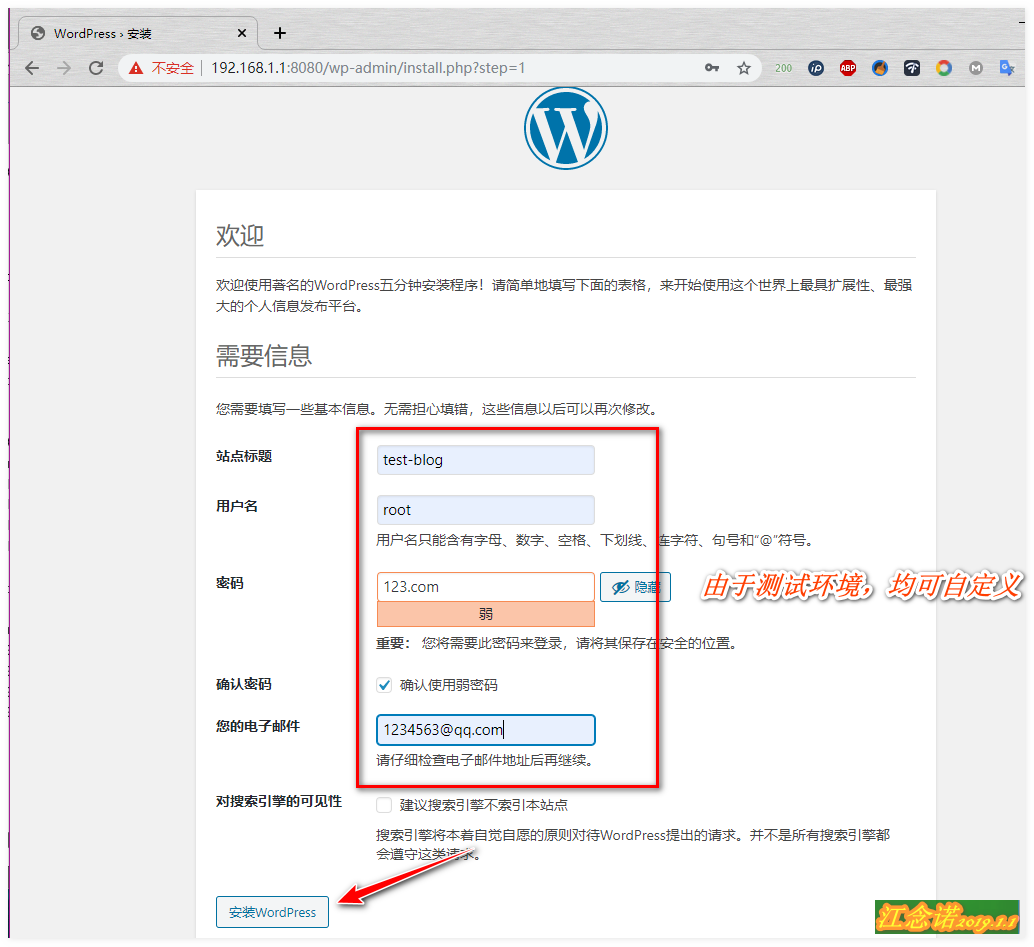

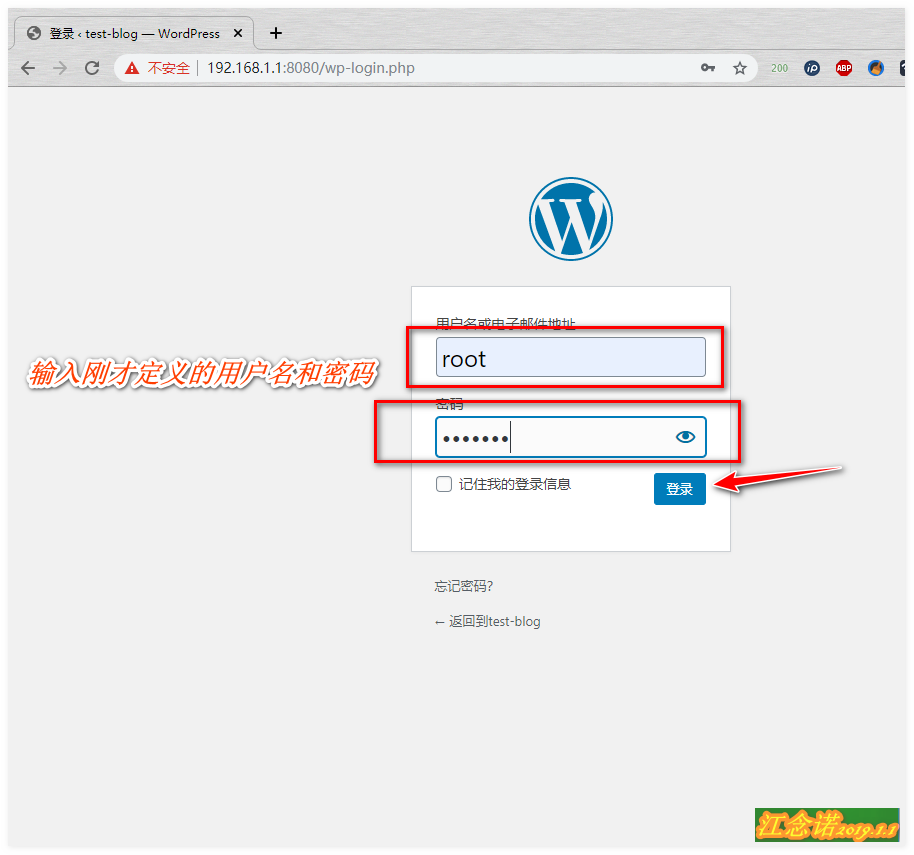

Visit your blog successfully!
3. Monitoring of Docker
(1) docker's own monitoring commands
[root@localhost ~]# docker top wordpress_wordprss_1 //View container usage
UID                 PID                 PPID                C                   STIME               TTY                 TIME                CMD
root                5601                5569                0                   20:53               ?                   00:00:00            apache2 -DFOREGROUND
33                  6073                5601                0                   20:54               ?                   00:00:00            apache2 -DFOREGROUND
33                  6074                5601                0                   20:54               ?                   00:00:00            apache2 -DFOREGROUND
33                  6075                5601                0                   20:54               ?                   00:00:00            apache2 -DFOREGROUND
33                  6076                5601                0                   20:54               ?                   00:00:00            apache2 -DFOREGROUND
33                  6077                5601                0                   20:54               ?                   00:00:00            apache2 -DFOREGROUND
33                  6096                5601                0                   20:54               ?                   00:00:00            apache2 -DFOREGROUND
33                  6098                5601                0                   20:54               ?                   00:00:00            apache2 -DFOREGROUND
33                  6099                5601                0                   20:54               ?                   00:00:00            apache2 -DFOREGROUND
33                  6100                5601                0                   20:54               ?                   00:00:00            apache2 -DFOREGROUND
33                  6155                5601                0                   20:57               ?                   00:00:00            apache2 -DFOREGROUND
[root@localhost ~]# docker stats wordpress_wordprss_1
[root@localhost ~]# docker logs wordpress_wordprss_1
//These three are the containers'own monitoring commands
(2)sysdig
[root@localhost ~]# docker run -it --rm --name sysdig --privileged=true --volume=/var/run/docker.sock:/host/var/run/docker.sock --volume=/dev:/host/dev --volume=/proc:/host/proc:ro --volume=/boot:/host/boot:ro --volume=/lib/modules:/host/lib/modules:ro --volume=/usr:/host/usr:ro sysdig/sysdig
//Create a container and automatically enter it
//--rm: Deleted as the container exits;
//--privileged=true: grant special privileges;
root@711dbeb59fdd:/# csysdig //Execute this command
Figure: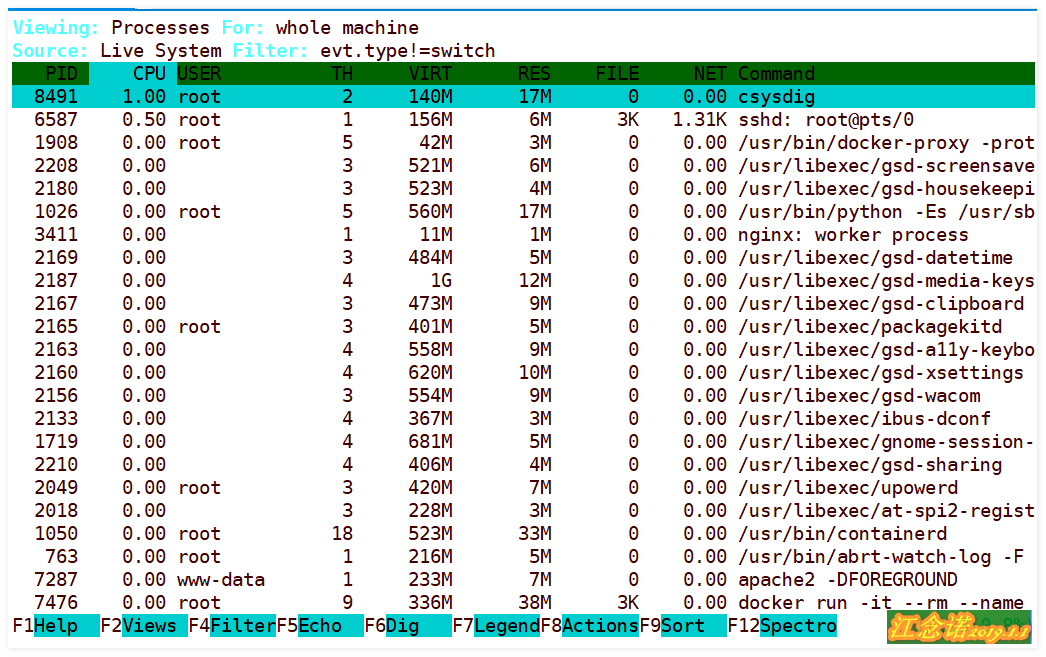
You can use keyboard and mouse to operate in the picture!
(3)scope
[root@localhost ~]#  curl -L git.io/scope -o /usr/local/bin/scope
[root@localhost ~]#  Chmod +x/usr/local/bin/scope//Download installation script
[root@localhost ~]#  scope launch //Start as container
........................
Weave Scope is listening at the following URL(s):
  * http://172.21.0.1:4040/
  * http://192.168.122.1:4040/
  * http://172.22.0.1:4040/
  * http://172.20.0.1:4040/
  * http://172.18.0.1:4040/
  * http://172.19.0.1:4040/
  * http://192.168.1.1:4040/
//Access based on the hint at the end
Figure: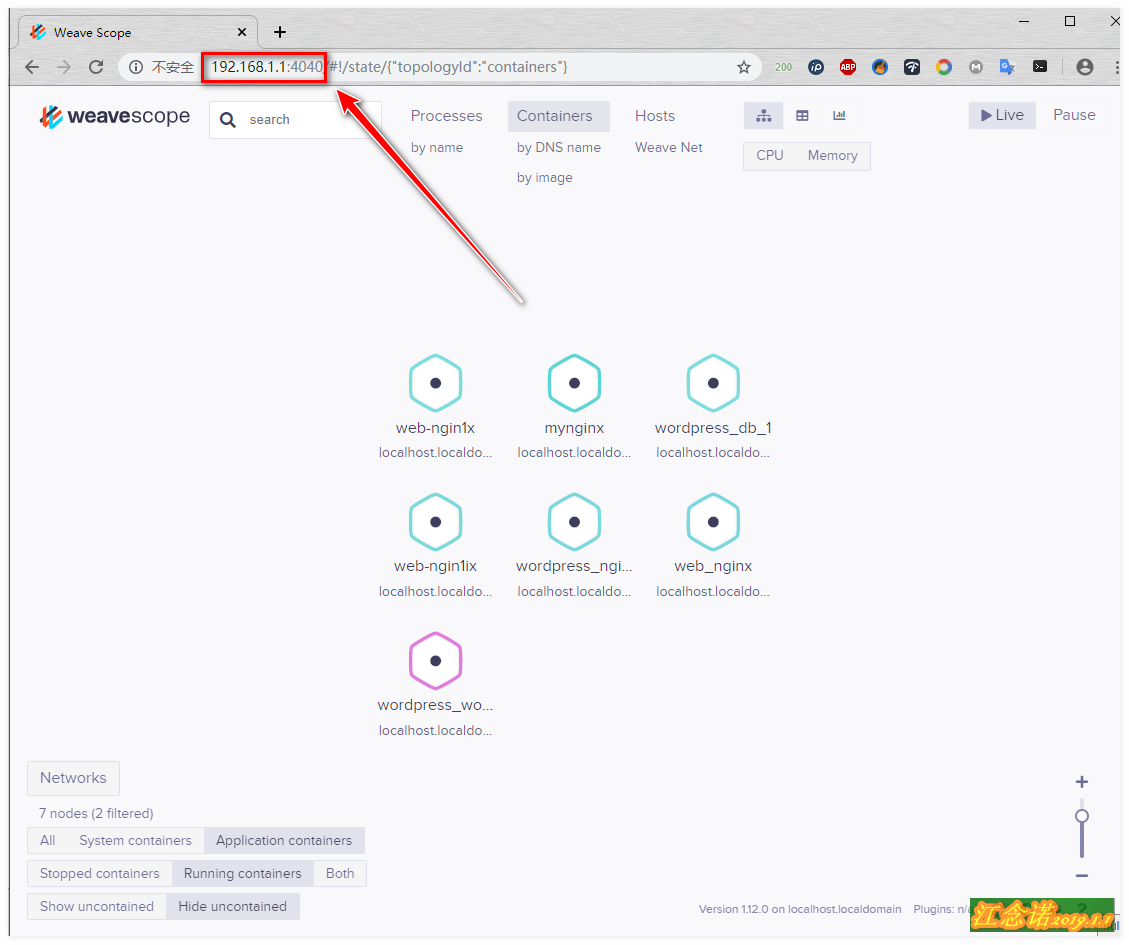
Follow the tips in the diagram and click to test yourself!
If you want to monitor both hosts, the hostname must be distinguished as follows:
[root@dockerA ~]#  curl -L git.io/scope -o /usr/local/bin/scope
[root@dockerA ~]#  chmod +x /usr/local/bin/scope
[root@dockerA ~]# scope launch 192.168.1.1 192.168.1.2 // Prefer specifying the local IP and then specify the other party's IP
[root@dockerA ~]# Docker run-itd --name HTTP httpd //run a container for testing
[root@dockerB ~]#  curl -L git.io/scope -o /usr/local/bin/scope
[root@dockerB ~]#  chmod +x /usr/local/bin/scope
[root@dockerB ~]# scope launch 192.168.1.2 192.168.1.1
[root@dockerB ~]# docker run -itd --name nginx nginx
Access (either dockerA or dockerB will do) test: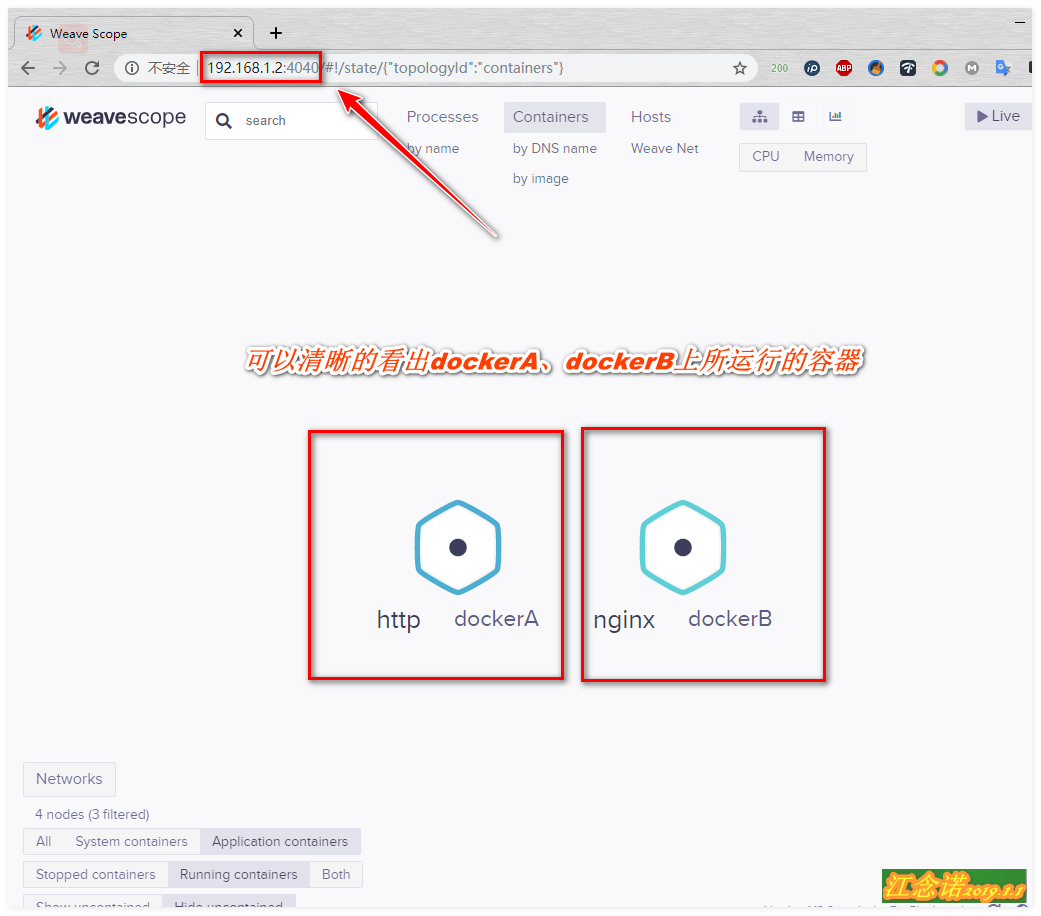
__________