1. Introduction to Docker Mirrors
1. Introduction of Mirror Composition
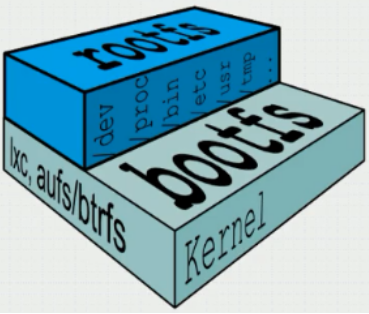
Hierarchical, with bootfs at the bottom and rootfs above
bootfs can be of type btrfs, aufs, lxc and require a kernel, but this kernel is only for user controls that launch containers
rootfs is represented as a root file system, which contains many files and directories
Both layers are mounted read-only when the container is started.
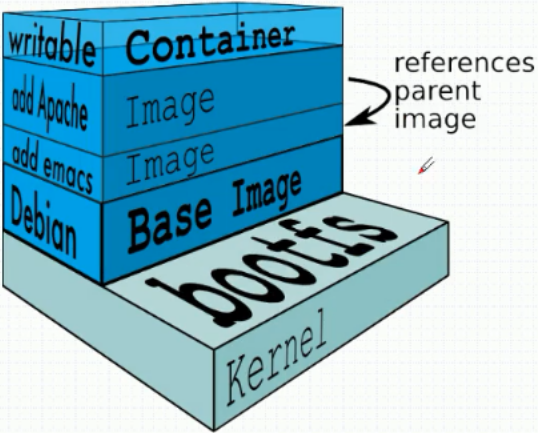
The basic process of building a mirror
Prepare a bootfs first
Then install a minimum system (base image)
Install the application on your system, and if you are building a mirror of apache, install Apache on your base image
Be careful:
Mirrors are read-only
When a container is started, a dedicated layer for the current container is added on top of the mirror, which is read and write
When a container is deleted, the exclusive read-write layer of the container is deleted, so the default container cannot store data permanently.
2. Mirror warehouse
As mentioned earlier, where the docker iamge is stored is called the docker registry. When the container is started, the local docker daemon downloads the image from the specified docker registry and completes the startup.
Docker registries can be classified into multiple categories
Vendor registry: Official warehouse
Mirror registry: Mirror acceleration like Ali Cloud
Private registry: Users can create their own mirrored warehouses, such as customize mirrors and place them in their own warehouses when large-scale deployments are needed within an enterprise
A general registry has two components:
Part I: Repository
A registry can have multiple repositories
Repositories can be divided into top-level warehouses and user warehouses, named user/warehouse
The name of a Repository is usually the name of an application, and there are multiple versions of an application in a Repository
Part Two: index
Maintain account information
Provide retrieval port
3. Method of downloading mirrors from the mirror warehouse
The format is as follows
docker pull <registry>[:port] /[<namespace>/]<name>:<tag>
Regisry:port This is where you specify the docker server from which to retrieve the image. If you are using the official docker repository (hub.docker.com), you can omit this.
namespace Here is the name space from which the user's repository is specified, and if it is a top-level repository, this can also be omitted
There are other things besides https://hub.docker.com, such as https://hub.daocloud.io/, and what CoreOS maintains: https://quay.io
Since this is not the default repository, you need to specify an address when downloading the image
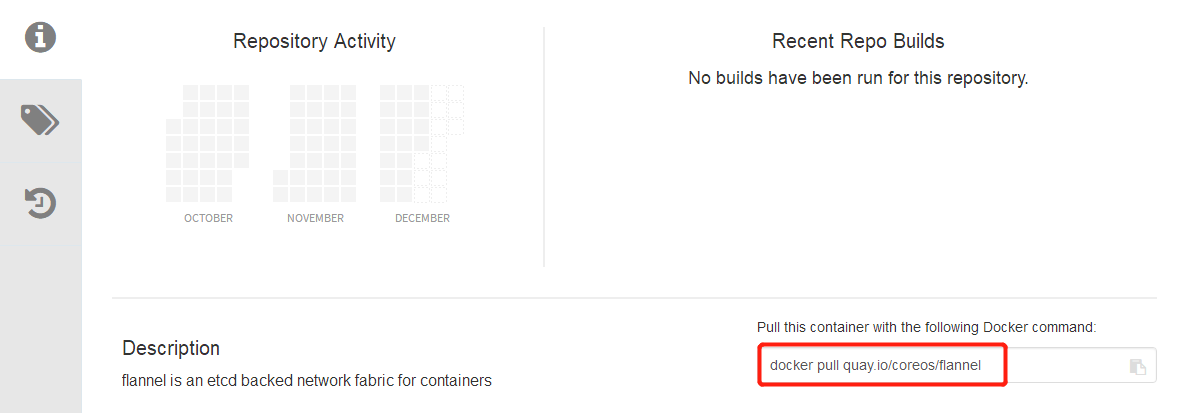
An example of downloading flannel from quay.io is as follows
Step 1: Log in to https://quay.io and search for flannel

Step 2: Find the project address

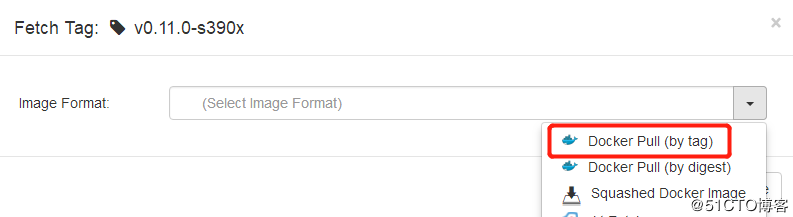
Step 3: View how to download the image
This method is not available because labels need to be specified
Step 4: View specific tags
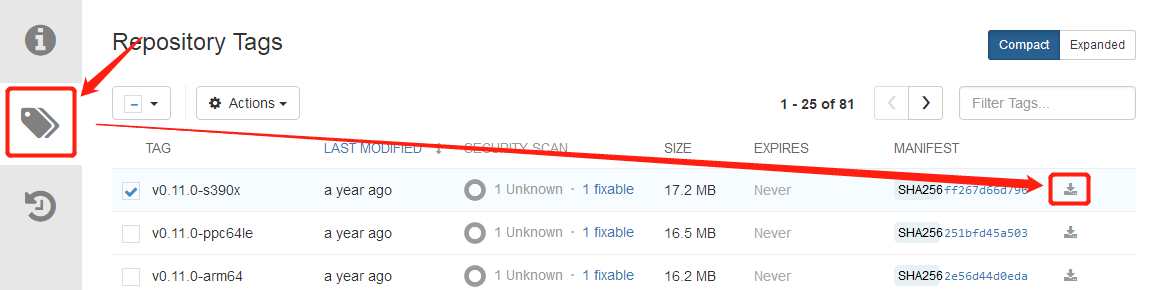
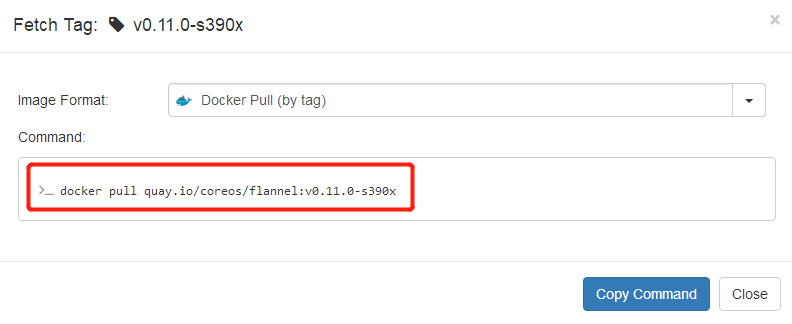
Step 5: Download the mirror
[root@host1 ~]# docker pull quay.io/coreos/flannel:v0.11.0-s390x
[root@host1 ~]# docker image ls
REPOSITORY               TAG                 IMAGE ID            CREATED             SIZE
busybox                  latest              b534869c81f0        2 weeks ago         1.22MB
nginx                    1.14-alpine         8a2fb25a19f5        8 months ago        16MB
quay.io/coreos/flannel   v0.10.0-s390x       463654e4ed2d        23 months ago       47MB
2. Making Mirrors
1. Types of mirroring methods
Based on dockerfile
Based on existing containers: Container-based mirroring is typically done by installing a minimal container, installing the application in that container, and mirroring the container in which the application is installed.
Automatic creation based on docker hub
2. Mirroring based on existing containers
Step 1: Start a busybox container and create an html page
[root@host1 ~]# docker run --name img1 -it busybox
/ # mkdir /data/html -p
/ # echo "test page[v1.0]">>/data/html/index.html
Step 2: Open another terminal and mirror the container
Command commit for mirroring
Containers for mirroring cannot be stopped
When mirroring containers, it is best to pause them, which requires option -p
The default image is made without a tag and does not belong to any repository
[root@host1 ~]# docker commit -p img1
sha256:cd7cb2a774400c721ed71f62bd20abe2c000f1d0f7d51d3bf025db1239b86b7d
[root@host1 ~]# docker image ls
REPOSITORY               TAG                 IMAGE ID            CREATED             SIZE
<none>                   <none>              cd7cb2a77440        6 seconds ago       1.22MB
Step 3: Label the mirror
Tagging command
A mirror can have multiple different tags
[root@host1 ~]# docker tag cd7cb2a77440 zxhk/httpd:v1-0
[root@host1 ~]# docker image ls
REPOSITORY               TAG                 IMAGE ID            CREATED             SIZE
zxhk/httpd               v1-0                cd7cb2a77440        2 minutes ago       1.22MB
Label it again
[root@host1 ~]# docker tag cd7cb2a77440 zxhk/httpd:latest
[root@host1 ~]# docker image ls
REPOSITORY               TAG                 IMAGE ID            CREATED             SIZE
zxhk/httpd               latest              cd7cb2a77440        3 minutes ago       1.22MB
zxhk/httpd               v1-0                cd7cb2a77440        3 minutes ago       1.22MB
Be careful:
If a mirror has more than one label, how to delete it needs to be deleted, similar to the system's hard link
Step 4: Start a container based on this and run apache in the container
[root@host1 ~]# docker run --name newhttpd -it zxhk/httpd:latest
/ # httpd -f -h /data/html
At this point, apache can then run, but each time you start a new container, you need to start apache manually, and then adjust the mirror to run apache automatically after you start the container
Step 5: Upgrade the mirror to automatically run the internal apache
Let's first look at the details of what we're doing as a mirror
[root@host1 ~]# docker inspect zxhk/httpd:latest
Part of this is Cmd, which is the command to execute when the container is running, as follows
"Cmd": [
      "sh"
],
When commit creates a mirror, you can set these by choosing
-a: named author
-c: Change commands executed after mirror-based boot
-m: Description misses you
-p: pause
Re-mirror
[root@host1 ~]# docker commit \
> -a "zxhk<237745635@qq.com>" \
> -c 'CMD ["/bin/httpd","-f","-h","/data/html"]' \
> -p img3 zxhk/httpd:v2.0
Start a container with this mirror
[root@host1 ~]# docker run --rm --name test-httpd zxhk/httpd:v2.0
Look at the commands executed in the container
[root@host1 ~]# docker ps
CONTAINER ID        IMAGE               COMMAND                  CREATED             STATUS              PORTS               NAMES
243f050288bd        zxhk/httpd:v2.0     "/bin/httpd -f -h /d..."   16 seconds ago      Up 15 seconds                           test-httpd
Take a look at the address information
[root@host1 ~]# docker inspect 243 | grep IPAddress
            "SecondaryIPAddresses": null,
            "IPAddress": "172.17.0.4",
                    "IPAddress": "172.17.0.4",
Accessing sites in test containers on hosts
[root@host1 ~]# curl 172.17.0.4
test page[v1.0]
At this point, the mirror creation is complete
3. Upload the created mirror to docker hub
1. Register users at https://hub.docker.com/
You need to climb over the wall to register, you know!!!
Register Account Process - Omit
2. Create repositories and registries on docker hub
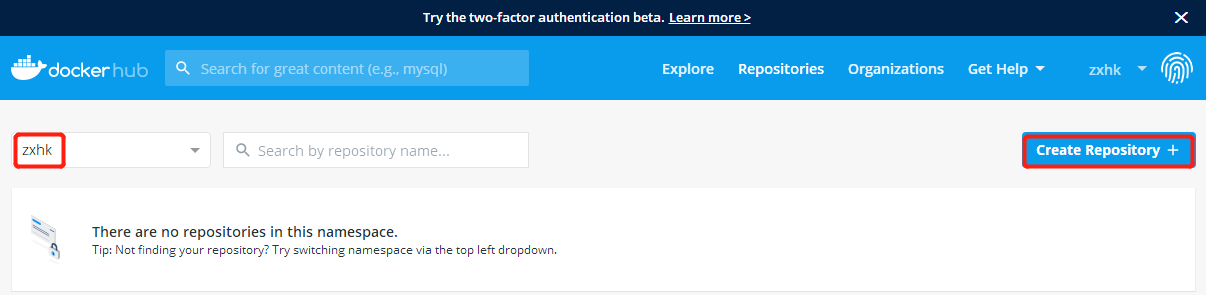
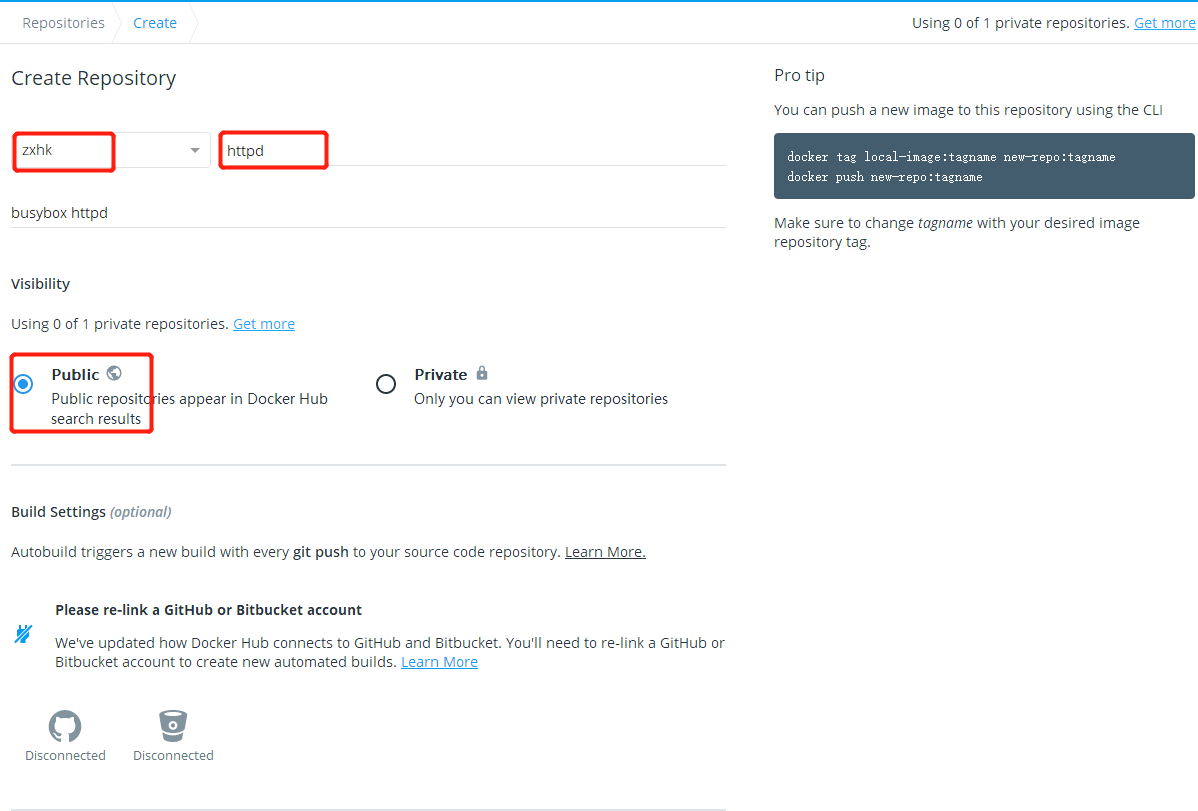
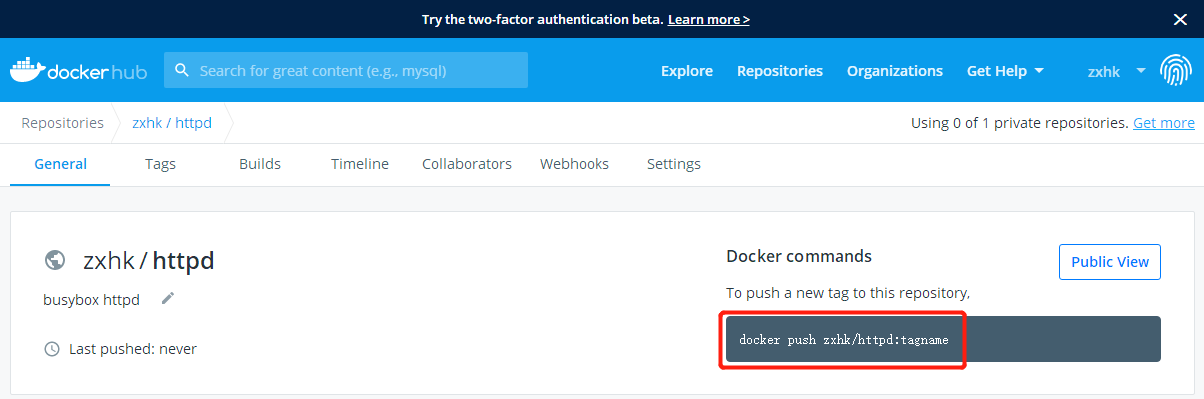
Be careful:
The repository name created must match the mirror name
3. Upload mirror files to your warehouse
Step 1: Log on to docker hub [my user name is zxhk]
[root@localhost ~]# docker login -uzxhk
Password:
WARNING! Your password will be stored unencrypted in /root/.docker/config.json.
Configure a credential helper to remove this warning. See
https://docs.docker.com/engine/reference/commandline/login/#credentials-store

Login Succeeded
Step 2: Upload the mirror to hub [where we upload both versions of the httpd mirror]
[root@localhost ~]# docker image ls
REPOSITORY               TAG                 IMAGE ID            CREATED             SIZE
zxhk/httpd               v2.0                89a647171235        18 hours ago        1.22MB
zxhk/httpd               latest              cd7cb2a77440        19 hours ago        1.22MB
zxhk/httpd               v1-0                cd7cb2a77440        19 hours ago        1.22MB
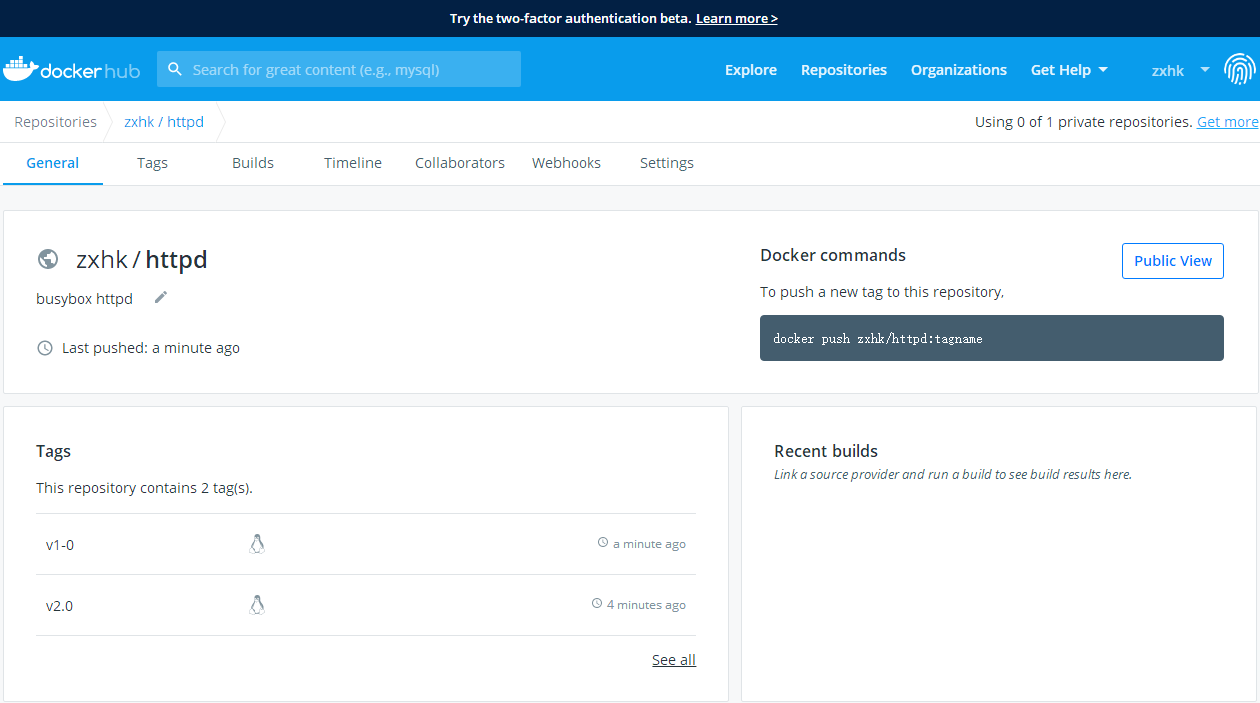
[root@localhost ~]# docker push zxhk/httpd:v2.0
The push refers to repository [docker.io/zxhk/httpd]
f577c88ef366: Pushed
eac247cb7af5: Mounted from library/busybox
v2.0: digest: sha256:c1c3e604e37652595563b8dc2be877620c77314c925115c7ba35f9969b1a77a0 size: 734
[root@localhost ~]# docker push zxhk/httpd:v1-0
Step 3: Check it out on docker hub
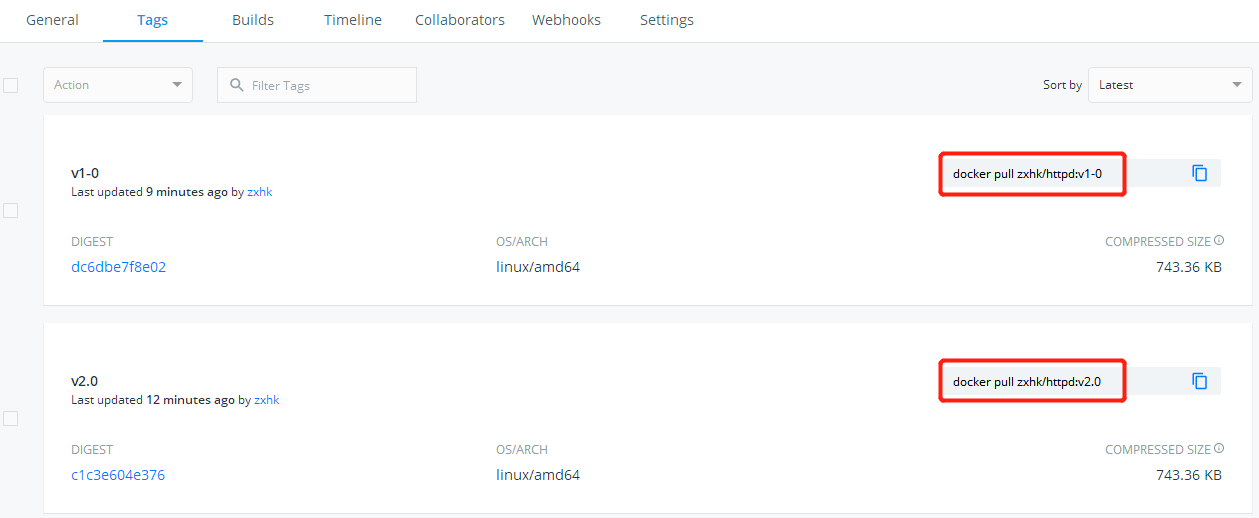
Step 4: Use our own mirror in docker hub
The use of mirrors has been identified in docker hub as follows:
For effect, delete the local image
[root@localhost ~]# docker rmi 89 zxhk/httpd:v1-0
[root@localhost ~]# docker rmi 89 zxhk/httpd:v2.0
[root@localhost ~]# docker image ls
REPOSITORY               TAG                 IMAGE ID            CREATED             SIZE
busybox                  latest              b534869c81f0        2 weeks ago         1.22MB
Download Mirror Startup Container
[root@localhost ~]# docker pull zxhk/httpd:v2.0

[root@localhost ~]# docker image ls
REPOSITORY               TAG                 IMAGE ID            CREATED             SIZE
zxhk/httpd               v2.0                89a647171235        19 hours ago        1.22MB
busybox                  latest              b534869c81f0        2 weeks ago         1.22MB

[root@localhost ~]# docker run --rm --name web1 89a
Check the container information
[root@localhost ~]# docker ps
CONTAINER ID        IMAGE               COMMAND                  CREATED             STATUS              PORTS               NAMES
0ec8687bb487        89a                 "/bin/httpd -f -h /d..."   16 seconds ago      Up 15 seconds                           web1
[root@localhost ~]# docker inspect 0ec | grep "IPAddr"
            "SecondaryIPAddresses": null,
            "IPAddress": "172.17.0.2",
                    "IPAddress": "172.17.0.2",
[root@localhost ~]# curl 172.17.0.2
test page[v1.0]
4. Upload the created mirrors to the mirror warehouse of Aliyun
1. Register users in Aliyun
Strategic
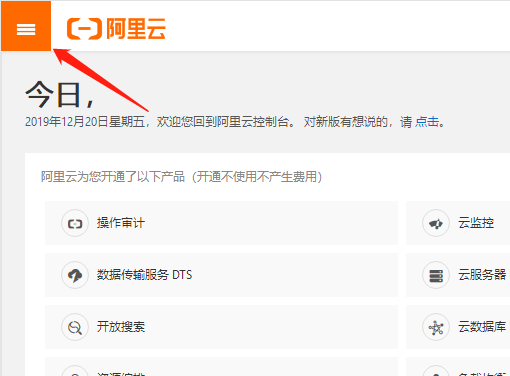
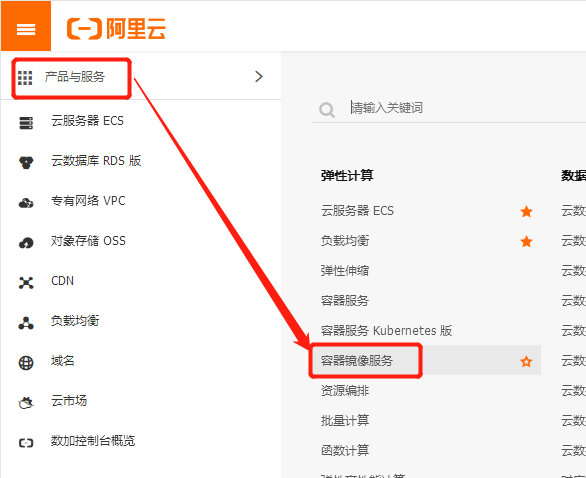
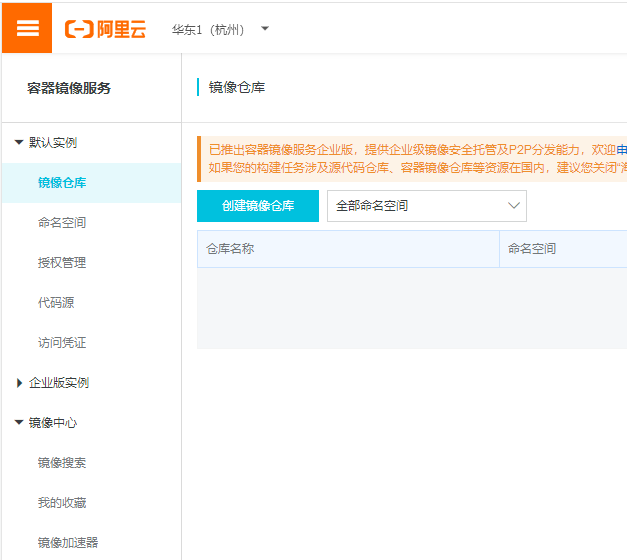
2. Enter the container mirror warehouse
3. Method of mirror acceleration using Ali Cloud
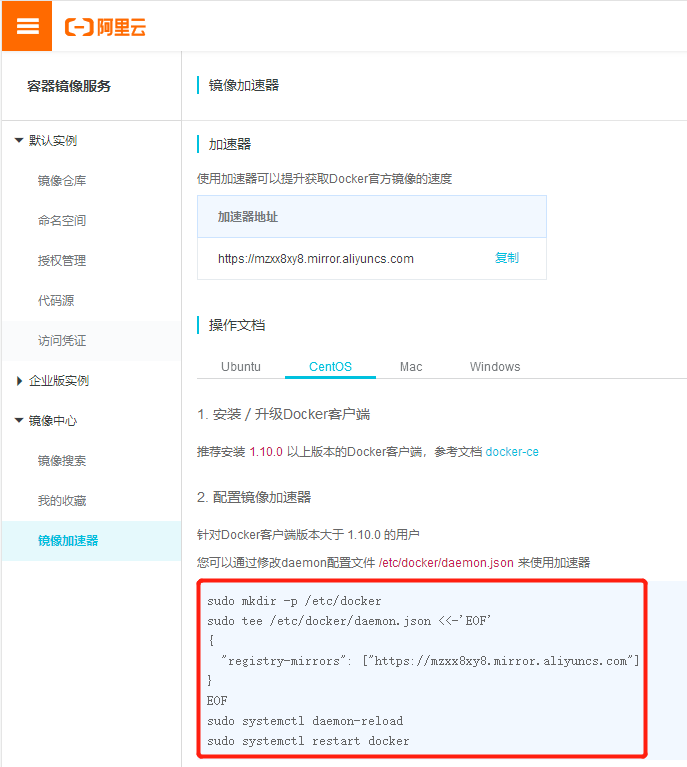
Add a mirror file to the docker configuration file
[root@localhost ~]# vim /etc/docker/daemon.json
{
    "registry-mirrors": [
        "https://registry.docker-cn.com",
        "https://mzxx8xy8.mirror.aliyuncs.com"
    ]
}
Restart Service
[root@localhost ~]# systemctl daemon-reload
[root@localhost ~]# systemctl restart docker
4. Use Ali Cloud to Create Warehouses
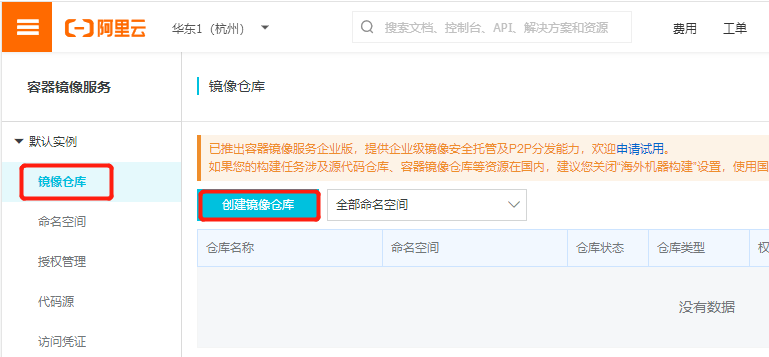

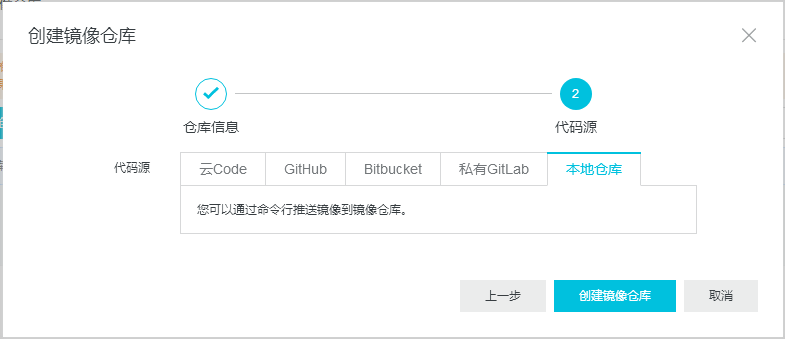
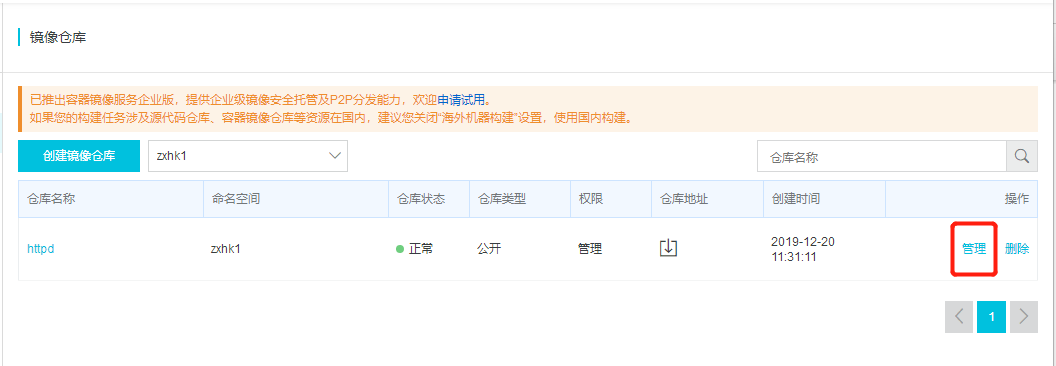
See how mirror warehouses are used
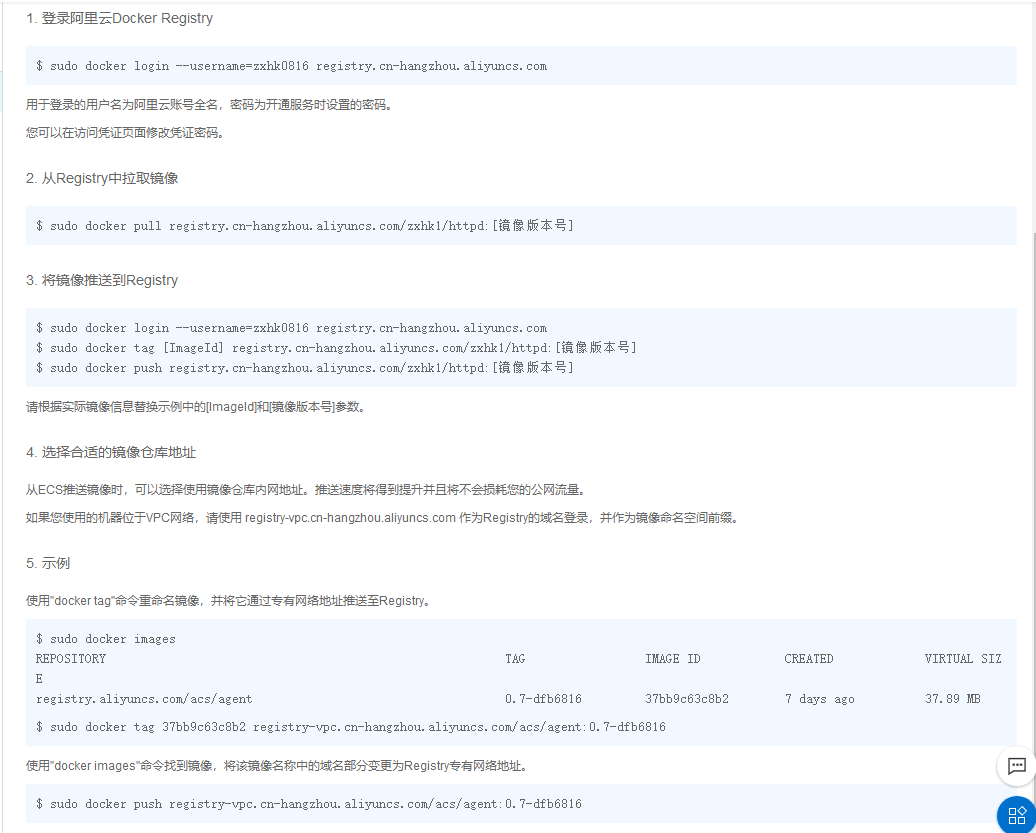
5. Upload mirror image to Aliyun warehouse
Step 1: Log on to Aliyun with your credentials
[root@localhost ~]# sudo docker login --username=zxhk registry.cn-hangzhou.aliyuncs.com
Password:
WARNING! Your password will be stored unencrypted in /root/.docker/config.json.
Configure a credential helper to remove this warning. See
https://docs.docker.com/engine/reference/commandline/login/#credentials-store
Login Succeeded
Step 2: Upload a mirror
A mirror uploaded to Ali Cloud needs to be labeled first
[root@localhost ~]# docker tag 89a registry.cn-hangzhou.aliyuncs.com/zxhk1/httpd:v2.0
[root@localhost ~]# docker push registry.cn-hangzhou.aliyuncs.com/zxhk1/httpd:v2.0
Step 3: Take the mirror from Ali Yunla
[root@localhost ~]# sudo docker pull registry.cn-hangzhou.aliyuncs.com/zxhk1/httpd:v2.0