Build Open Source IVRE through Docker
* Originator: Hack Liu
1 Introduction
1.1 Purpose of preparation
This article mainly introduces the installation, deployment and configuration of the open source IVRE project. The purpose is to provide IVRE project learning, researchers, help them build and deploy IVRE faster.
1.2 background
IVRE (also known as DRUNK) is a network investigation framework, including two passive detection modules based on p0f and Bro and an active detection module based on Nmap & Zmap. Its function is similar to ZoomEye (Eye of Zhong Kui), a network space search engine launched by Chuangyu Company.
1.3 definition
Docker: An open source application container engine that allows developers to package their applications and dependencies into a portable container and then distribute them to any popular Linux machine, as well as virtualization. Containers are completely sandboxed, with no interfaces to each other (similar to the app for the iPhone). With almost no performance overhead, it is easy to run in machine and data centers. Most importantly, they do not depend on any language, framework or system.
1.4 References
Install Docker:
http://www.cnblogs.com/MicroTeam/p/see-docker-run-in-debian-with-aliyun-ecs.html
IVRE official website:
GitHub
https://github.com/cea-sec/ivre
2. System configuration
2.1 Operating Environment
Ubuntu Server 14.4 64 bits
Docker
IVRE
2.2 System Dependence
Python 2, version 2.6 minimum
the Crypto module
the pymongo module, version 2.7.2 minimum.
Nmap & ZMap
Bro & p0f
MongoDB, version 2.6 minimum
webServer (inApache,NginxThe next test passes)
webBrowser (inFireFoxandChromumThe next test passes)
Maxmind GeoIPFree database
Tesseract(Optional, yesNmapScanning results add snapshots)
Docker & Vagrant (version 1.6 minimum,Optional)
2.3 Front-end components
AngularJS
Twitter Bootstrap
jQuery
D3.js
flag-icon-css
Passive recon
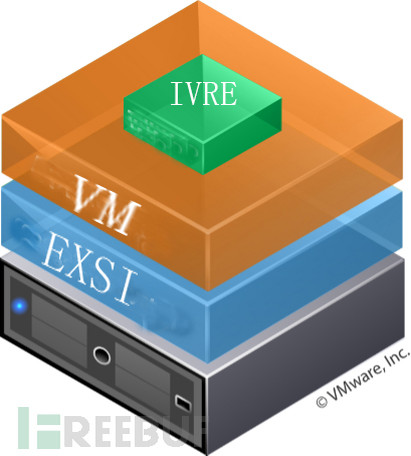
2.4 System Installation Deployment Diagram

2.5 System hardware configuration
Tester configuration:
CPU: Intel to Strong E5400 Series CPU*2
Memory: 4G 1333MHz
Hard Disk: 100GB
2.6 System Application Server Software Installation and Configuration
Linux Server Installation Steps (omitted)
Note: If the kernel version is less than 3.8, you need to upgrade the kernel. The reference method is as follows
http://docs.docker.com/installation/debian/
View linux kernel commands:
uname –a
3. Program deployment
3.1 Installation of Docker
There are two ways to quickly install Docker:
The first method: (recommended)
sudo wget -qO- https://get.docker.com/ | sh
The second method:
sudo curl -sSL https://get.docker.com/ | sh
3.1.1 Verify that the Docker installation was successful (negligible)
Run hello world:
sudo docker run hello-world
If the previous steps are all right, you can see that hello-world is started.
Hello from Docker.
This message shows that your installation appears to be working correctly.
3.1.2 Adding non-administrator users to the docker group
Sudo useradd-G docker login system username
3.2 Installation of Vagrant
There are two ways to install IVRE:
The first method: (recommended)
wget https://releases.hashicorp.com/vagrant/1.7.4/vagrant_1.7.4_x86_64.deb
sudo dpkg -i vagrant_1.7.4_x86_64.deb
The second method:
sudo apt-get install -y vagrant
3.3 Installation of IVRE
$ mkdir -m 1777 var_lib_mongodb var_log_mongodb ivre-share
$ wget -q https://ivre.rocks/Vagrantfile
$ sudo vagrant up --no-parallel
$ docker attach ivreclient
root@e809cb41cb9a:/#
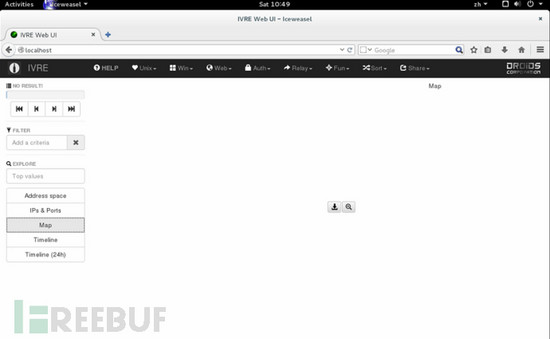
At this point IVRE has been installed successfully. IVRE installed through Docker has no data.
The interface is as follows:

4. IVRE Running and Stopping
See what containers docker has. Command:
docker ps –a
Open IVRE in three steps.
The first step is to open the database server, command:
sudo docker start ivredb
The second step is to open the web and command:
sudo docker start ivreweb
The third step is to open the client and command:
sudo docker start ivreclient
Then enter ivreclient through attach command
sudo docker attach ivreclient
5. IVRE scan and import data
Enter ivreclient through attach command
sudo docker attach ivreclient
5.1 Run the following initialization commands: (the first four steps are negligible)
root@881486651a32:/$ ipinfo --init
    This will remove any passive information in your database. Process ? [y/N] y
    root@881486651a32:/$ ipdata --init
    This will remove any country/AS information in your database. Process ? [y/N] y
    root@881486651a32:/$ scancli --init
    This will remove any scan result in your database. Process ? [y/N] y
    root@881486651a32:/$ runscans-agentdb --init
    This will remove any agent and/or scan in your database and files. Process ? [y/N] y
    root@881486651a32:/$ ipdata --download --import-all --dont-feed-ipdata-cols
    [...]
The latest command will take a long time. Then we can integrate the
Nmap results to the database:
    root@881486651a32:/$ nmap2db -r -s MySource -c MyCategory /ivre-share
You can then exit the shell (`C-d`), this will stop the
container.
Or ignore step 5.1 to execute the following commands:
root@881486651a32:/$ ipdata --download
5.1 Scanning tasks
Execute orders:
root@881486651a32:/$ runscans --routable --limit 1000 --output=XMLFork
The above command will scan 1,000 random hosts on the Internet and start 13 nmap processes.
5.2 Scanning results are stored in database
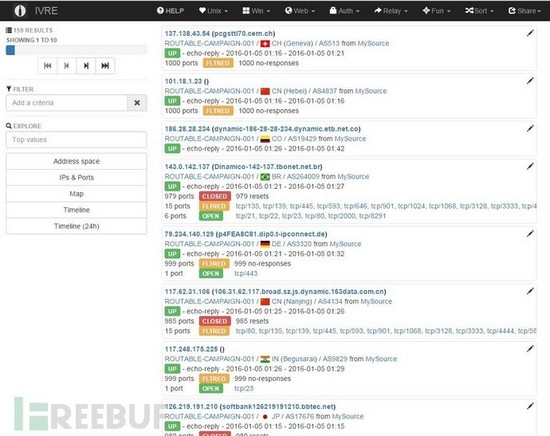
root@881486651a32:/$ nmap2db -c ROUTABLE-CAMPAIGN-001 -s MySource -r scans/ROUTABLE/up5.3 Interface Display

6. Error Resolution in Installation
After installing IVRE successfully, enter ivreclient through attach command. There may be a lack of commands such as ipdata, runscans and nmap2db.
The solutions are as follows:
Enter ivreclient through attach command
sudo docker attach ivreclient
Install curl
root@881486651a32:/$ apt-get install crul
Install unzip
root@881486651a32:/$ apt-get install unzip
Use curl command to download all files in bin directory of IVRE project to Docker container:
root@881486651a32:/$ tmp
root@881486651a32:/$ curl –O http://hackliu.com/bin.zip
root@881486651a32:/$ cd /
Unzip bin.zip to the / usr/bin directory
root@881486651a32:/$ unzip /tmp/bin.zip –d /usr/
Add execution permissions for downloaded files:
root@881486651a32:/$ chmod + x analyzercli
root@881486651a32:/$ chmod + x getmoduli
root@881486651a32:/$ chmod + x httpd-ivre
root@881486651a32:/$ chmod + x ipdata
root@881486651a32:/$ chmod + x ipinfo
root@881486651a32:/$ chmod + x ipinfohost
root@881486651a32:/$ chmod + x nmap2db
root@881486651a32:/$ chmod + x p0f2db
root@881486651a32:/$ chmod + x passiverecon2db
root@881486651a32:/$ chmod + x passivereconworker
root@881486651a32:/$ chmod + x plotdb
root@881486651a32:/$ chmod + x runscans
root@881486651a32:/$ chmod + x runscans-agent
root@881486651a32:/$ chmod + x runscans-agentdb
root@881486651a32:/$ chmod + x scancli
root@881486651a32:/$ chmod + x scanstatus
7 other
7.1 Installation of required software packages
Links: http://pan.baidu.com/s/1kUsuOGv Password: wvct