Preface
Recently, in learning Spring Boot, a series has been opened to record the pits encountered in the learning process. The proverb goes deep and shallow, but my level is still limited. I'm afraid it's hard to do it. So it's called shallow Spring Book.
This is the first article in this series to build a simple Hello World
See the original text Personal Blog
Catalog
- Hellowrold and its basic concepts
- Code organization and CRUD
Tools and related environments
- Intellij JDEA
- JDK
- Gradle
Helloworld
Intellij IDEA in a new Gradle project, the acquisition of Java and the Web, followed by some conventional projects, fill in GroupId, etc., not to elaborate.
The initial project directory structure is as follows:
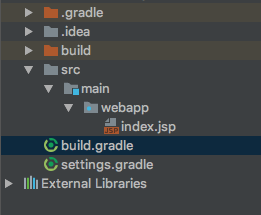
We add java and resources directories to the src/main directory to store our source code and configuration information, respectively.
build.gradle
This is one rom A build file, which can be used directly here.
plugins {
    id 'org.springframework.boot' version '1.5.2.RELEASE'
    id 'java'
}


jar {
    baseName = 'bookstore'
    version =  '0.0.1-SNAPSHOT'
}

repositories {
    jcenter()
}

dependencies {
    compile("org.springframework.boot:spring-boot-starter-web")
    testCompile("org.springframework.boot:spring-boot-starter-test")
}
After the configuration is completed, click the blue icon in the upper left corner of Gradle panel to download the relevant packages automatically.
Application
Create a new Application.java file in the src/main/java directory:
import org.springframework.boot.CommandLineRunner;
import org.springframework.boot.SpringApplication;
import org.springframework.boot.autoconfigure.SpringBootApplication;
import org.springframework.context.ApplicationContext;
import org.springframework.context.annotation.Bean;

import java.util.Arrays;

@SpringBootApplication
public class Application {

    public static void main(String[] args) {
        SpringApplication.run(Application.class, args);
    }

    @Bean
    public CommandLineRunner commandLineRunner(ApplicationContext ctx) {
        return args -> {

            System.out.println("Let's inspect the beans provided by Spring Boot:");

            String[] beanNames = ctx.getBeanDefinitionNames();
            Arrays.sort(beanNames);
            for (String beanName : beanNames) {
                System.out.println(beanName);
            }

        };
    }

}
Add HelloworldController.java:
import org.springframework.web.bind.annotation.RestController;
import org.springframework.web.bind.annotation.RequestMapping;

@RestController
public class HelloController {

    @RequestMapping("/")
    public String index() {
        return "Greetings from Spring Boot!";
    }

}
Here, a simple Restful-style microservice is completed.
Run
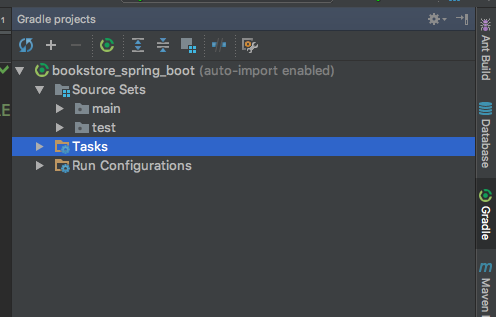
Open the Gradle panel and double-click bootRun in the diagram to run the project.
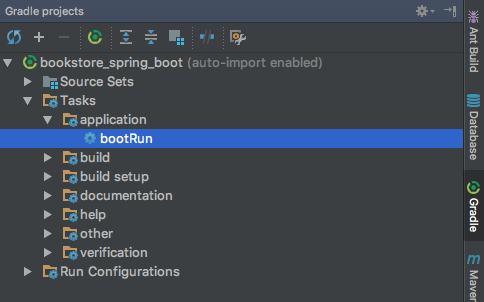
You can also run the gradle bootRun command in the same directory as the build.gradle file.
Visit http://localhost:8080/to see the results of the operation:
Package
By double-clicking the build - > build in the Gradle panel or running the'gradle build'command, you can package the project into a jar file, which is located in. / build/libs/[baseName+version].jar. This can be used for deployment to test or production environments.
The basic process is roughly the same.
Basic concepts and pits encountered
Spring Boot greatly simplifies a large number of configuration files needed in java development. According to the concept of predefined higher than configuration, Spring Boot can be used out of the box as much as possible, so it is also excellent for the construction of micro services.
By cooperating with Spring Cloud and Docker, we can build a relatively perfect micro-service system.
Creeping pit
- The Gradle project created by default will add group and version contents to the build.gradle file, which need to be removed, otherwise it will not start due to configure error at run time.
- When you run spring boot by double-clicking bootRun, you end up in the state shown above, but the program is already running. It can be accessed through localhost.
- on