In the project, we need to do the interface automation test, so we go to do the experiment, and do the experiment from building the test environment. In the process of learning, we will certainly encounter different problems, so we spent two days to make a simple interface automation environment, and also encountered some problems in the middle. Now we record the pits we trampled on the road.
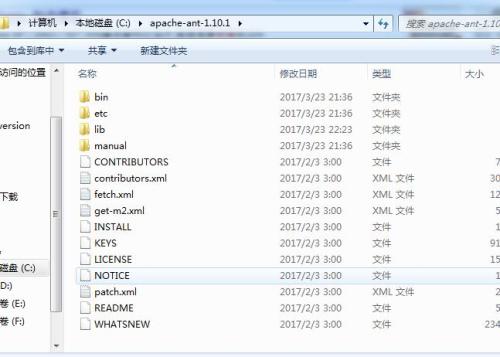
1. Construction of ant environment
Download ant package and configure environment variables.
See my other blog for configuration methods. The address is as follows:
http://fangwei009.blog.51cto.com/5234706/1910384
2. jmeter environment construction
Download jmeter and see another blog for the way to build it. The address is as follows:
http://fangwei009.blog.51cto.com/5234706/1910385
In particular, when I used JMeter 3.0, I encountered an error. I used apache-jmeter-2.13 for reference. So we used version 2.13 of jmeter. Installation is done in the same way as above, using version 2.13.
3. Install JDK and configure java environment variables (omitted)
I. Jmeter+ant
A. First, we have recorded the default Jmeter script and passed the test. There is a script (query module. jmx)
b. Copy ant-JMeter-1.1.1.jar in the extras subdirectory of the JMeter directory to the lib subdirectory of the Ant directory, so that the class "org.programmerplanet.ant.taskdefs.jmeter.JMeterTask" can be found at the Ant runtime, thus triggering the JMeter script successfully.
c,jmeter saves files in. csv format by default, so we need to set up the contents of bin/jmeter.properties file to save.
jmeter.save.saveservice.output_format=xml
d, the main logical thinking: run the. jmx script under d: jemeterTest script to generate. jtl files and put them in
In the D: jemeterTest resultLog JTL file, ant converts the corresponding file into the corresponding html file and puts it in D: jemeterTest resultLog html
The contents of the build.xml file are as follows:
<?xml version="1.0" encoding="UTF-8"?>
<project name="ant-jmeter-test" default="run" basedir=".">
<tstamp>
<format property="time" pattern="yyyyMMddhhmm" />
</tstamp>
<!-- Need to change to your local one Jmeter Catalog-->
<property name="jmeter.home" value="C:\apache-jmeter-2.13" />
<!-- jmeter generate jtl Path of results report in format -->
<property name="jmeter.result.html.dir" value="C:\apache-jmeter-2.13\bin\demo\html"/>
<property name="jmeter.result.jtl.dir" value="C:\apache-jmeter-2.13\bin\demo\jtl"/>
<!-- Prefixes for generated reports-->
<property name="ReportName" value="TestReport" />
<property name="jmeter.result.jtlName" value="${jmeter.result.jtl.dir}/${ReportName}${time}.jtl" />
<property name="jmeter.result.htmlName" value="${jmeter.result.html.dir}/${ReportName}.html" />
<target name="run">
<antcall target="test" />
<antcall target="report"/>
</target>
<target name="test">
<taskdef name="jmeter" classname="org.programmerplanet.ant.taskdefs.jmeter.JMeterTask" />
<jmeter jmeterhome="${jmeter.home}" resultlog="${jmeter.result.jtlName}">
<!-- Declare the script to run."*.jmx"Refers to all that is contained in this directory. jmeter Script-->
<testplans dir="C:\apache-jmeter-2.13\bin\demo" includes="*.jmx" />
<property name="jmeter.save.saveservice.output_format" value="xml"/>
</jmeter>
</target>
<path id="xslt.classpath">
<fileset dir="${jmeter.home}/lib" includes="xalan*.jar"/>
<fileset dir="${jmeter.home}/lib" includes="serializer*.jar"/>
</path>
<target name="report">
<tstamp> <format property="report.datestamp" pattern="yyyy/MM/dd HH:mm" /></tstamp>
<xslt
classpathref="xslt.classpath"
force="true"
in="${jmeter.result.jtlName}"
out="${jmeter.result.htmlName}"
style="${jmeter.home}/extras/jmeter-results-detail-report_21.xsl" />
<!-- Because when the report is generated above, the relevant pictures will not be copied to the target directory, so you need to copy them manually. -->
<copy todir="${jmeter.result.html.dir}">
<fileset dir="${jmeter.home}/extras">
<include name="collapse.png" />
<include name="expand.png" />
</fileset>
</copy>
</target>
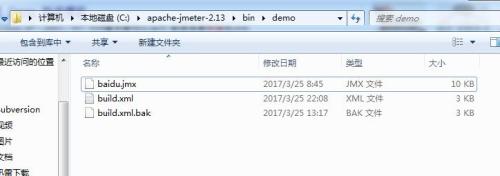
</project>Look at my catalog environment:
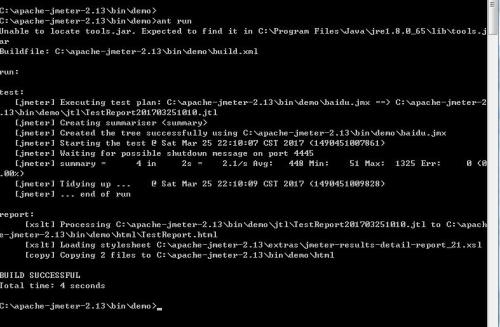
Results after implementation:

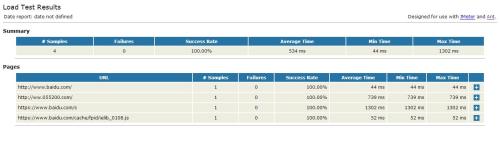
Open the html below html as follows:
This is just the beginning, then we need to build Jenkins, optimize the script, not finished, to be continued...
If you have any questions, please pay attention to Wechat Public Number Consultation!
For more automation tutorial resources, please pay attention to Wechat Public Number: