Docker overview
- What is Docker: Docker is an open source application container engine that allows developers to package their applications and dependency packages into a portable application container image And then publish to any popular Linux or Windows On the machine, it can also be realized Virtualization . The container is fully used sandbox Mechanism, there will be no interface between them.
Official website: https://www.docker.com/
Containerization Technology
- Containerization technology is not a complete operating system for simulation

Compare Docker and virtual machine technologies:
-
The traditional virtual machine virtualizes a set of hardware, runs a complete operating system, and then installs and runs software on this system.
-
The applications in the container run directly on the content of the host. The container does not have its own kernel or virtual hardware, so it is lightweight.
-
Each container is isolated from each other. Each container has its own file system and does not affect each other.
Advantages of Docker
Faster delivery and deployment of applications
-
Traditional: a pile of help documents, installer
-
Docker: packaging image release test, one click operation
More convenient upgrade and capacity expansion
-
After using Doker, our deployment application is like building blocks!
-
The project is packaged as an image to expand server A! Server B
Simpler system operation and maintenance
- After containerization, our development and test environments are highly consistent.
More efficient utilization of computing resources
- Docker is kernel level virtualization, which can run many container instances on a physical machine! Server performance can be squeezed to the extreme.
Basic composition of Docker
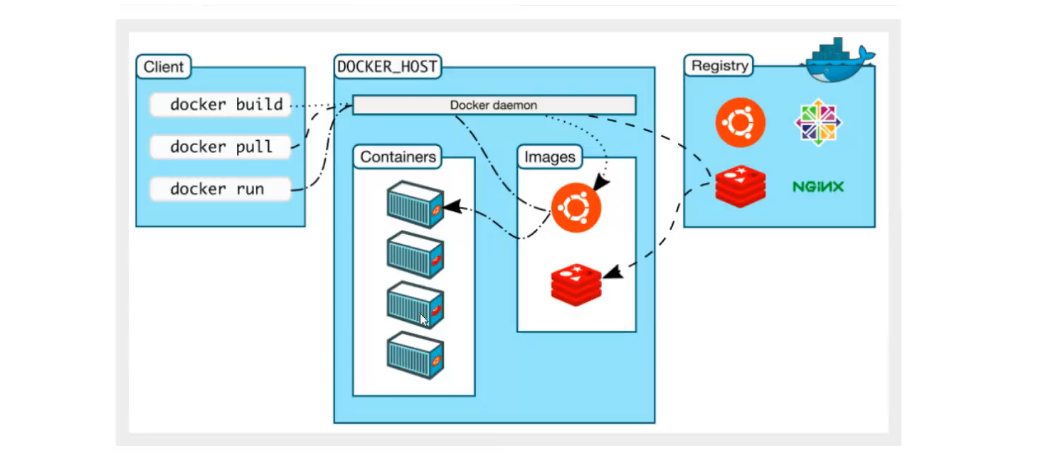
Image:
- The docker image is like a template, which can be used to create container services. The Tomcat image - > Run - > tomcat01 container (provides a server). Multiple containers can be created through this image (the final service run or project run is in the container).
Container:
-
Docker uses container technology to run one or a group of applications independently and create them through image.
-
Start, stop, delete, basic command!
-
At present, this container can be understood as a simple linux system
Repository:
-
The warehouse is where the image is stored!
-
The warehouse is divided into public warehouse and private warehouse!
-
Docker hub (foreign by default)
-
Alicloud... All have container servers (configure image acceleration!)
Download and install Docker
- Note that bloggers here use Alibaba cloud servers. If you don't want to buy them, you can build them yourself. Refer to the article: https://blog.csdn.net/weixin_45692705/article/details/119869250?spm=1001.2014.3001.5501
- All commands in this article are operated by the root user. If other users remember to add sudo
Environmental inspection
Environment view command
uname -r
The system kernel we choose here should be above 3.10

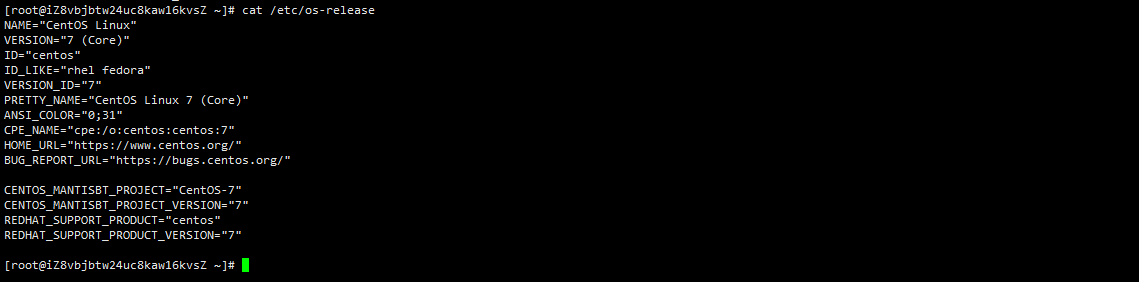
System version command
cat /etc/os-release
Download and install
- Official website download address: https://docs.docker.com/engine/install/centos/
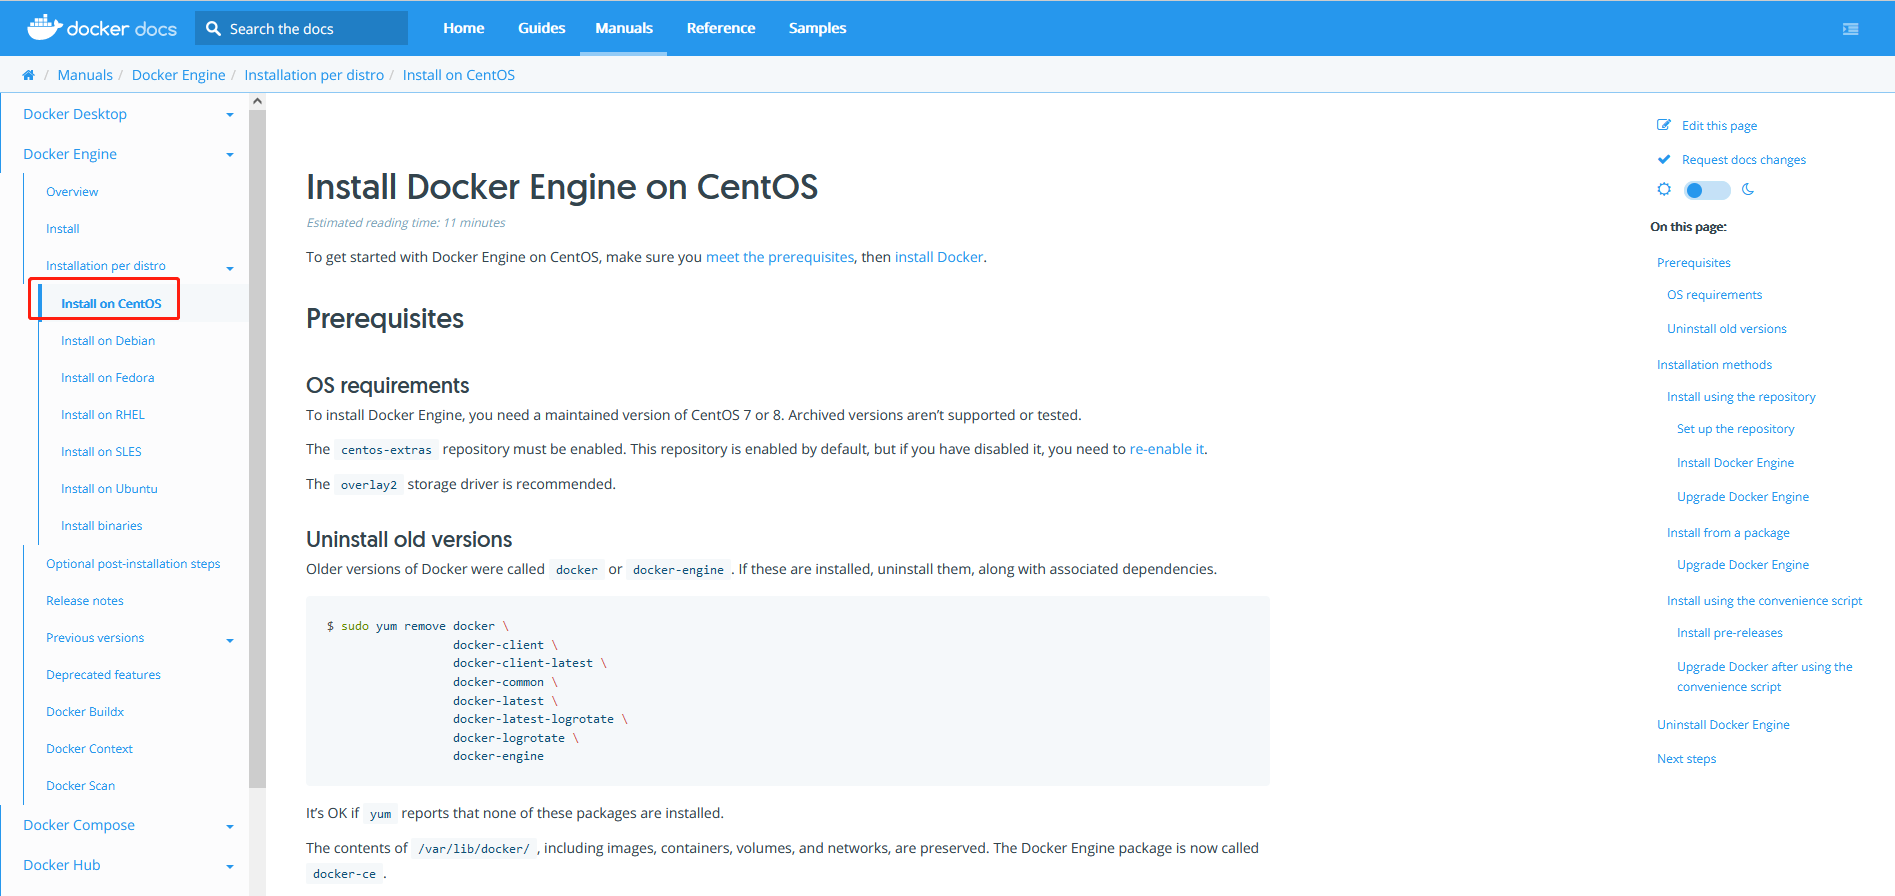
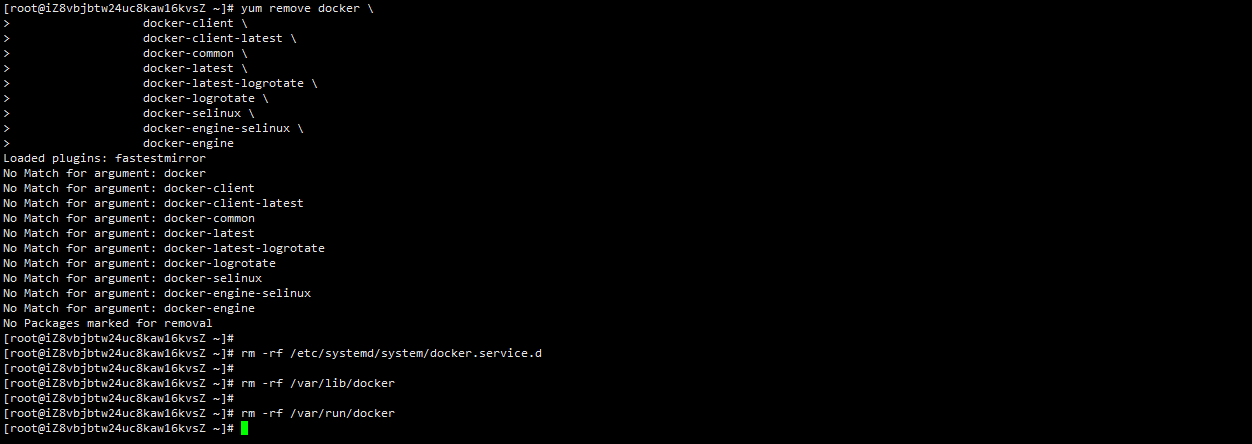
- Uninstall old version
yum remove docker \
                  docker-client \
                  docker-client-latest \
                  docker-common \
                  docker-latest \
                  docker-latest-logrotate \
                  docker-logrotate \
                  docker-selinux \
                  docker-engine-selinux \
                  docker-engine

rm -rf /etc/systemd/system/docker.service.d

rm -rf /var/lib/docker

rm -rf /var/run/docker
- Download docker installation package
yum install -y yum-utils

- Set the image warehouse. docker is a foreign warehouse by default
#Alicloud image address
yum-config-manager \ --add-repo \ http://mirrors.aliyun.com/docker-ce/linux/centos/docker-ce.repo

- Update yum package index
yum makecache fast

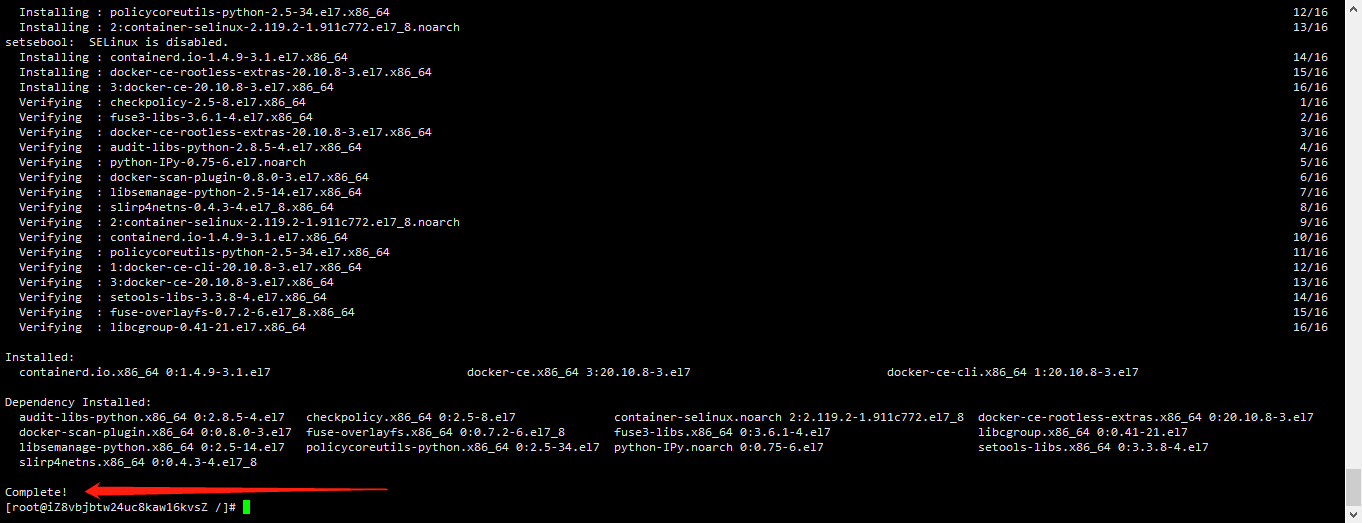
- Install docker (docker CE community version, dcoker EE enterprise version)
yum install docker-ce docker-ce-cli containerd.io
- There will be several prompts in the middle. Just don't enter y.

- View installed docker information
docker version

- Start docker service
systemctl start docker
- ps -ef|grep docker is used to view the process

- hello world!
docker run hello-world

- Check out the downloaded Hello world image
docker images

Uninstall Docker
#1. Uninstall dependency
yum remove docker-ce docker-ce-cli containerd.io

#2. Delete resources
 sudo rm -rf /var/lib/docker
 sudo rm -rf /var/lib/containerd

 #/Default working path of var/lib/docker
- Uninstall is still very easy. You can understand it. There is no demonstration here.
Configuring alicloud image acceleration
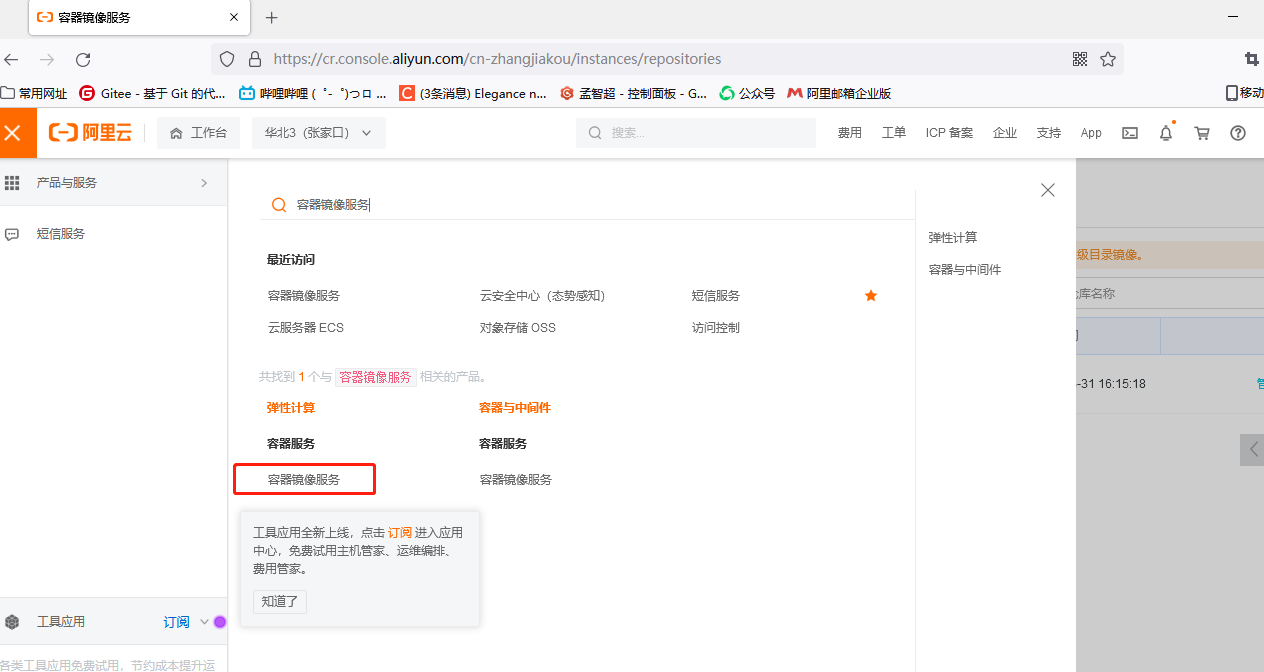
- Log in to Alibaba cloud, find the Alibaba cloud console homepage, search for images, and click container image service.
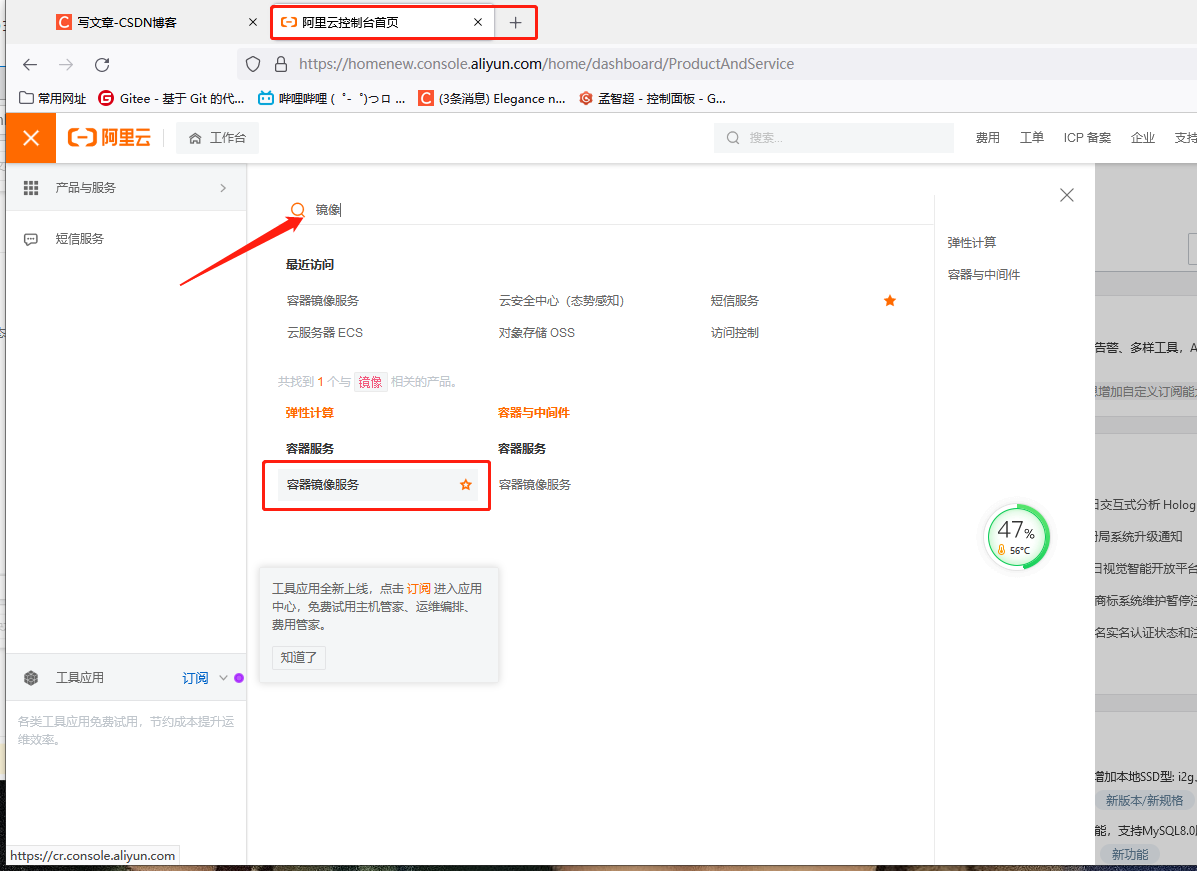
- After entering, click the image accelerator under the image center directory, select the corresponding server version, copy its configuration and execute
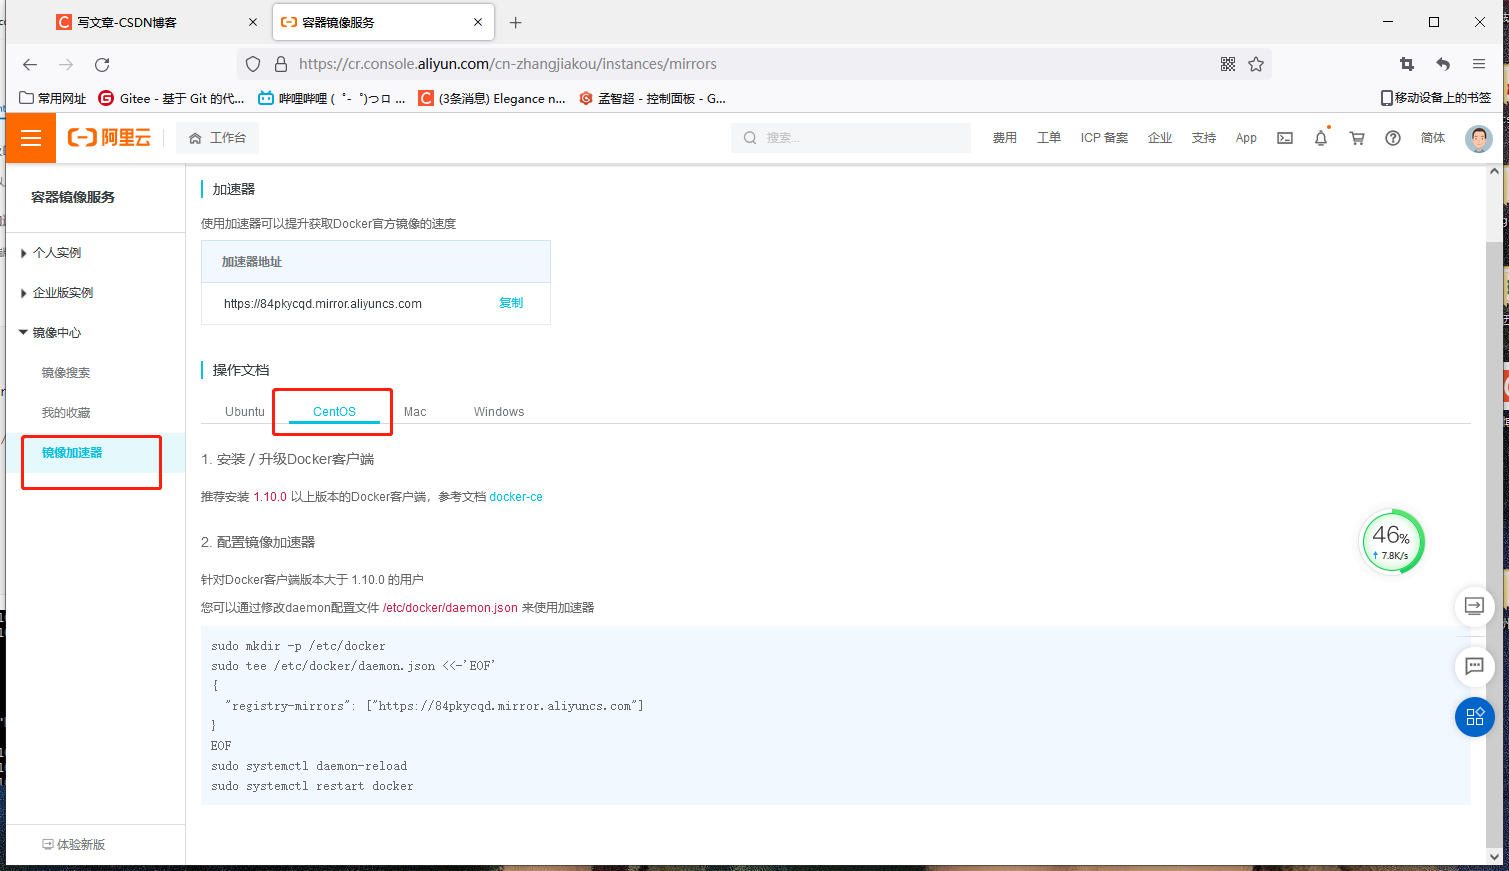
sudo mkdir -p /etc/docker
sudo tee /etc/docker/daemon.json <<-'EOF'
{
  "registry-mirrors": ["https://84pkycqd.mirror.aliyuncs.com"]
}
EOF
sudo systemctl daemon-reload
sudo systemctl restart docker

- If no error is reported, the configuration is complete~
Underlying principle
Review the helloWord we installed and executed
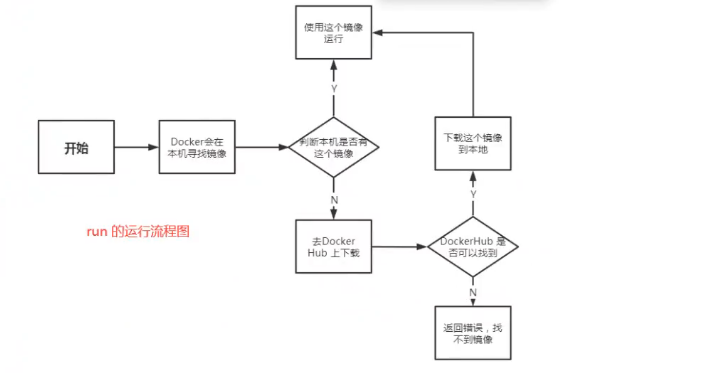
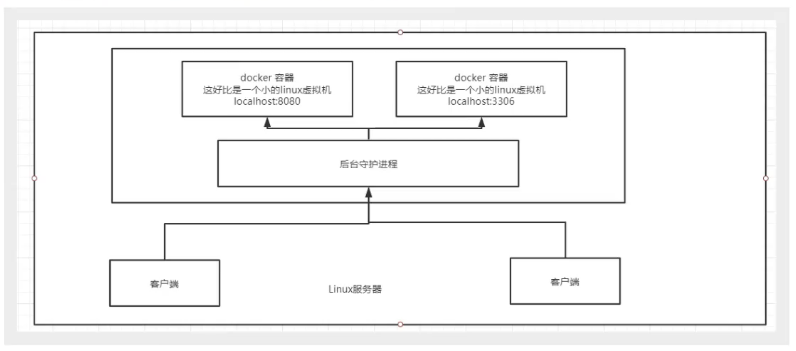
How does Docker work?
- Docker is a client server system. The daemon of docker runs on the host and is accessed from the client through the Socket! DockerServer will execute this command after receiving the docker client instruction!
Why is Docker faster than VM?
-
Docker has fewer abstraction layers than virtual machines.
-
Docker uses the kernel of the host, and the vm needs to be a Guest OS.
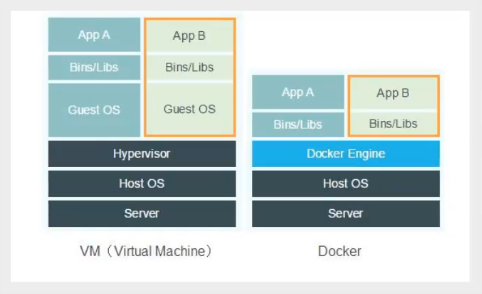
Therefore, when creating a new container, docker does not need to reload an operating system kernel like the virtual machine to avoid booting. The virtual machine loads the Guest OS at the minute level, while docker uses the host operating system, omitting this complex process at the second level!
Common commands of Docker

Help command
- Omnipotent help command
docker command --help
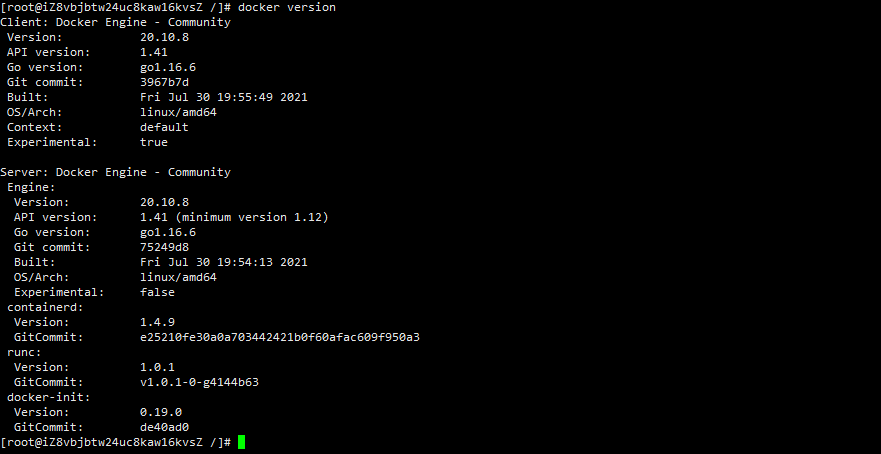
View Dcoker version information
- The version information of docker is displayed. It is best to view it after starting the docker service
docker version
Dcoker system information viewing
- Displays the system information of docker, including the number of images and containers
docker info

Mirror command
Mirror view
- View mirrors on all local hosts
docker images

What do these columns mean? No hurry. Let's explain it one by one.
- REPOSITORY source of the REPOSITORY image
- TAG mirror label
- IMAGE ID ID of the image
- The creation time of the CREATED image
- SIZE the SIZE of the mirror
This command also has two common options
-
-a list all mirrors

-
-The q value displays the id of the image

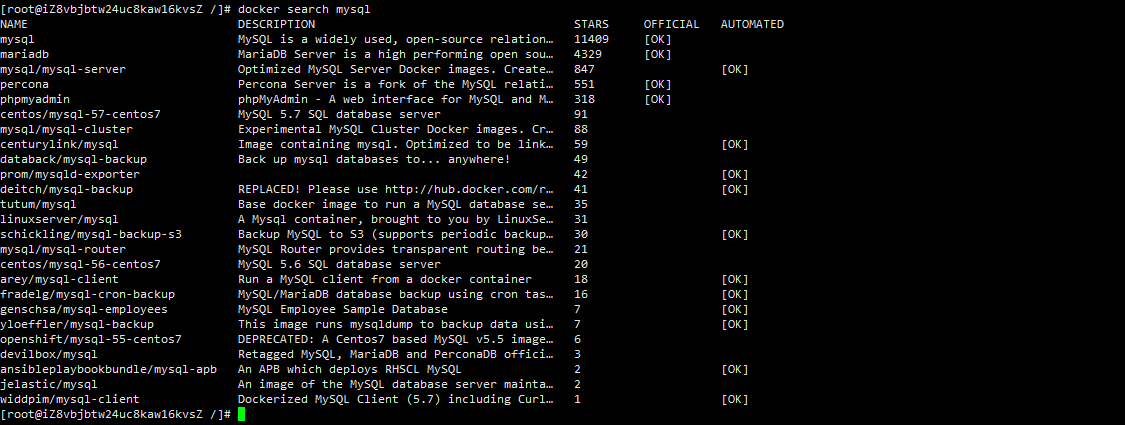
Mirror search
- This command is used to find images from Docker Hub.
docker search Image name
Optional, filter by search
- --The image of filter=STARS=3000 search processing is that STARS (STARS is equivalent to usage) is greater than 3000

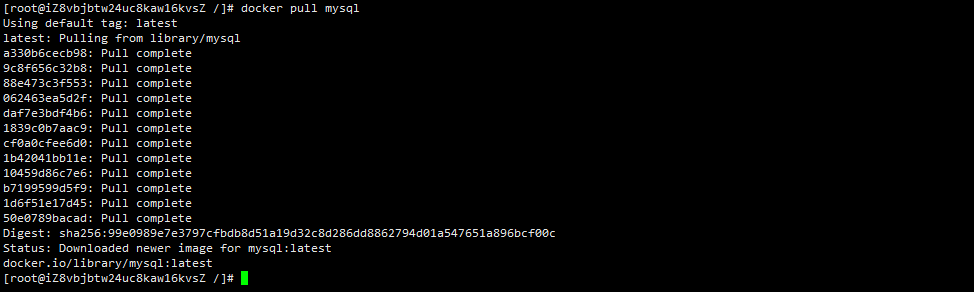
Download Image
- Download the image from Docker Hub to local.
docker pull Image name[:tag]
- Note: tag is the specified version. If you do not write tag, it is the latest version by default
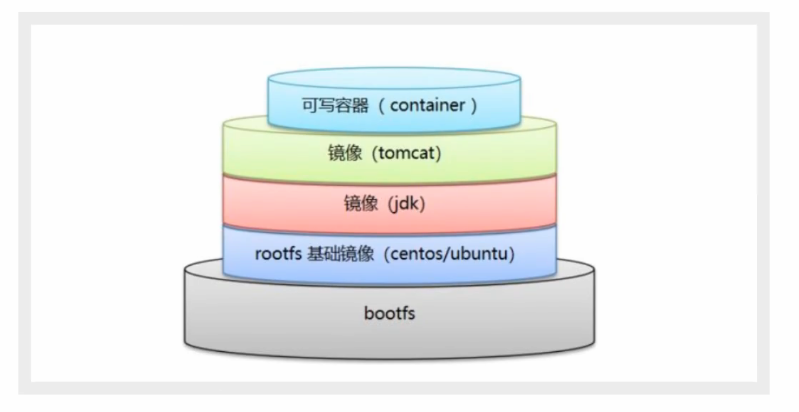
 Here's an explanation. docker is a layered download image. You can see the benefits of this later.
- Digest signature
- docker.io/library/mysql:latest real address
Specified version download
 So the benefits of layering are obvious. docker will automatically avoid repeated downloads
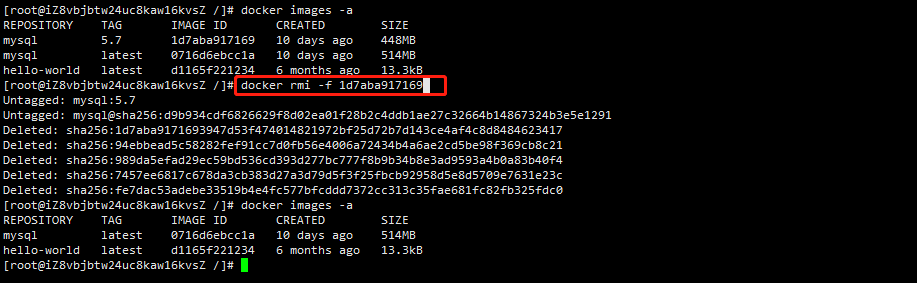
delete mirror
- Deletes the specified mirror
docker rmi -f image id
- Delete multiple mirrors
docker rmi -r image id1 image id2 image id3
- Delete all images (shell commands are involved here). For those interested, please see the article: "X" must be installed in front of schoolgirls. An article teaches you to learn Shell programming~)
docker rmi -r $(docker images -aq)
It's best to delete through id to ensure uniqueness. Here's a demonstration. Let's go down and try it by ourselves~
Container command
- Note that we must have an image before we can create a container.
Create a new container and start
docker run [Optional parameters] Image name
Parameter description
- --name="Name" the container name tomcat01 tomcat02 is used to distinguish containers
- -d background operation
- -it runs interactively, entering the container to view the content
- -p specifies the port of the container - p 8080:8080

Return host from container
- Direct container stop and exit
exit

- The container does not stop exiting
ctrl + p + q
List all running containers
- Lists currently running containers
docker ps
Optional parameters
- -a lists currently running containers + historically running containers
- -n=1 displays the most recently created container
- -q displays only the number of the container

You can see that there are no running containers. Let's add the - a parameter to view the containers that have been running in history.

Delete container
- Delete the specified container. You cannot delete a running container
docker rm container id

- Forcibly delete the specified container and add the - f parameter
docker rm -f container id
- Delete all containers
docker rm -f $(docker ps -aq)
This is just a demonstration of deleting the specified (hello world) container according to the id number!
Start container
- Start the container in the background, if not, create it
docker run -d Container name|container id

Note: docekr ps found the container stopped
Note: if the docker container runs in the background, there must be a foreground process. If docker finds no application, it will stop automatically.
- To start a running container, you need to check the id of the container before starting a container according to the id.
docker start container id

- Restarting the container is basically the same as starting the container.
docker restart container id

Stop container
- Stop the currently running container
docker stop container id

- Force stop of current container
docker kill container id

Other commands
view log
docker logs -tf --tail 10 container id
Optional parameters
- -tf display log
- --tail number displays the number of logs
View process information in container
docker top container id

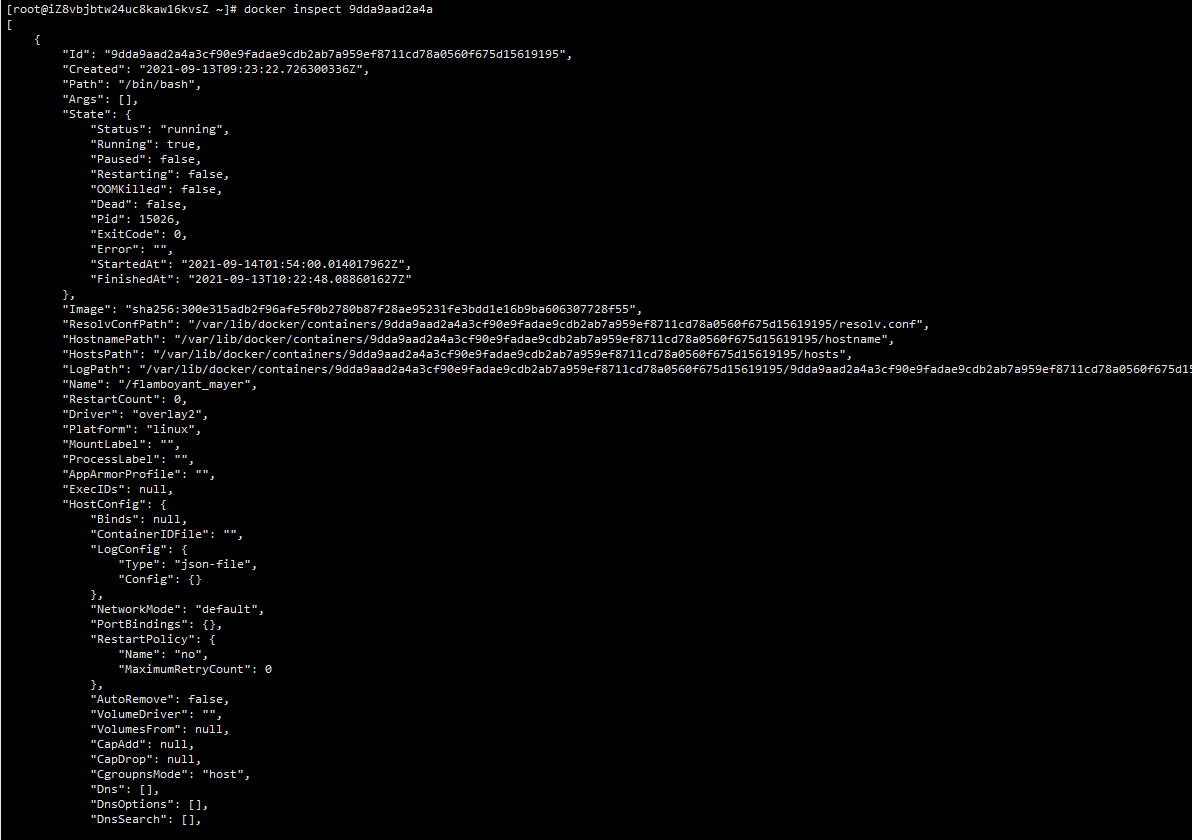
View the metadata of the image
docker inspect container id
Enter the currently running container
- We usually run the container in the background mode. We need to enter the container and modify some configurations
First kind
docker exec -it container id /bin/bash
- After docker exec enters the container, open a new terminal where you can operate (commonly used)

Second
docker attach container id
- docker attach enters the terminal where the container is executing and will not start a new process

Copy files from the container to the host
docker cp container id:Host path of the destination within the container

Container data volume

What is a data container volume?
-
Review of docker's concept. Package the application and environment into an image!
-
The data is in the container. If we delete the container, the data will be lost! Requirement: the data can be persistent and mysql data can be stored locally.
-
There can be a data sharing technology between containers. The data generated in the docker container can be synchronized locally!
-
This is volume technology! For directory mounting, mount the directory in our container to linux.
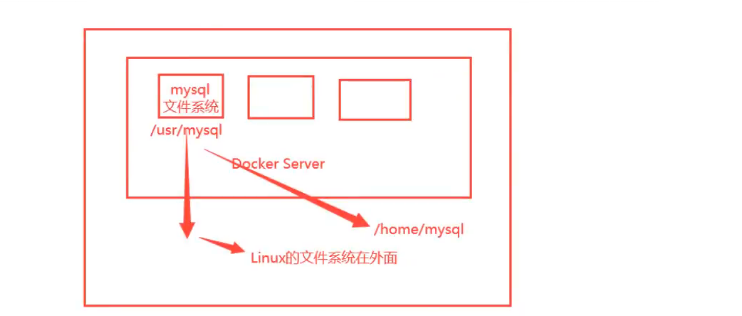
To sum up: the persistence and synchronization of containers can also share data between containers!
Using container data volumes
- Use the command to mount
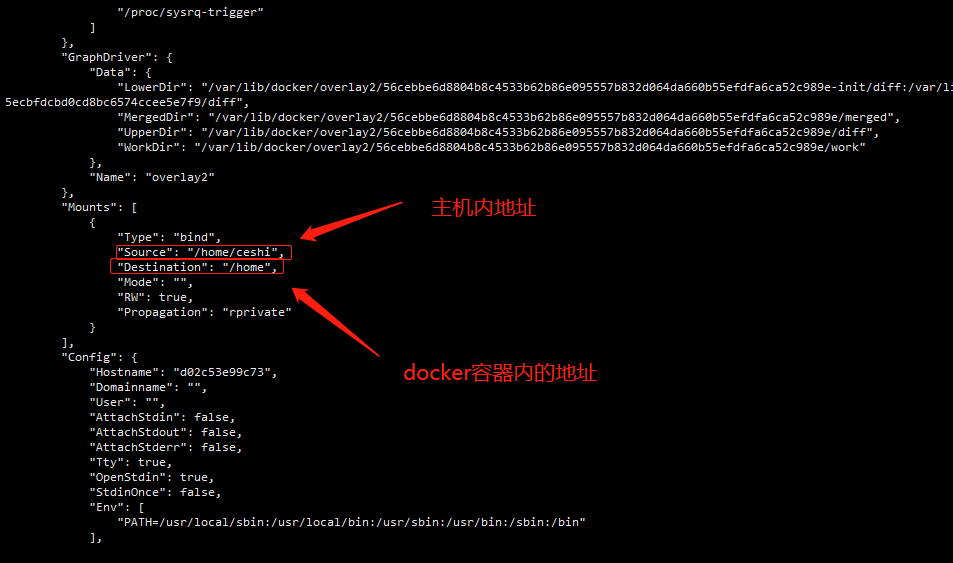
docker run -dit -v Host Directory:In container directory

After successful startup, you can use the docker inspect container id command to view the details
To test the synchronization of files, we now create the test.java file on the host

Then we go into the container to see if the file exists

Test again, stop the container, modify the file on the host, and start the container. The data in the container is still synchronized
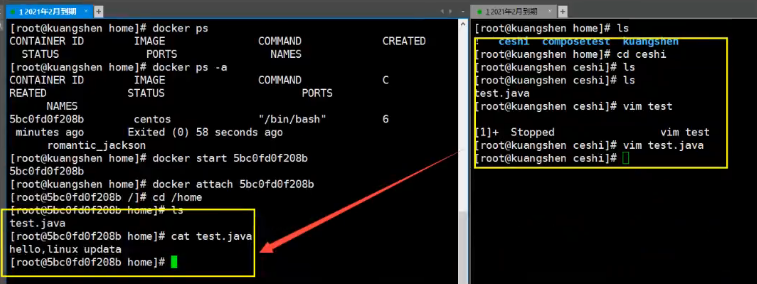
Benefits: we only need to modify locally in the future, and the container will be automatically synchronized!
Named mount anonymous mount
- Anonymous mount
docker run -d -P --name nginx01 -v /ect/nginx nginx

- View all volume s
docker volume ls

This is anonymous mount. After - v, we only write the path inside the container, not the path outside the container!
- Named mount
docker run -d -P --name nginx02 -v juming-nginx:/etc/nginx nginx

View all volume s

Named mount, via -v volume name: path in container
- Viewing volumes
 All volumes in the docker container are in / var / lib / docker / volumes / xxx without a specified directory/_ data
We can easily find one of our volumes through named mount. In most cases, named mount is used
How to determine whether to mount by name or anonymously, or by specifying a path?
- -v path in container is mounted anonymously
- -v volume name: named mount path in container
- -v / host path: the path in the container specifies the path to mount
- expand
Change read and write permissions through - v path in container: ro rw
- ro(readonly) is read-only. If you see ro, it means that this path can only be operated through the host, and it cannot be operated inside the container.
- rw(readwrite) is readable and writable.
Once the container permission is set, the container limits the content we mount
docker run -d -P --name nginx02 -v juming-nginx:/etc/nginx:ro nginx
docker run -d -P --name nginx02 -v juming-nginx:/etc/nginx:rw nginx
First acquaintance with Dockerfile
-
Dockerfile is the build file used to build the docker image! Command script! Experience it first!
-
Through this script, you can generate an image layer by layer. The script commands one by one, and each command is a layer.
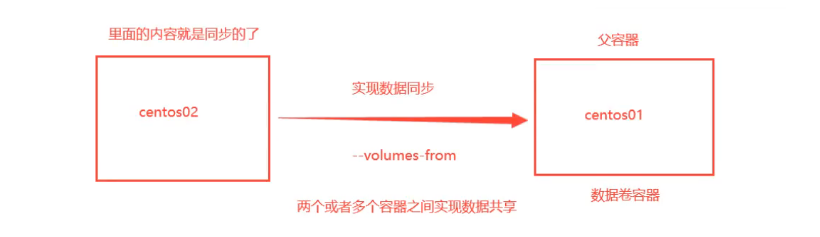
Data volume container
- Multiple mysql synchronization data
DockerFile
- Introduction to DcokerFile
dockerfile is the file used to build the docker image! Command parameter script!
Construction steps:
- Write a dockerfile file
- docker build builds into an image
- docker run run image
- docker push publishing images (DockerHub, Alibaba cloud image warehouse)
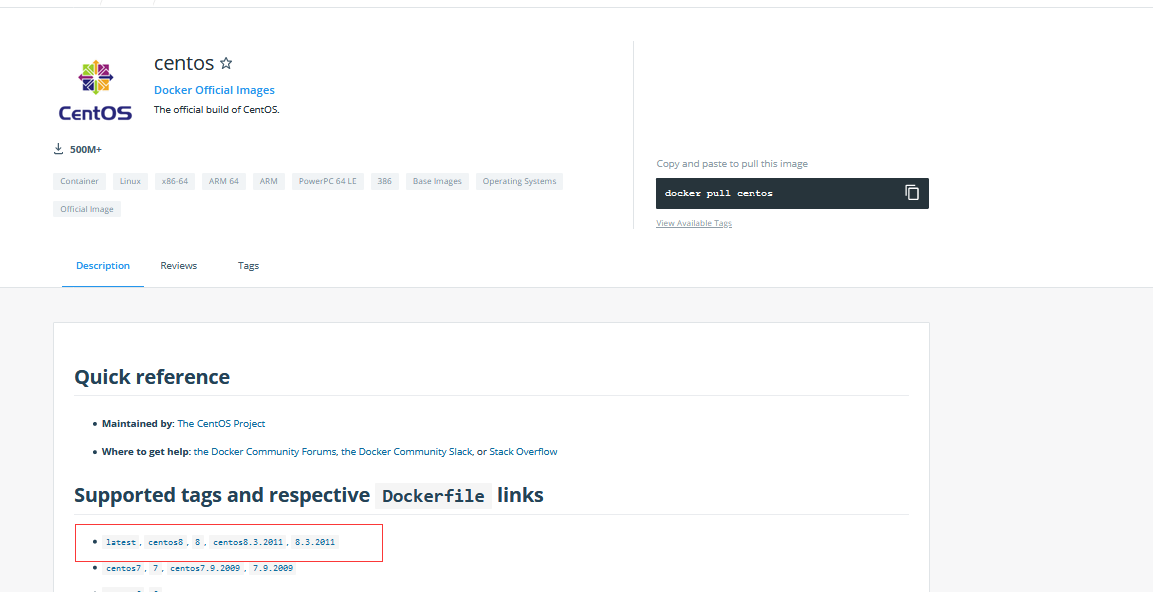
Let's see what the authorities do
DockerFile construction process
Basic knowledge
- Each reserved keyword (instruction) must be uppercase
- Execute from top to bottom
- #Indicates a comment
- Each instruction creates a new mirror layer and commits it.
-
Dockerfile is development oriented. If we want to publish projects and mirror them in the future, we need to write a dockerfile file. This file is very simple! Docker image has gradually become the standard of enterprise delivery, which must be mastered!
-
Steps: development, deployment, operation and maintenance... not a single one can be omitted
-
DockerFile: build a file that defines all the steps and source code
-
DockerImages: images generated through DockerFile construction, and products finally released and run
-
Docker container: a container is an image that runs to provide services
DockerFile instruction
- In the past, we used to use others. Now that we know these instructions, let's practice writing a mirror image by ourselves!
| instructions | explain |
|---|---|
| FROM | Basic image, everything starts from here |
| MAINTAINER | Who wrote the image, name + email |
| RUN | Commands to run during image construction |
| ADD | Add content |
| WORKDIR | Mirrored working directory |
| VOLUME | Mounted directory |
| EXPOSE | Reserved port configuration |
| CMD | Specify the command to run when the container starts. Only the last one will take effect and can be replaced |
| ENTRYPOINT | Specify the command to run when the container starts, and you can append the command |
| ONBUILD | When an inherited DockerFile is built, the ONBUILD instruction will be run. Trigger command. |
| COPY | Similar to ADD, copy our files to the image |
| ENV | Set environment variables during construction! |
Difference between CMD and ENTRYPOINT
- CMD specifies the command to run when the container is started. Only the last one will take effect and can be replaced
# Write dockerfile file
[root@iZ8vbjbtw24uc8kaw16kvsZ dockerfile]# vim centostest
FROM centos
CMD ["ls","-a"]

# Build mirror
[root@iZ8vbjbtw24uc8kaw16kvsZ dockerfile]# docker build -f centostest -t cmdtest .

# run and find that our ls -a command takes effect
[root@iZ8vbjbtw24uc8kaw16kvsZ dockerfile]# docker run ccf40f4cce18
.
..
.dockerenv
bin
dev
etc
home
lib
lib64
lost+found
media
mnt
opt
proc
root
run
sbin
srv
sys
tmp
usr
var

# Want to append a command - l ls -al
[root@iZ8vbjbtw24uc8kaw16kvsZ dockerfile]# docker run ccf40f4cce18 -l
docker: Error response from daemon: OCI runtime create failed: container_linux.go:367: starting container process caused: exec: "-l": executable file not found in $PATH: unknown.
ERRO[0000] error waiting for container: context canceled

# cmd, - l replaces CMD["ls","-a"] commands, - l is not a command, so an error is reported!
- ENTRYPOINT specifies the command to run when the container is started. You can append the command
# Write dockerfile file
[root@iZ8vbjbtw24uc8kaw16kvsZ dockerfile]# vim dockerfile-cmd-entory
FROM centos
ENTRYPOINT ["ls","-a"]

# Build mirror
[root@iZ8vbjbtw24uc8kaw16kvsZ dockerfile]# docker build -f dockerfile-cmd-entory -t dockeren .

# Our additional command is directly spliced behind our ENTRYPOINT command!
[root@iZ8vbjbtw24uc8kaw16kvsZ dockerfile]# docker run ffdaffe72ed2 -l
total 56
drwxr-xr-x  1 root root 4096 Mar 31 01:06 .
drwxr-xr-x  1 root root 4096 Mar 31 01:06 ..
-rwxr-xr-x  1 root root    0 Mar 31 01:06 .dockerenv
lrwxrwxrwx  1 root root    7 Nov  3 15:22 bin -> usr/bin
drwxr-xr-x  5 root root  340 Mar 31 01:06 dev
drwxr-xr-x  1 root root 4096 Mar 31 01:06 etc
drwxr-xr-x  2 root root 4096 Nov  3 15:22 home
lrwxrwxrwx  1 root root    7 Nov  3 15:22 lib -> usr/lib
lrwxrwxrwx  1 root root    9 Nov  3 15:22 lib64 -> usr/lib64
drwx------  2 root root 4096 Dec  4 17:37 lost+found
drwxr-xr-x  2 root root 4096 Nov  3 15:22 media
drwxr-xr-x  2 root root 4096 Nov  3 15:22 mnt
drwxr-xr-x  2 root root 4096 Nov  3 15:22 opt
dr-xr-xr-x 96 root root    0 Mar 31 01:06 proc
dr-xr-x---  2 root root 4096 Dec  4 17:37 root
drwxr-xr-x 11 root root 4096 Dec  4 17:37 run
lrwxrwxrwx  1 root root    8 Nov  3 15:22 sbin -> usr/sbin
drwxr-xr-x  2 root root 4096 Nov  3 15:22 srv
dr-xr-xr-x 13 root root    0 Mar 29 05:51 sys
drwxrwxrwt  7 root root 4096 Dec  4 17:37 tmp
drwxr-xr-x 12 root root 4096 Dec  4 17:37 usr
drwxr-xr-x 20 root root 4096 Dec  4 17:37 var
Many commands in Dockerfile are very similar. We need to understand their differences. Our best learning is to compare them and test the effect!
DockerFile actual test
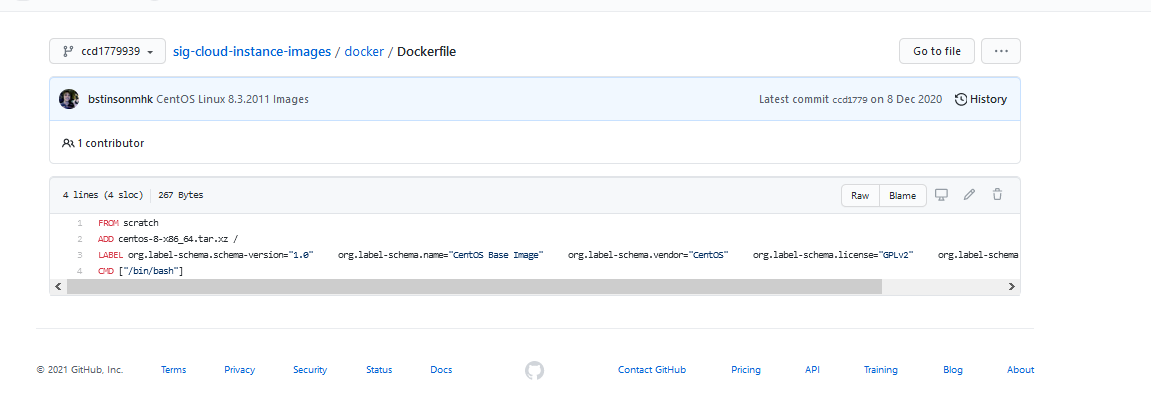
- 99% of the images in the Docker Hub are FROM scratch from this basic image, and then configure the required software and configuration to build
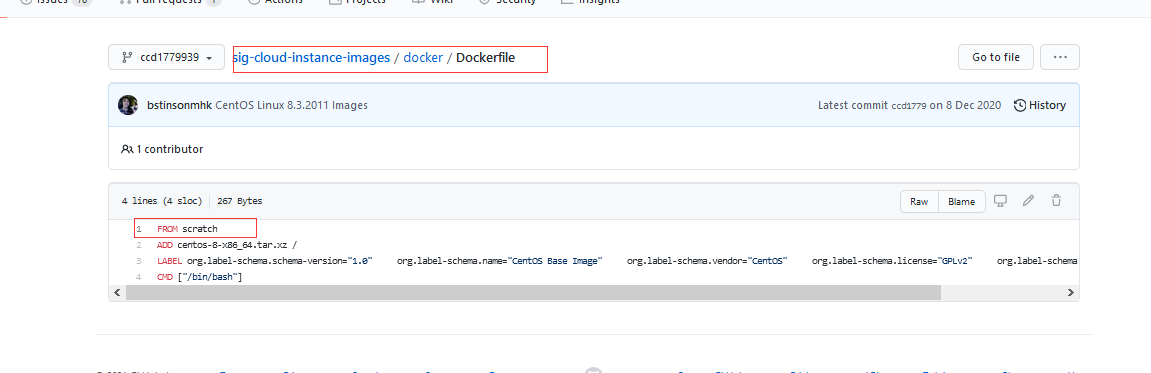
Create your own centos
- Writing Dockerfile files
FROM centos # base image

MAINTAINER yl<1903838739@qq.com> # Author and email

ENV MYPATH /usr/local # Setting environment variables
WORKDIR $MYPATH # Set working directory

#Download related dependencies. The centos image downloaded by default does not support vim and ifconfig instructions. After downloading these two dependencies, you can run vim and ifconfig instructions
RUN yum -y install vim
RUN yum -y install net-tools

EXPOSE 80 # Exposed port

CMD echo $MYPATH
CMD echo "---end---"
CMD /bin/bash # Enter the / bin/bash directory when the container starts
- Build an image from this file
docker build -f dockerfile File path -t Image name:[tag]
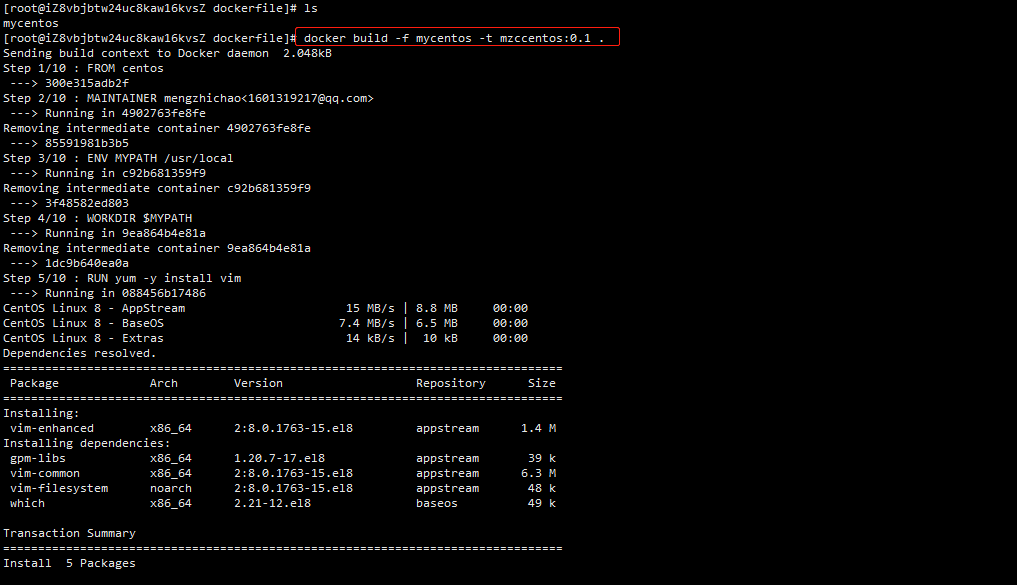
docker build -f mycentos -t mzccentos:0.1 .
- mycentos is the file name. If it is not in the folder path where the file is located, the full path must be written. mzccentos is its own image name and 0.1 is the version number. Note that there is another one after it. It cannot be omitted.
- test run
docker run -it mzccentos:0.1

At this point, our handwritten dockerfile runs.
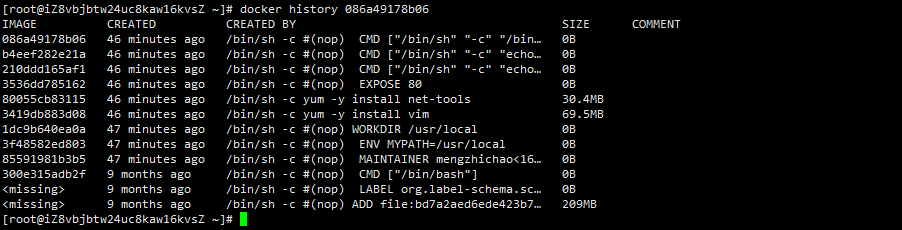
Lists the history of changes made locally
docker history container id
Publish your own image

Publish to Dcoker Hub
- Go to the Docker Hub official website to register your account to ensure that you can log in
Official website: https://registry.hub.docker.com/
- Log in to our DockerHub from the command line
docker login -u User name enter password

- Modify the image name (naming rules DockerHub user name / image name: version number)
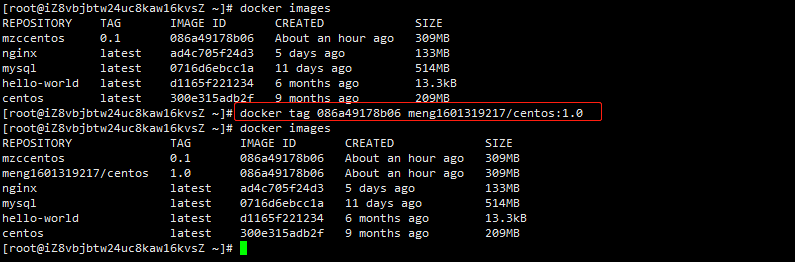
Note: exceptions may occur when subsequent push is not modified
- Submit your own image on our server
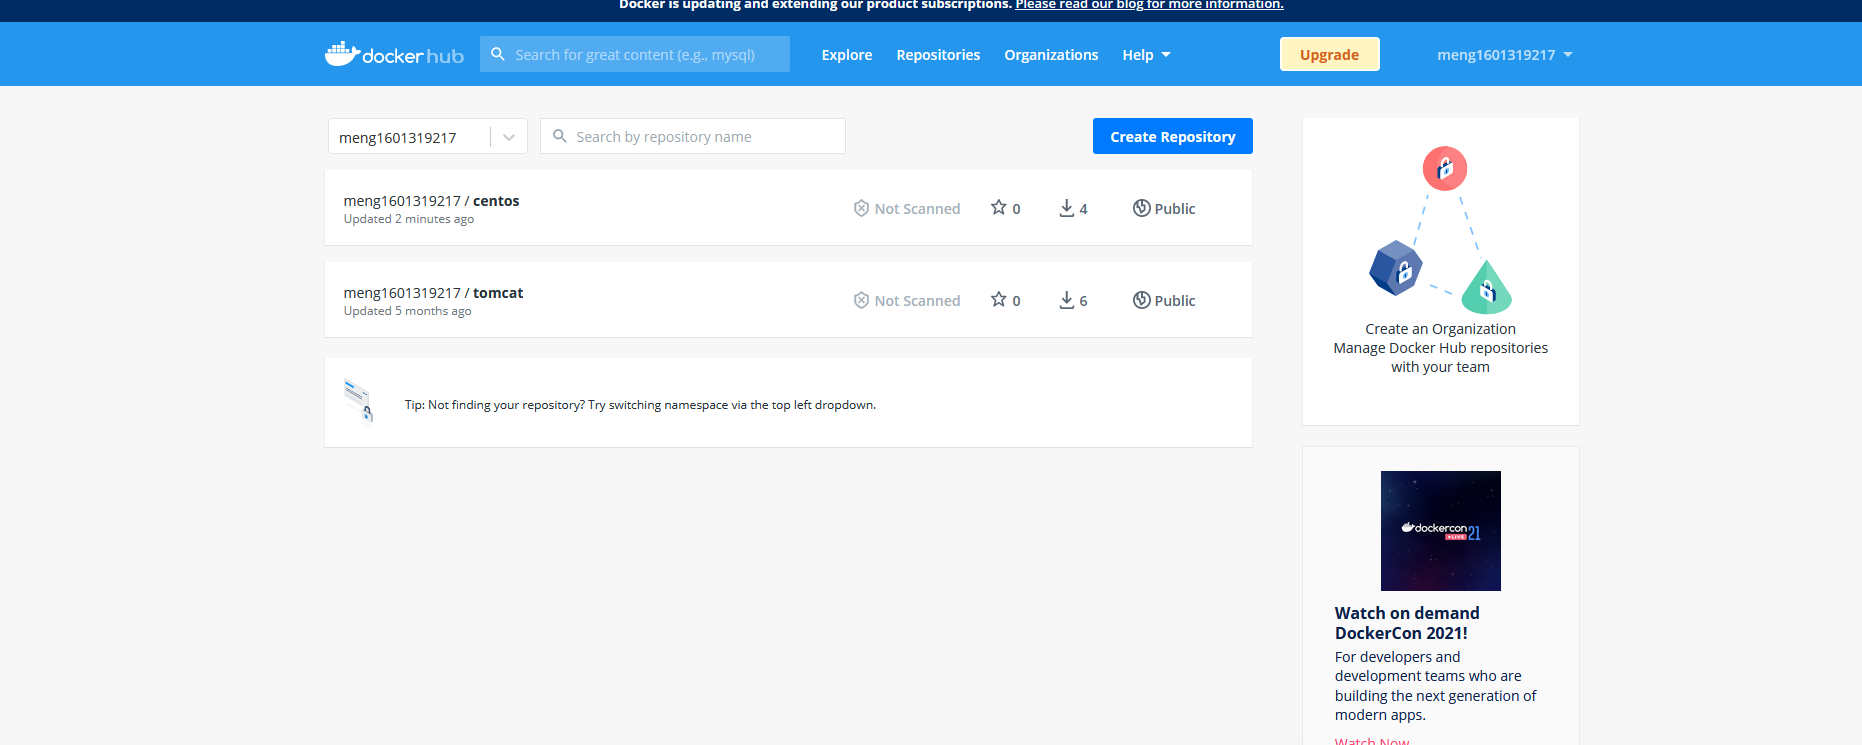
docker push Image name

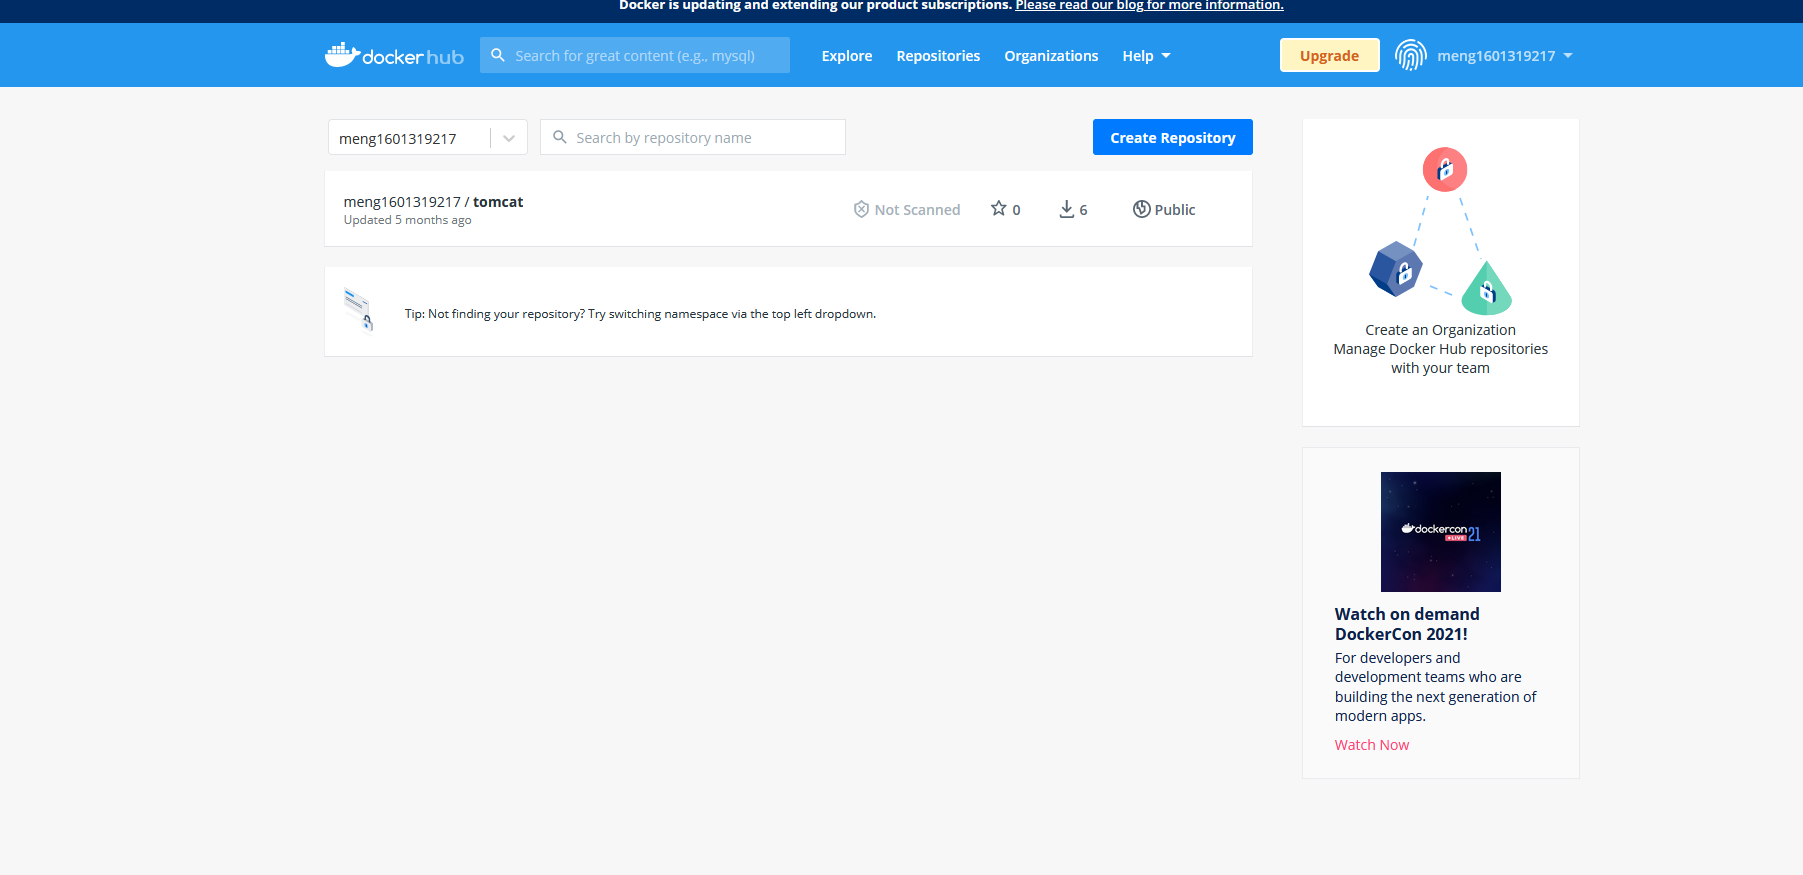
- Go to Docker Hub to check
Publish to alicloud
- Log in to alicloud and search the container image service
- Create namespace

- Create container image
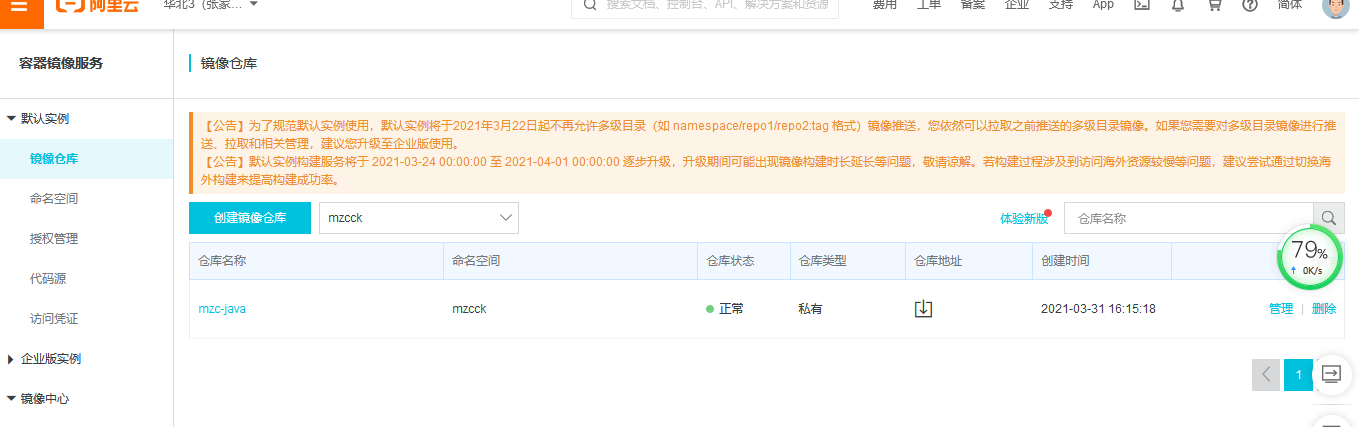
- Browse Alibaba cloud

5. Push
#Log in to alicloud docker login --username=Zhou Zhou class registry.cn-zhangjiakou.aliyuncs.com #Modify image name docker tag [ImageId] registry.cn-zhangjiakou.aliyuncs.com/mzcck/mzc-java:[Mirror version number] #Push images to alicloud docker push registry.cn-zhangjiakou.aliyuncs.co m/mzcck/mzc-java:[Mirror version number]


Development essential (important)
- Now let's clear all images on docker and reinstall the environment required for Java development.
docker rmi -f $(docker images -q)
docker rm -f $(docker ps -aq)
1, Install MySQL
- Here we demonstrate that Docker installs MySQL 5.7 and mounts data and configuration files
- Get image
docker pull mysql:5.7

- Mount the data, configure the password, and run the container
docker run -d -p 3306:3306 -v /home/mysql/conf:/etc/mysql/conf.d -v /home/mysql/data:/var/lib/mysql -e MYSQL_ROOT_PASSWORD=123456 --name mysql mysql:5.7
Parameter interpretation: - d background operation - p port mapping - v mount volume - e environment configuration -- name container name

- Connect to MySQL via local Navicat tools
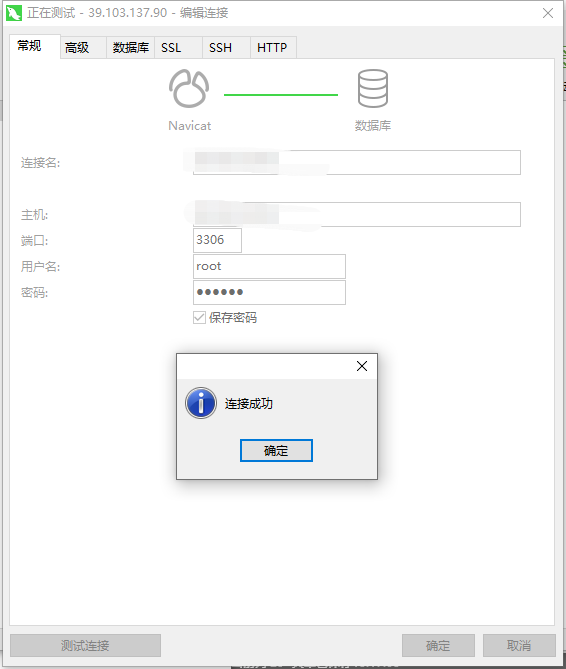
- Is there a problem with the new database test mount


- After the creation, it is found that the newly created database information already exists in the local data directory. Even if the image is deleted, the database volume we mounted to the local will not be lost, which realizes the container data persistence function!
2, Install Redis
- Docker installs redis and mounts external configuration and data
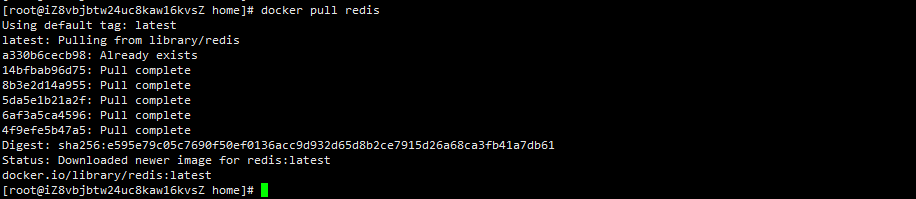
- Pull the image from dockerHub to the local
docker pull redis
- Create directory (host)
Configuration file directory (redis.conf configuration file is placed in this directory, and the directory can be customized)
mkdir -p /home/redis/conf
Data directory
mkdir -p /home/redis/data

- Start the container, load the configuration file and persist the data
docker run -d --privileged=true -p 6379:6379 --restart always -v /home/redis/conf/redis.conf:/etc/redis/redis.conf -v /home/redis/data:/data --name myredis redis redis-server /etc/redis/redis.conf --appendonly yes
Parameter interpretation:
- -d start the container as a daemon
- --privileged=true elevates the permissions in the container
- -P 6379: bind host port
- --restart always
- -v /home/redis/conf/redis.conf mapping configuration file
- -v /home/redis/data map data directory
- --name myredis specifies the container name
- --appendonly yes enables data persistence

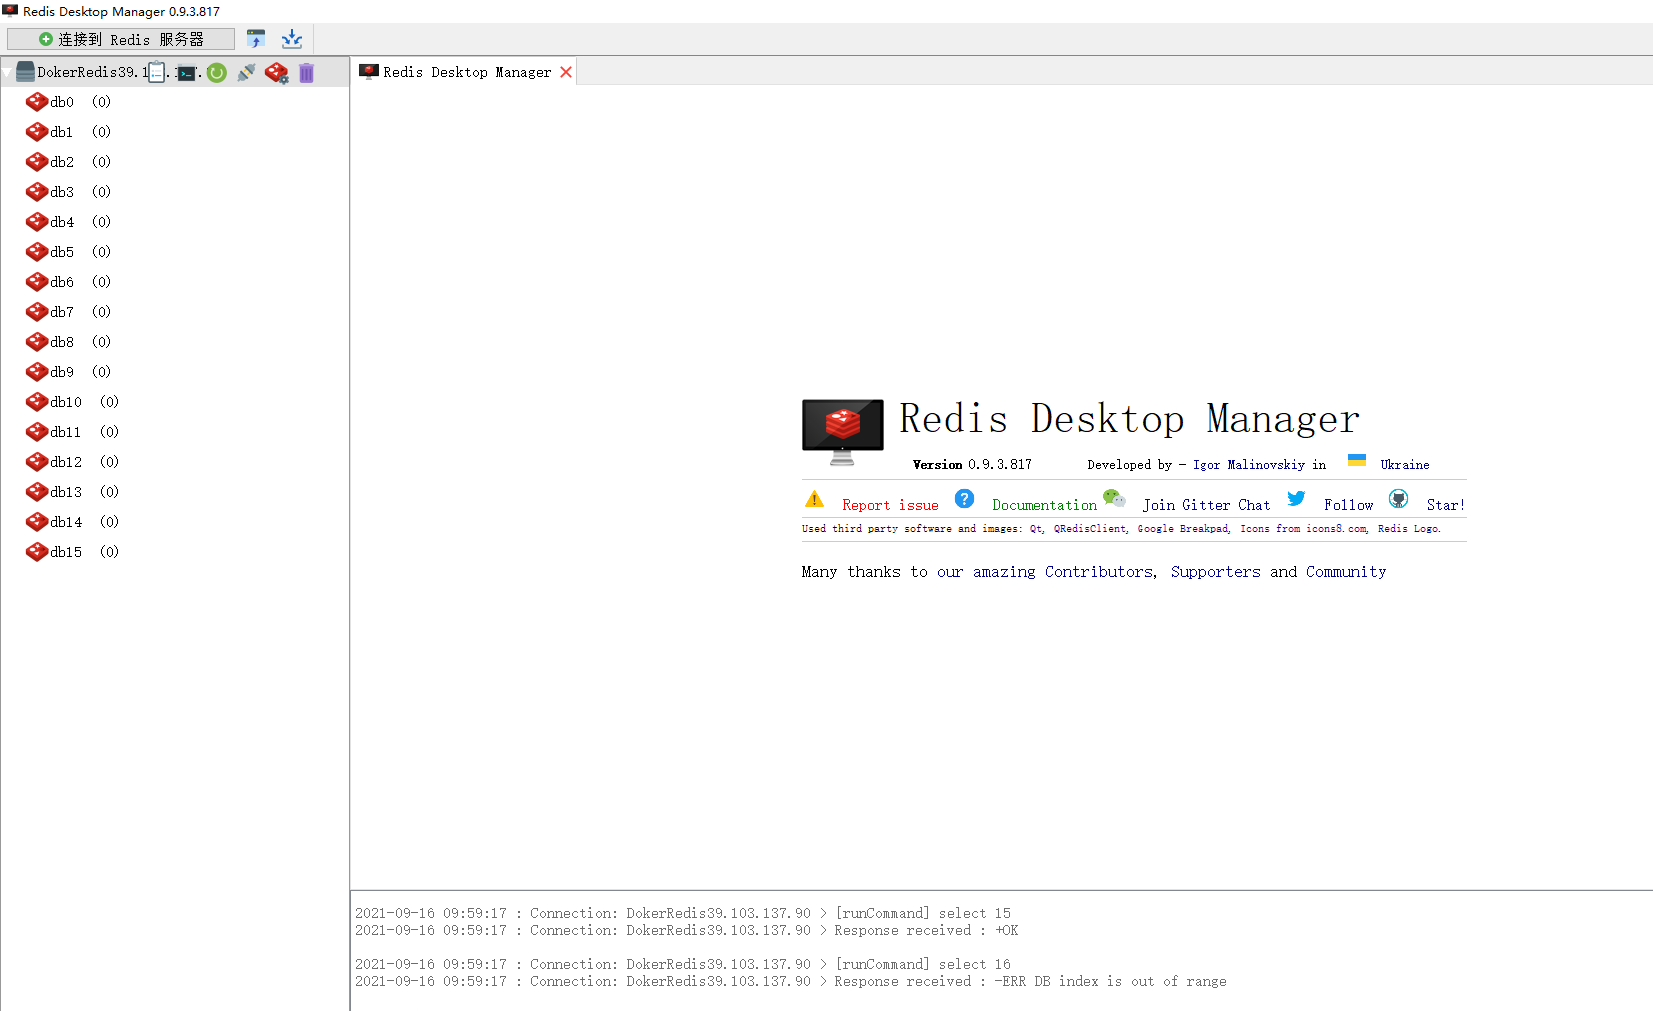
- Use the redis client connection test (redis does not set a user name and password, and can connect directly to the port through ip)
- Add data to test whether the mount is effective
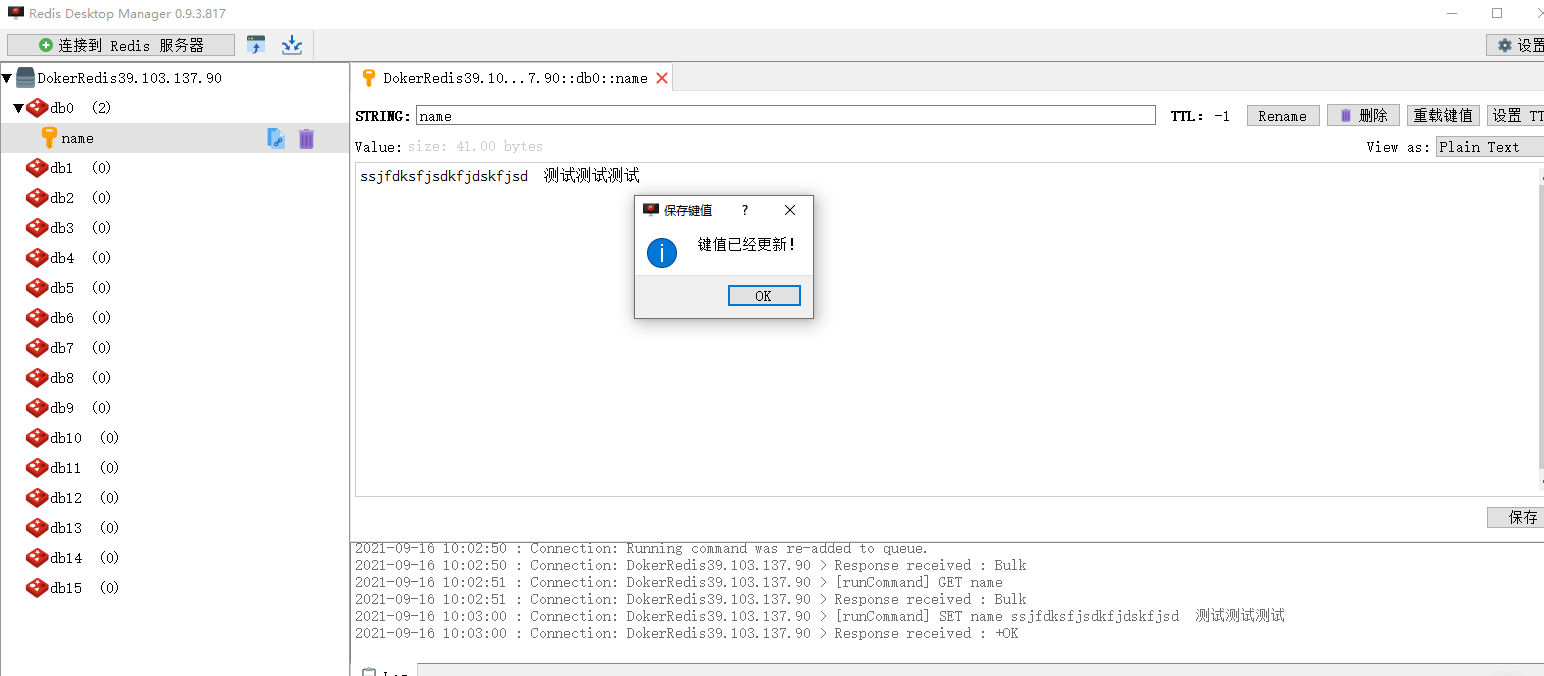
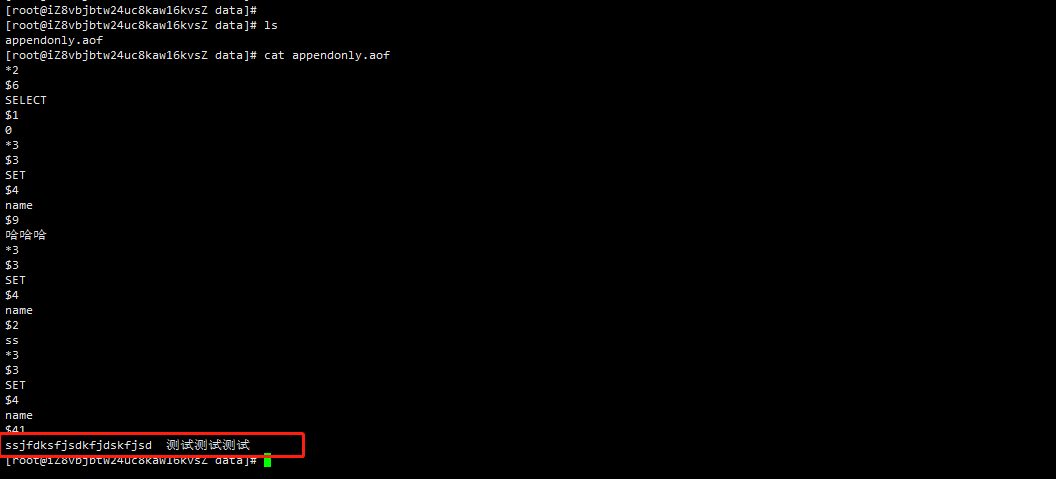
At this point, we have no problem installing and mounting redis
3, Installing Nginx
- Docker installs nginx and mounts the host directory into the container
- Download nginx image (pull the latest version directly here, and you can download the corresponding version as needed)
docker pull nginx

- Create the mount directory on the host
Log directory
mkdir /home/nginx/log
Profile directory
mkdir /home/nginx/conf
Project location
mkdir /home/nginx/html

- Start the image and complete the corresponding mounting and configuration
docker run --name mynginx -d -p 80:80 -v /home/nginx/log:/var/log/nginx -v /home/nginx/conf.d:/etc/nginx/conf.d -v /home/nginx/html:/usr/share/nginx/html nginx

Note: Although the startup is successful here, the nginx.conf configuration file is not mounted. Because direct mounting will report an error, we follow the operation below
- After the above container is started successfully, we first enter the container docker exec -it container id /bin/bash
- After entering the container, find the location of the nginx.conf file. cd /etc/nginx, and check whether the file exists.
- Exit container exit

- Enter the conf directory cd /home/nginx/conf created by our host (local)
- Copy the nginx.conf file in the container to our local folder docker cp container id:/etc/nginx/nginx.conf

- After completing the above operations, delete the docker rm -f container id from the nginx container you started earlier

- Restart the container by executing the following command 👇
docker run --name mynginx -d -p 80:80 -v /home/nginx/log:/var/log/nginx -v /home/nginx/conf.d:/etc/nginx/conf.d -v /home/nginx/conf/nginx.conf:/etc/nginx/nginx.conf -v /home/nginx/html:/usr/share/nginx/html nginx
Parameter interpretation:
- -d start the container as a daemon
- --name myredis specifies the container name
- -p 80:80 bind host port

At this point, we have finished mounting and running nginx
4, Install Tomcat
- Download the tomcat image. The latest version is still used here
docker pull tomcat
- Start mirroring
docker run --name tomcat -itd --privileged=true --rm -v /home/tomcat/webapp:/usr/local/tomcat/webapps/webapp -p 8080:8080 tomcat
Parameter Description:
- --Name tomcat create container name tomcat
- --privileged=true allow mirror mount mapping local directory
- -p 8081:8080 port mapping
- -v data volume mount
- -itd background Daemon Start container
- Tomcat image name

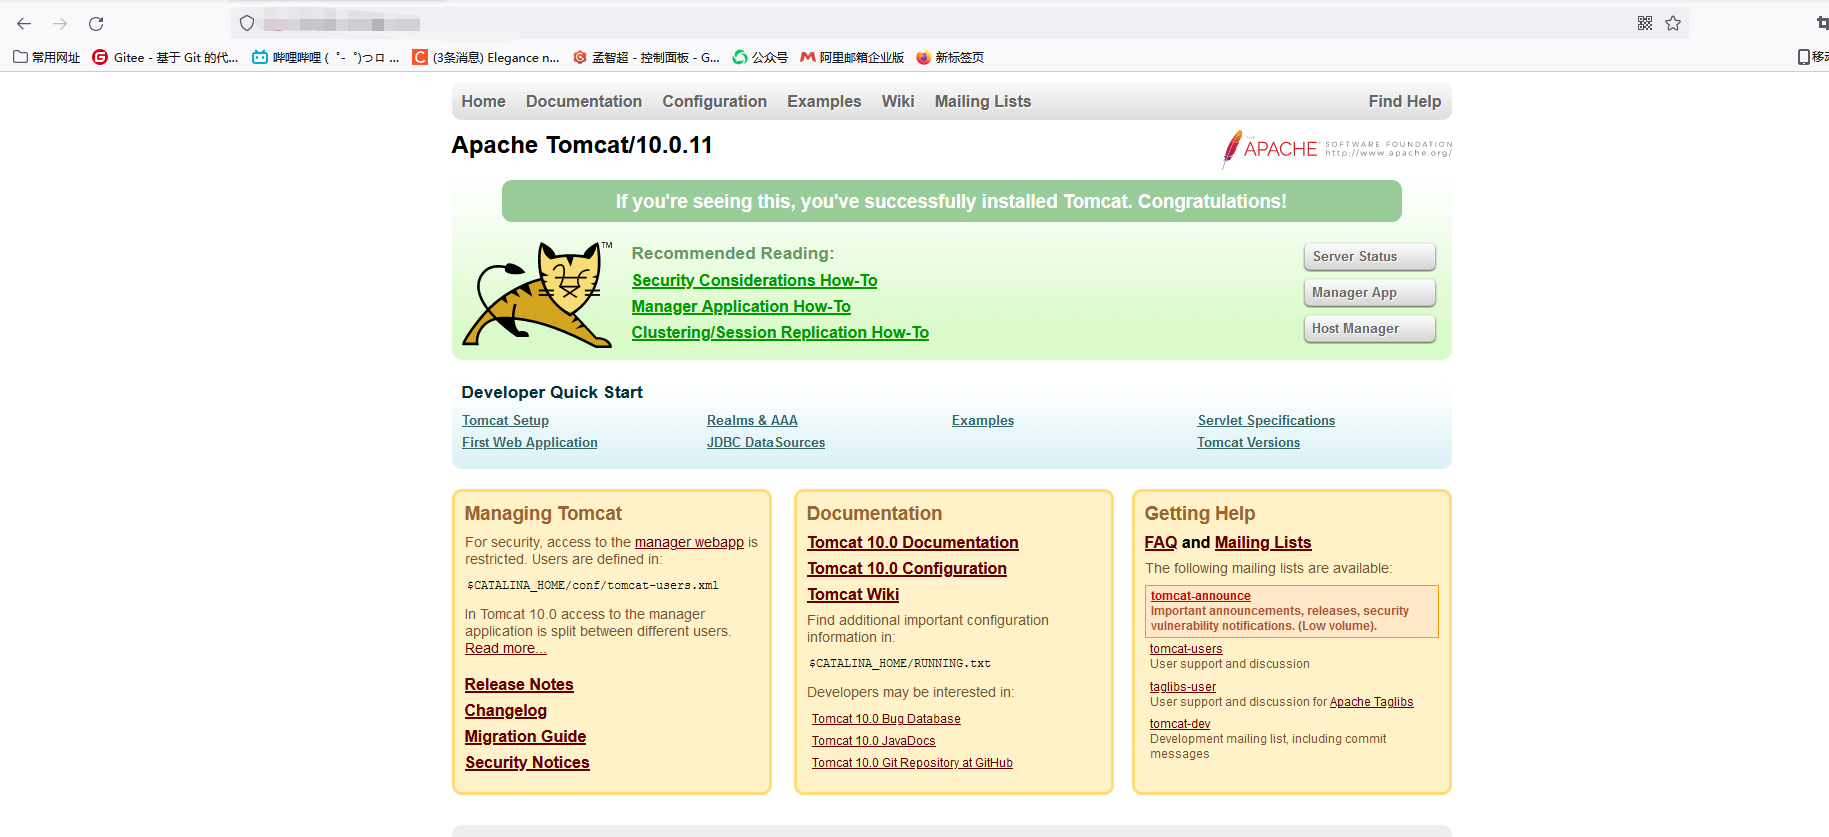
We visited test report 404

Let's go into the container and find out
docker exec -it container id /bin/bash

When we came in, we found nothing under webapp. The reason for Alibaba cloud image. The default is the smallest image, and all unnecessary images are eliminated to ensure the smallest running environment.
- Solution:
cp -r webapps.dist/* webapps

- Retest:
- be accomplished.
- OK, so the whole Docker basic operation is completed and the official account is not easy to finish. After reading, don't forget to pay attention to the official account with one key and three links. All the information can be obtained in the public number.

👇