1. Resource Objects for k8s
Deployment, Service and Pod are the three core resource objects of k8s
Deployment: The controller of the most common stateless application that supports scaling, rolling upgrade, and so on.
Service: Provides a fixed access interface for flexible, life-cycle PD objects for service discovery and service access.
Pod: The smallest unit to run containers and schedule.The same pod can run multiple containers at the same time, which share net, UTS, IPC, in addition to USER, PID, MOUNT.
ReplicationController: Used to ensure that each copy of a Pod meets the target number at any time. Simply put, it is used for an older stateless Pod application controller that is always running and accessible for each container or container group.
RwplicatSet: A new generation of stateless Pod application controllers differs from RC in that they support only equal value selectors (key-value pairs) and RS additionally supports set-based selectors.
StatefulSet: Used to manage stateful persistent applications, such as the database service program, which differs from Deployment in that it creates a unique persistence identifier for each pod and ensures order between each pod.
DaemonSet: Used to ensure that each node runs a copy of a pod, new nodes are added to the pod, and the pod is recycled when the node is removed.
Job: Used to manage applications that can be terminated after running, such as batch processing for job tasks;
1.Pod's life cycle is defined as the following stages.
- Pending:Pod has been created, but one or more containers have not been created, including the Pod dispatch phase and the download process of container mirrors.
- Running:Pod has been dispatched to Node, all containers have been created, and at least one container is running or restarting.
- All containers in Succeeded:Pod exited normally.
- Failed: All containers in Pod exit, at least one container exits at one time.
2. Features
Pod is the smallest unit that can be created, dispatched, and managed.
Each Pod has a separate IP;
A Pod consists of one or more containers that share namespaces, shared storage, and so on; all containers for a Pod are on the same Node;
Container life cycle management;
Restrict resource use, resources (requests, limits);
Detect containers: livenessProbe;
Pod s within a cluster can be accessed arbitrarily, typically through a two-tier network.
3.Pod and Containers
In Docker, containers are the smallest unit of processing. The objects to be added or deleted are containers. Containers are a virtualization technology. Containers are isolated from each other. Isolation is based on Linux Namespace.
In K8S, Pod contains one or more related containers. Pod can be considered an extension of the container, a Pod is also an isolator, and a set of containers contained within Pod are shared (including PID, Network, IPC, UTS).In addition, containers in Pod can access common data volumes for file system sharing.
4. Resource Requests and Limitations
When creating a Pod, you can specify computing resources (currently supported resource types have CPU and memory), that is, resource requests (Request) and resource constraints (Limit) for each container. Resource requests are the minimum resource requirements required by the container, and resource constraints are the upper resource limits that the container cannot exceed.Relationships are: 0<=request<=limit<=infinity
A Pod's resource request is the sum of all container resource requests in the Pod.When dispatching a Pod, K8S determines whether the Node meets demand based on the total amount of resources in the Node (obtained through the cAdvisor interface) and the computing resources already used on the Node.
Resource requests ensure that a Pod has enough resources to run, while resource restrictions prevent one Pod from using resources indefinitely and causing other Pods to crash.Especially in public cloud scenarios, malware tends to take advantage of memory to platform.
For configuration, see http://blog.csdn.net/liyingke112/article/details/77452630
5. One pod multi-container
Pod mainly establishes an application-oriented "logical host" model in a containerized environment that can contain one or more containers that are closely related to each other.When any of these containers is abnormal, the Pod is also abnormal.
One pod multi-container integrates multiple single containers with the same application into one class virtual machine, making all containers share a single vm resource, improving coupling, facilitating replication of replicas and improving overall availability.
Advantages of one pod with multiple containers:
Containers under the same Pod share data and communication more easily, using the same network namespace, IP address, and port range, and can discover and communicate with each other through localhost.
Container shared storage space running within the same Pod (if set), data in the storage volume will not be lost after the container restarts and can be read by other containers under the same Pod.
Compared to native container interfaces, Pod simplifies the deployment and management of applications by providing a higher level of abstraction, with different containers providing different services.Pod is like a unit for managing horizontal deployments, where host hosting, resource sharing, coordinated replication, and dependency management can all be handled automatically.
6.Pod-Use
The core principle is to spread multiple applications across multiple Pod s
Reasons: reasonable application based on resources; scaling, different applications should have different scaling strategies, etc.
If containers don't have to run together, put them in different Pod s
If containers were previously separate components, put them in different Pod s
If the expansion strategy before the container is different, put it in a different Pod
Conclusion: Single Pod single container application, except for special reasons
Experimental environment
| Host | IP Address | service |
|---|---|---|
| master | 192.168.1.21 | k8s |
| node01 | 192.168.1.22 | k8s |
| node02 | 192.168.1.23 | k8s |
Experiments based on https://blog.51cto.com/14320361/2464655 continue
Two, Namespace: Namespace
Default namespace: Default
Namespace is another important concept in the kubernetes system. By "assigning" objects within the system to different Namespaces, different projects, groups, or user groups are logically grouped so that different groups can be managed separately while sharing the resources that use the entire cluster.
When the Kubernetes cluster is started, a Namespace named "default" is created. If the Namespace is not specified specifically, the user-created pods, RC s, and services are all created in the Namespace named "default".
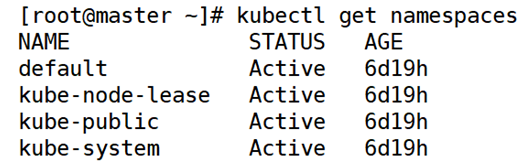
1. View Namespace
[root@master ~]# kubectl get namespaces
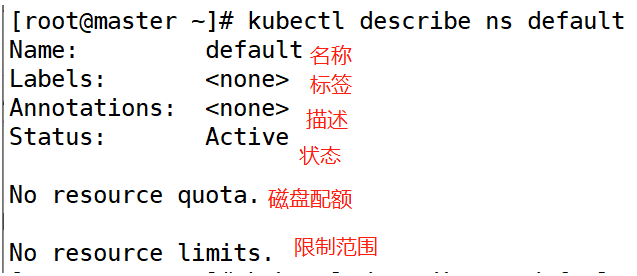
2. View Namespace Details
[root@master ~]# kubectl describe ns default
3. Create Namespace
[root@master ~]# kubectl create ns bdqn
Check it out
[root@master ~]# kubectl get namespaces

4. Create a yaml file for namespace
(1) View format
[root@master ~]# kubectl explain ns
//View the format of the nasespace yaml file
(2) Create a yaml file for namespace
[root@master ~]# vim test-ns.yaml
apiVersion: v1
kind: Namespace
metadata:
  name: test
(3) Run yaml file of namespace
[root@master ~]# kubectl apply -f test-ns.yaml
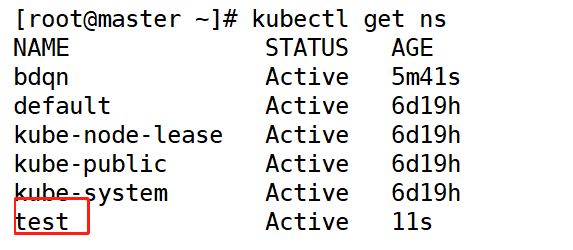
(4) Check it out
[root@master ~]# kubectl get ns
4. Delete Namespace
[root@master ~]# kubectl delete ns test
[root@master ~]# kubectl delete -f test-ns.yaml
Note: The namespace resource object is used for isolation of resource objects and does not isolate communication between Pod s in different namespaces.That's what network policy resources do.
5. View the specified namespace
You can use the --namespace or -n option
[root@master ~]# kubectl get pod -n kube-system
[root@master ~]# kubectl get pod --namespace kube-system
Three, Pod
1. Write a yaml file of pod
[root@master ~]# vim pod.yaml
kind: Pod
apiVersion: v1
metadata:
  name: test-pod
spec:
  containers:
  - name: test-app
    image: 192.168.1.21:5000/web:v1
The replicas field is not supported in pod's yaml file
(1) Run once
[root@master ~]# kubectl apply -f pod.yaml
(2) Check it out
[root@master ~]# kubectl get pod

ps: Because this pod was created by itself, k8s will not be generated automatically after deletion, which is equivalent to creating it in docker
2. Specify namespace namespace for pod
(1) Modify yaml file of pod
[root@master ~]# vim pod.yaml
kind: Pod        #Resource Type
apiVersion: v1   #api version
metadata:
  name: test-pod    #Specify Controller Name
  namespace: bdqn   #Specify namespace (namespace)
spec:
  containers:      #container
  - name: test-app  #Container name
    image: 192.168.1.21:5000/web:v1  #image
Execute once
[root@master ~]# kubectl apply -f pod.yaml
(2) Check it out
[root@master ~]#  kubectl get pod -n bdqn
//View by namespace name

3. Mirror acquisition strategies in pod
Always: Always get a mirror from the specified repository when the mirror label is "laster" or the mirror does not exist.
IfNotPresent: Download from the target repository only if the local image does not exist.
Never: Downloading mirrors from the repository is prohibited, that is, using only local mirrors.
Note: For labels that are "laster" or do not exist, the default mirror download policy is "Always", while for other label mirrors, the default policy is "IfNotPresent".
4. Observe the differences and associations between pod s and service s
(1) yaml file of pod (specified port)
[root@master ~]# vim pod.yaml
kind: Pod          #Resource Type
apiVersion: v1      #api version
metadata:
  name: test-pod       #Specify Controller Name
  namespace: bdqn   #Specify namespace (namespace)
spec:
  containers:                          #container
  - name: test-app                    #Container name
    image: 192.168.1.21:5000/web:v1   #image
    imagePullPolicy: IfNotPresent   #Acquired Policies
    ports:
    - protocol: TCP
      containerPort: 80
<1>Delete previous pod s
[root@master ~]# kubectl delete pod -n bdqn test-pod
<2>Execute
[root@master ~]# kubectl apply -f pod.yaml
<3>Check it out
[root@master ~]# kubectl get pod -n bdqn

(2) yaml file of pod (modify port)
[root@master ~]# vim pod.yaml
kind: Pod
apiVersion: v1
metadata:
  name: test-pod
  namespace: bdqn
spec:
  containers:
  - name: test-app
    image: 192.168.1.21:5000/web:v1
    imagePullPolicy: IfNotPresent
    ports:
    - protocol: TCP
      containerPort: 90   #Change the port
<1>Delete previous pod s
[root@master ~]# kubectl delete pod -n bdqn test-pod
<2>Execute
[root@master ~]# kubectl apply -f pod.yaml
<3>Check it out
[root@master ~]# kubectl get pod -n bdqn -o wide

<4>Visit

You will find that the modified port 90 is not valid, he is just a prompt field and is not valid.
(3) yaml file of pod (add label)
[root@master ~]# vim pod.yaml
kind: Pod
apiVersion: v1
metadata:
  name: test-pod
  namespace: bdqn
  labels:                 #Label
    app: test-web          #Label Name
spec:
  containers:
  - name: test-app
    image: 192.168.1.21:5000/web:v1
    imagePullPolicy: IfNotPresent
    ports:
    - protocol: TCP
      containerPort: 90   #Change the port
--------------------------------------pod---------------------------------------------
(4) Write a service yaml file
[root@master ~]# vim test-svc.yaml
apiVersion: v1      #api version
kind: Service          #Resource Type
metadata:
  name: test-svc       #Specify Controller Name
  namespace: bdqn   #Specify namespace (namespace)
spec:
  selector:          #Label
    app: test-web    #Label name (must match pod's label name)
  ports:
  - port: 80          #Host Port
    targetPort: 80    #Container Port
You will find that the added port 80 is valid, so you can't tamper with it.
<1>Execute
[root@master ~]# kubectl apply -f test-svc.yaml
<2>Check it out
[root@master ~]# kubectl get svc -n bdqn

[root@master ~]# kubectl describe svc -n bdqn test-svc

<4>Visit
[root@master ~]# curl 10.98.57.97

--------------------------------------service---------------------------------------------
Fourth, container restart strategy
Pod's Restart Policy applies to all containers within the Pod and is only judged and restarted by kubelet on the Node where the Pod resides.When a container exits abnormally or a health check fails, kubelet will operate according to the RestartPolicy settings.
Always: (used by default) But restart a Pod object whenever it terminates;
OnFailure: Restart the Pod object only if it has an error;
Never: Never restart;
5. Default health check for pod
Each container starts with a process specified by Dockerfile's CMD or ENTRYPOINT.If the return code is not zero when the process exits, Kubernetes will restart the container according to the restartPolicy if the container is considered to have failed.
(1) Write yaml file for health examination
Let's simulate a container failure scenario with the following Pod profile:
[root@master ~]# vim healcheck.yaml
apiVersion: v1
kind: Pod
metadata:
  labels:
    test: healcheck
  name:  healcheck
spec:
  restartPolicy: OnFailure  #Specify restart policy
  containers:
  - name:  healcheck
    image: busybox:latest
    args:                   #Commands to run when generating pod s
    - /bin/sh
    - -c
    - sleep 20; exit 1
<1>Execute
[root@master ~]# kubectl apply -f healcheck.yaml
<2>Check it out
[root@master ~]# kubectl get pod -o wide

[root@master ~]# kubectl get pod -w | grep healcheck

In the example above, the container process returns a non-zero value, while Kubernetes believes that the container has failed and needs to be restarted.In many cases, however, a failure occurs and the process does not exit.
Sixth, small experiments
1) Create a k8s namespace with your own name in which all the following operations are located.
(1) Create a namespace
[root@master ~]# kubectl create ns xgp
(2) Check it out
[root@master ~]# kubectl get ns xgp

2) Create a Pod resource object using a private mirror in a private repository whose Download Strategy is: NEVER.Pod's restart strategy is Never.
[root@master ~]# vim pod.yaml
kind: Pod
apiVersion: v1
metadata:
  name: test-pod
  namespace: xgp
  labels:
    app: test-web
spec:
  restartPolicy: Never
  containers:
  - name: www
    image: 192.168.1.21:5000/web:v1
    imagePullPolicy: Never
    args:
    - /bin/sh
    - -c
    - sleep 90; exit 1
    ports:
    - protocol: TCP
      containerPort: 80
3) Execute abnormal exit after creating the container to see the final state of the Pod.
(1) Execute the yaml file of the pod above
[root@master ~]# kubectl apply -f pod.yaml
(2) View test-pod information in ns dynamically
[root@master ~]# kubectl get pod -n xgp -w | grep test-pod

delete test-pod
[root@master ~]# kubectl delete pod -n xgp test-pod
4) Create a Service resource object to associate with the above Pod objects and verify their associations.
(1) Modify yaml file of pod
[root@master ~]# vim pod.yaml
kind: Pod
apiVersion: v1
metadata:
  name: test-pod
  namespace: xgp
  labels:
    app: test-web
spec:
  restartPolicy: Never
  containers:
  - name: www
    image: 192.168.1.21:5000/web:v1
    imagePullPolicy: Never
    ports:
    - protocol: TCP
      containerPort: 80
(1) Write yaml file for service
[root@master ~]# vim svc.yaml
apiVersion: v1
kind: Service
metadata:
  name: test-svc
  namespace: xgp
spec:
  selector:
    app: test-web
  ports:
  - port: 80
    targetPort: 80
(2) Execute once
[root@master ~]# kubectl apply -f svc.yaml
(3) Check it out
[root@master ~]# kubectl get pod -o wide -n xgp

(4) Visit
[root@master ~]# curl 10.244.1.21
