https://blog.csdn.net/shida_csdn/article/details/80006645
I. Research Background
The company happens to need to configure a local private Docker warehouse and provide Cache functionality to act as a proxy for DockerHub.
Nexus 3 not only integrates warehouse functions such as maven and npm, but also supports Docker
Experiments show that Nexus 3 can basically meet the needs, except for poor mirror management (not as intuitive as Harbor)
II. Deployment steps
2.1. Deployment environment
Operating system: CentOS 7 64
Java: 1.8.0_171 (Nexus runtime dependent jdk environment)
2.2. Install Nexus 3
Simple installation, download and decompress
Download address: https://www.sonatype.com/download-oss-sonatype nexus-3.10.0-04-unix.tar.gz
Unzip it into the / opt directory (you can change the directory yourself.) Another nonsense.
- # tar zxvf nexus-3.10.0-04-unix.tar.gz -C /opt
2.3 Configuration Certificate (Self-Signed)
https is not enabled by default nexus, but docker is enabled. For uniformity, https certificates need to be configured
Here, we implement it with keytool
Step 1: Generate the authentication file that the server needs to configure
Change the IP address to the IP address of your machine (for convenience, I have IP for both domain name and IP)
Running the script generates a keystore.jks in the current directory
- #!/bin/bash
- NEXUS_DOMAIN=192.168.12.129
- NEXUS_IP_ADDRESS=192.168.12.129
- PASSWD=Nexus123
- keytool -genkeypair -keystore keystore.jks -storepass ${PASSWD} -keypass ${PASSWD} -alias nexus -keyalg RSA -keysize 2048 -validity 5000 -dname "CN=${NEXUS_DOMAIN}, OU=Nexus, O=Nexus, L=Beijing, ST=Beijing, C=CN" -ext "SAN=IP:${NEXUS_IP_ADDRESS}" -ext "BC=ca:true"
keystore.jks is placed in the nexus ssl directory, which is easy to manage.
- # cp keystore.jks /opt/nexus-3.10.0-04/etc/ssl/
Step 2: Generate the certificates required by the client
In the directory where keystore.jks is located, execute the following command (the password is the same as above):
The keystore.cer file will be generated under the current folder (which will be imported into the client machine later)
- # keytool -export -alias nexus -keystore keystore.jks -file keystore.cer -storepass Nexus123
Step 3: Configure Nexus to use certificates and open https
- # cp /opt/nexus-3.10.0-04/etc/nexus-default.properties /opt/nexus-3.10.0-04/etc/nexus-default.properties.bak
- # vim /opt/nexus-3.10.0-04/etc/nexus-default.properties
- ## DO NOT EDIT - CUSTOMIZATIONS BELONG IN $data-dir/etc/nexus.properties
- ##
- # Jetty section
- application-port-ssl=8443
- application-port=8081
- application-host=0.0.0.0
- nexus-args=${jetty.etc}/jetty.xml,${jetty.etc}/jetty-http.xml,${jetty.etc}/jetty-requestlog.xml,${jetty.etc}/jetty-https.xml,${jetty.etc}/jetty-http-redirect-to-https.xml
- nexus-context-path=/
- # Nexus section
- nexus-edition=nexus-pro-edition
- nexus-features=\
- nexus-pro-feature
Next, configure / opt/nexus-3.10.0-04/etc/jetty/jetty-https.xml
- # vim /opt/nexus-3.10.0-04/etc/jetty/jetty-https.xml
- <Set name="KeyStorePath">/opt/nexus-3.10.0-04/etc/ssl/keystore.jks</Set>
- <Set name="KeyStorePassword">Nexus123</Set>
- <Set name="KeyManagerPassword">Nexus123</Set>
- <Set name="TrustStorePath">/opt/nexus-3.10.0-04/etc/ssl/keystore.jks</Set>
- <Set name="TrustStorePassword">Nexus123</Set>

Step 4: Start Nexus
- # /opt/nexus-3.10.0-04/bin/nexus start
Start logs can be viewed here: / opt/sonatype-work/nexus 3/log/nexus.log
Let's go directly to the browser. (admin/admin123)
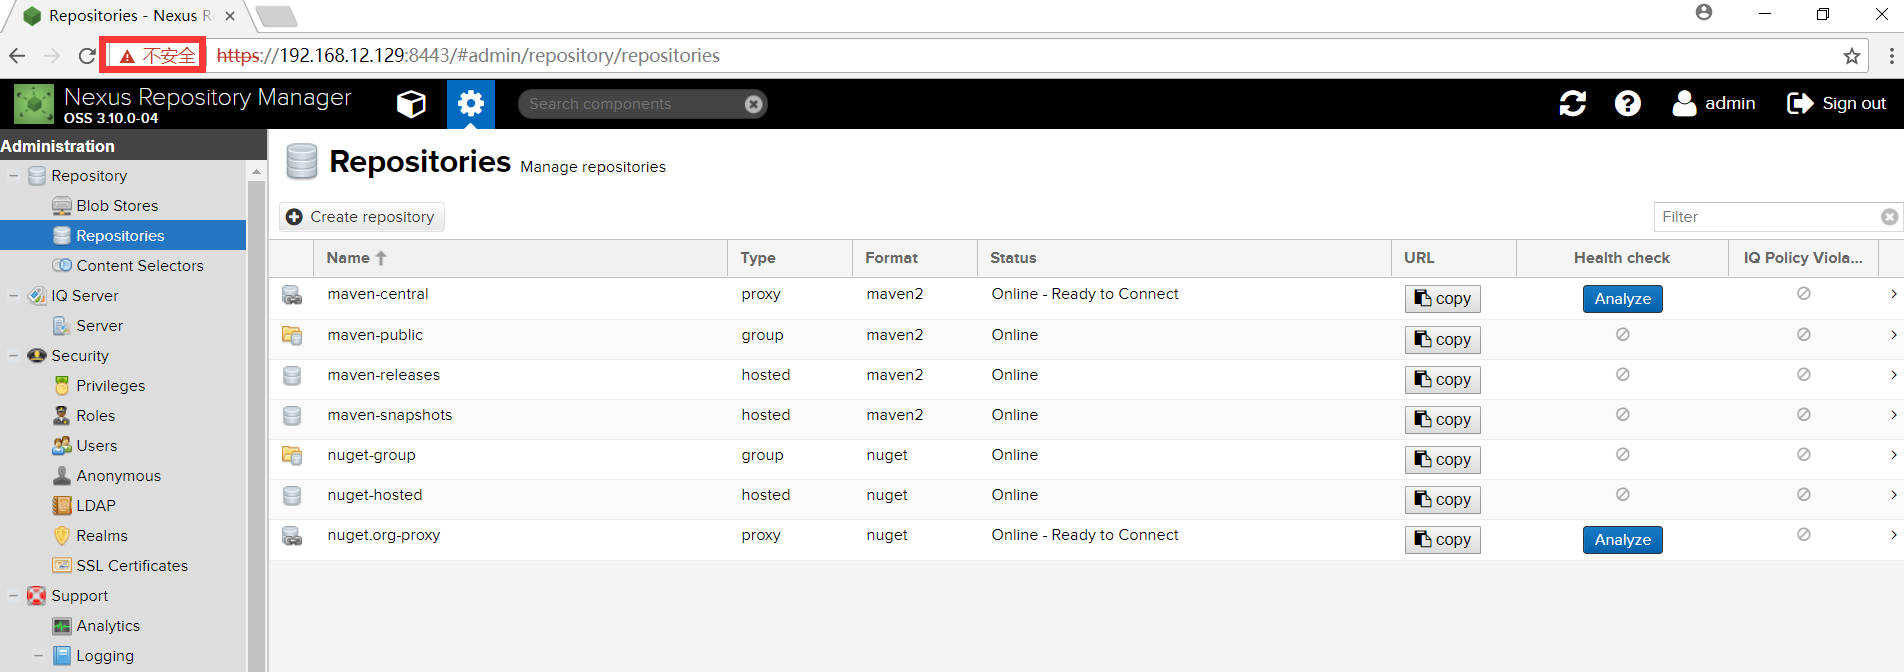
It's https, but it's not trusted because we're self-signed.
Step 5: Import certificates into browsers in our experiment
Import the keystore.cer file generated in the second step into the browser
Google Browser: Settings - Advanced - Management Certificate
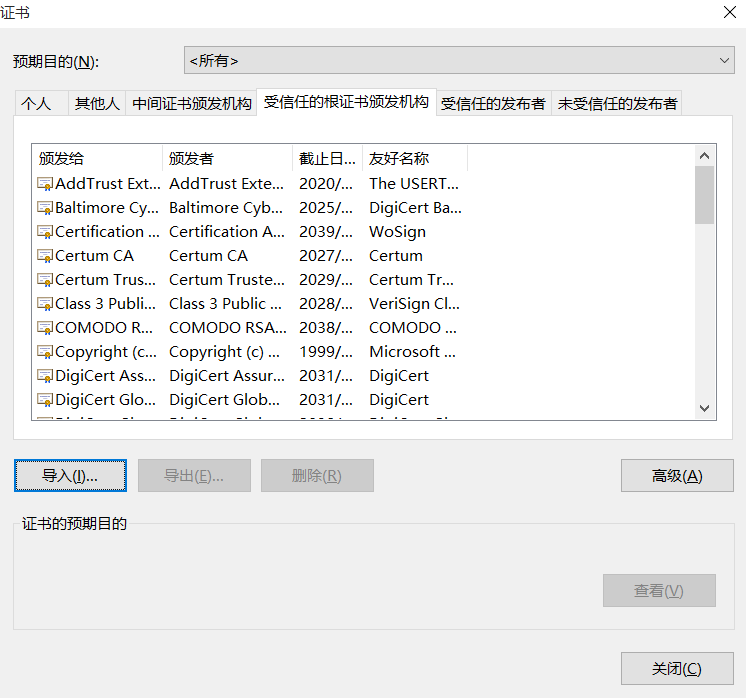
Click Import, select our certificate file, and execute the import in turn.
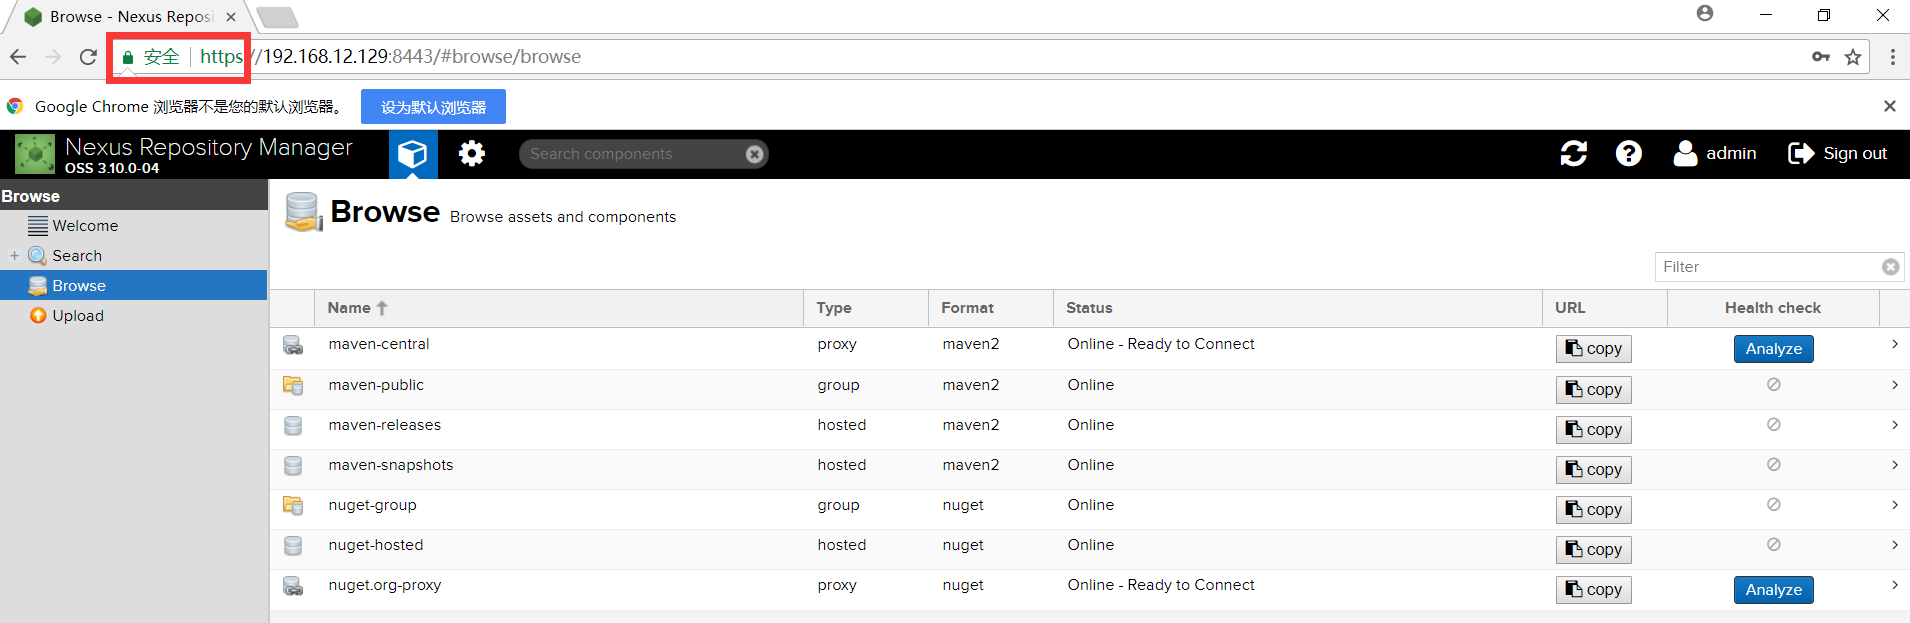
Restart Chrome and re-visit https://192.168.12.129:8443 (Nexus address)
Discover that it's unsafe and successful!
2.4 Configure Docker Registry (Private Warehouse)
Repository - Repositories - Create repository - Select docker (hosted)
Fill in a name (e.g. docker-local)
Check HTTPS, fill in a port (e.g. 7709), and "Enable Docker V1 API" by default.
Click Create repository to create a warehouse
2.5 Configure Docker Mirror (Mirror Agent)
Repository - Repositories - Create repository - Select docker (proxy)
Fill in a name (such as docker-hub)
Check HTTPS and fill in a port (e.g. 7719)
Remove the Force basic authentication check and tick "Enable Docker V1 API"
Fill in Remote storage: My DaoCloud address, http://cfdd5a36.m.daocloud.io
Docker Index chooses "Use Docker Hub" by default.
Click Create repository to create a warehouse
2.6 Configuration of Realms
Security - Realms, activate Docker Realm

2.7 Client Import Certificate
Previously, we only tried to import certificates in browsers to enable Docker clients to communicate with the warehouse properly.
Client import certificates are required
With Centos 7 as an example, importing certificates is divided into two steps (Ubuntu importing certificate step, please move to the appendix at the end of the article)
Step 1: Copy keystore.cer to / etc/pki/ca-trust/source/anchors directory
Step 2: Update certificate information and execute # update-ca-trust extract
2.8 Configure Docker Daemon using Mirror
Edit/lib/system/docker.service
After ExecStart=/usr/bin/dockerd, add the parameter -- registry-mirror=https://192.168.12.129:7719
Or write / etc/docker/daemon.json
- {"registry-mirrors": ["https://192.168.12.129:7719"]}
Restart Docker service
- # systemctl daemon-reload
- # systemctl restart docker
2.9 Verify that Docker can communicate with Nexus Docker warehouse normally
Log in to private warehouse, username password (admin/admin123)
- # docker login 192.168.12.129:7709

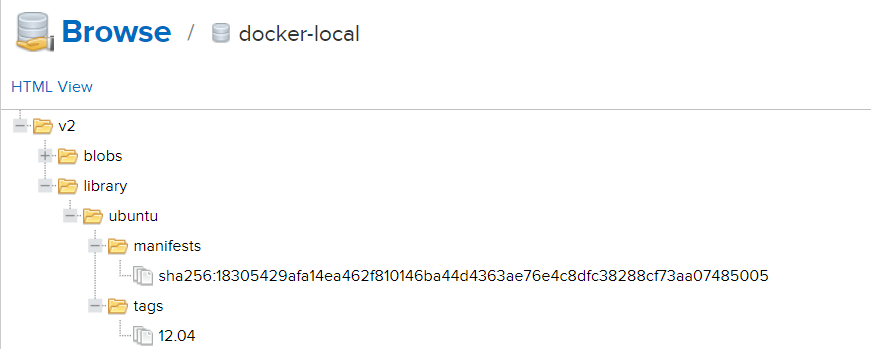
Push Mirror to Private Warehouse
- # docker tag ubuntu:12.04 192.168.12.129:7709/library/ubuntu:12.04
- # docker push 192.168.12.129:7709/library/ubuntu:12.04

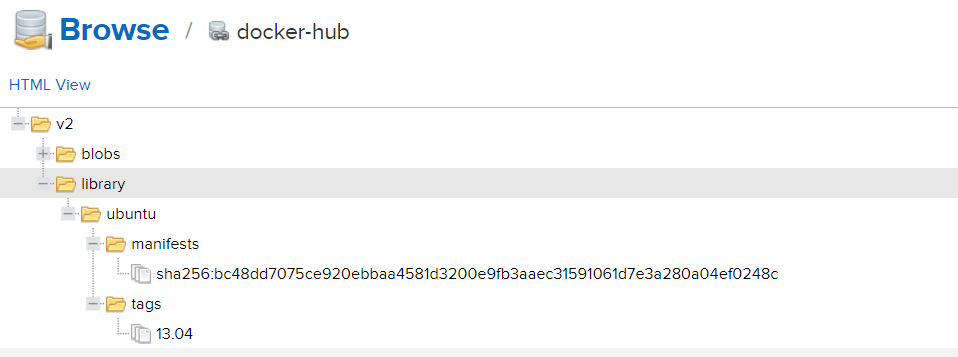
Pull mirror (via Mirror)
- # docker pull ubuntu:13.04
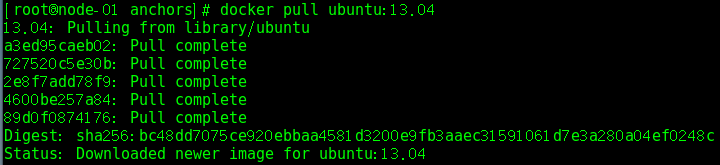
2.10 Finally, let's see if there are any mirrors we have operated in the warehouse.
At this point, the tutorial is over, the configuration is successful, go home for dinner! uuuuuuuuuuu
=====
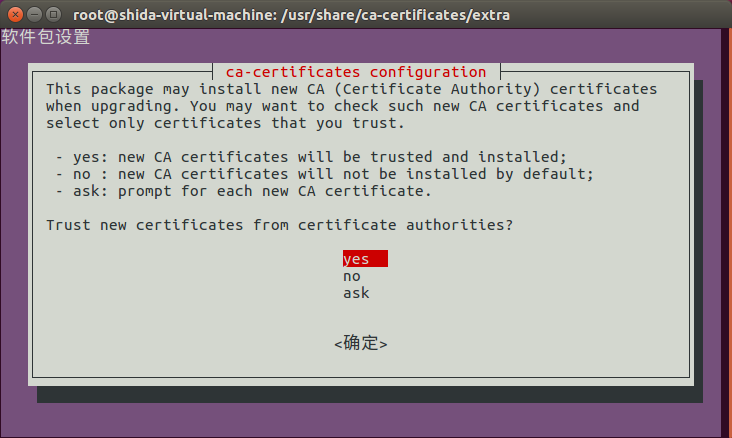
Additional notes on Ubuntu 16.04 import certificate:
Under * Ubuntu system, the general imported certificate format is crt, so it is necessary to export the certificate file in this format first.
- # keytool -importkeystore -srckeystore keystore.jks -destkeystore keystore.p12 -deststoretype PKCS12
- # openssl pkcs12 -in keystore.p12 -nokeys -out keystore.crt
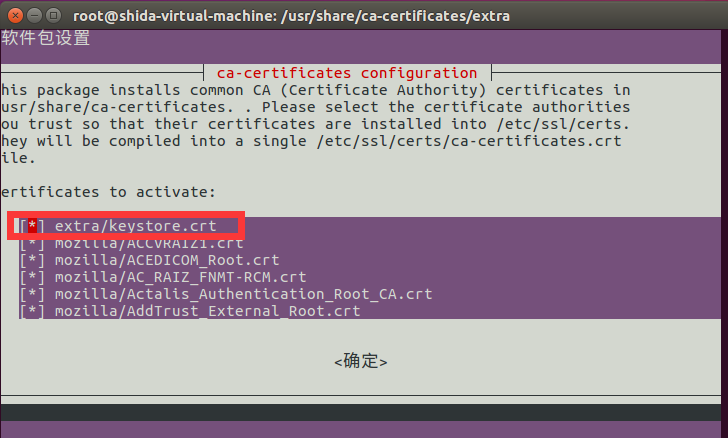
* Import the exported keystore.crt into the Ubuntu system
- # mkdir /usr/share/ca-certificates/extra
- # cp keystore.crt /usr/share/ca-certificates/extra
- # dpkg-reconfigure ca-certificates
Set Nexus to boot automatically:
(Note that modifying jdk and nexus paths is the path you actually use)
- # vim /lib/systemd/system/nexus.service
- [Unit]
- Description=nexus
- After=network.target
- [Service]
- Type=forking
- LimitNOFILE=65536
- Environment="JAVA_HOME=/opt/jdk1.8.0_171"
- ExecStart=/opt/nexus-3.10.0-04/bin/nexus start
- ExecReload=/opt/nexus-3.10.0-04/bin/nexus restart
- ExecStop=/opt/nexus-3.10.0-04/bin/nexus stop
- PrivateTmp=true
- [Install]
- WantedBy=multi-user.target
- # systemctl enable nexus.service
- # systemctl start nexus.service
Nexus 3 Installs Helm Plug-ins: Walk Here https://blog.csdn.net/shida_csdn/article/details/80314674