zabbix Sends WeChat Alerts with Pictures
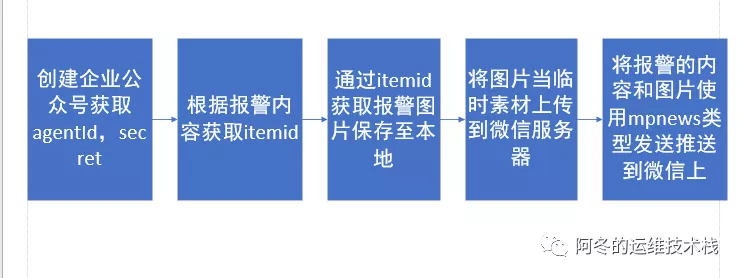
2.1 Realization Ideas
2.2 Preparing the environment
- The script uses python scripts, running in python 2.7.5
- Dependent libraries are installed in advance: requests
2.3 ×××tid,secret
This section allows you to see a detailed description of the previous article without a diagram
2.4 Script Implementation
#!/usr/bin/python
#coding=utf-8
_author__ = 'zhangdongdong'
import requests, json
import urllib3
import smtplib,sys,os,time,re,requests
from email.mime.image import MIMEImage
if sys.getdefaultencoding() != 'utf-8':
    reload(sys)
    sys.setdefaultencoding('utf-8')
urllib3.disable_warnings()
class WechatImage(object): # According to the Enterprise WeChat api interface document, define a class using mpnews type, https://qydev.weixin.qqq.com/wiki/index.php?Title=%E6%B6%88%E6%81%AF%E7%B1%BB%E5%8B%E5%8F%8A%E6%95%B0%E6%8D%AE%A0%BC%8F%8F

    def get_token(self, corpid, secret): # Get token
        url = "https://qyapi.weixin.qq.com/cgi-bin/gettoken"
        data = {"corpid": corpid,
                "corpsecret": secret}
        r = requests.get(url=url, params=data, verify=False)
        token = r.json()['access_token']
        return token

    def get_image_url(self, token, path): # Upload a temporary material picture and return to media_id
        url = "https://qyapi.weixin.qq.com/cgi-bin/media/upload?access_token=%s&type=image" % token
        data = {"media": open(path, 'rb')}
        r = requests.post(url=url, files=data)
        dict_data = r.json()
        return dict_data['media_id']
    def get_messages( self,subject,content,path): #Define parameter dictionary in mpnews type
        data = ''
        messages = {}
        body = {}
        content_html=text_to_html(content)
        token = self.get_token(corpid, secret)
        image = self.get_image_url(token, path)
        content_html += "<br/> <img src='https://qyapi.weixin.qq.com/cgi-bin/media/get?access_token=%s&media_id=%s'>" % (token, image)
        body["title"] = subject
        body['digest'] = content
        body['content'] = content_html
        body['thumb_media_id'] = image
        data = []
        data.append(body)
        messages['articles'] = data
        return messages
    def send_news_message(self, corpid, secret,to_user, agentid,path): #Define data to send mpnews type
        token = self.get_token(corpid, secret)
        messages = self.get_messages( subject, content,path)
        url = "https://qyapi.weixin.qq.com/cgi-bin/message/send?access_token=%s" % token
        data = {"toparty": to_user,                                 # User Account Number in Enterprise Number
                "agentid": agentid,                             # Application id in enterprise number
                "msgtype": "mpnews",
                "mpnews": messages,
                "safe": "0"}
        headers = {'content-type': 'application/json'}
        data_dict = json.dumps(data, ensure_ascii=False).encode('utf-8')
        r = requests.post(url=url, headers=headers, data=data_dict)
        return r.text
def text_to_html(text): #Convert the text field of the message content to HTML format
    d=text.splitlines()
    #Store mail content in a list as a list element per line
    html_text=''
    for i in d:
        i='' + i + '<br>'
        html_text+=i + '\n'
    #Add html wrap tags to each element of the list
    return html_text
def get_itemid():
    #Get alert itemid
    itemid=re.search(r'Monitor ID:(\d+)',sys.argv[3]).group(1)
    return itemid
def get_graph(itemid):
    #Get the alarm chart and save it
    session=requests.Session()   #Create a session session session
    try:
        loginheaders={
        "Host":host,
        "Accept":"text/html,application/xhtml+xml,application/xml;q=0.9,image/webp,image/apng,*/*;q=0.8"
        }
        #Define Request Header

        payload = {
        "name":user,
        "password":password,
        "autologin":"1",
        "enter":"Sign in",
        }
        #Define incoming data
        login=session.post(url=loginurl,headers=loginheaders,data=payload)
        #Log on
        graph_params={
            "from" :"now-10m",
            "to" : "now",
            "itemids" : itemid,
            "width" : "290", #Picture height and width parameters
            "height" : "40",
        }
        #Define parameters for getting pictures
        graph_req=session.get(url=graph_url,params=graph_params)
        #Send get request for picture data
        time_tag=time.strftime("%Y%m%d%H%M%S", time.localtime())
        graph_name='baojing_'+time_tag+'.png'
        #Save picture name with alarm time
        graph_name = os.path.join(graph_path, graph_name)
        #Save pictures using absolute paths
        with open(graph_name,'wb') as f:
            f.write(graph_req.content)
            #Write the captured picture data to a file
        return graph_name
    except Exception as e:
        print(e)
        return False
if __name__ == '__main__':
    user='Admin'    #Define zabbix user name
    password='zabbix'    #Define zabbix user isecret
    graph_path='/usr/lib/zabbix/alertscripts/graph/'   #Define the path to store pictures, pictures need to be cleaned up regularly
    graph_url='http://192.168.73.133/chart.php'#Define the url of the chart
    loginurl="http://192.168.73.133/index.php "#Defines the url of the login
    host='192.168.73.133'
    itemid=get_itemid()
    path =get_graph(itemid)
    to_user = str(sys.argv[1])
    subject = str(sys.argv[2])
    content = str(sys.argv[3])
    corpid= "xxxxx"
    secret = "xxxxxxx"
    agentid = "1000002"
    wechat_img = WechatImage()
    wechat_img.send_news_message(corpid, secret,to_user, agentid, path)
2.5 Define the type of alarm medium
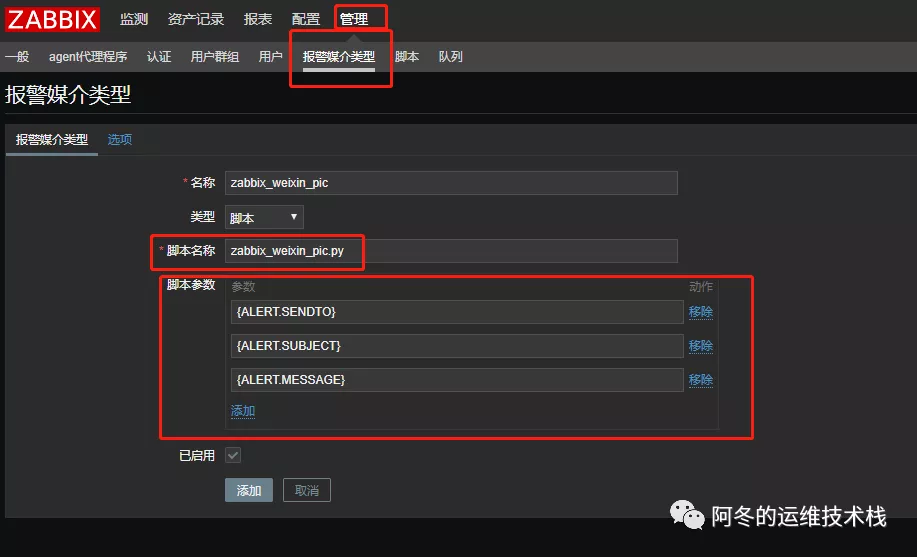
Open the ZABBIX monitoring web, select the alarm media type in the management menu, create the media type, select the script, fill in the name of the microstrip diagram script just written zabbix_weixin_pic.py, script parameters, and add
Open the user in management, click on the user who needs to set up the mail alarm, add the alarm medium in the alarm medium, select the type just defined in the pop-up box, fill in the Department id created in the enterprise micro-mail, and add the last one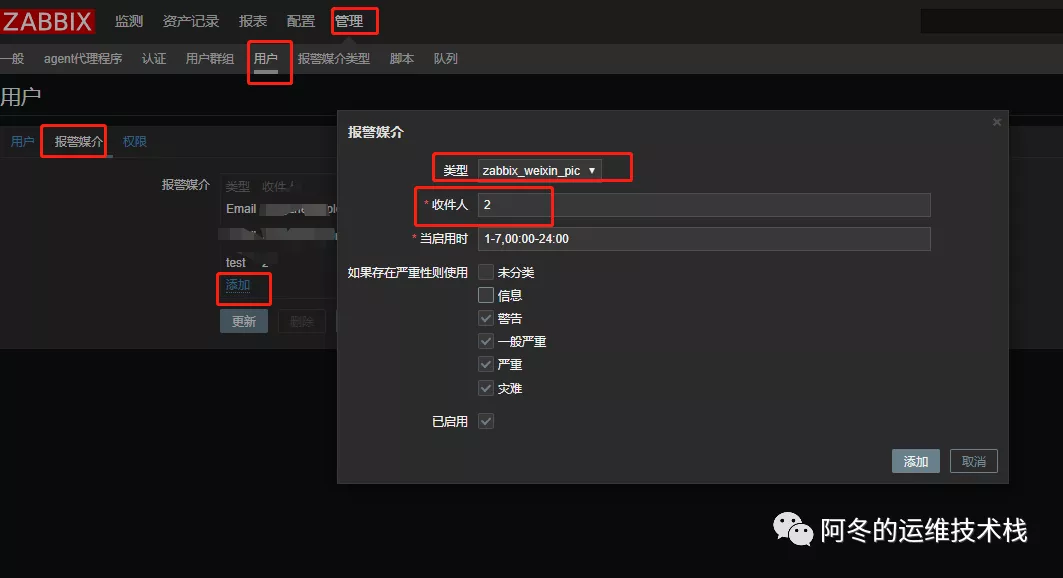
2.6 Define warning actions
- Click on the action in the Configuration menu, create the action, and fill it out according to the picture
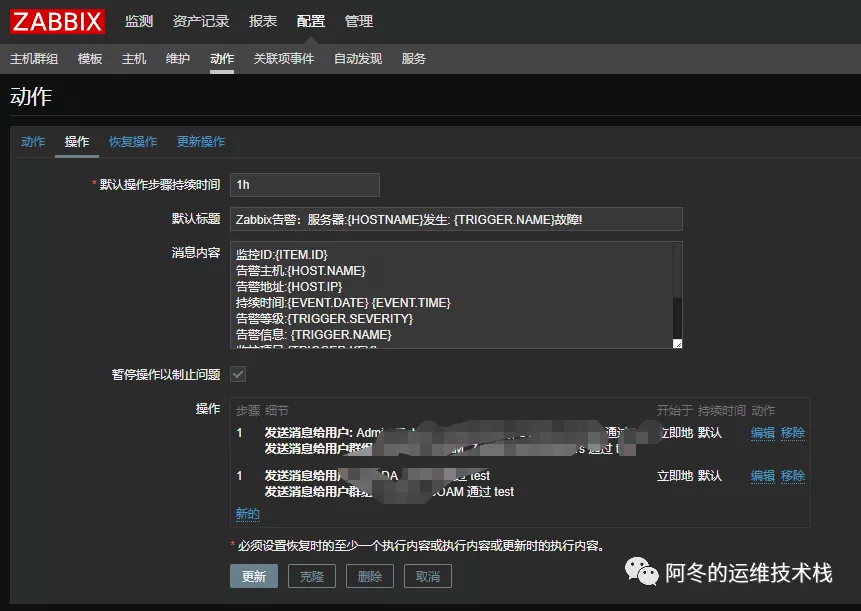
operation
Default Title
Zabbix Warning:
Secondary server: {HOSTNAME} occurred: {TRIGGER.NAME} failure!
Monitoring ID:{ITEM.ID}
Alert Host: {HOST.NAME}
Alert Host: {HOST.IP}
Warning time: {EVENT.DATE} {EVENT.TIME}
Alert level: {TRIGGER.SEVERITY}
Alert information: {TRIGGER.NAME}
Alert item: {TRIGGER.KEY}
Question details: {ITEM.NAME}:{ITEM.VALUE}
Current status: {TRIGGER.STATUS}:{ITEM.VALUE}
Event ID:{EVENT.ID}
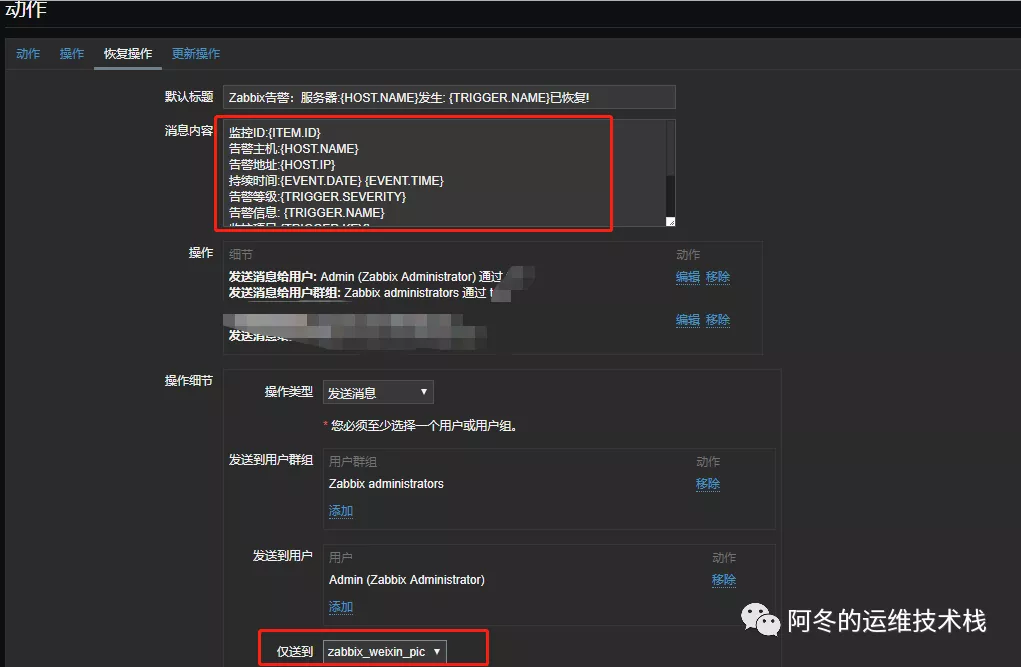
Recovery operation
Zabbix Warning:
Secondary server: {HOST.NAME} occurred: {TRIGGER.NAME} recovered!
Monitoring ID:{ITEM.ID}
Alert Host: {HOST.NAME}
Alert Host: {HOST.IP}
Warning time: {EVENT.DATE} {EVENT.TIME}
Alert level: {TRIGGER.SEVERITY}
Alert information: {TRIGGER.NAME}
Alert item: {TRIGGER.KEY}
Question details: {ITEM.NAME}:{ITEM.VALUE}
Current status: {TRIGGER.STATUS}:{ITEM.VALUE}
Event ID:{EVENT.ID}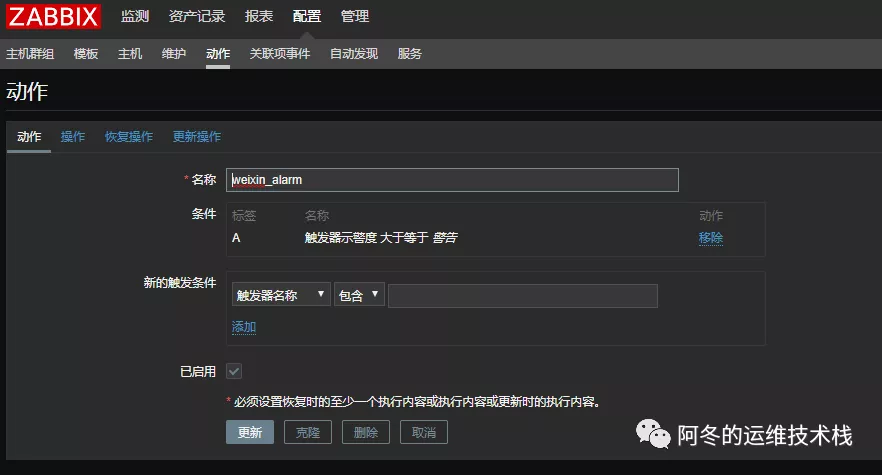
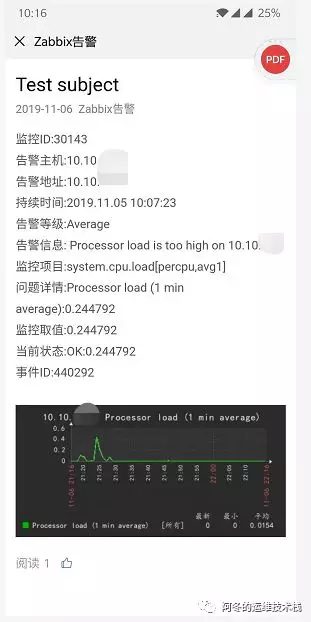
2.7 Test results
You can trigger an alarm test effect manually, and you can receive an alarm with a picture on your mobile phone. You can also see a picture of history by clicking on the page after the message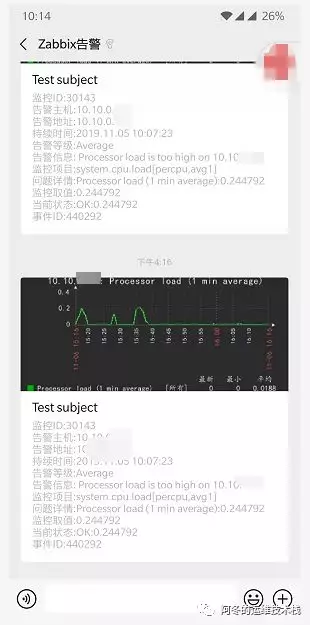
Huan X X X Chen Shifu"