Zabbix monitoring platform installation and deployment
For the deployment of Zabbix monitoring platform, at least four components need to be installed, namely, Zabbix? Server, Zabbix? Web, Databases, and Zabbix? Agent. The detailed steps for the installation and configuration of Zabbix monitoring platform are as follows:
1, System environment preparation
    Server side: 192.168.2.101 (httpd, mysql, PHP)
    Agent end: 192.168.2.102
    System environment: LAMP
    setenforce 0: turn off Selinux
    systemctl stop firewalld: turn off the firewall
    systemctl disable firewalld permanent shutdown firewall
    Download the ZABBIX version. The installation method of each version is similar. You can choose the installation version according to the actual situation. This version is Zabbix-3.2.6.tar.gz. (now the interface of zabbix4. * is pretty good. You can download zabbix4.4. * directly to install the download address.)
    https://sourceforge.net/projects/zabbix/)
2, ZABBIX server is installed in source mode, and extension dependency package is installed.
    yum install -y mysql-libs mysql-devel curl curl-devel net-snmp  net-snmp-devel   perl-DBI
    cd /usr/src
    wget-c https://jaist.dl.sourceforge.net/project/zabbix/ZABBIX%20Latest%20Stable/3.2.6/zabbix-3.2.6.tar.gz
    tar xzf zabbix-3.2.6.tar.gz
    ./configure --prefix=/usr/local/zabbix/ --enable-server --with-mysql --with-libcurl
    make && make install
The following prompt appears after the installation is completed

3, Deploy LAMP environment
    yum install httpd httpd-devel php php-devel php-mysql mariadb-server mysql –y
    Start database, set up zabbix library and authorize
    systemctl start mariadb
    create database zabbix charset=utf8; create database
    grant all on zabbix.* to zabbix@'localhost' identified by "123456";
    flush privileges; refresh permissions

    Import data to zabbix Library
    cd /usr/src/zabbix-3.2.6/database/mysql (download compile path)
    cd /usr/src/zabbix-3.2.6/database/mysql
Data import to database
    mysql -h192.168.11.14 -uzabbix -p123456 zabbix <schema.sql
    mysql -h192.168.11.14 -uzabbix -p123456 zabbix <images.sql
    mysql -h192.168.11.14 -uzabbix -p123456 zabbix <data.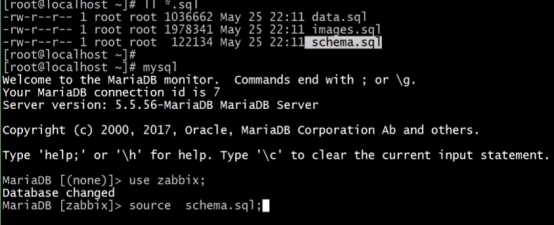
Backup profile
    cd /usr/local/zabbix/etc/
    \cp  zabbix_server.conf  zabbix_server.conf.bak
Edit the zabbix_server.conf configuration file
    vim zabbix_server.conf
    LogFile=/tmp/zabbix_server.log
    DBHost=locDdalhost        #Database host name. When it is set to localhost, connect mysql through the sock
    DBName=zabbix             #Specify the name of the zabbix data database
    DBUser=zabbix               #Specify the user name to connect to the database
    DBPassword=123456     #Password required by the user to connect to the database
Set as system service and authorize
    \cp /usr/src/zabbix-3.2.11/misc/init.d/tru64/zabbix_server /etc/init.d/
    chmod o+x /etc/init.d/zabbix_server
Set up zabbix users (startup needs), soft connection (startup needs)
    groupadd  zabbix
    useradd  -g  zabbix  zabbix
    usermod  -s  /sbin/nologin  zabbix
    ln -s /usr/local/zabbix/sbin/zabbix_*  /usr/local/sbin/
Remote PHP
vim /var/www/html/info.php validation release file

    Start Apache: systemctl restart httpd
    Start zabbix: service zabbix? Server restart
Copy the zbbix web program code file to the Apache release directory
\cp /usr/src/zabbix-3.2.11/frontends/php/* /var/www/html/ -rf
Tip: if error 500 is reported, reinstall the PHP version
    Because zabbix3.2.9 Need php5.4 Version above, default comes with 5.3.3(Error messages such as 500 will be reported or unable to open the web page will be reinstalled PHP
    [root@localhost etc]# rpm -Uvh http://repo.webtatic.com/yum/el6/latest.rpm
    //Uninstall PHP
    [root@localhost etc]# yum -y remove php*
    //Install php5.6
    [root@localhost etc]# yum -y install php56w.x86_64 php56w-cli.x86_64 php56w-common.x86_64 php56w-gd.x86_64 php56w-ldap.x86_64 php56w-mbstring.x86_64 php56w-mcrypt.x86_64 php56w-mysql.x86_64 php56w-pdo.x86_64 php56w-mbstring php56w-bcmath php56w-gd php56w-xml gd gd-devel --skip-broken
Add power on self start
    [root@localhost etc]# chkconfig --add httpd
    [root@localhost etc]# chkconfig httpd on
    [root@localhost etc]# chkconfig --add mysqld
    [root@localhost etc]# chkconfig mysqld on
Open the browser to access the local IP,
        Set the zabbix web management interface installation configuration, click next step, as shown below
        The following error is reported during browser access: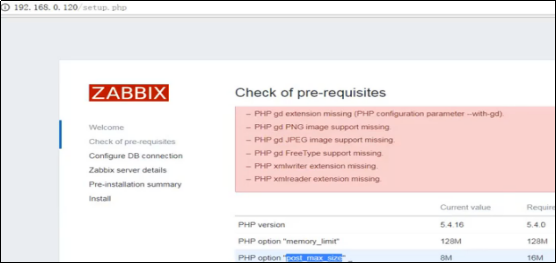
Edit php.ini and run the following code (great trick)
        yum install php-mbstring php-bcmath php-gd php-xml install gd gd-devel -y

        sed -i '/post_max_size/s/8/16/g;/max_execution_time/s/30/300/g;/max_input_time/s/60/300/g;s/\;date.timezone.*/date.timezone \= PRC/g;s/\;always_populate_raw_post_data/always_populate_raw_post_data/g'  /etc/php.ini
    //Restart htppd after modifying parameters: systemctl restart httpd
    //Restart htppd after modifying parameters: systemctl restart httpd
In / etc/hosts, add the following in the last line
193.192.168.11.44 www.zabbi.com later database changes are convenient
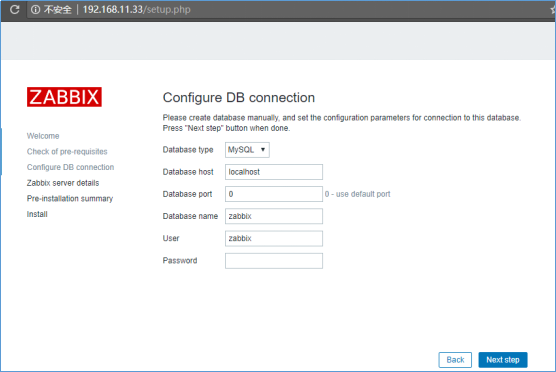
Next step is filled in as follows: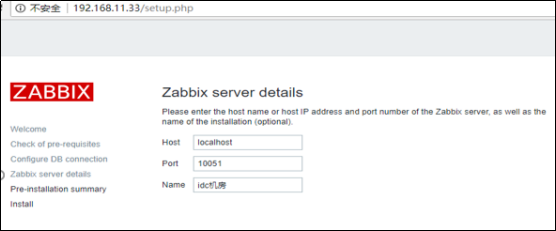
Next step is as follows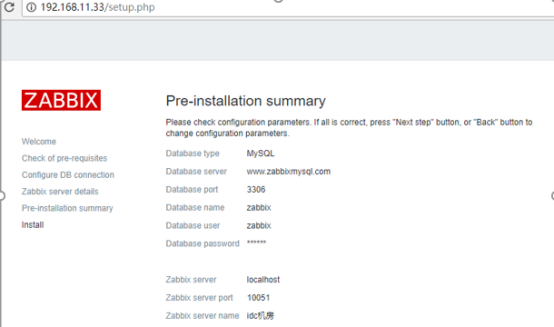
False report five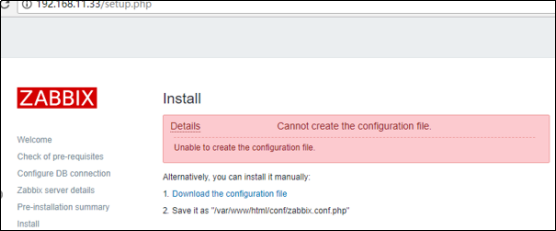
To create the zabbix.conf.php file, execute the following command
chmod o+w /var/www/html/conf
Method 1: modify the owner of / var/www/html/conf file to apache
chown -R apache conf
Method 2: click download and upload to 192.168.0.101var/www/html/conf/directory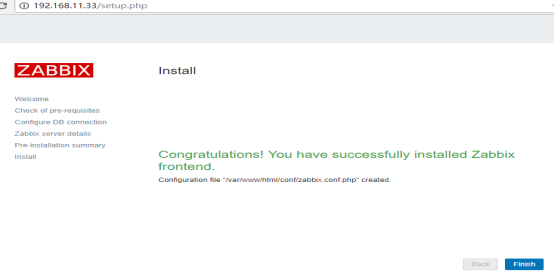
    User name: admin
    Password: zabbix
    The successful login is as follows: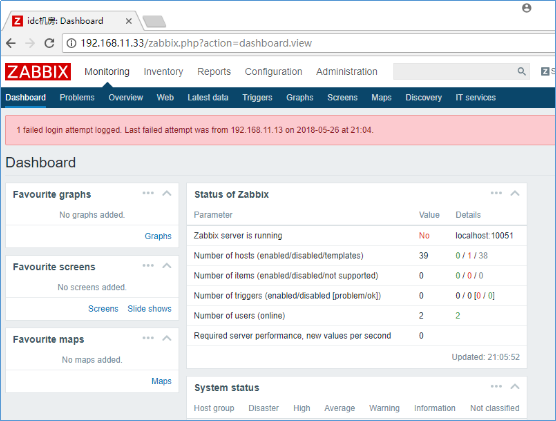
After being configured into Chinese interface, there are the following alarms: the following alarms indicate that the server is not started
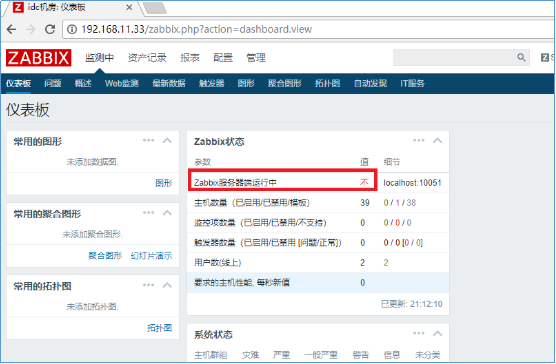
Back up the configuration file before modifying it
    77 behavior: DBHost=www.zabbixmysql.com database address
    111 behavior: DBPassword=123456 database password
As shown in the figure below:


The error message of executing / etc / init.d/zabbix ﹣ server restart is as follows:
False report six
resolvent:
    1)useradd zabbix
    2)ln -s /usr/local/zabbix/sbin/zabbix_* /usr/local/sbin/
    Restart / etc / init.d/zabbix ﹣ server restart, and the error is as follows:
Wrong seven:
resolvent:
    hold/tmp/zabbix_server.log Delete it
    rm -rf /tmp/zabbix_server.log

    //Restart / etc / init.d/zabbix_serverrestart
Refresh ZABBIX sever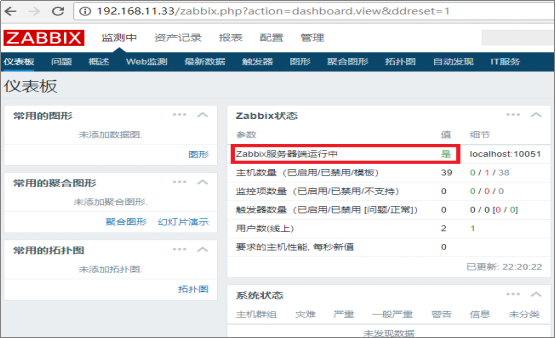
The default is English, which is changed to Chinese. (we don't know the main English)
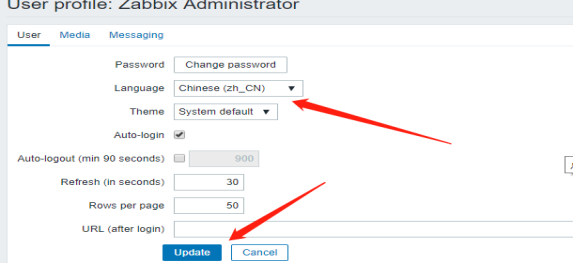
4, To configure ZABBIX server:
    1) Add to 192.168.11.55 and 192.168.11.66 client monitoring:
    Click in the main menu:
    < configuration > - < create host > - enter the host name 192.168.11.55, and add the group as linux servers as follows:
    (wrong IP address screenshot)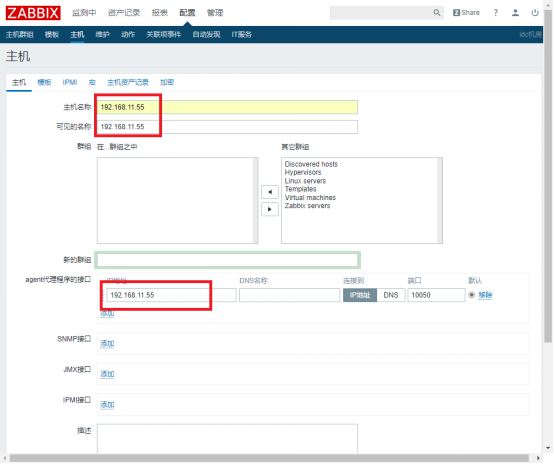
Then click the bottom < add > to add 55 and 66 successfully, as shown below:
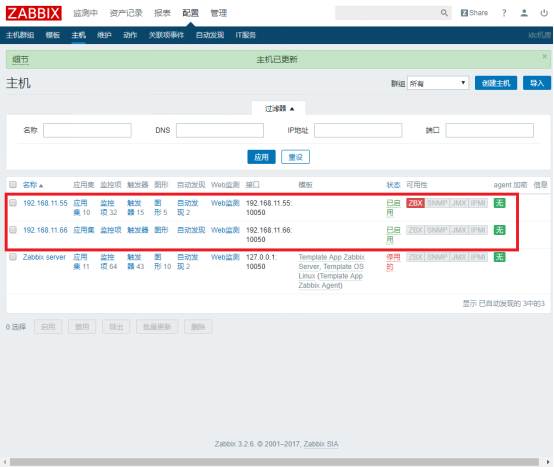
2) Add monitored items:
Click < 192.168.11.66 > in the figure above, then click < template > - < Select > and select < template OS Linux > - < Select > - < add > - < update > in the pop-up menu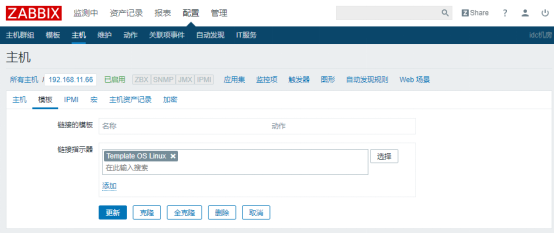
When adding another client, do the same as above to add the host
5, Client installation configuration: 192.168.11.55/66
    1)192.168.11.55 install zabbix
    cd /usr/src
    wget  http://sourceforge.net/projects/zabbix/files/ZABBIX%20Latest%20Stable/3.2.6/zabbix-3.2.6.tar.gz
    tar xzf zabbix-3.2.6.tar.gz
    cd zabbix-3.2.6
    ./configure --prefix=/usr/local/zabbix --enable-agent && make && make install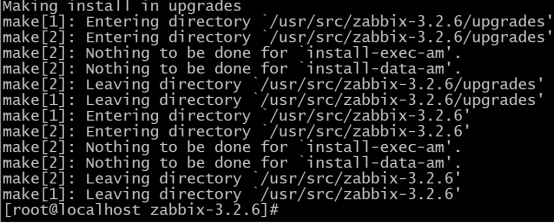
ln –s /usr/local/zabbix/sbin/zabbix_* /usr/local/sbin/
Modify the ZABBIX ﹣ agentd.conf client configuration file, execute the following command, ZABBIX ﹣ agentd.conf content, specify the server IP, and set the local Hostname as the local IP address or DNS name:
CPU, memory, load, network card, disk, IO, application service, port, login user
vim /usr/local/zabbix/etc/zabbix_agentd.conf modify the following parameters
91 line Server=192.168.11.101
 132 line ServerActive=192.168.11.101
 143 line Hostname=192.168.11.102
Copy ZABBIX? Agentd from the source installation directory to the line file directory and give execution permission
    cp /usr/src/zabbix-3.2.6/misc/init.d/tru64/zabbix_agentd /etc/init.d/
    useradd zabbix
    ln -s /usr/local/zabbix/sbin/zabbix_* /usr/local/sbin/
    chmod o+x /etc/init.d/zabbix_agentd
    /etc/init.d/zabbix_agentd  start
In the zabbix web interface, you can see the following memory situation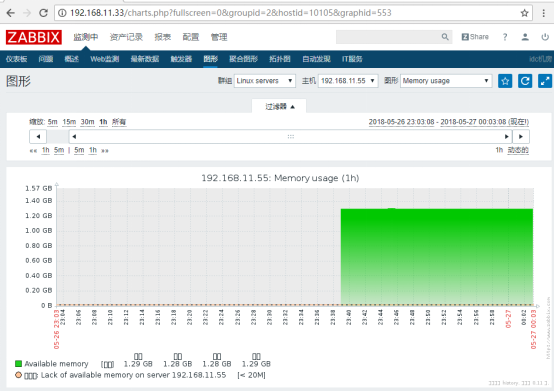
Garbled code in Chinese mode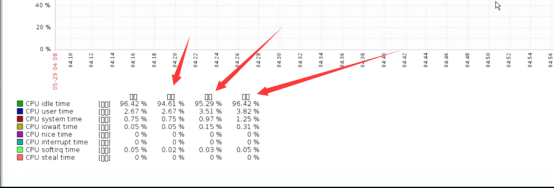
resolvent:
Enter httpd home directory: back up the original font
Copy font from win side to Linux: C:\Windows\Fonts and modify the original name after uploading


