Xiaobai Full Stack Development I
brief introduction
From a beginner's point of view (vue, Koa and Express) Starting from 0, build a single page front-end project that provides data through RESTful API and consists of vue. I hope I can help you, like me, who are all white stacks. (I have read many articles about how to build the whole stack, some of which may be used for reference.)
Immediately after graduation, the topic is XXX course website, which is similar to the website of B station. Students can watch videos, documents (tentatively word and pdf) and comment under videos and documents. Teachers upload videos and documents. Because I have to finish it by myself, I started my whole journey. Share my whole stack experience and record my completion progress.
- At that time, my website was conceived as a spa with vue express providing interface api mongodb.
Open the whole stack journey
First of all, you need these things, node vue-cli webpack mongodb. When you're ready, let's start the whole stack tour.
Start creating projects
cd to the folder where you want to create the directory and then on the command line vue init webpack vuefile (your own project name)

Let's talk about this ESLint. It's a code style checking plug-in. Whether your indentation is two or four spaces, you don't need it: when your code doesn't conform to ESLint's rules, it will make an error, even if your code's grammar and logic are correct. See if you like to choose yes or no. If you accidentally return, you choose yes. I'll tell you how to solve it later.
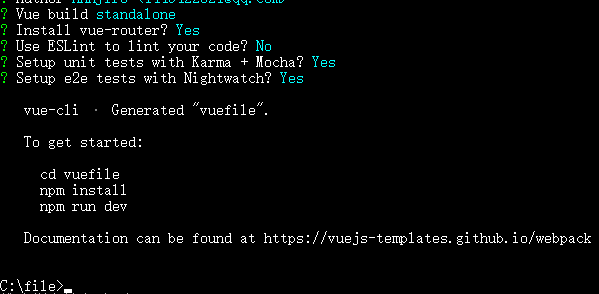
Then cd to vuefile as shown in the screenshot, then npm install a key to install dependencies, and finally npm run dev your vue can run. It's about this long.
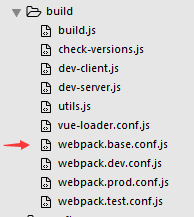
Fill in the previous pit if your ESLint selects Yes to find eslint-loader in vuefile > build > webpack. base. conf. JS and annotate the code block.

The project has been created and completed. Next, change the project to spa
Construction of login interface
Enter our vue workspace (src folder)
Find main.js and change it to this way
import Vue from 'vue'
import App from './App'
import router from './router'
import ElementUI from 'element-ui' // Introducing element-ui
import 'element-ui/lib/theme-default/index.css'

Vue.config.productionTip = false
Vue.use(ElementUI)  //Using ElementUI globally, you can use element-ui in other. vue files
/* eslint-disable no-new */
new Vue({
  mode: 'history', //Opening history mode ensures that spa can move forward and backward just like previous web pages
  el: '#app',
  router,
  template: '<App/>',
  components: { App }
})
New Component login in components
-
<template>
    <el-row class="content">
    <el-col :xs="24" :sm="{span: 6,offset: 9}">
      <el-switch on-text="Sign in" off-text="register" v-model="inOut" on-color="#20A0FF" off-color="#42d885">
      </el-switch>
        <el-row>
          <el-input
            v-model="name"
            placeholder="Account number"
            type="text">
          </el-input>
          <el-input
            v-model="password"
            placeholder="Password"
            type="password">
          </el-input>
          <template v-if="inOut">
            <el-button type="primary"  @click="login">Sign in</el-button>
          </template>
          <template  v-else>
            <el-popover
              placement="right"
              width="200"
              trigger="focus"
              :content=tips>
            <el-input
            placeholder="Confirm password"
            v-model="password_r"
            type="password" slot="reference">
          </el-input>
            </el-popover>
          <el-button type="success"  @click="register">register</el-button>
          </template>
        </el-row>
    </el-col>
  </el-row>
</template>
<script>
    export default {
    data () {
      return {
        name: '',
        password: '',
        password_r:'',
        inOut: true,
        tips:"Enter the password"
      }
    },
    watch: {
    // If the question changes, the function runs
    password_r: function () {
      if(this.password_r ==''){
        this.tips="Enter the password"
      }
      else if(this.password_r != this.password)
      {
        this.tips="The two passwords are different."
      }
      else
        this.tips="Successful docking and registration"
    }
  },
  methods:{
    login() {
           this.$message({
          message:  `Welcome ${this.name}Classmate`,
          type: 'success'
        })
        },
    register() {
        this.$message({
          message:  `New classmate ${this.name}login was successful`,
          type: 'success'
        })
      }
    }
  }
</script>
<style lang="stylus" scoped>
  .el-row.content
    padding 16px
  .title
    font-size 28px
  .el-input
    margin 12px 0
  .el-button
    width 100%
</style>
This step requires npm install stylus and stylus-loader
Adding index.js to router for new login.vue
//... The first one doesn't say anything about introducing other needs.
import Login from '@/components/Login'
Vue.use(Router)
export default new Router({
  routes: [
    {
      path: '/',
      name: 'Hello',
      component: Hello
    },
    {
      path: '/login',
      name: 'Login',
      component: Login
    },
  ]
})
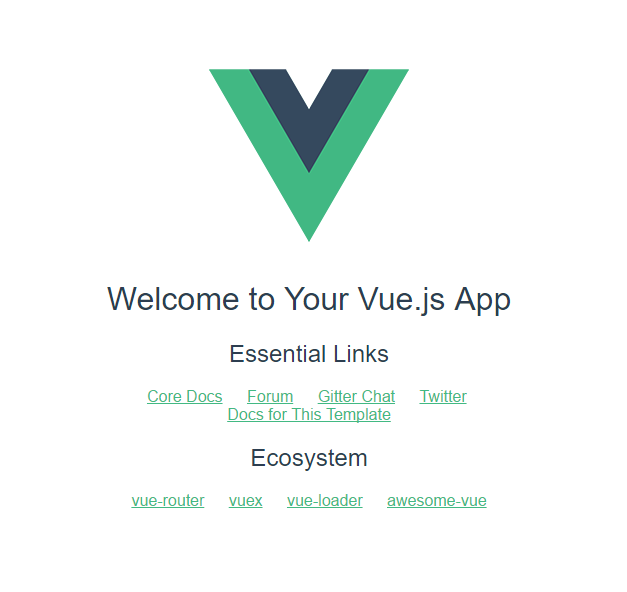
Enter in our browser http://localhost:8080/#/login

If you grow up like that, you'll probably succeed.