Angular 2 is a fully functional framework of All in one, different from previous version Angular 1.x: TypeScript (launched by Microsoft) has become the official push language, while introducing frameworks such as rxjs, which makes the programming more rigorous and efficient; it abandons complex elements such as $scope and simplifies it to Component; it has a more complete routing function built-in, so it does not need to use 1.x. The generation of angular-ui-router and other tools.
Characteristics of Single Page Application
advantage
- When a user visits, only one page and static resource is requested. Back-end applications can focus on the processing of api interface requests, reduce the pressure of page hopping routing and page rendering, and reduce the pressure of frequent requests for static resources.
- Page switching does not need to re-request and render pages, which reduces the white screen problem of client page switching. At the same time, page switching is faster and smoother because of local routing and page rendering.
- When compiling debugging, the page app is updated in real time and shows the latest effect, so the debugging efficiency is high.
- It can be easily transplanted to web and app.
Inferiority
- The first screen needs to download larger static resources (which can be compressed and streamlined through webpack packaging tools)
- The first screen needs to start the application and render slowly (Angular 2 supports precompilation and accelerates the start-up speed)
Programming
development environment
Angular 2 programs need to be written using nodejs (now almost a necessary tool for front-end development.) I choose Visual Studio Code. Plug-in management and installation are more convenient, and the function is also better than Sublime Text.
After nodejs and IDE are ready, start a console or operate directly through the console of Visual Studio Code. 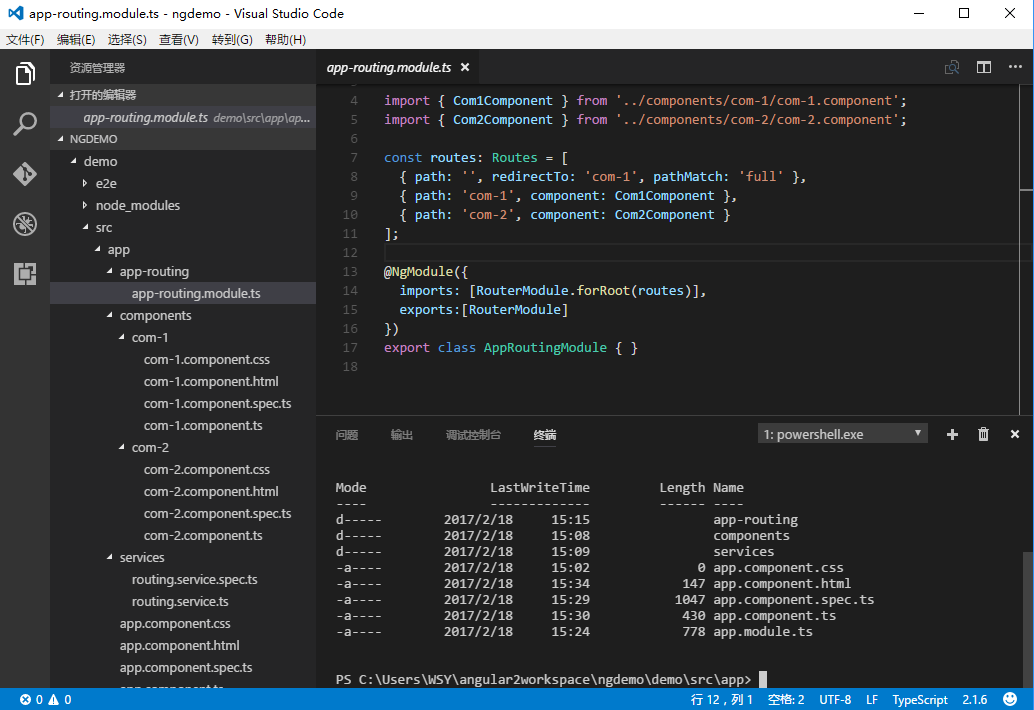
Second, install the angular-cli tool using node's package management tool npm. This makes it more convenient to build angular 2 applications and compile packages, otherwise you need to install and configure web packages yourself.
New project
Create a new directory from the command line, such as demoapp
mkdir demoapp
cd demo app
A new angular 2 application, ng new demoapp, is created using angular-cli. At this time, node automatically downloads the node module (placed in node_module) on which angular 2 depends. The project interface after the completion of the construction is shown as follows: 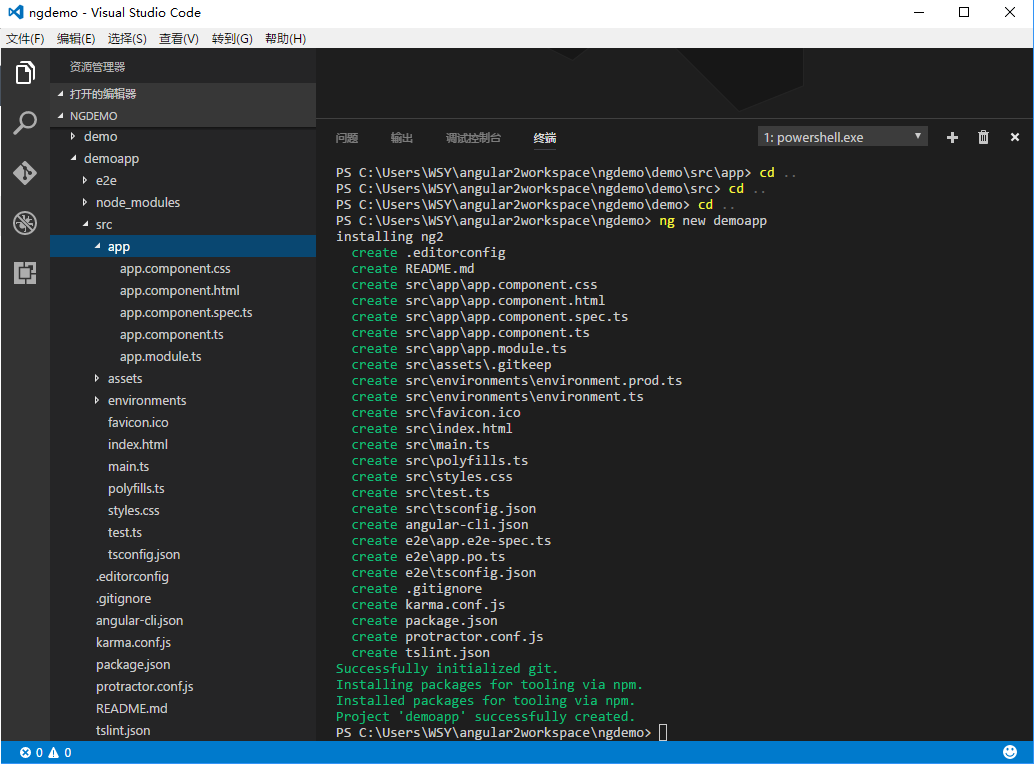
- The src/app folder is the main code of the program.
- src/index.html is the first screen page and src/main.ts is the startup entry.
- src/package.json is configured for dependency management
- src/angular-cli.json configures Angular projects (global styles, toolkits, etc. can be introduced here)
- Refer to the nodejs module specification and angular file specification for the rest of the files
At this point, the project is already a viable initial project. Start the node service by executing ng ng ng serve r and enter localhost:4200 in the browser to preview. 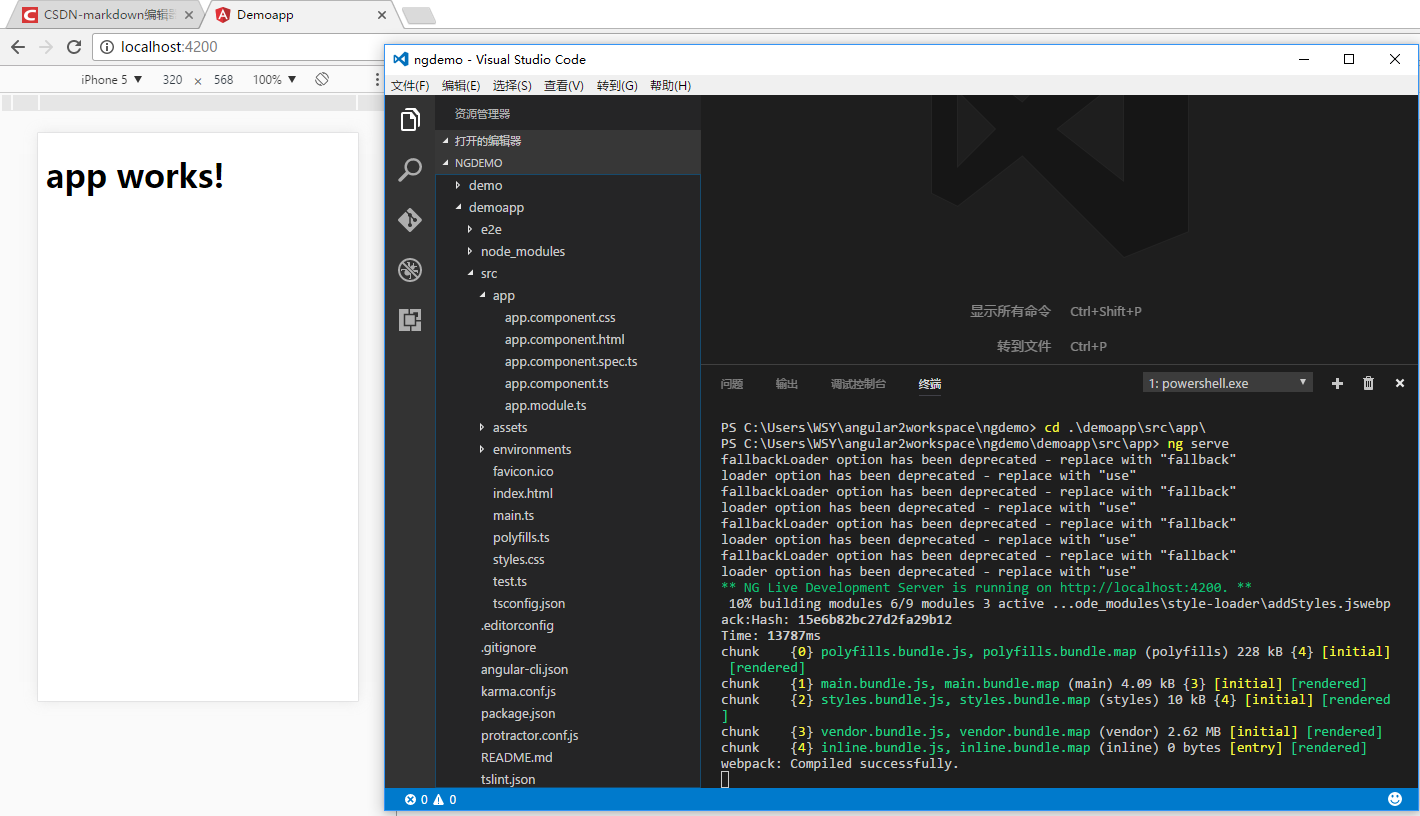
The project start-up process is roughly as follows:
- [main.ts] loads the root module [app.module.ts]: platformBrowserDynamic().bootstrapModule(AppModule);
- [app.module.ts] Load root Component: bootstrap: [AppComponent]
- AppComponent is "app works!" on the page.
Main concepts
Component
Component includes page logic, page template and style file, which together defines the view, data and logic of a page. In the basic project, we can write our own Component.
- Create a unified Components directory under the src/app folder. mkdir components, cd components
- Fast generation of new Components through angular-cli tools. Ng g Component component Component 1
The newly generated Component structure is as follows: 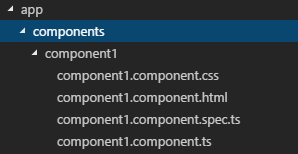
component.ts
The file declares the template path, template label name, data, and logical code.
import { Component, OnInit } from '@angular/core';

@Component({
  selector: 'app-component1',
  templateUrl: './component1.component.html',
  // You can also use template: `p > template content </p >', but it's easier to edit in an html file alone.
  styleUrls: ['./component1.component.css']
})
export class Component1Component implements OnInit {
  constructor() { }
  ngOnInit() {
  }
}
This document shows that <app-component 1> in html is where templates work, and data and business logic work under this tag. This is similar to directive in Angular 1. X. In order to understand how to write this ts file, it is recommended to learn about the declaration and use of the module by TypeScript. Does it look like Java or C#?
component.html
The document reads as follows:
<p>
  component1 works!
</p>
And <app-component 1> </app-component 1> in the page will be replaced by the template content.
Association and binding of component.ts and component.html (data and behavior)
The component.ts file code was changed to read as follows:
import { Component, OnInit } from '@angular/core';

@Component({
  selector: 'app-component1',
  templateUrl: './component1.component.html',
  styleUrls: ['./component1.component.css']
})
export class Component1Component implements OnInit {
  constructor() { }
  ngOnInit() {
  }
  modelValue:string = '';
  message:string = 'This is a message';
  buttonClicked():void {
    alert('button clicked!');
  }
}
Two string variables and a void method are declared in ts. Make the following modifications in html:
<p>
  {{message}}
</p>

<input [(ngModel)]="modelValue" name="modelValue" />
<p>your input is : {{modelValue}}</p>

<button (click)="buttonClicked()">click me</button>
The effect will be shown later. First, we show the component in the application.
Current applications show root Component, so Component 1 needs to be turned into root.
The methods are as follows:
Modify src/app.module.ts
import { BrowserModule } from '@angular/platform-browser';
import { NgModule } from '@angular/core';
import { FormsModule } from '@angular/forms';
import { HttpModule } from '@angular/http';

import { AppComponent } from './app.component';
// Introducing Compoonent1
import { Component1Component } from './components/component1/component1.component';

@NgModule({
  declarations: [
    AppComponent,
    Component1Component
  ],
  imports: [
    BrowserModule,
    FormsModule,
    HttpModule
  ],
  providers: [],
  //Change root Component to Component1
  bootstrap: [Component1Component]
})
export class AppModule { }
Modify the application home page html to change the label from <app-root> to <app-component 1>.
<!doctype html>
<html>
<head>
  <meta charset="utf-8">
  <title>Demoapp</title>
  <base href="/">

  <meta name="viewport" content="width=device-width, initial-scale=1">
  <link rel="icon" type="image/x-icon" href="favicon.ico">
</head>
<body>
  <!--<app-root>Loading...</app-root>-->
  <app-component1></app-component1>
</body>
</html>
The application will be refreshed automatically. The effect is as follows: 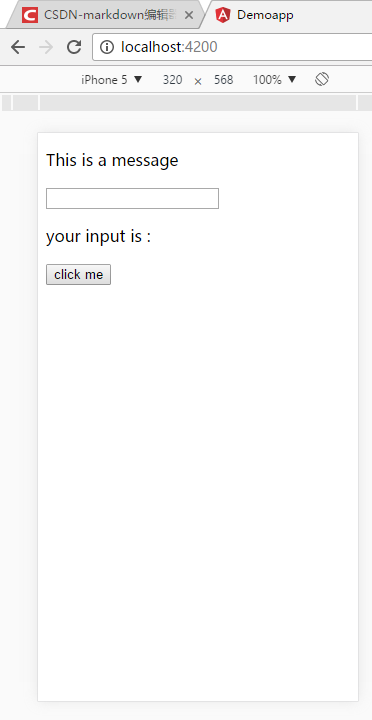
You can see message: string = This is a message'; the binding has worked, and the first < p > has been replaced with message content.
Then we enter some text in the input box: 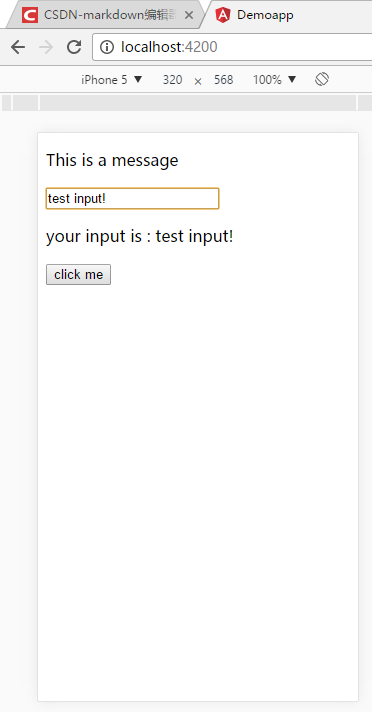
You can see that when the user enters text, the next line shows the results of the user's input in real time.
We click the button: 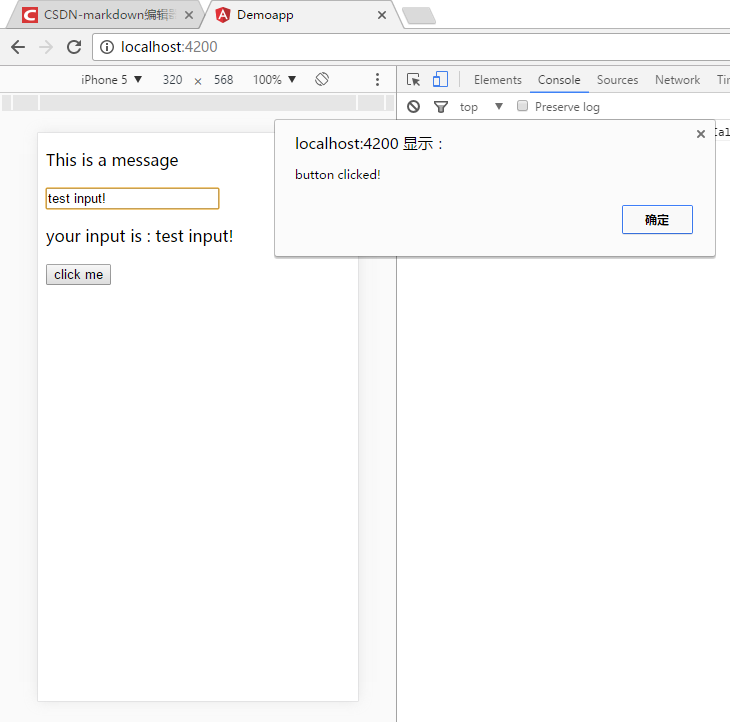
You can see that the function is triggered.
Here's just a simple example of data and behavior binding, as well as Angular 1. X. But the difference between Angular 2 and Angular 1.x is that Angular 2 supports one-way data and events transfer, which greatly improves the performance of dirty value detection and page rendering. For example, here () stands for outgoing, [] for incoming, and [()] for bidirectional binding. See Angular2 documentation for details.
Route
Routing is responsible for page hopping in application, and it is one of the core of single-page application. Angular 2 can jump pages by <a routerLink="href"> tags, or by code in ts files.
Routing declaration
The routing module declares and initializes when the application starts. We can declare a single module NgModule for routing. The code is as follows
- Create a new module app.routing.ts, which includes the declaration of the relationship between path and Component
import { NgModule } from '@angular/core';
import { RouterModule, Routes } from '@angular/router';
import { Component1Component } from './components/component1/component1.component';
const routes: Routes = [
  { path: 'component1', component: Component1Component }
];
@NgModule({
  imports: [RouterModule.forRoot(routes)],
  exports:[RouterModule]
})
export class AppRoutingModule { }
Introduce routing module in app.module.ts:
import { BrowserModule } from '@angular/platform-browser';
import { NgModule } from '@angular/core';
import { FormsModule } from '@angular/forms';
import { HttpModule } from '@angular/http';
//Introduce all component s
import { AppComponent } from './app.component';
import { Component1Component } from './components/component1/component1.component';
//Incoming routing
import { AppRoutingModule } from './app.routing';

@NgModule({
  declarations: [
    AppComponent,
    Component1Component
  ],
  imports: [
    BrowserModule,
    FormsModule,
    HttpModule,
    //Incoming routing
    AppRoutingModule
  ],
  providers: [],
  bootstrap: [AppComponent]
})
export class AppModule { }
At the same time, we need to add the view location of route management < router-outlet > in the template.
Routing instance
We restore the original root component to the original component.
At the same time, the template of root component is modified to:
<h1>
  {{title}}
</h1>
<a routerLink="component1">link-component1</a>
<button (click)="showComponent()">click to component1</button>
// The view of routing management is shown here.
<router-outlet></router-outlet>
Introducing routing component and showComponent() method into root component.ts file
import { Component } from '@angular/core';
//Introducing routing components
import { Router, ActivatedRoute } from '@angular/router';
@Component({
  selector: 'app-root',
  templateUrl: './app.component.html',
  styleUrls: ['./app.component.css']
})
export class AppComponent {
  //Instantiating components in constructors
  constructor(
    private router:Router
  ) {}
  title = 'app works!';
  showComponent(): void {
    //Routing jump
    this.router.navigate(['component1']);
  }
}
Start-up effect:
The application homepage is as follows: 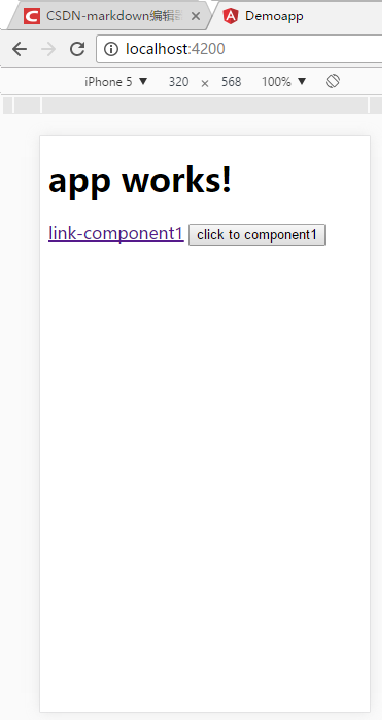
There is no view in <router-outlet>. Click on the link or button to import the view through two different routes, the effect is as follows:
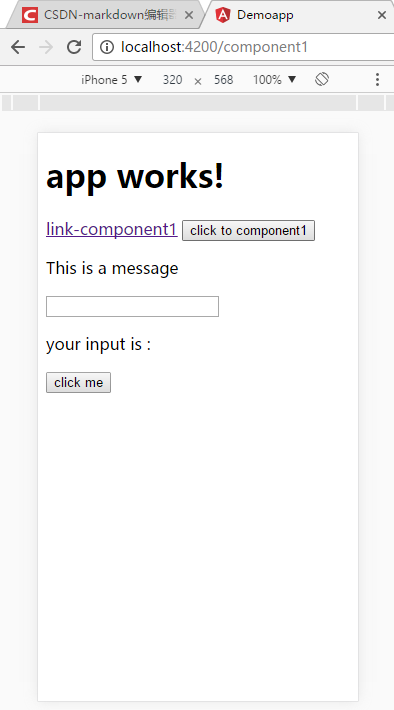
You can see that the address bar has changed from localhost:4200 to localhost:4200/component1, which is shown on the component1 page.
For the rest of the routing functions, see the Angular 2 documentation.
service
Angular 2 injects declared services through dependency injection. Good service design can further separate pages from logic and achieve loose coupling effect. Angular 2's dependency injection page, Angular 1.x, is different and more concise. The general steps are as follows:
- Declare the service ts file and add the @Injectable annotation.
- Introduce services as providers in app.module.ts
- Injecting services into component using services
Example: Encapsulating routing jumps as services
In the example above, if each Component is introduced separately and the jump method is declared to be very laborious and error-prone, we can encapsulate the route jump as a service separately.
Step 1: Establishing Services
//Create services folder and create routing service
mkdir services
cd services
ng g service routing
Step 2: Implementing Service Approaches
import { Injectable } from '@angular/core';
import { Router, ActivatedRoute } from '@angular/router';
@Injectable()
export class RoutingService {
  constructor(
    private router: Router
  ) { }
  showComponent(): void {
    this.router.navigate(['component1']);
  }
}
Step 3: Introducing services in app.module.ts
import { BrowserModule } from '@angular/platform-browser';
import { NgModule } from '@angular/core';
import { FormsModule } from '@angular/forms';
import { HttpModule } from '@angular/http';
import { AppComponent } from './app.component';
import { Component1Component } from './components/component1/component1.component';
import { AppRoutingModule } from './app.routing';
//Introduction Service
import { RoutingService } from './services/routing.service';

@NgModule({
  declarations: [
    AppComponent,
    Component1Component
  ],
  imports: [
    BrowserModule,
    FormsModule,
    HttpModule,
    AppRoutingModule
  ],
  //Introduction Service
  providers: [RoutingService],
  bootstrap: [AppComponent]
})
export class AppModule { }
Step 4: Injecting services into component
import { Component } from '@angular/core';
//Introduction Service
import { RoutingService } from './services/routing.service';

@Component({
  selector: 'app-root',
  templateUrl: './app.component.html',
  styleUrls: ['./app.component.css']
})
export class AppComponent {
  //Service injection
  constructor(
    private routing:RoutingService
  ) { }
  title = 'app works!';
}
step5: call
<h1>
  {{title}}
</h1>
<a routerLink="component1">link-component1</a>
<!-- A method that calls a service directly, rather than directly component.ts Method in -->
<button (click)="routing.showComponent()">click to component1</button>
<router-outlet></router-outlet>
The effect is the same as before.
Program packing
Easy packaging with angular-cli tools
- ng build packaged program retains ts script, which is very convenient for browsers to debug.
- ng build --prod packages the application into the version deployed in the production environment, leaving only confused and compressed js files, which greatly reduces the volume and boots the application more quickly. (In my actual test, when the debugging package is 3.8 megabytes, the production package is nearly 1.1 megabytes)
The default output folder for packaging operations is src/dist. Deploy the copy to the web server.