Catalog
objective
Develop a helloworld applet based on the underlying hardware.
Phase 1: Implementing with Binary Editor
First download a binary editor software Bz.exe 1 To create a helloos.img image file and make a floppy disk image file (through the binary editor), in fact, C statements are converted by other programs into a series of low-level machine language instructions, which are packaged in the format of the executable target program and stored in the form of binary disk files. They write the binary file directly and write it to the computer, which can be used to display the helloworld applet. The steps are as follows:
- Write a helloos.img image file on Bz according to the tutorial
- Copy the entire toolset folder attached to the tutorial under another folder
- Create a new folder gq_helloos under the toolset folder
- Add the written helloos.img to gq_helloos
- Add cons_nt.bat under the z_new_w folder in the toolset file to the new folder
- Create a file named run.bat in gq_helloos and edit the contents of the file as follows:
copy helloos.img ..\z_tools\qemu\fdimage0.bin
..\z_tools\make.exe	-C ../z_tools/qemu
- Similarly, create a file named install.bat in gq_helloos and edit the contents of the file as follows:
..\z_tools\imgtol.com w a: helloos.img
(.bat suffix is batch file format, batch file is formatless text file, it contains some command code, at the command prompt input batch file name or double-click batch file will execute the command according to the order of commands in the file. Equivalent to a file that collects command sets.)
- The next step is to install the program on a floppy disk. What if you can't afford to buy a floppy disk? Then use the simulator, the simulator used here is QEMU, the tutorial has put QEMU in the file. \ z_tools qemu, when using, just open the command window, wait a minute! How to open the command window? Just double-click on cons_nt.bat added before 666 to open the command window, and then enter the "run" command in the command line window.
The equivalent of run.bat is the "run" instruction. To enter "run" in the command window is to invoke the instruction in run.bat and start running the program.
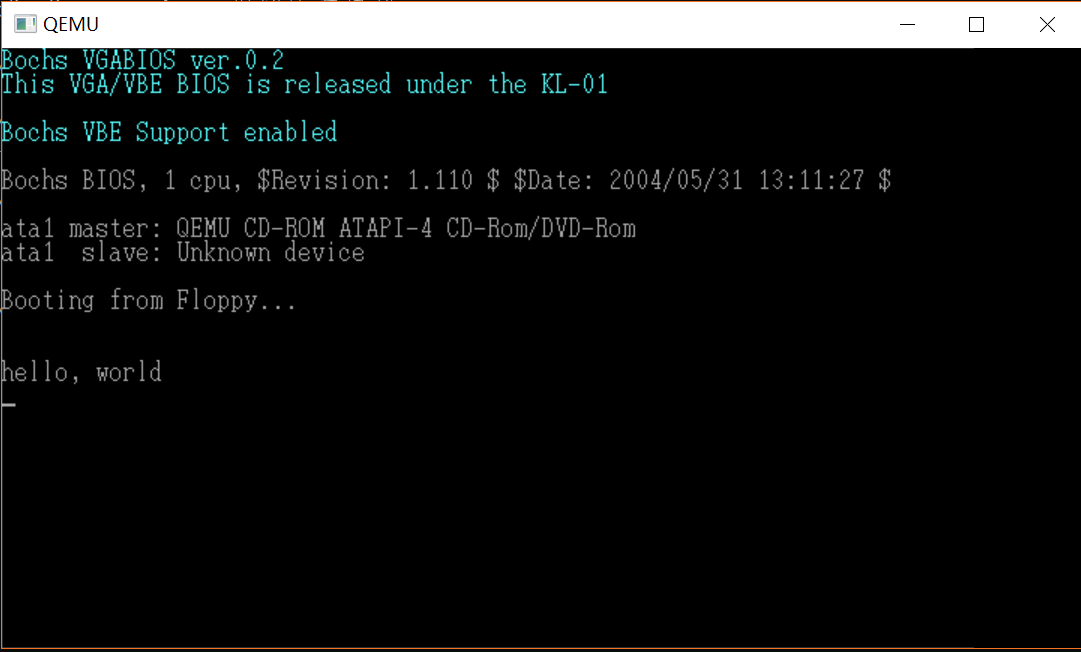
- The following is the content displayed by calling the QEMU simulator, a hello,world

Stage 2: Writing in Assembly Language
Next, use assembly language to write the program, and modify the gq_helloos folder built in the previous step
- Delete the previously written helloos.img image file first (but the final run of the program still needs the image file, the assembly file will be used to generate the image file below)
- Create assembly file helloos.nas, which is written as follows:
	DB	0xeb, 0x4e, 0x90, 0x48, 0x45, 0x4c, 0x4c, 0x4f
	DB	0x49, 0x50, 0x4c, 0x00, 0x02, 0x01, 0x01, 0x00
	DB	0x02, 0xe0, 0x00, 0x40, 0x0b, 0xf0, 0x09, 0x00
	DB	0x12, 0x00, 0x02, 0x00, 0x00, 0x00, 0x00, 0x00
	DB	0x40, 0x0b, 0x00, 0x00, 0x00, 0x00, 0x29, 0xff
	DB	0xff, 0xff, 0xff, 0x48, 0x45, 0x4c, 0x4c, 0x4f
	DB	0x2d, 0x4f, 0x53, 0x20, 0x20, 0x20, 0x46, 0x41
	DB	0x54, 0x31, 0x32, 0x20, 0x20, 0x20, 0x00, 0x00
	RESB	16
	DB	0xb8, 0x00, 0x00, 0x8e, 0xd0, 0xbc, 0x00, 0x7c
	DB	0x8e, 0xd8, 0x8e, 0xc0, 0xbe, 0x74, 0x7c, 0x8a
	DB	0x04, 0x83, 0xc6, 0x01, 0x3c, 0x00, 0x74, 0x09
	DB	0xb4, 0x0e, 0xbb, 0x0f, 0x00, 0xcd, 0x10, 0xeb
	DB	0xee, 0xf4, 0xeb, 0xfd, 0x0a, 0x0a, 0x68, 0x65
	DB	0x6c, 0x6c, 0x6f, 0x2c, 0x20, 0x77, 0x6f, 0x72
	DB	0x6c, 0x64, 0x0a, 0x00, 0x00, 0x00, 0x00, 0x00
	RESB	368
	DB	0x00, 0x00, 0x00, 0x00, 0x00, 0x00, 0x55, 0xaa
	DB	0xf0, 0xff, 0xff, 0x00, 0x00, 0x00, 0x00, 0x00
	RESB	4600
	DB	0xf0, 0xff, 0xff, 0x00, 0x00, 0x00, 0x00, 0x00
	RESB	1469432
Do not look at this code only 22 lines, short and concise, RESB stands for omitted bytes, omitted all 0x00, such as the last RESB 1469432, omitted 146932 0x00.
- Create batch file asm.bat, write as follows:
..\z_tools\nask.exe helloos.nas helloos.img
The command is to generate the corresponding mirror file helloos.img according to the assembly file helloos.nas. - The next step is the same as above: use! cons_nt.bat to open the command line window, enter the "asm" instruction in the command line, then generate the corresponding mirror file helloos.img in the folder, and finally enter the "run" instruction in the command line, the program will execute as above, showing the helloworld window.
Phase 3: Improving assembler
It's mainly about improving the helloos.nas file to make the code more readable (to tell the truth, I can't understand it, just copy it).
; hello-os
; TAB=4

; The following paragraph is the standard FAT12 Format Floppy Disk Specific Code

		DB		0xeb, 0x4e, 0x90
		DB		"HELLOIPL"		; The name of the startup area can be any string (8 bytes)
		DW		512				;Specify the size of each sector (512 bytes must be required)
		DB		1				; Specify the size of clusters in sectors (must be one sector)
		DW		1				; Regulations FAT Starting position (usually from the first position)
		DB		2				; FAT Number (must be 2)
		DW		224				; The size of the root directory (generally 224 items)
		DW		2880			; Specify disk size (2880 sector sizes are required)
		DB		0xf0			; Specify the type of disk
		DW		9				; Regulations FAT Length (must be 9 sectors)
		DW		18				; Specify the number of sectors of a track (18 must be required)
		DW		2				; Number of required heads (2 required)
		DD		0				; Do not use partitions, must be 0
		DD		2880			; Resize the disk to 2880 sectors
		DB		0,0,0x29		; The tutorial doesn't know what it is.
		DD		0xffffffff		; たぶんボリュームシリアルDesignation
		DB		"HELLO-OS   "	; The name of the disk
		DB		"FAT12   "		; Disk format
		RESB	18				; Empty 18 bytes

;Subject of Procedure

		DB		0xb8, 0x00, 0x00, 0x8e, 0xd0, 0xbc, 0x00, 0x7c
		DB		0x8e, 0xd8, 0x8e, 0xc0, 0xbe, 0x74, 0x7c, 0x8a
		DB		0x04, 0x83, 0xc6, 0x01, 0x3c, 0x00, 0x74, 0x09
		DB		0xb4, 0x0e, 0xbb, 0x0f, 0x00, 0xcd, 0x10, 0xeb
		DB		0xee, 0xf4, 0xeb, 0xfd

; Information display section

		DB		0x0a, 0x0a		;Two line changes
		DB		"hello, world"
		DB		0x0a			; Line feed
		DB		0

		RESB	0x1fe-$			; Automatically fill in 0 x00,Until 0 x001fe

		DB		0x55, 0xaa

; Outside Start Zone Output

		DB		0xf0, 0xff, 0xff, 0x00, 0x00, 0x00, 0x00, 0x00
		RESB	4600
		DB		0xf0, 0xff, 0xff, 0x00, 0x00, 0x00, 0x00, 0x00
		RESB	1469432
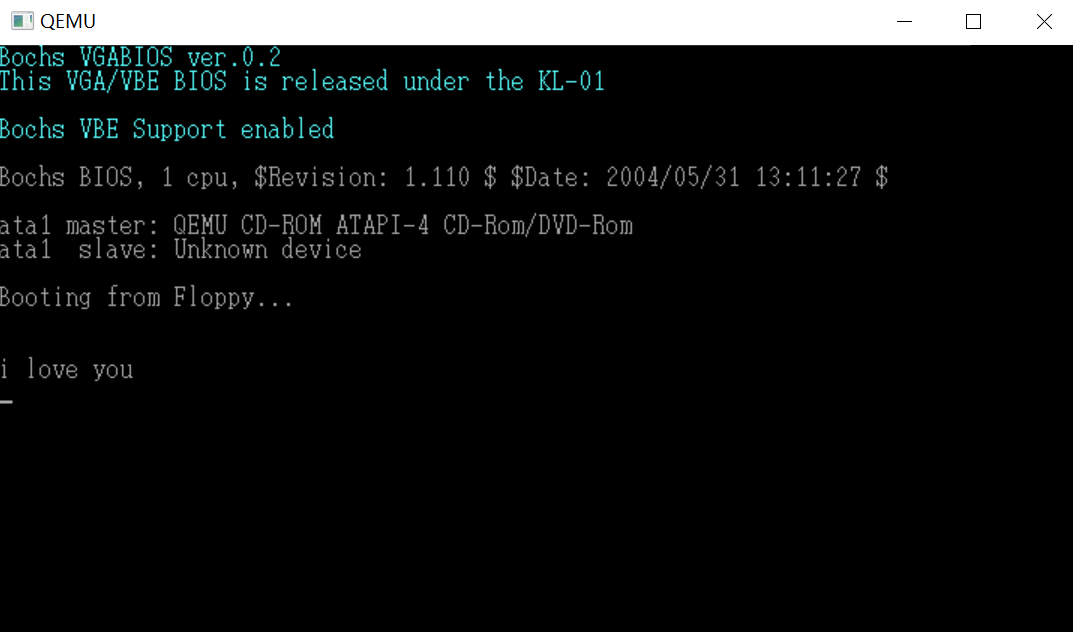
In it, "hello, world" can also be replaced by other strings, which can also be displayed, such as vulgar can no longer vulgar i love you
Instructions for assembly language are annotated 2
Harvest
After a busy day, I have gained a lot. Now I am proficient in code copying and copy and paste. emm knows more or less the process of code execution, a little assembly language, mirror files, batch files, the principle of CPU data processing has a certain understanding, will use binary editor, and today collect a lot of fire shadow wallpaper. Handsome Class 7
Notes
-
To know that all the files and programs on the computer are essentially a bunch of binary numbers, and all the operations performed by the computer are controlled by this bunch of binary numbers. In theory, arbitrary files or software can be written by using binary editor, so this paper uses binary editor to write a helloos.img mirror file. ↩︎
-
:: This is an annotation command, equivalent to the annotation in C.//
DB: DB instruction is the abbreviation of define by te, which means to write a byte directly to a file, or, of course, to write a string with double quotation marks.
RESB: It means to omit bytes, but the omitted bytes are all 0x00. For example, RESB 7 means to leave out seven bytes.
DW: Abbreviation for define word. word=16 bits in the computer world, that is, two bytes, so DW means two bytes.
DD: Abbreviation for define double-word, meaning four bytes
TAB: TAB=4 stands for indentation of 4 bits
Dollar symbol is a variable that represents the current number of bytes and can be used to control the number of 0x00 in the code. ↩︎