Welcome to visit me Personal blog For forwarding, please indicate the source: http://www.wensibo.top/2017/03/08/Write a note/
I always want to write a note application, because I have been using hammer note and a note, feel that the experience is still possible, but always feel that I can do it, because some things delayed this period of time, the project was completed a few days ago, has no time to upload to github (Grandpa passes by to give a star \\\\\\\\\\\
function
- Achieve the most basic addition, deletion, modification of notes
- Notes can be saved locally
- The main interface is designed in Material Design style, which is relatively beautiful (do not spray)
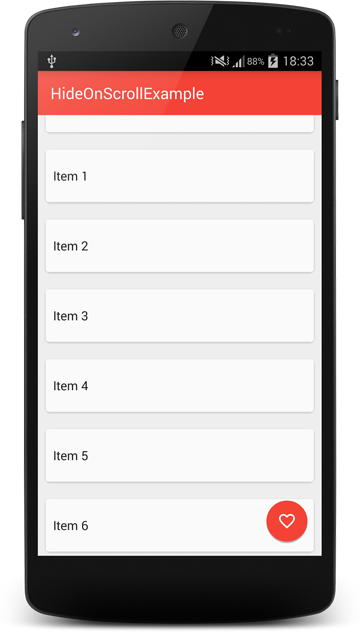
- Recycle View slides up and down to automatically hide Toolbar and Floating Action Button
- Item of Recycle View can achieve side slip effect such as QQ, which can be edited by clicking delete and setting top.
- You can set the note as a star, then a red sign will be added to the left of the note interface to remind the user that the note is an important note.
- Change the main interface marker with time, and in accordance with the editing time from new to old
Effect
Talk is cheap,show me your code
How to use local Sqlite database data in RecycleView
RecycleView is a component highlighted by google when it launched Material Design. It has completely replaced the traditional ListView. Its powerful function is one of its greatest advantages, but one limitation is that our custom RecycleView must inherit and rewrite RecyclerView.Adapter and RecyclerView.ViewHolder, although in it we can rewrite the party at will. Act, but you can see that if we use a database as a data source, RecyclerView.Adapter can't support reading Cursor, but the power of open source is once again apparent, directly to the above. github address But we only need to reuse two of them here, let me tell you.
1. Add the following Recycler View Cursor Adapter and CursorFilter to the project
Because the code is too long for typesetting, I attach download links directly.
RecyclerViewCursorAdapter
CursorFilter
2. Create a new custom adapter and inherit RecyclerViewCursor Adapter
- NoteAdapter
public class NoteAdapter extends RecyclerViewCursorAdapter<NoteAdapter.MyNoteViewHolder> {

    private Context mContext;
    private RecyclerViewOnItemClickListener mOnItemClickListener;
    private onSwipeListener mOnSwipeListener;


    public NoteAdapter(Context context,Cursor cursor,int flags) {
        super(context,cursor,flags);
        this.mContext = context;
    }

    @Override
    public MyNoteViewHolder onCreateViewHolder(ViewGroup parent, int viewType) {
        View root = LayoutInflater.from(parent.getContext()).inflate(R.layout.note_row, parent, false);
        MyNoteViewHolder holder = new MyNoteViewHolder(root);
        return holder;
    }

    @Override
    public void onBindViewHolder(final MyNoteViewHolder holder, Cursor cursor) {
        int position = cursor.getPosition();
        holder.tv.setText(cursor.getString(cursor.getColumnIndex(NoteDbAdapter.COL_CONTENT)));
        holder.tv_dateTime.setText(cursor.getString(cursor.getColumnIndex(NoteDbAdapter.COL_DATETIME)));
        holder.mRowtab.setBackgroundColor(cursor.getInt(cursor.getColumnIndex(NoteDbAdapter.COL_IMPORTANT)) == 1?
                mContext.getResources().getColor(R.color.colorAccent):mContext.getResources().getColor(android.R.color.white)
        );
        holder.root.setTag(position);

        holder.tv.setOnClickListener(new View.OnClickListener() {
            @Override
            public void onClick(View view) {
                if (mOnItemClickListener != null) {
                    mOnItemClickListener.onItemClickListener(view, holder.getAdapterPosition());
                }
            }
        });


    }

    @Override
    protected void onContentChanged() {

    }

    /** Setting Click Events */
    public void setRecyclerViewOnItemClickListener(RecyclerViewOnItemClickListener onItemClickListener) {
        this.mOnItemClickListener = onItemClickListener;
    }

    public RecyclerViewOnItemClickListener getOnItemClickListener() {
        return mOnItemClickListener;
    }

    /** Click Event Interface */
    public interface RecyclerViewOnItemClickListener {
        void onItemClickListener(View view, int position);
    }


    /**
     * Internal class Holder
     */
    class MyNoteViewHolder extends RecyclerView.ViewHolder {
        private TextView tv;
        private TextView tv_dateTime;
        private View mRowtab;
        private Button btnTop;
        private Button btnDelete;
        private View root;

        public MyNoteViewHolder(View root) {
            super(root);
            this.root = root;
            tv = (TextView) root.findViewById(R.id.row_text);
            tv_dateTime = (TextView) root.findViewById(R.id.tv_note_time);
            mRowtab = root.findViewById(R.id.row_tab);
            btnTop = (Button) root.findViewById(R.id.btnTop);
            btnDelete = (Button) root.findViewById(R.id.btnDelete);
        }
    }

}
3. Use this in Activity
mRecyclerView = (RecyclerView) findViewById(R.id.recycle_notes);
        mRecyclerView.setLayoutManager(new LinearLayoutManager(this));
        mCursor = mNoteDbAdapter.fetchAllNotes();
        mNoteAdapter = new NoteAdapter(this, mCursor, 0);
        Log.d(TAG, "mCursor The size is:" + mCursor.getCount());

        //Setting Click Events
        mNoteAdapter.setRecyclerViewOnItemClickListener(new NoteAdapter.RecyclerViewOnItemClickListener() {
            @Override
            public void onItemClickListener(View view, int position) {
                if (mCursor == null || mCursor.isClosed()) {
                    if (mCursor == null) {
                        Log.d("NoteActivity", "newCursor is null");
                        Toast.makeText(NoteActivity.this, "newCursor is null", Toast.LENGTH_SHORT).show();
                    } else if (mCursor.isClosed()){
                        Log.d("NoteActivity", "newCursor is closed");
                        Toast.makeText(NoteActivity.this, "newCursor is null", Toast.LENGTH_SHORT).show();
                    }
                } else {
                    mCursor.moveToPosition(position);
                    String content = mCursor.getString(mCursor.getColumnIndex(NoteDbAdapter.COL_CONTENT));
                    int importtant = mCursor.getInt(mCursor.getColumnIndex(NoteDbAdapter.COL_IMPORTANT));
                    int id = mCursor.getInt(mCursor.getColumnIndex(NoteDbAdapter.COL_ID));
                    Log.d("NoteActivity", content + importtant);
                    Note clickNote = new Note(id, content, importtant);
                    Intent intent = new Intent();
                    intent.setClass(NoteActivity.this, NoteContentActivity.class);
                    Bundle bundle = new Bundle();
                    bundle.putSerializable("note", clickNote);
                    intent.putExtras(bundle);
                    startActivity(intent);
                }

            }
        });

        //Setting up the adapter
        mRecyclerView.setAdapter(mNoteAdapter);
How to hide Toolbar and FAB buttons while sliding up and down RecycleView
The idea is simple. Just record the distance of movement when RecycleView slides downward (finger slides upward). Over a certain range, Toolbar and Floating Action Button's animate().translationY method will be called to move it in the Y axis direction. When RecycleView slides upward (finger slides downward), it will return to its original state, and when it slides to the bottom of RecycleView. Toolbar and FAB are forced to return to their original state and code.
- HidingScrollListener
public abstract class HidingScrollListener extends RecyclerView.OnScrollListener {

    private static final int HIDE_THRESHOLD = 20;
    private int scrolledDistance = 0;
    private boolean controlsVisible = true;
    private int mItemSize=0;

    public HidingScrollListener(int itemSize) {
        this.mItemSize = itemSize - 1;
    }

    /**
     *
     * @param recyclerView
     * @param dx Horizontal rolling distance
     * @param dy Longitudinal rolling distance
     *           The offset between two rolling events is recorded, not the total rolling distance.
     */
    @Override
    public void onScrolled(RecyclerView recyclerView, int dx, int dy) {
        super.onScrolled(recyclerView, dx, dy);
        int firstVisibleItem = ((LinearLayoutManager) recyclerView.getLayoutManager()).findFirstVisibleItemPosition();
        int lastVisibleItem = ((LinearLayoutManager) recyclerView.getLayoutManager()).findLastVisibleItemPosition();

        if (firstVisibleItem == 0||lastVisibleItem==mItemSize) {
            if (!controlsVisible) {
                onShow();
                controlsVisible = true;
            }
        }else{
            //If the total rolling distance exceeds a certain value
            // (This value depends on your own settings. The larger the sliding distance, the longer the sliding distance is needed to display or hide it.)
            // We display or hide the Toolbar in its direction (dy > 0 means roll-down, dy < 0 means roll-up).
            if (scrolledDistance > HIDE_THRESHOLD && controlsVisible) {
                onHide();
                controlsVisible = false;
                scrolledDistance = 0;
            } else if (scrolledDistance < -HIDE_THRESHOLD && !controlsVisible) {
                onShow();
                scrolledDistance = 0;
                controlsVisible = true;
            }
        }
        //Calculate the total distance of rolling (deltas addition).
        // But only when the Toolbar is hidden and rolled up or when the Toolbar is not hidden and rolled down
        if ((controlsVisible && dy > 0) || (!controlsVisible && dy < 0)) {
            scrolledDistance += dy;
        }
    }

    public abstract void onHide();
    public abstract void onShow();
}
Use the drop-back method in Avtivity
//Setting up a scroll listener for recycleview
        mRecyclerView.setOnScrollListener(new HidingScrollListener(mCursor.getCount()) {
            @Override
            public void onHide() {
                hideView();
            }

            @Override
            public void onShow() {
                showView();
            }
        });

       private void hideView() {
        mToolbar.animate().translationY(
                -mToolbar.getHeight()).setInterpolator(new AccelerateInterpolator(2));
        FrameLayout.LayoutParams ip = (FrameLayout.LayoutParams) mFloatingActionButton.getLayoutParams();
        int fabButtonMargin = ip.bottomMargin;
        mFloatingActionButton.animate().translationY(
                mFloatingActionButton.getHeight() + fabButtonMargin).setInterpolator(new AccelerateInterpolator(2)).start();
    }

    private void showView() {
        mToolbar.animate().translationY(0).setInterpolator(new DecelerateInterpolator(2));
        mFloatingActionButton.animate().translationY(0).setInterpolator(new DecelerateInterpolator(2)).start();
        }
Pay special attention to layout files
If you find that you're running like the screenshot below, you're sure it's because you've written less of these two sentences in the layout file.
android:clipToPadding="false"
android:paddingTop="?attr/actionBarSize"
The complete layout code is as follows:
- main_activity.xml
<?xml version="1.0" encoding="utf-8"?>
<FrameLayout xmlns:android="http://schemas.android.com/apk/res/android"
             xmlns:app="http://schemas.android.com/apk/res-auto"
              android:layout_width="match_parent"
              android:layout_height="match_parent">

    <android.support.v7.widget.RecyclerView
        android:id="@+id/recycle_notes"
        android:layout_width="match_parent"
        android:layout_height="match_parent"
        android:clipToPadding="false"
        android:paddingTop="?attr/actionBarSize"
        />

    <android.support.v7.widget.Toolbar
        android:id="@+id/toolbar"
        android:layout_width="match_parent"
        android:layout_height="?attr/actionBarSize"
        android:background="?attr/colorPrimary"
        android:clipToPadding="false"
        app:titleTextColor="@android:color/white"
        />

    <android.support.design.widget.FloatingActionButton
        android:id="@+id/button_add_note"
        android:layout_width="wrap_content"
        android:layout_height="wrap_content"
        android:layout_gravity="bottom|right"
        android:layout_marginBottom="16dp"
        android:layout_marginRight="16dp"
        android:src="@drawable/ic_action_new"
        android:elevation="15dp"
        app:fabSize="normal"
        app:pressedTranslationZ="8dp"
        app:rippleColor="#ff87eb"
        />

</FrameLayout>
Finally, we will talk about how to achieve the side slip of QQ-like deletion, designated operation.
Thank you first. Zhang Xu Tong One of his libraries helped me solve this problem. click here Visit his project.
1. Use com.mcxtzhang.swipemenulib.SwipeMenuLayout layout in the layout file, add button after ItemView to delete the top button.
2. Set the Open Side-Slide Menu in Adapter, and you can set whether the menu is left or right.
((SwipeMenuLayout) holder.root.findViewById(R.id.swipeMenuLayout)).setIos(false).setLeftSwipe(false).setSwipeEnable(true);
3. Setting Action Events in Activity
 mNoteAdapter.setOnSwipeListener(new NoteAdapter.onSwipeListener() {
            @Override
            public void onDel(int pos) {
                Toast.makeText(NoteActivity.this, "Click the first" + (pos+1) + "strip item Delete button", Toast.LENGTH_SHORT).show();
                mCursor.moveToPosition(pos);
                int id = mCursor.getInt(mCursor.getColumnIndex(NoteDbAdapter.COL_ID));
                mNoteDbAdapter.deleteNoteById(id);
                mCursor = mNoteDbAdapter.fetchAllNotes();
                mNoteAdapter.changeCursor(mCursor);
            }

            @Override
            public void onTop(int pos) {
                Toast.makeText(NoteActivity.this, "Click the first" + (pos+1) + "strip item Of Top Button", Toast.LENGTH_SHORT).show();
                mCursor.moveToPosition(pos);
                int id = mCursor.getInt(mCursor.getColumnIndex(NoteDbAdapter.COL_ID));
                Note editNote = mNoteDbAdapter.fetchNoteById(id);
                editNote.setDateTime(DateUtil.formatDateTime());
                mNoteDbAdapter.updateNote(editNote);
                mCursor = mNoteDbAdapter.fetchAllNotes();
                mNoteAdapter.changeCursor(mCursor);
            }
        });
Successfully, if you want to see the detailed code, or if you have any suggestions to go Github Send me a question or leave me a message in the station. Remember star.