When you first started Android development, you used the android:layout_weight attribute when writing layouts in xml.
First, the attribute must be in the Linearlayout layout to be effective.
This attribute means weight: the width or height of the View is equal to the original width or height (android:layout_width) plus the proportion of the remaining space! (Take care of the remaining space here)
Code directly:
<LinearLayout xmlns:android="http://schemas.android.com/apk/res/android"
    xmlns:tools="http://schemas.android.com/tools"
    android:layout_width="match_parent"
    android:layout_height="match_parent"
    android:orientation="horizontal"
    tools:context="com.dgg1.weight.MainActivity">

    <Button
        android:layout_width="0dp"
        android:layout_height="wrap_content"
        android:layout_weight="1"
        android:background="#ff00ff"
        android:text="Button 1" />

    <Button
        android:layout_width="0dp"
        android:layout_height="wrap_content"
        android:layout_weight="2"
        android:background="#ffff00"
        android:text="Button 2" />
</LinearLayout>
The results achieved are as follows: 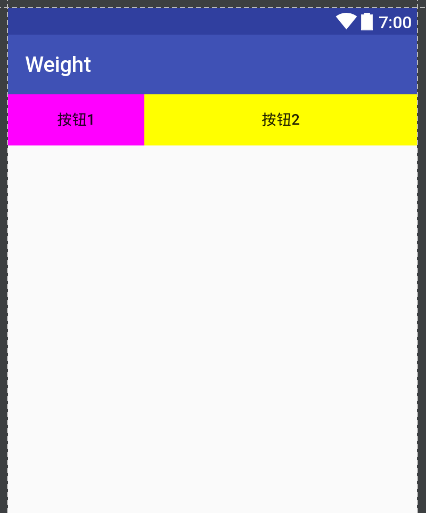
This is also the official way of writing.
Now let me put it another way:
<LinearLayout xmlns:android="http://schemas.android.com/apk/res/android"
    xmlns:tools="http://schemas.android.com/tools"
    android:layout_width="match_parent"
    android:layout_height="match_parent"
    android:orientation="horizontal"
    tools:context="com.dgg1.weight.MainActivity">

    <Button
        android:layout_width="match_parent"
        android:layout_height="wrap_content"
        android:layout_weight="1"
        android:background="#ff00ff"
        android:text="Button 1" />

    <Button
        android:layout_width="match_parent"
        android:layout_height="wrap_content"
        android:layout_weight="2"
        android:background="#ffff00"
        android:text="Button 2" />
</LinearLayout>
Ah, isn't that exactly the same (hey, people who don't look carefully may really think it hasn't changed anywhere) I've changed layout_width from 0 to match_parent here.
The results achieved are as follows: 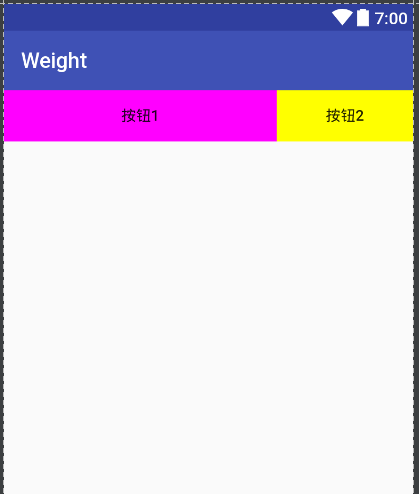
You will find that the effect is the opposite of the previous effect. Why does this effect occur? The layout_weight attribute means the original width of the control + the proportional width of the remaining space!
In the first case, assuming the screen width is 100, when you set the width to 0dp, the width of button 2 is 0 (control width) +100 (remaining width) *2/3 (ratio) = 67 (actual width), and the width of button 1 is 0 + 100*1/3 = 33;
The second scenario: Assuming that the width of the screen is 100, when you set the width to match_parent, the width of button 1 is 100 and the width of button 2 is 100, then the remaining width is 100 - (100 + 100) = - 100 (the remaining width is - 100), then continue to convert the actual width of button1 to 100 + (- 100) * 1/3 = 67, and the actual width of button2 to 100 + (- 100) * 2/3 = 33. Now.
So the opposite will happen. (The first is officially recommended)
But sometimes a second way of writing may be required when using a reusable layout of the include tag.
If you have any questions or omissions, please leave a message to discuss and make progress together.