As a programmer, if you like to output technical articles, you must have had the idea of building a personal blog website. After comparing a lot of blog frameworks, I found that the blog website built with the theme of Hexo + Hexo theme matrix not only has a beautiful interface, but also has powerful functions. Today, I will take you to build a beautiful blog website with Hexo. I hope it will help you!
Introduction to Hexo
Hexo is a fast, concise and efficient blog framework. We can use Markdown to write articles, and then generate static websites through hexo. Hexo has a very rich theme, and many blogs you have seen are generated with it.
Hexo theme theme
When using Hexo, we usually use it with third-party themes. Here we recommend a theme Hexo theme material designed based on Material Design. The interface is simple and beautiful, and the content of the article is beautiful and easy to read. Responsive design, blog can be well displayed on desktop, tablet, mobile phone and other devices. Built in rich plug-ins, powerful.
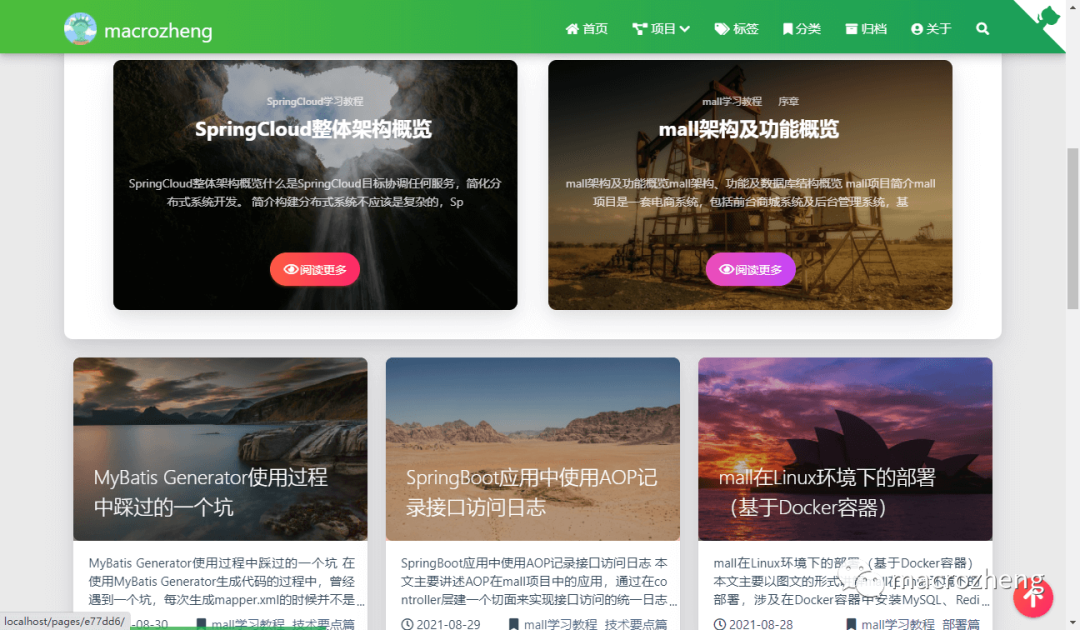
Effect demonstration
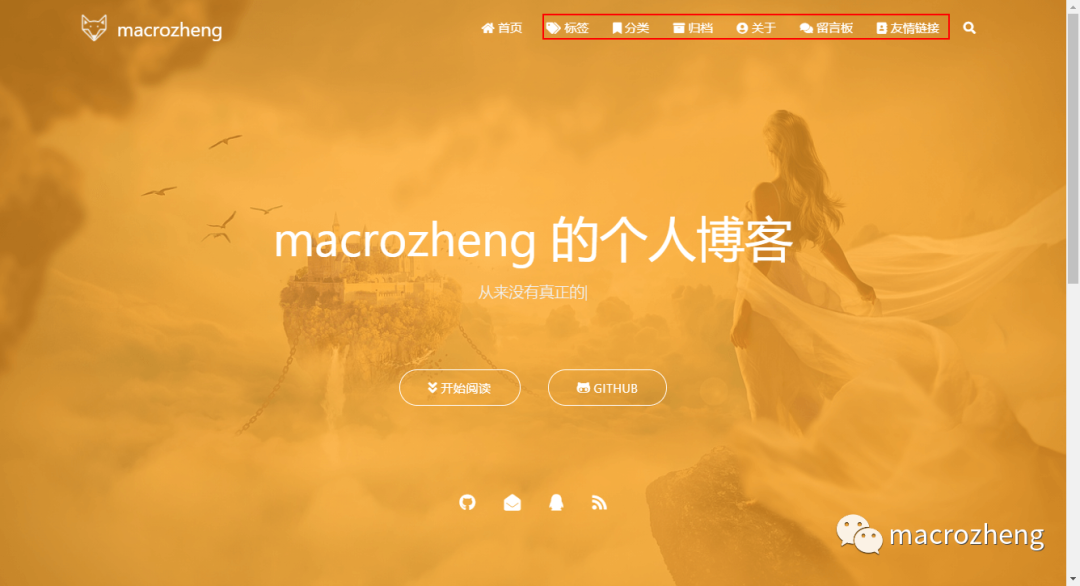
Let's first look at the effect of the finished product. With this theme, Hexo still has a beautiful interface. Friends who want to build a blog can try it!
build
We will first use Hexo to build a basic blog site, and then switch to the Hexo theme matrix theme.
-
First, use the following command to install Hexo CLI. You can tell by name that it is a Hexo CLI tool;
npm install -g hexo-cli
-
After successful installation, initialize a blog directory, enter the directory, and then install the dependency;
#  Initialize blog directory
hexo init website-hexo
#  Enter blog directory
cd website-hexo
#  Install blog related dependencies
npm install
-
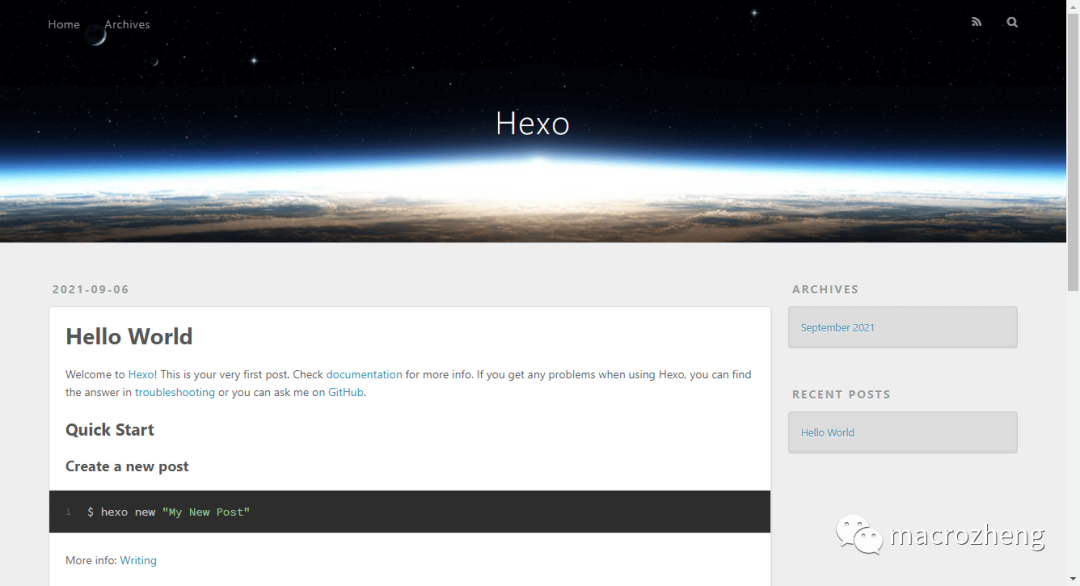
Such a basic blog website has been built. Do you want to build a blog website in seconds, and then use the following command to start the blog website;
hexo server
-
After successful startup, we can visit the home page. Friends who have used Hexo should know that Hexo should be used with the theme, otherwise it is really ugly. Visit the address: http://localhost:4000/
to configure
To build a blog website, some configurations need to be customized. Next, let's talk about the overall configuration of Hexo and the theme configuration of Hexo theme matrix.
Hexo overall configuration
There are many themes that support Hexo. Here I choose a Hexo theme matrix that I think is more beautiful.
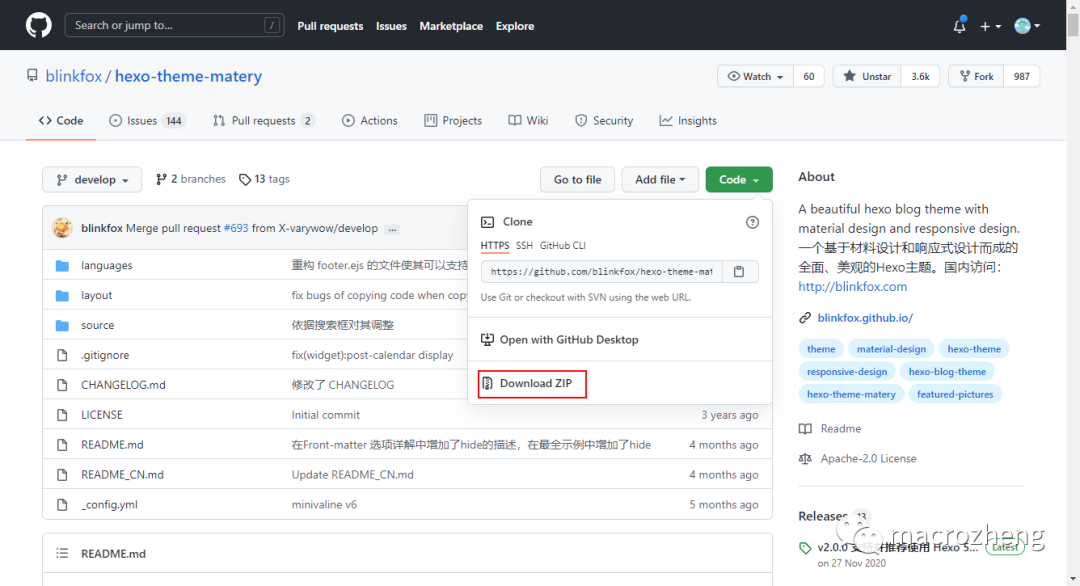
-
First download the theme and unzip it to the themes directory of the project. The download address is: https://github.com/blinkfox/hexo-theme-matery
-
Modify the configuration file under the project root directory_ config.yml, which is the overall configuration of Hexo. Change the theme attribute to Hexo theme matrix;
theme: hexo-theme-matery
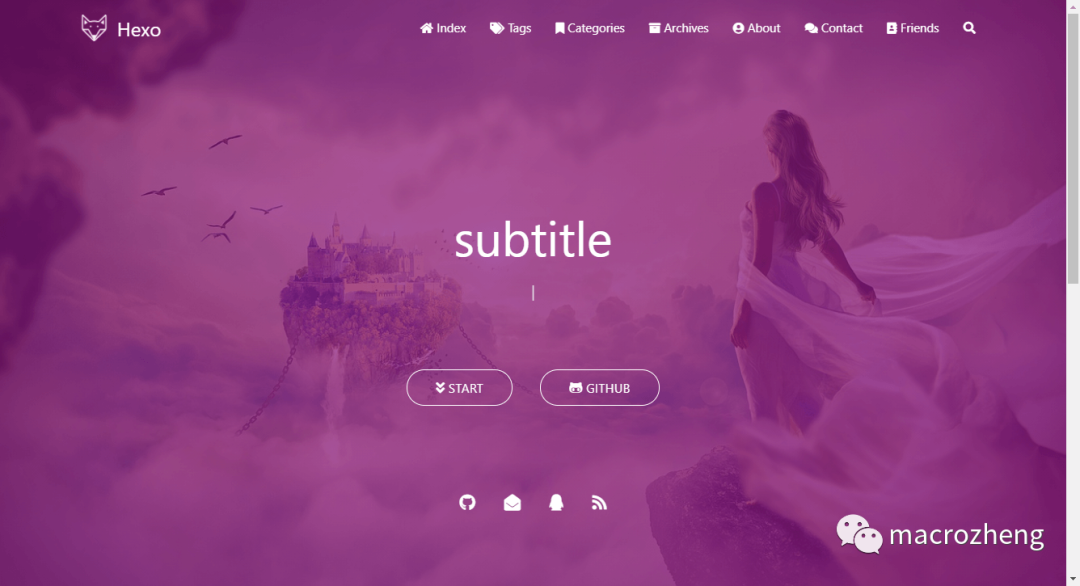
-
After the modification is successful, we restart the project and look at the home page. Sure enough, the page is much more beautiful. Visit the address: http://localhost:4000/
-
Of course_ The config.yml file can not only change the theme, but also many website configurations, such as website configuration, website configuration, home page configuration, etc.
#  Website configuration
title: macrozheng #  Website title
subtitle: 'macrozheng Personal blog' #  Website subtitle
description: 'Justice may be late, but will never be absent.' #  Website description
keywords:
author: macrozheng #  Website author
language: zh-CN #  The language of the website can be set to Chinese
timezone: ''

#  URL configuration
url: http://localhost:4000  #  The URL will affect the original link address of the article page
permalink: :year/:month/:day/:title/ #  Permanent link format for articles

#  Home page configuration
index_generator:
  path: ''
  per_page: 12 #  Pagination settings. The theme settings 6, 12 and 18 are better
  order_by: -date #  In reverse chronological order

#  Paging configuration
per_page: 12
pagination_dir: page
Add fixed page
-
There are some navigation buttons at the top of the home page, such as label, classification, archiving, etc. if we do not create the corresponding page, we will not be able to access it;
-
Use the hexo new page "categories" command to create a new classification page. The classification page contains at least the following contents;
---
title: categories
date: 2021-09-06 10:19:56
type: "categories"
layout: "categories"
---
-
Use the hexo new page "tags" command to create a new tab, which contains at least the following contents;
---
title: tags
date: 2021-09-06 10:25:04
type: "tags"
layout: "tags"
---
-
Use the hexo new page "about" command to create a new about page. The about page contains at least the following contents;
---
title: about
date: 2021-09-06 10:28:56
type: "about"
layout: "about"
---
-
Use the hexo new page 404 command to create a new 404 page, which at least includes the following contents;
---
title: 404
date: 2021-09-06 10:32:48
type: "404"
layout: "404"
description: "Oops~,I collapsed! The page you want cannot be found :("
---
-
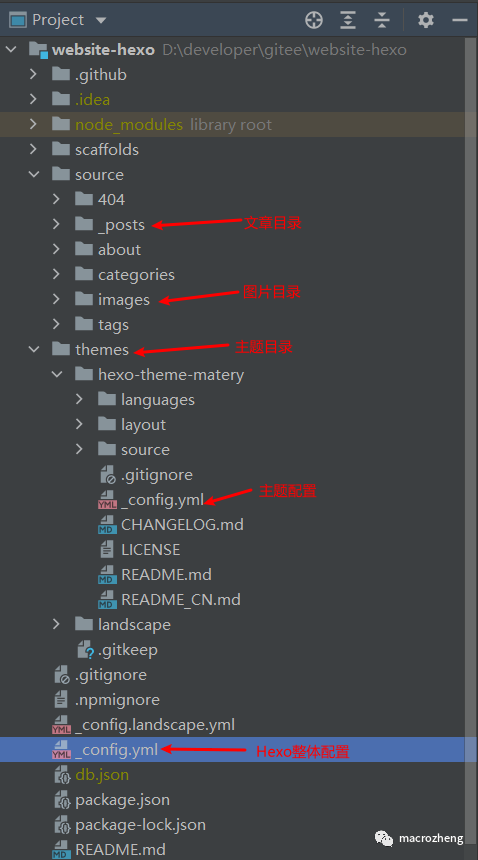
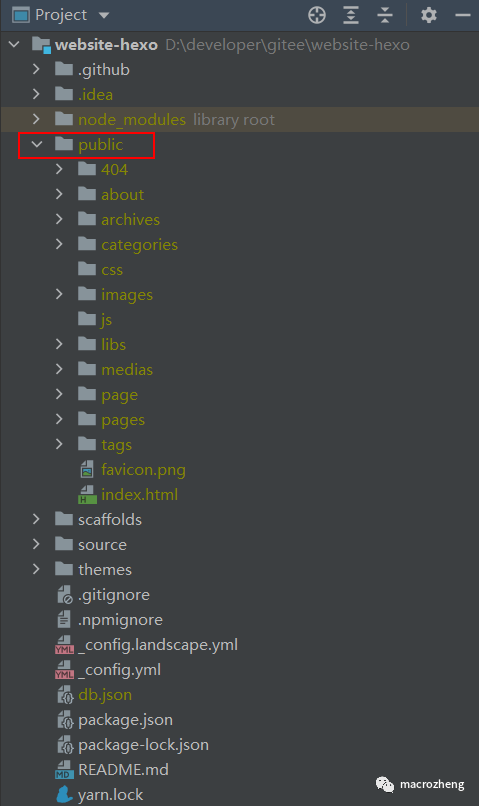
After the pages are created successfully, the project directory structure is as follows. Here, the directory is pasted for everyone to understand.
Theme configuration
We need to modify not only the configuration of Hexo, but also the configuration of Hexo theme theme, such as menu navigation at the top and about pages, which are configured in the theme. Note: the theme configuration needs to be modified. / themes / Hexo theme matrix/_ Config.yml file.
-
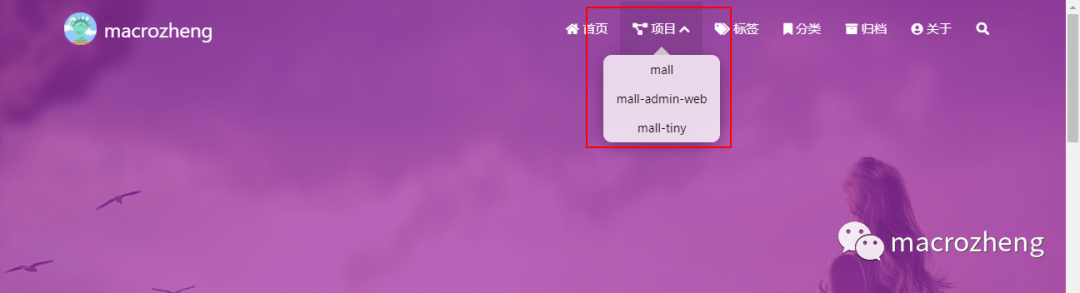
We can configure the navigation menu. For example, I added the item navigation menu;
#  Configure the name, path, and icon for menu navigation
menu:
  Index:
    url: /
    icon: fas fa-home
  project:
    icon: fas fa-project-diagram"
    children:
      - name: mall
        url: https://github.com/macrozheng/mall
      - name: mall-admin-web
        url: https://github.com/macrozheng/mall-admin-web
      - name: mall-tiny
        url: https://github.com/macrozheng/mall-tiny
  Tags:
    url: /tags
    icon: fas fa-tags
-
After adding successfully, the navigation menu will have the item menu, and the secondary menu can be displayed;
-
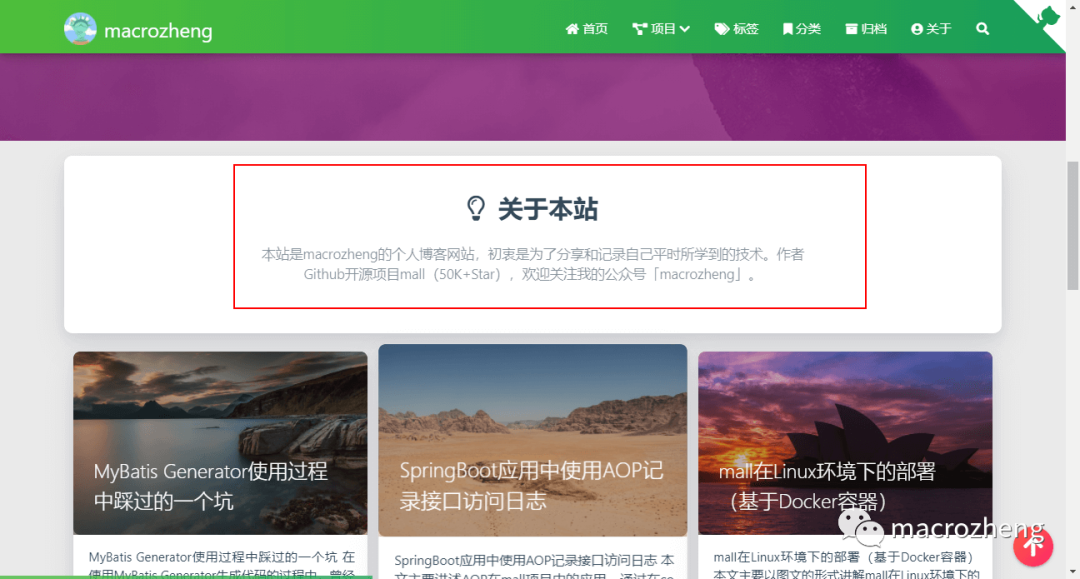
We can configure the introduction on the home page and modify the configuration under dream;
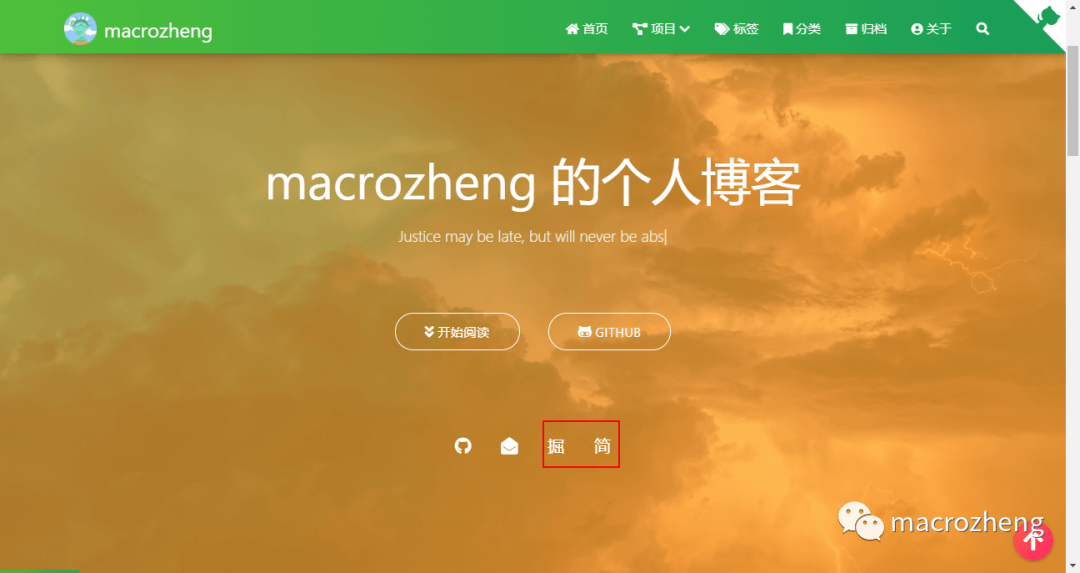
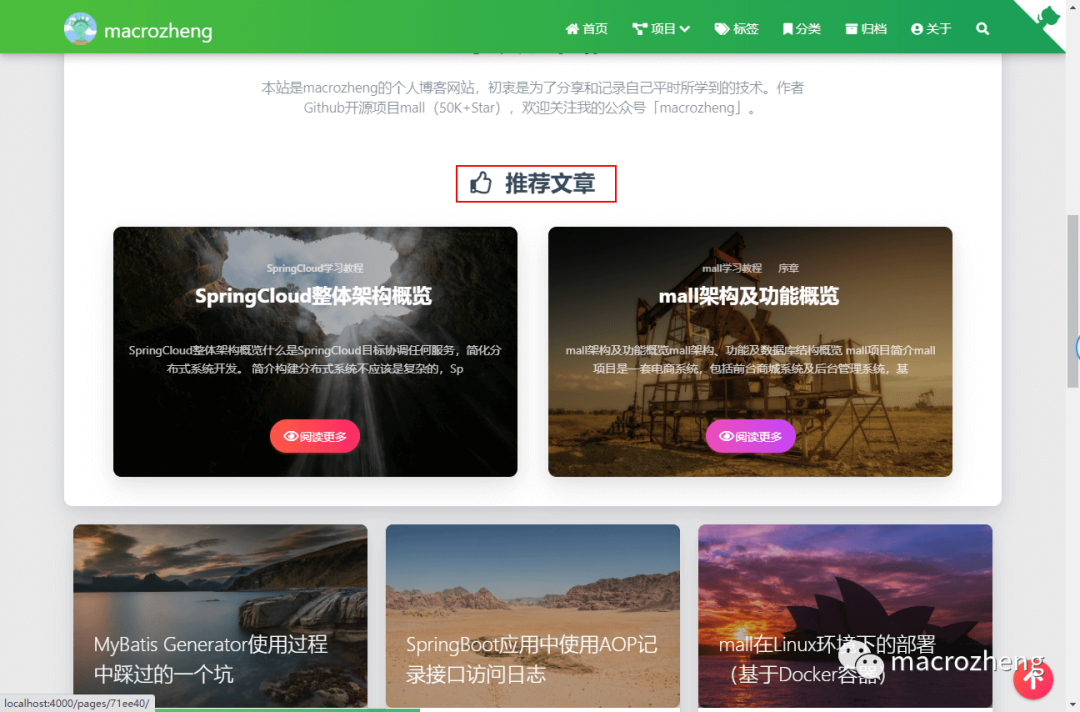
#  Configure the statement of "dream" displayed on the home page
dream:
  enable: true
  showTitle: true
  title: About this site
  text: This site is macrozheng The original intention of personal blog website is to share and record the technology they usually learn. author Github Open source project mall(50K+Star),Welcome to my official account.「macrozheng」.
-
After successful configuration, the home page is displayed as follows;
-
We can configure the personal information in the banner on the home page;
#  home page   banner   The second line of personal information configuration in. If it is left blank, it will not be enabled
socialLink:
  github: https://github.com/macrozheng # https://github.com/xxx
  email: macrozheng@126.com # xxx@xxx.com
  facebook: # https://www.facebook.com/xxx
  twitter: # https://twitter.com/xxx
  qq: # 123456789
  weibo: # https://weibo.com/xxx
  zhihu: # https://www.zhihu.com/xxx
  juejin: https://juejin.im/user/5cf7c1d7f265da1bc07e28b7
  jianshu: https://www.jianshu.com/u/9bdcaae6d6b7
  rss: false # true,false
-
Since we have customized two links, nuggets and Jianshu, we also need to modify / layout under the theme directory/_ Add the following contents to the partial / social-link.ejs file, otherwise it cannot be displayed;
<% if (theme.socialLink.juejin) { %>
    <a href="<%= theme.socialLink.juejin %>" class="tooltipped" target="_blank" data-tooltip="Follow my Nuggets: <%= theme.socialLink.juejin %>" data-position="top" data-delay="50">
        <i class="fab fa-zhihu1">Dig</i>
    </a>
<% } %>

<% if (theme.socialLink.jianshu) { %>
    <a href="<%= theme.socialLink.jianshu %>" class="tooltipped" target="_blank" data-tooltip="Follow my Jane book: <%= theme.socialLink.jianshu %>" data-position="top" data-delay="50">
        <i class="fab fa-zhihu1">simple</i>
    </a>
<% } %>
-
After successful configuration, the home page is displayed as follows;
-
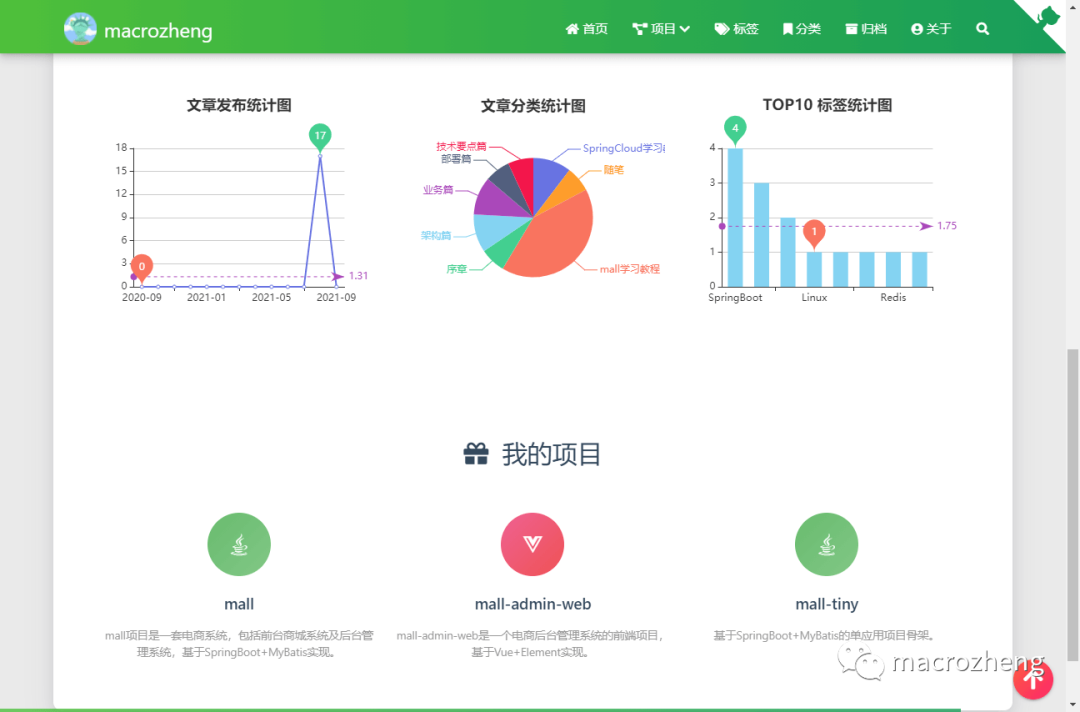
We can configure the about page. Personal information and my project are configured below, and the technical display is closed;
#  Configure personal information in the about page, including avatar, occupation and personal introduction
profile:
  avatar: /medias/avatar.png
  career: Java Development Engineer
  introduction: absorbed Java Technology sharing, covering SpringBoot,SpringCloud,Docker,Middleware and other practical technologies, Github Open source project mall(50K+Star).

#  Configure my project information on the about page. If you don't need this information, you can set it inactive or delete it
myProjects:
  enable: true
  data:
    mall:
      icon: fab fa-java
      iconBackground: 'linear-gradient(to bottom right, #66BB6A 0%, #81C784 100%)'
      url: https://github.com/macrozheng/mall
      desc: mall The project is a set of e-commerce system, including foreground mall system and background management system SpringBoot+MyBatis realization.
    mall-admin-web:
        icon: fab fa-vuejs
        iconBackground: 'linear-gradient(to bottom right, #F06292 0%, #EF5350 100%)'
        url: https://github.com/macrozheng/mall-admin-web
        desc: mall-admin-web It is a front-end project of e-commerce background management system based on Vue+Element realization.
    mall-tiny:
      icon: fab fa-java
      iconBackground: 'linear-gradient(to bottom right, #66BB6A 0%, #81C784 100%)'
      url: https://github.com/macrozheng/mall-tiny
      desc: be based on SpringBoot+MyBatis Single application project skeleton.

#  Configure the "my skills" information on the "about" page. If you don't need this information, you can set it as inactive or delete it
mySkills:
  enable: false
  data:
    Java:
      background: 'linear-gradient(to right, #FF0066 0%, #FF00CC 100%)'
      percent: 85%
-
After the configuration is successful, the personal page is displayed as follows;
-
There are other useful configurations, such as Github link configuration, reprint configuration, sharing configuration, typewriter subtitle configuration and filing number configuration.
#  Is the configuration on   header   Display in   fork   me   on   github   The default is true. You can modify it to your warehouse address
githubLink:
  enable: true
  url: https://github.com/macrozheng
  title: Fork Me

#  Reprint statement
reprint:
  enable: true
  default: cc_by_nc_nd

#  sharejs article sharing module
#  Support sequence. The optional items are twitter,   facebook,   google,   qq,   qzone,   wechat,   weibo,   douban,   linkedin.
sharejs:
  enable: true
  sites: qq,wechat,weibo,douban

#  Typing effect subtitle
#  If there is a symbol  ‘ , Please in  ’  Add before  \
subtitle:
  enable: true
  loop: true #  Cycle
  showCursor: true #  Show cursor
  startDelay: 300 #  Start delay
  typeSpeed: 100 #  Typing speed
  backSpeed: 50 #  Delete speed
  sub:
    - Justice may be late, but will never be absent.

#  ICP filing information is displayed at the end
icp:
  enable: false
  url: #  Filing link
  text: #  Filing information
Writing articles
When writing articles, we can directly use Markdown to write, and then add front matter configuration in the header. All articles are placed in source/_ In the posts directory.
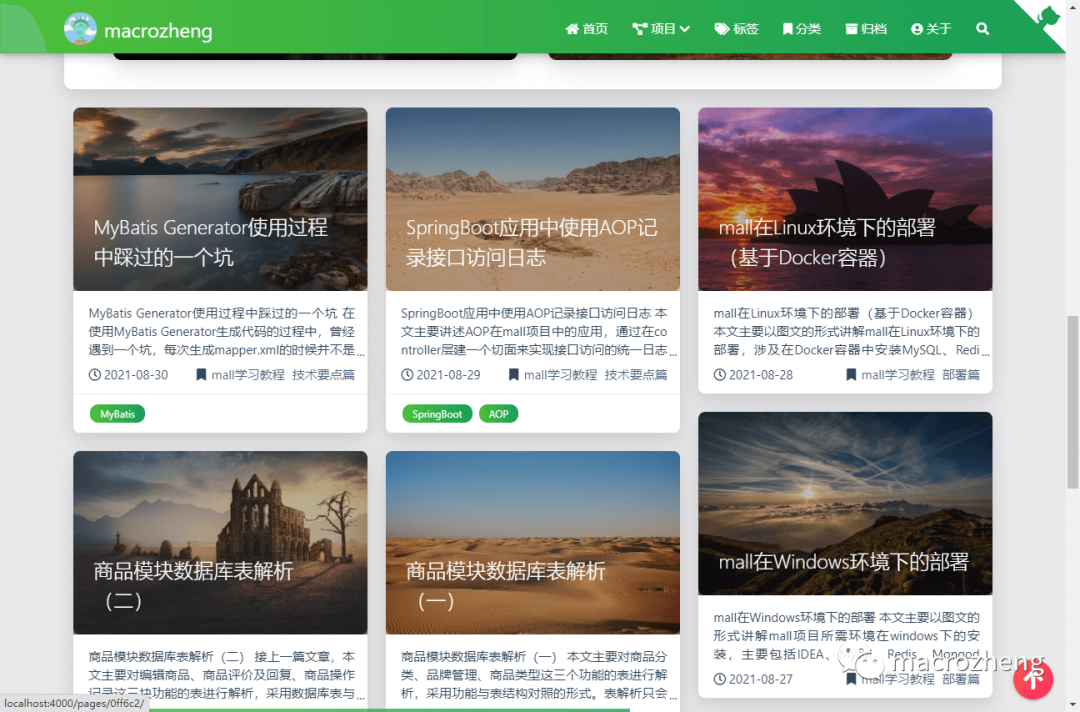
-
Here we are_ After adding articles to the posts directory, you can see them by restarting the blog website;
-
We must add front matter to each article. Front matter can be used to configure the title, classification, label and other information of the article. A simple configuration is as follows:;
---
title: mall integration SpringBoot+MyBatis Build basic skeleton
date: 2021-08-21 16:30:11
permalink: /pages/c68875/
categories:
  - mall Learning tutorial
  - Architecture
tags:
  - SpringBoot
  - MyBatis
---
-
There are many front matter configurations, which will not be described here. Please refer to the following table directly;
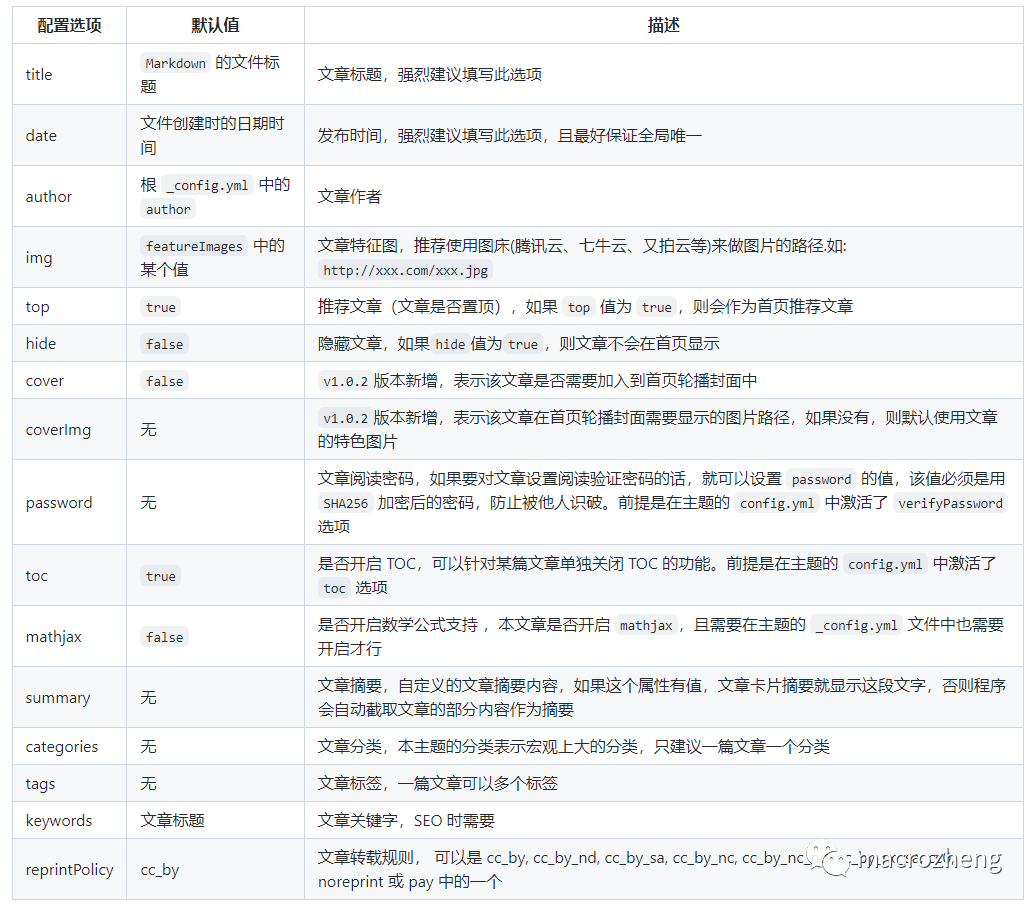
-
If you want some articles to be recommended on the home page, you can add the top: true configuration;
-
If you copy the picture directly, you will find that the picture cannot be displayed. We need to change the relative path of the article picture to the absolute path to display it;
 
-
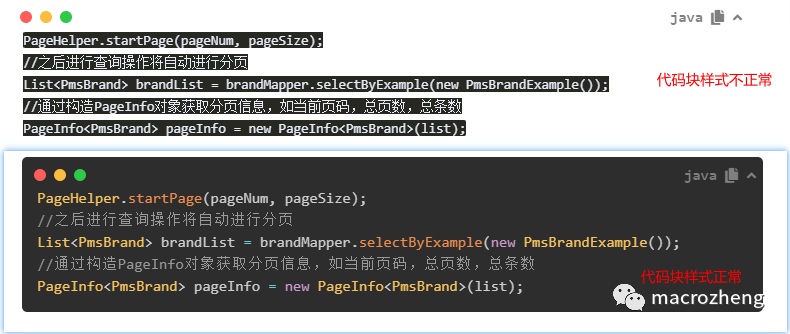
If you have code in your article, there will be problems with the display by default. You need to modify the configuration of Hexo_ config.yml, disable highlight and enable prismjs to display normally;
highlight:
  enable: false
  line_number: true
  auto_detect: false
  tab_replace: ''
  wrap: true
  hljs: false
prismjs:
  enable: true
  preprocess: true
  line_number: true
  tab_replace: ''
-
If it doesn't work here, you can use the hexo clean command to empty the cache and try again, with a code block style comparison diagram attached;
-
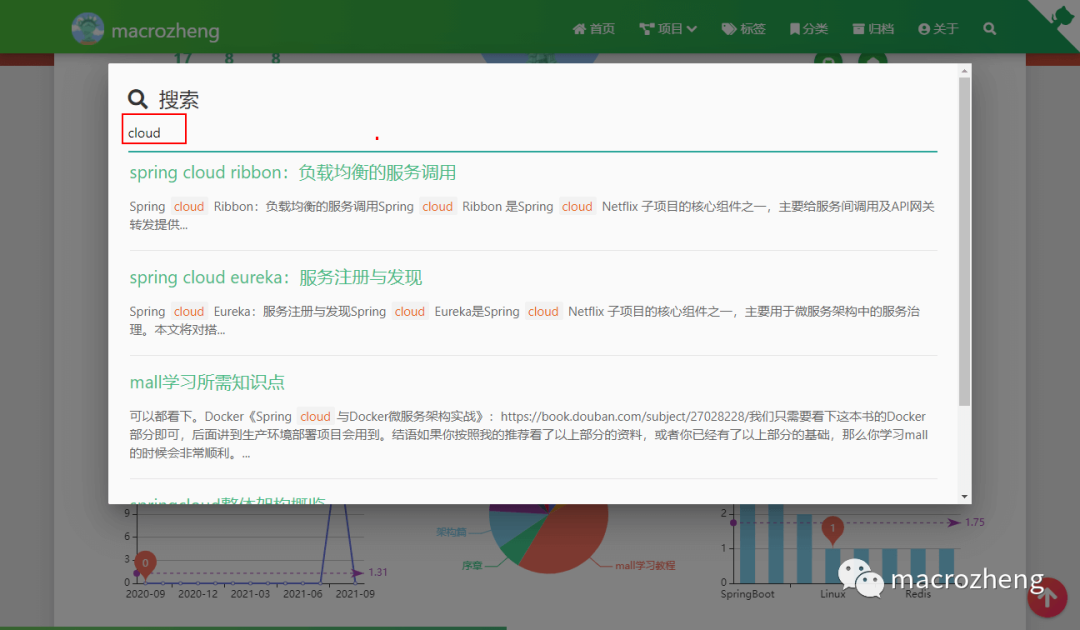
Also, the search plug-in does not take effect by default. We need to use the following command to install the search plug-in first;
npm install hexo-generator-search --save
-
Then modify the configuration file of Hexo in the root directory_ config.yml, add the following configuration;
search:
  path: search.xml
  field: post
-
After the search takes effect, the display effect is as follows.
deploy
Hexo generates a website quickly and easily. A command generates a static file and then places it in the html directory of Nginx.
-
Use the hexo generate command on the command line to package the project into a static file, and the output file directory is public;
-
Next, copy all the files in the public directory to the html directory of Nginx to complete the deployment. The displayed content after deployment is as follows.
summary
Using Hexo with Hexo theme matrix to build a blog website not only has a beautiful interface, but also has powerful functions. If you want to build your own blog website, this is a good choice!