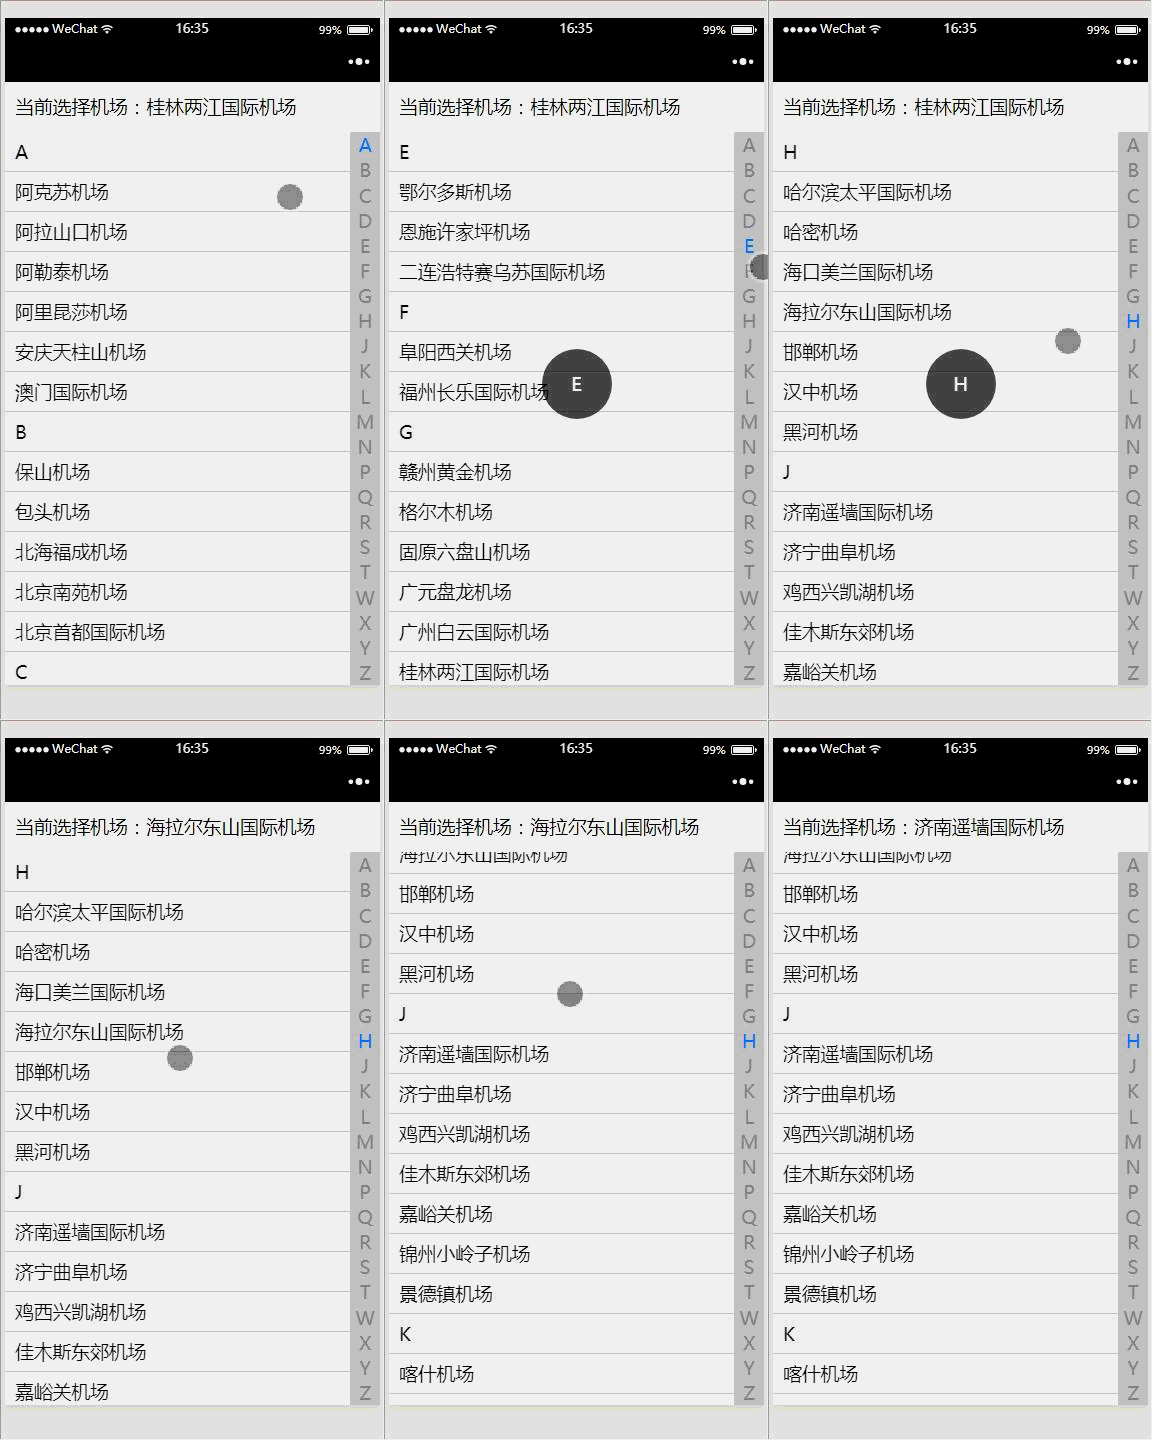
Effect display

Principle of implementation
- 'currently selected Airport' and the navigation bar on the right are fixed positioning;
- Scroll view component is used in the left display window;
- The letter prompt in the selection is made in your own WXSS style.
WXML
<view class="right-nav">
    <view bindtap="getCurrentCode" class="{{chooseIndex == index ? '.city-list-active' : ''}}" wx:for="{{cityList}}" style="height:{{codeHeight}}px" data-code="{{item.code}}">
    {{item.code}}
    </view>
</view>

<view class="city-layer {{isShowLayer ? '' : 'layer-hide'}}">
  {{code}}
</view>

<view class="current-choose-city">Airport currently selected:{{chooseCity}}</view>
<scroll-view class="city-scroll" scroll-y="true" style="height:{{cityHeight}}px" bindscroll="scroll" scroll-top="{{scrollTop}}">
    <view class="city-box" wx:for="{{cityList}}" wx:key="{{item.code}}">
        <view class="city-code">{{item.code}}</view>
        <view class="city-list" wx:for="{{item.cityList}}" wx:for-item="city" bindtap="getChooseCity" data-city="{{city}}">
              {{city}}
        </view>
    </view>
</scroll-view>
WXSS
.current-choose-city{
  position: fixed;
  width: 100%;
  height: 50px;
  line-height: 50px;
  padding: 0 10px;
  top: 0;
  left: 0;
  background-color: #fff;
  z-index: 10;
}
.right-nav{
  width: 30px;
  color: #888;
  text-align: center;
  position: fixed;
  bottom: 0;
  right: 0;
  background-color: rgb(200, 200, 200);
  z-index: 9;
}
.city-scroll{padding-top: 50px;}
.city-code{
  background-color: #f7f7f7;
}
.city-list,.city-code{
  height: 39px;
  line-height: 40px;
  padding: 0 30px 0 10px;
  overflow: hidden;
  border-bottom: 1px solid #c8c7cc;
}
.city-list-active{color:#007aff;}

/*Prompt for clicked letters  */
.city-layer{
  width: 70px;
  height: 70px;
  line-height: 70px;
  text-align: center;
  border-radius: 50%;
  color: #fff;
  background-color: rgba(0, 0, 0, .7);
  position: fixed;
  top: calc(50% - 35px);
  left:calc(50% - 35px);
  z-index: 11;
}
.layer-hide{display: none;}
JS
var city_list = require('./city.js');

Page({
  data: {
    cityList: city_list.city,
    chooseCity: 'You haven't selected an airport yet!',
    isShowLayer: false,
    chooseIndex: 0,
    len: [],
    code: null,
    codeHeight: null,
    cityHeight:null,
    scrollTop: 0
  },
  onLoad (options) {
    var windowHeight = wx.getSystemInfoSync().windowHeight;
    var arr = [];

    this.data.cityList.forEach(current => arr.push(current.cityList.length + 1));
    this.setData({
      codeHeight: (windowHeight - 50) / this.data.cityList.length,
      cityHeight: windowHeight - 50,
      len: arr
    });
  },
  getCurrentCode(e){
    var index = 0, sum = 0,self = this;

    for (var i = 0; i < this.data.cityList.length;i++){
      if (this.data.cityList[i].code === e.target.dataset.code){
        index = i
        break;
      }
    }
    for (var j = 0; j < index; j++) {
      sum += this.data.len[j];
    }

    this.setData({
      code: e.target.dataset.code,
      scrollTop: sum * 40,
      chooseIndex: index,
      isShowLayer: true
    });

    setTimeout(() => {
      self.setData({ isShowLayer: false })
    },500);
  },
  getChooseCity(e){
    this.setData({ chooseCity: e.target.dataset.city });
  }
})
Summary:
- In the onLoad function, set the display height on the left and the height of the box where each letter of the right navigation is located;
- getCurrentCode function is to get the index of the click letter, then prompt and close the prompt after 500ms;
- getChooseCity function is used to get the selected airport and assign a value to chooseCity.
Code simplification:
var index = 0;
for (var i = 0; i < this.data.cityList.length;i++){
  if (this.data.cityList[i].code === e.target.dataset.code){
    index = i
    break;
  }
}
Simplified as:
Add to data-index="{{index}}",Reduce cycle consumption:
<view bindtap="getCurrentCode" class="{{chooseIndex == index ? '.city-list-active' : ''}}" wx:for="{{cityList}}" style="height:{{codeHeight}}px" data-code="{{item.code}}" data-index="{{index}}">
var index = e.target.dataset.index;For more wechat applet instances, please click: http://blog.csdn.net/m0_/article/details/78853722