Recently, I was working on the project of connecting wechat applet to the Internet of things. However, the online data always did not match the demand. I finally succeeded in continuous experiments. I will make a brief record here.
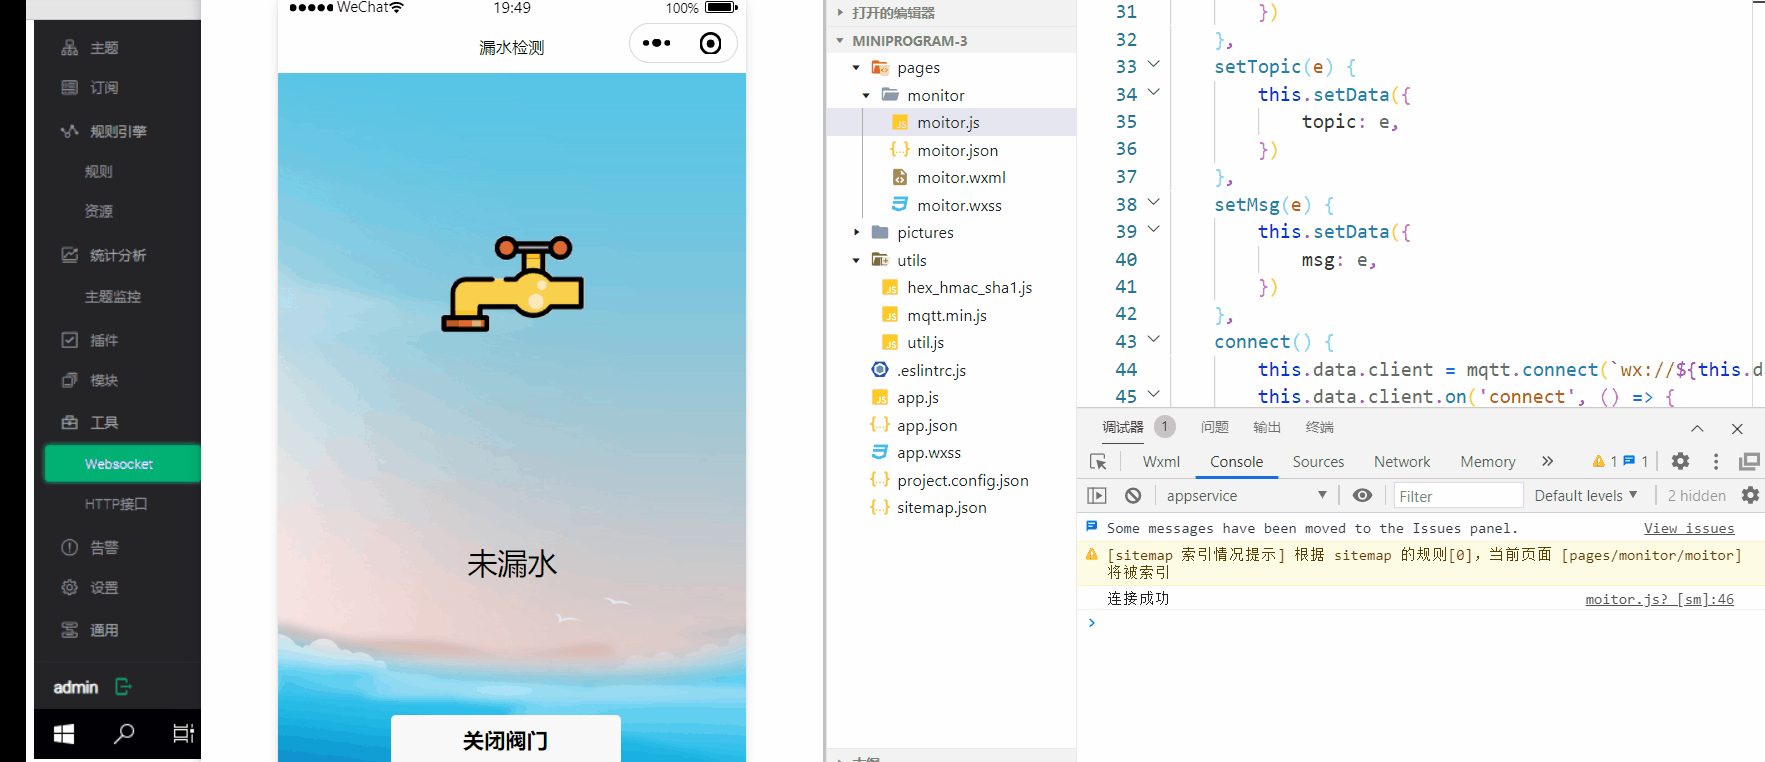
Effect display
EMQX server configuration
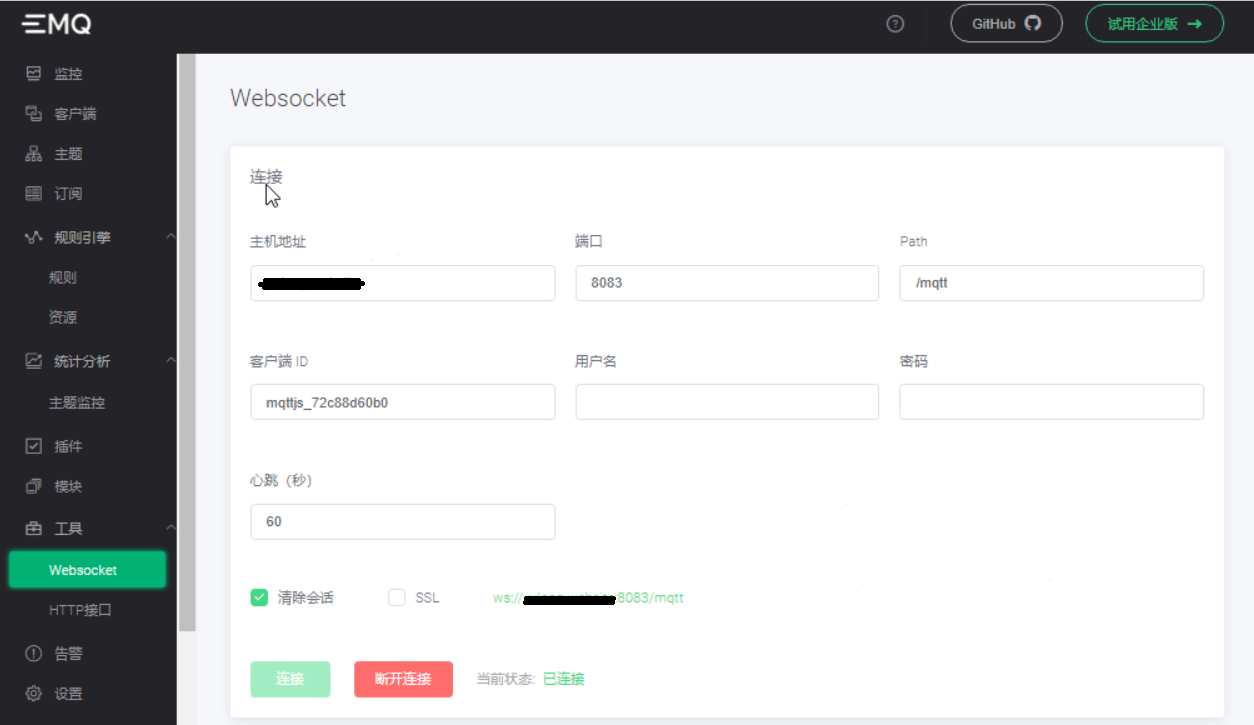
Replace the host address with the server domain name. If there is no ICP record, use WS communication, that is, use port 8083. Click the connection above.
If you have filed and obtained the SSL certificate, you can check SSL. At this time, you can communicate through WSS and use port 8084.
Note: the server must release the relevant ports! Check the firewall or security rules to confirm that the port is open.
If you want to use WSS communication, you need the following additional configuration.
The steps of EMQX deployment certificate are as follows:
Download xxx.pem and xxx.key files from the certificate issuing website, rename them to cert.pem and key.pem (. Key suffix is changed to. PEM, and its content will not change), and replace etc/certs/cert.pem and key.pem in the EMQX installation path. You can also choose to change the listener.wss.externel.keyfile and listener.wss.externel.certfile in etc/emqx.conf, both with PEM as the suffix.
The steps for setting the domain name of wechat applet are as follows:
Enter the wechat public platform, select development management, development settings, modify the socket legal domain name, keep wss: / /, and do not add ports behind.
After that, clear the wechat applet cache. You can see that the change has taken effect in the details and project configuration.
Wechat applet part code
The following is the js code related to mqtt communication
import mqtt from '../../utils/mqtt.min.js';
Page({

    /**
     * Initial data of the page
     */
    data: {
        client: 'wxapp',
        host: 'x.x.x.x:8083',
        /*
        Note that 8083 port is used here, and whether to change 8084 is determined according to the requirements. x.x.x.x can be directly replaced by the domain name, or fill in the public IP bound by the domain name.
        */
        topic: 'testtopic/miniprogram',
        msg: '',
        mqttOptions: {
          protocolVersion: 4,
          clientId: 'wxapp',
          clean: true,
          password: 'wxapp',//Customized, the same as the EMQX server configuration
          username: 'wxapp',//Customized, the same as the EMQX server configuration
          reconnectPeriod: 1000,
          connectTimeout: 30 * 1000,
          resubscribe: true // If the connection is disconnected and reconnected, the subscribed topic will be automatically subscribed again (true by default)
        },
    },
    setHost(e) {
        this.setData({
            host: e,
        })
    },
    setTopic(e) {
        this.setData({
            topic: e,
        })
    },
    setMsg(e) {
        this.setData({
            msg: e,
        })
    },
    connect() {
        this.data.client = mqtt.connect(`wx://${this.data.host}/mqtt`, this.data.mqttOptions)
        /*
        Note that the above is wx: / /, using port 8083. If using port 8084, it needs to be changed to wxs://
        */
        this.data.client.on('connect', () => {
            console.log('Connection succeeded')
            this.data.client.on('message', (topic, payload) => {
                console.log(`received Topic: ${topic}, Payload: ${payload}`)
            })
            this.data.client.on('error', (error) => {
                console.log('error')
            })
            this.data.client.on('reconnect', () => {
                console.log('Reconnecting...')
            })
            this.data.client.on('offline', (errr) => {
                console.log('Offline')
            })
        })
    },
    disconnect() {
        this.data.client.end()
        this.setData({
          btnText: 'connect',
        })
        wx.showToast({
          title: 'Disconnected successfully'
        })
    },
    subscribe() {
        this.data.client.subscribe(this.data.topic)
        wx.showToast({
          title: `Topic subscription succeeded`
        })
    },
    unsubscribe() {
        this.data.client.unsubscribe(this.data.topic)
        wx.showToast({
          title: `Unsubscribe succeeded`
        })
    },
    publish() {
        this.data.client.publish(this.data.topic, this.data.msg)
        console.log('Message sent')
    },
    onLoad: function (options) {
        this.connect();
        this.subscribe();
    },
Wechat applet connects to EMQX server
Create a client side for EMQX before connecting
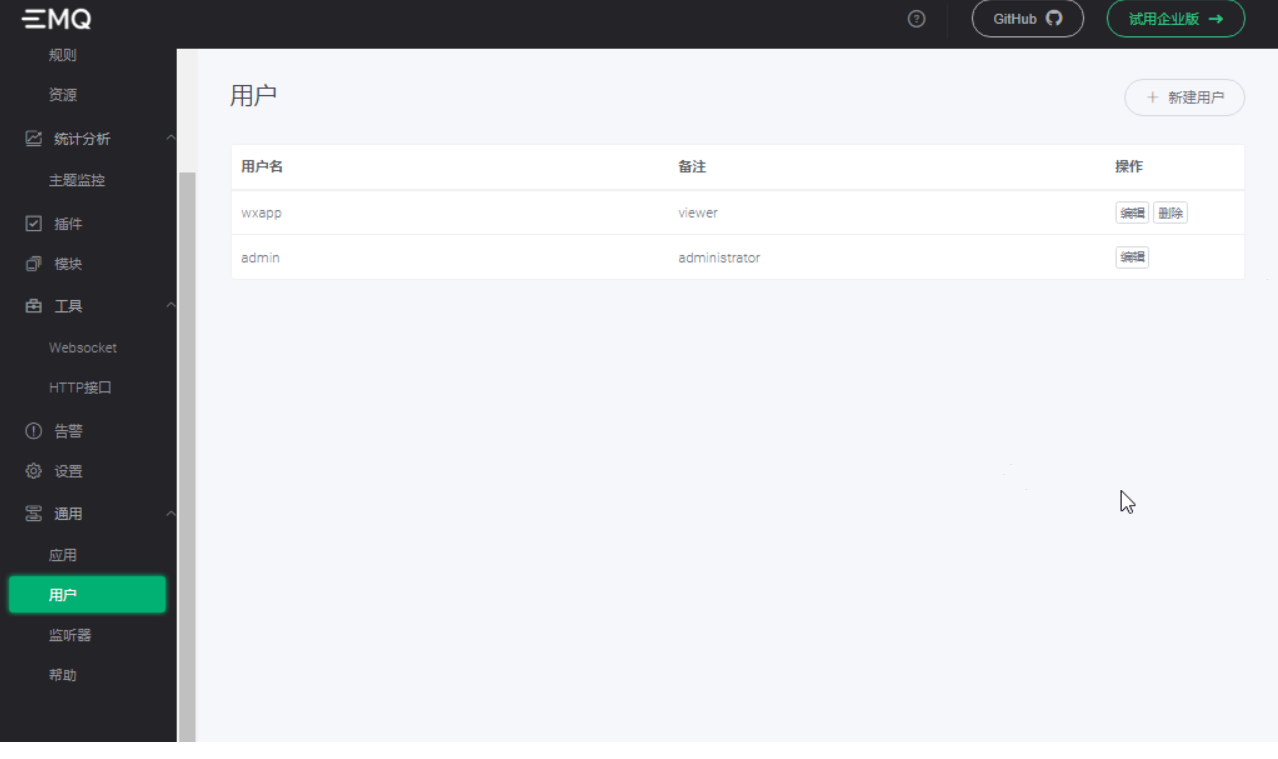
I have created a new user here. Click new user and enter the username and password corresponding to the applet to create it.
Returning to the websocket page, you should see that the applet has connected to the EMQX server.
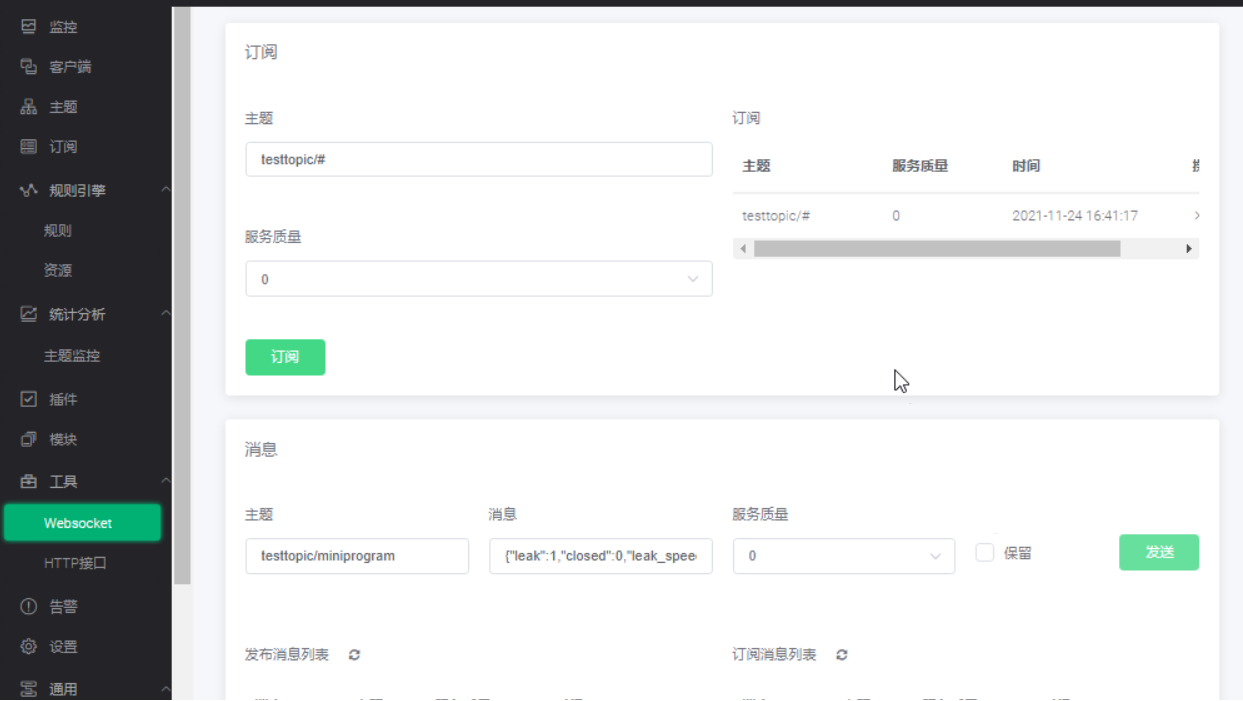
Next, implement EMQX to send messages to wechat applet. First, click subscribe (the topic should match the applet side). The applet should complete the connection and subscription to the topic testtopic/miniprogram by using the above program. After clicking subscribe, it actually subscribes to all topics under testtopic. In the message panel, change the subject to testtopic/miniprogram, edit the message. The format of the message should be json. Finally, click send. You should be able to receive the sent message on the wechat applet console. As for how the wechat applet sends messages to the EMQX server, you can use this.public at the appropriate location. Note that when publishing, the receiver should subscribe to the corresponding topic.
The above is the content of connecting the wechat applet to the EMQX server. I hope it will be of some help to readers.