CDN (static resources) + Nginx (load balancing & reverse proxy) + Redis (master-slave configuration & Sentinel listening cluster) + Mysql (master-slave configuration)
Introduction: Business from the initial stage of development to gradually mature, server architecture is also from relatively single to cluster, then to distributed, technology iteration speed is also very fast, leading to our continuous learning and re-learning.
A good server architecture is indispensable to support high concurrency services. It requires load balancing, master-slave cluster database, master-slave cluster nosql cache, and static files uploading cdn, such as Seven cattle cloud And so on, these are the powerful backing to make business programs run smoothly.
Not much gossip. Here's a brief introduction to building a Windows server architecture.
Configuration of Nginx
Introduction: Nginx is Igor Sysoev The second largest number of visits to Russia Rambler.ru Site development of a high-performance HTTP and reverse proxy server.
So some people don't understand the difference between reverse agent and forward agent.
Forward proxy is just like GWF, which requires proxy access to Google (using Chrome plug-ins can also access), but Google does not know who the real client is, the proxy hides the real request client, and the service requested by the client is replaced by the proxy server.
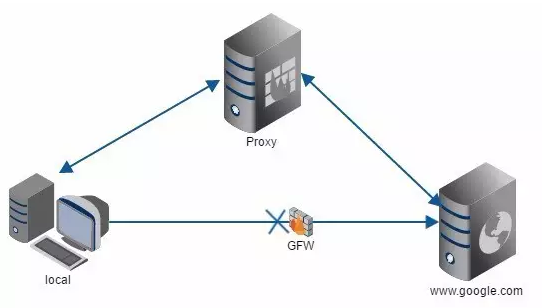
www.baidu.com is our reverse proxy server, which will help us forward requests to the real server.
1, Download Nginx-Windows & Tomcat7
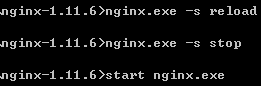 1: Reload Configuration 2: Close 3: Open (or nginx-c conf/nginx.conf)
Appendix: Working Principle of Nginx
2. Modifying configuration files
Modify Tomcat conf server. XML (three ports) & nginx-1.11.6 conf nginx.conf:
#user  nobody;#User name
worker_processes  1;#Work process (one to one CPU)

#error_log  logs/error.log;
#error_log  logs/error.log  notice;
#error_log  logs/error.log  info;

#pid        logs/nginx.pid;


events {
    worker_connections  1024;#Maximum number of connections per process (say worker_processes*worker_connections). It is also said that worker_processes*worker_connections/4 is less than the total number of files opened by the system process, which should depend!
}


http {
      upstream tomcat  { #Used for reverse proxy
                server localhost:8082 weight=2;#Weight weight (a machine with good performance weights can be set larger)
                server localhost:8083 weight=3;
        }
    include       mime.types;
    default_type  application/octet-stream;

    #log_format  main  '$remote_addr - $remote_user [$time_local] "$request" '
    #                  '$status $body_bytes_sent "$http_referer" '
    #                  '"$http_user_agent" "$http_x_forwarded_for"';#Forwarding real ip

    #access_log  logs/access.log  main;

    sendfile        on;
    #tcp_nopush     on;

    #keepalive_timeout  0;
    keepalive_timeout  65;

    #gzip  on;

    server {
        listen       80;#Default port 80
        server_name  localhost;

        #charset koi8-r;

        #access_log  logs/host.access.log  main;

        location / {#Configure static files, etc.
            root   html;
            index  index.html index.htm;
            proxy_pass http://tomcat; # reverse proxy (upstream tomcat above)
        }

        #error_page  404              /404.html;

        # redirect server error pages to the static page /50x.html
        #
        error_page   500 502 503 504  /50x.html;
        location = /50x.html {
            root   html;
        }
    }

}
3, test
How do you know which application services are accessed?
We modify the project page, change the content of the page to aaa... and bbb..., put war in Tomcat, restart Tomcat and Nginx, respectively.


According to the figure above, Nginx distributes requests to different Tomcat s.
Introduction: Nginx is a master-worker multi-process mode. The master is responsible for request forwarding. The number of worker is CPU. The listenfd of all worker processes will become readable when new connections come. To ensure that only one process handles the connection, all worker processes grab accept_mutex before registering the listenfd read event, and the process that grabs the mutex lock registers the listenfd read event. In order to ensure that only one process handles the connection, all worker processes grab the listenfd read event before registering the listenfd read event Call accept in the read event to accept the connection.
4. Preventing CC Attack
Using NGINX Flow Control and fail2ban to Prevent CC Attack
Add in http module
limit_req_zone $binary_remote_addr zone=sym:10m rate=5r/s;   #Limit the frequency of requests initiated, five times per second
limit_conn_zone $binary_remote_addr zone=conn_sym:10m;       #Limit the number of connections initiated
Add in location
limit_req zone=sym burst=5;
limit_conn conn_sym 10;
Restart Nginx after configuration. Simulate multithreaded concurrent requests, and the results show success and exceptions:
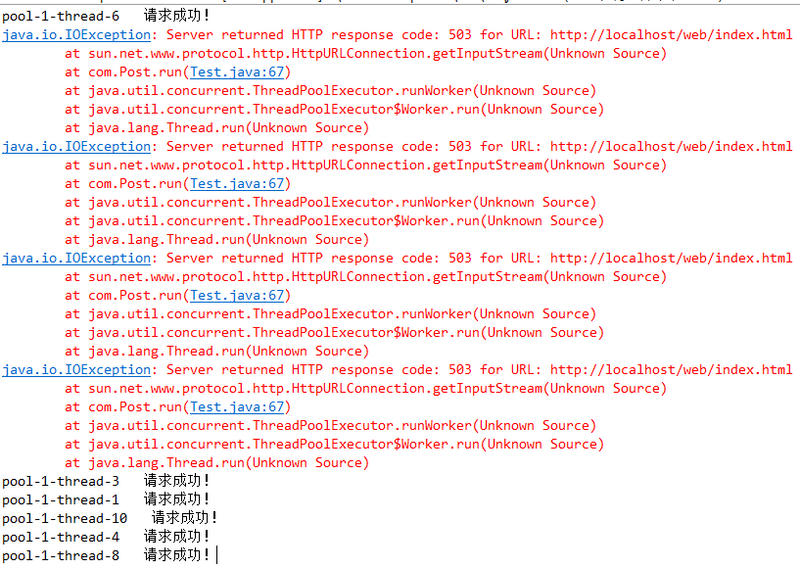
Query Nginx/conf/error.log, as follows:

Configuration of Redis & Sentinel
According to the business, we can adopt two-level and multi-level caching. Individuals tend to use Ehcache & Redis.
1, Download Redis3.0
Unzip redis and duplicate three copies. The folder names are redis-slave, redis-slave 2 and redis-sentinel, respectively.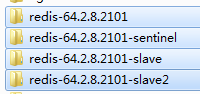
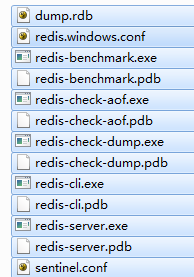 (*.conf file name may be different! sentinel.conf needs to be created!
2. Modifying configuration files
Modify redis.windows.conf under redis (home) folder:
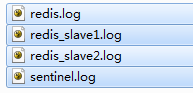
port 6380                          #Port (not duplicated)
logfile "E:/redis.log"             #Log (to prevent downtime after checking)
slave-read-only no                 #The default is yes and no is used for master-slave replication
requirepass "XXX"                  #Password (master and slave passwords need to be the same)
Modify redis.windows.conf under redis-slave (from):
port 6381
logfile "E:/redis_slave1.log"
slaveof 127.0.0.1 6380              #master
slave-read-only no
masterauth "XXX"                    #Master password
requirepass "XXX"
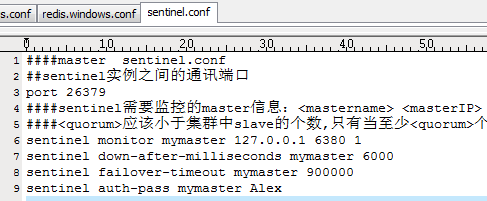
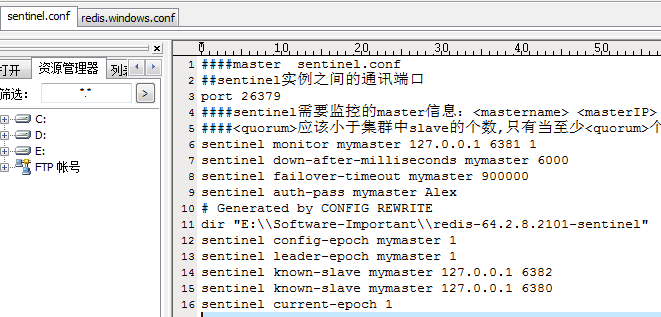
Create sentinel.conf file under redis-sentinel (Sentinel):
port 26379
sentinel monitor mymaster 127.0.0.1 6380 1          #Master configuration, the final number is the condition used by the Sentinel cluster to determine whether master-slave replication is possible
sentinel down-after-milliseconds mymaster 6000
sentinel failover-timeout mymaster 900000
sentinel auth-pass mymaster Alex                    #Password
The following is a demonstration:
(1) Running master-slave Redis:


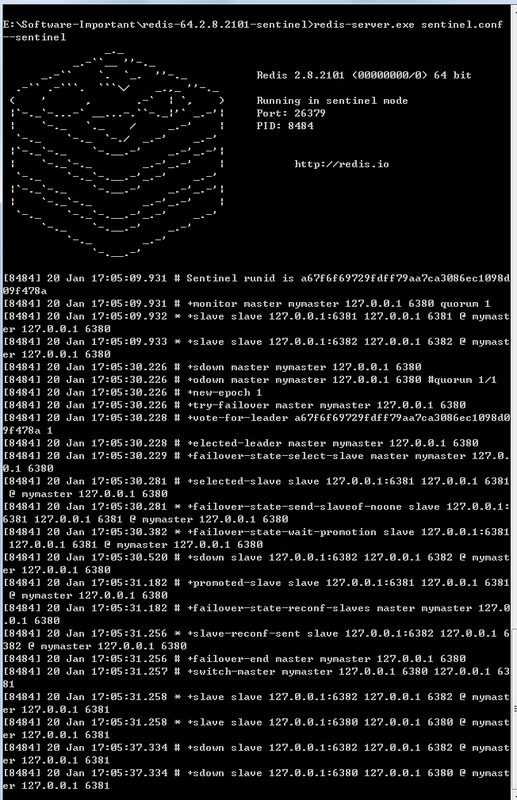
(2) Run Sentinel:
Introduction: Sentinel monitoring Redis, see Appendix
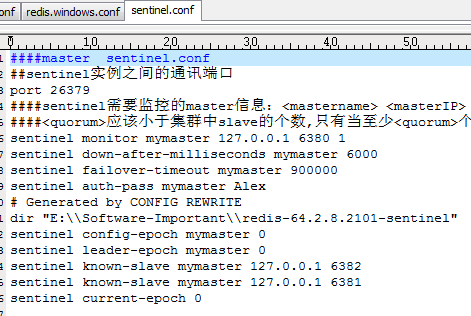
Appendix: Sentinel

After running Sentinel, the configuration content will be refreshed:
To prevent Sentinel down s. Multiple sentinel.conf can be replicated and ports can be modified to start separately.
(3) Detecting master-slave handover
When the master is down, to prevent the whole resource from hanging up, Sentinel will be used to monitor Redis in real time, and master-slave replication and switching will occur immediately after the situation occurs, which greatly reduces the probability of system crash.
The monitor's main port changed to 6381, and the sub-monitor's main port changed to 6380.
Configuration of Mysql Cluster
1. Configure master master master server
(1) Create users on Master MySQL, allow other Slave servers to access Master remotely, read binary logs through the user, and achieve data synchronization.

The user created must have REPLICATION SLAVE privileges. In addition, there is no need to add unnecessary privileges. The password is'XXX'. 192.168.94%. It means that the server where the user is located and the% is a wildcard character. It means that 192.168.94.0/255 Server can log on to the main server.
(2) Modify my.Ini file. Start the binary log-bin.
Under [mysqld], add:
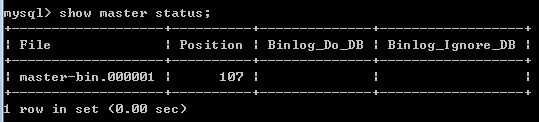
server-id=1                       #Give the unique identification of the database service, usually set the end number of the server Ip for everyone.
log-bin=master-bin
log-bin-index=master-bin.index
(3) Restart Mysql service and view logs
2. Configuring slaver slave server
(1) Modify my.ini file and add it under [mysqld]
log_bin           = mysql-bin
server_id         = 2
relay_log         = mysql-relay-bin
log_slave_updates = 1
read_only         = 1
Restart Mysql
(2) Connect Master
change master to master_host='192.168.XXX.XXX',
master_port=3306,
master_user='alexnevsky',
master_password='XXXX',
master_log_file='master-bin.000001',
master_log_pos=0;
(3) Start Slave
start slave;