Form-class controls host the entry and interaction of data from a Web page. This chapter describes how to use the v-model instruction to complete two-way data binding for a form.
6.1 Basic Usage
Form controls are common in practical business, such as radio, multiple selection, drop-down selection, input box, etc. They can be used to complete data entry, verification, submission, etc.
Vue.js provides a v-model directive for bidirectionally binding data on form class elements, such as when used in input boxes, where the input is mapped to the bound data in real time.
Examples include the following:
 1 <div id="app">
 2     <input type="text" v-model="message" placeholder="Please enter...">
 3     <p>The input is:{{message}}</p>
 4 </div>
 5
 6 <script>
 7     var app = new Vue({
 8         el: "#app",
 9         data: {
10             message: ""
11         }
12     });
13 </script>
As you type in the input box, {{message}} renders the content in real time in the view.
As shown in Figure 6-1: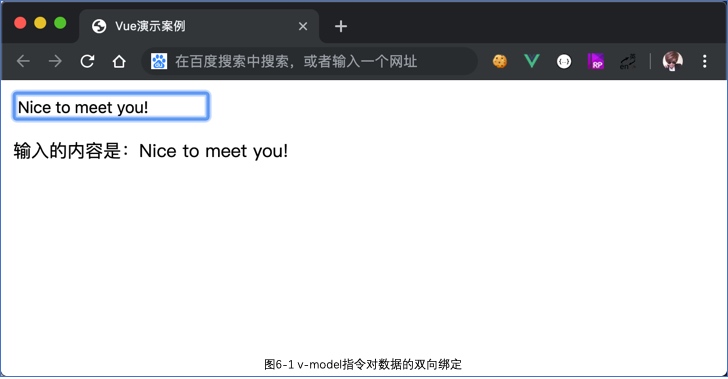 

The same is true for text fields <textarea>
 1 <div id="app">
 2     <textarea v-model="text" placeholder="Please enter..."></textarea>
 3     <p>The input is:</p>
 4     <p style="white-space: pre;">{{text}}</p>
 5 </div>
 6
 7 <script>
 8     var app = new Vue({
 9         el: "#app",
10         data: {
11             text: ""
12         }
13     });
14 </script>
Tips:
After prompting v-model, the value displayed by the form control depends only on the bound data, does not care about the value attribute at initialization, nor does it work for values inserted between <textarea></textarea>.
When using v-model, if you input Chinese using the Chinese input method, Vue will not update the data before there is no selected phrase, that is, during the phonetic phase, and will trigger_update when you type Chinese characters.
If you want to always update in real time, you can replace the v-model with @input.
In fact, the v-model is also a special grammatical sugar, but it will be handled intelligently on different forms.
For example, the following example:
 1 <div id="app">
 2     <input type="text" @input="handleInput" placeholder="Please enter...">
 3     <p>The input is:{{message}}</p>
 4 </div>
 5
 6 <script>
 7     var app = new Vue({
 8         el: "#app",
 9         data: {
10             message: ""
11         },
12         methods: {
13             handleInput: function(event) {
14                 this.message = event.target.value;
15             }
16         }
17     });
18 </script>
See more form controls.
Radio button:
Radio buttons, when used alone, do not require v-model. Instead, use v-bind to bind a Boolean type value, select it when true, and uncheck it when false.
For example:
 1 <div id="app">
 2     <input type="radio" :checked="picked">
 3     <label>radio button</label>
 4 </div>
 5
 6 <script>
 7     var app = new Vue({
 8         el: "#app",
 9         data: {
10             picked: true
11         }
12     });
13 </script>
If you use combination to achieve the effect of mutually exclusive selection, you need v-model with value to use:
 1 <div id="app">
 2     <input type="radio" v-model="picked" value="html" id="html">
 3     <label for="html">HTML</label>
 4
 5     <input type="radio" v-model="picked" value="js" id="js">
 6     <label for="js">JavaScript</label>
 7
 8     <input type="radio" v-model="picked" value="css" id="css">
 9     <label for="css">CSS</label>
10
11     <p>Your choice is:{{picked}}</p>
12 </div>
13
14 <script>
15     var app = new Vue({
16         el: "#app",
17         data: {
18             picked: "js"
19         }
20     });
21 </script>
This item is checked when the value of the data picked matches the value of the form button, so the second item is checked in the current state.
As shown in Figure 6-2: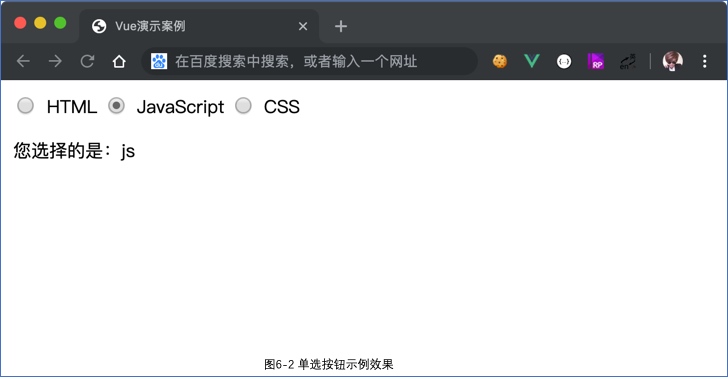 

Check box:
Checkboxes are also used separately and in combination, although they are used slightly differently from radio.
When checkboxes are used alone, they also bind a Boolean value with a v-model.
For example:
 1 <div id="app">
 2     <input type="checkbox" v-model="checked" id="checked">
 3     <label for="checked">Selection status:{{checked}}</label>
 4 </div>
 5
 6 <script>
 7     var app = new Vue({
 8         el: "#app",
 9         data: {
10             checked: false
11         }
12     });
13 </script>
When checked, the value of data checked is changed to true, and the rendered content in <label>is updated.
When used in combination, v-model and value are also used together. Multiple check boxes are bound to the same array type of data, and the value of value is selected in the data.
This process is also bidirectional, and when checked, the value of the value is automatically push ed into the array.
The sample code is as follows:
 1 <div id="app">
 2     <input type="checkbox" v-model="checked" value="html" id="html">
 3     <label for="html">HTML</label>
 4     <br>
 5     <input type="checkbox" v-model="checked" value="js" id="js">
 6     <label for="js">JavaScript</label>
 7     <br>
 8     <input type="checkbox" v-model="checked" value="css" id="css">
 9     <label for="css">CSS</label>
10     <br>
11     <p>You chose:{{checked}}</p>
12 </div>
13
14 <script>
15     var app = new Vue({
16         el: "#app",
17         data: {
18             checked: ["html", "css"]
19         }
20     });
21 </script>
The results in the current state are shown in Figure 6-3: 

Selection list:
Choice lists are drop-down selectors and are common form controls, as well as radio and multiple selection.
First, take a look at the sample code for the radio:
 1 <div id="app">
 2     <select v-model="selected">
 3         <option>html</option>
 4         <option value="js">JavaScript</option>
 5         <option>css</option>
 6     </select>
 7     <p>You chose:{{selected}}</p>
 8 </div>
 9
10 <script>
11     var app = new Vue({
12         el: "#app",
13         data: {
14             selected: "html"
15         }
16     });
17 </script>
<option>is an alternative, if the value attribute is included, the v-model will match the value of the value first.
If not, the text of <option>will be matched directly.
For example, when the second item is selected, the selected value is js, not JavaScript.
Add the attribute multiple to <select>to select multiple, and the v-model binds to an array, similar to the use of check boxes.
The sample code is as follows:
 1 <div id="app">
 2     <select v-model="selected" multiple>
 3         <option>html</option>
 4         <option value="js">JavaScript</option>
 5         <option>css</option>
 6     </select>
 7     <p>You chose:{{selected}}</p>
 8 </div>
 9
10 <script>
11     var app = new Vue({
12         el: "#app",
13         data: {
14             selected: ["html", "js"]
15         }
16     });
17 </script>
In business, <option>is often output dynamically by v-for, and value and text are also output dynamically by v-bind.
For example:
<div id="app">
    <select v-model="selected">
        <option v-for="item in options" :value="item.value">{{item.text}}</option>
    </select>
    <p>You chose:{{selected}}</p>
</div>

<script>
    var app = new Vue({
        el: "#app",
        data: {
            options: [
                {text:"HTML", value:"html"},
                {text:"JavaScript", value:"js"},
                {text:"CSS", value:"css"},
            ],
            selected: "html"
        }
    });
</script>
Although the drop-down selection requirement can be easily accomplished with a selection list <select>control, it is not commonly used in real business because its style relies on platforms and browsers, is not uniform, is less aesthetic, and has limited functionality, such as not supporting search, so a common solution is to use a similar control called <div>moi.
When you've finished reading the components in Chapter 7, you can try writing a generic component for a drop-down selector.
6.2 Binding Values
The radio buttons, check boxes, and selection lists described in the previous section use or radio mode separately, and the value of the v-model binding is a static string or Boolean value.
But in business, sometimes you need to bind a dynamic data, which you can do with v-bind.
Radio button:
 1 <div id="app">
 2     <input type="radio" v-model="picked" :value="value">
 3     <label>radio button</label>
 4     <p>{{picked}}</p>
 5     <p>{{value}}</p>
 6 </div>
 7
 8 <script>
 9     var app = new Vue({
10         el: "#app",
11         data: {
12             picked: false,
13             value: 123
14         }
15     });
16 </script>
When selected, app.picked===app.value, values are 123.
Check box:
 1 <div id="app">
 2     <input type="checkbox" v-model="toggle" :true-value="value1" :false-value="value2">
 3     <label>check box</label>
 4     <p>{{toggle}}</p>
 5     <p>{{value1}}</p>
 6     <p>{{value2}}</p>
 7 </div>
 8
 9 <script>
10     var app = new Vue({
11         el: "#app",
12         data: {
13             toggle: false,
14             value1: "a",
15             value2: "b"
16         }
17     });
18 </script>
When checked, app.toggle===app.value1;
When unchecked, app.toggle===app.value2.
Selection list:
 1 <div id="app">
 2     <select v-model="selected">
 3         <option :value="{number:123}">123</option>
 4     </select>
 5     {{selected.number}}
 6 </div>
 7
 8 <script>
 9     var app = new Vue({
10         el: "#app",
11         data: {
12             selected: ""
13         }
14     });
15 </script>
When selected, app.selected is an Object, so app.selected.number===123.
6.3 Modifier
Like event modifiers, v-model s also have modifiers that control when data is synchronized.
.lazy:
In the input box, the default of v-model is to synchronize the input box's data in the input event (except for the case of the Chinese input method described in the prompt).
Using the modifier.lazy turns into synchronization in the change event, with the following sample code:
 1 <div id="app">
 2     <input type="text" v-model.lazy="message">
 3     <p>{{message}}</p>
 4 </div>
 5
 6 <script>
 7     var app = new Vue({
 8         el: "#app",
 9         data: {
10             message: ""
11         }
12     });
13 </script>
This is because message s are not changed in real time, but are updated when you are out of focus or press Enter.
.number:
Using the modifier.number, you can convert the input to Number type, otherwise, although you enter a number, its type is actually String.
For example, it may be useful when you have a number input box. The sample code is as follows:
 1 <div id="app">
 2     <input type="number" v-model.number="message">
 3     <p>{{typeof message}}</p>
 4 </div>
 5
 6 <script>
 7     var app = new Vue({
 8         el: "#app",
 9         data: {
10             message: 123
11         }
12     });
13 </script>
.trim:
The modifier.trim automatically filters the first and last spaces of the input, and the sample code is as follows:
 1 <div id="app">
 2     <input type="text" v-model.trim="message">
 3     <p>{{message}}</p>
 4 </div>
 5
 6 <script>
 7     var app = new Vue({
 8         el: "#app",
 9         data: {
10             message: ""
11         }
12     });
13 </script>
Starting with Vue.js 2.x, v-model can also be used to customize components to meet customization requirements, which are detailed in chapter 7.