Demo and source code of this article have been put in GitHub, if you think this article is good, please point a compliment, or add a star to GitHub!
https://github.com/zwl-jasmine95/Vue_test
All of the following knowledge is based on vue.js version 2.0
I. Brief Introduction
Vue.js (pronunciation/vju/, similar to view) is a progressive framework for building user interfaces. Unlike other heavyweight frameworks, Vue uses a bottom-up incremental design. The core library of Vue only focuses on the view layer. It is not only easy to get started, but also easy to integrate with third-party libraries or existing projects.
On the other hand, when and when Single file component Sum Vue Ecosystem Support Library When used in combination, Vue is also fully capable of driving complex single-page applications.
Vue.js It is currently a popular JavaScript MVVM library, which is built on the idea of data-driven and modularization. Compared with Angular.js, Vue.js provides a simpler and more understandable API that enables us to quickly get started and use Vue.js.
MVVM:

DOM Listeners and Data Bindings are two tools, they are the key to achieve bidirectional binding.
From the View side, the DOM Listeners tool in ViewModel can help us monitor the changes of DOM elements on the page, and if there are changes, change the data in Model.
From the Model side, when we update the data in the Model, the Data Bindings tool will help us update the DOM elements in the page.
2. Basic instruction knowledge of vue.js
Vue.js provides some commonly used built-in instructions:
- v-if instruction
- v-show instruction
- v-else instruction
- v-for instruction
- v-bind instruction
- v-on instruction
1. Declarative rendering
The core of Vue.js is to allow declarative rendering of data into DOM using concise template syntax. The principle of personal sensory realization is similar to that of angular JS.
Let's try to write a simple hello world! :
 1 <body>
 2     <div id="app">
 3         {{message}}
 4     </div>
 5
 6     <script type="text/javascript" src="lib/js/vue.js"></script>
 7     <script type="text/javascript">
 8         /**
 9          * Declaratively rendering data into DOM using concise template syntax
10          */
11         var app = new Vue({
12             el:'#app',
13             data:{
14                 message:'Hello World!'
15             }
16         });
17     </script>
18 </body>
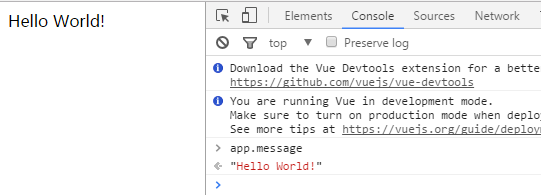
Data values can be viewed through app.message. But there are two important points to note when writing code:
1) The js code we write must be placed at the bottom of the body tag, or we will report an error of'No #app'because the page DOM results are not loaded when the js code is placed in the head tag.
2) {{message} is actually a variable, which can be named arbitrarily as long as it corresponds to js.
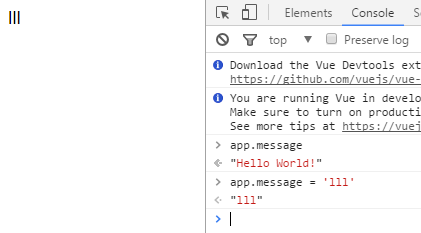
Data and DOM have been bound together and everything is responsive. Data values can be changed through app.message.
_______ In addition to text interpolation, we can also bind DOM element attributes by instructions with prefix v-, to indicate that they are special attributes provided by Vue.
The v-bind instruction can take a parameter after its name, separated by a colon, which is usually an attribute of an HTML element, such as v-bind:class.
v-bind:argument="expression"
 1 <body>
 2     <div id="app-2">
 3         <span v-bind:title="message">
 4             Hover the mouse for a few seconds to see the dynamic binding message here!
 5         </span>
 6     </div>
 7
 8     <script type="text/javascript" src="lib/js/vue.js"></script>
 9     <script type="text/javascript">
10         /**
11          * Declaratively rendering data into DOM using concise template syntax
12          */
13         var app2 = new Vue({
14             el: '#app-2',
15             data: {
16                 message: 'Pages are loaded on ' + new Date()
17             }
18         })
19     </script>
20 </body>
The purpose of this instruction here is to "keep the title attribute of the element node consistent with the message attribute of the Vue instance".

The process of using Vue is the process of defining the components of MVVM.
- Define View
- Define Model
- Create a Vue instance or "ViewModel" to connect View and Model
When creating a Vue instance, you need to pass in an option object that can contain data, mount elements, methods, module lifecycle hooks, and so on.
In this example, the El attribute of the option object points to View, el:' app'indicating that the Vue instance will be mounted to the element <div id="app"> </div>; the data attribute points to Model, and data: message indicates that our Model is a message object.
Vue.js has a variety of data binding grammars, the most basic form is text interpolation, using a pair of braces grammar, at run time {{message}} will be replaced by the message attribute of the data object, so the page will output "Hello World!".
2. Conditions and Cycles
1)v-if
v-if is a conditional rendering instruction that performs insertion or deletion of elements based on the value of conditional expressions.
v-if="expression"
Expression is an expression that returns a bool value, which can be either a bool attribute or an expression that returns a bool.
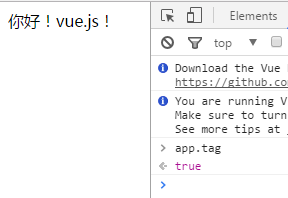
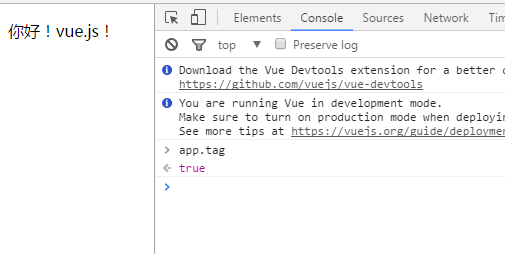
1 <div class="app">
2     <span v-if="true">Hello! vue.js!</span>
3 </div>

This code can also be implemented in js:
<body>
    <div class="app">     <!--It doesn't have to be used here. id,class All right, as long as js The selector correspondence in the ____________-->
        <span v-if="tag">Hello! vue.js!</span>
    </div>

    <script type="text/javascript" src="lib/js/vue.js"></script>
    <script type="text/javascript">
        var app = new Vue({
            el:'.app',    //Attention selector
            data:{
                tag:true
            }
        });
    </script>
</body>
Although class es are used instead of id s, variables can also be viewed in the console through app.tag:
Expanding:
V-show is also conditional rendering instruction. Unlike v-if instruction, elements using v-show instruction are always rendered to HTML. It simply sets style attributes of CSS for elements.
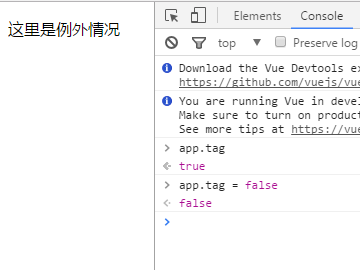
You can also add an "else block" for v-if or v-show with the v-else instruction. The v-else element must immediately follow the v-if or v-show element -- otherwise it cannot be recognized.
(Whether the v-else element is rendered in HTML depends on whether the v-if or v-show instructions were used earlier.)
 1 <body>
 2     <div id="app">
 3         <p v-if="tag">Hello! vue.js!</p>
 4         <p v-else>This is the exception.</p>
 5     </div>
 6
 7     <script type="text/javascript" src="lib/js/vue.js"></script>
 8     <script type="text/javascript">
 9         var app = new Vue({
10             el:'#app',    //Attention selector
11             data:{
12                 tag:true
13             }
14         });
15     </script>
16 </body>
Change the tag value in the console:
2)v-for
The v-for instruction renders a list based on an array, similar to JavaScript's traversal syntax:
v-for="item in items"
items are an array, and item is the element of the array that is currently traversed.
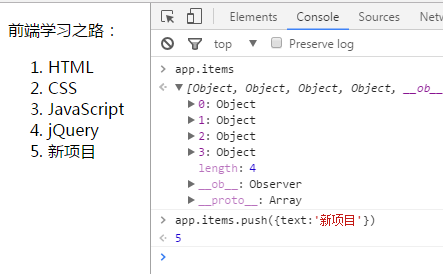
The v-for instruction can bind array data to render a list of items:
 1 <body>
 2     <div class="app">
 3         <p>Front-end learning path:</p>
 4         <ol>
 5             <li v-for="item in items">{{item.text}}</li>
 6         </ol>
 7     </div>
 8
 9     <script type="text/javascript" src="lib/js/vue.js"></script>
10     <script type="text/javascript">
11         var app = new Vue({
12             el:'.app',
13             data:{
14                 items:[
15                     {text:'HTML'},
16                     {text:'CSS'},
17                     {text:'JavaScript'},
18                     {text:'jQuery'}
19                 ]
20             }
21         });
22     </script>
23 </body>

In the console, enter app. items. push ({text:'New project'}), and you will find a new item added to the list:
In addition, v-for has a special way to get index values:

Index can be used directly as index value
3. Processing user input
1)v-on
The v-on directive is used to listen for DOM events, and its syntax is similar to v-bind, for example, to listen for click events of <a> elements:
<a v-on:click="doSomething">
There are two forms of invoking methods: binding a method (letting events point to a reference to a method), or using inline statements.
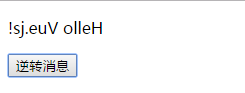
 1 <body>
 2     <div id="app">
 3         <p>{{ message }}</p>
 4         <button v-on:click="reverseMessage">Reverse news</button>
 5     </div>
 6
 7     <script type="text/javascript" src="lib/js/vue.js"></script>
 8     <script type="text/javascript">
 9         var app = new Vue({
10             el: '#app',
11             data: {
12                 message: 'Hello Vue.js!'
13             },
14             // stay `methods` Defining methods in objects
15             methods: {
16                 reverseMessage: function () {
17                     //reverse() Method is used to reverse the order of elements in an array.
18                     //In the method this point app
19                     this.message = this.message.split('').reverse().join('')
20                 }
21             }
22         })
23     </script>
24 </body>
 --->
--->
Vue.js provides abbreviations for the two most commonly used instructions v-bind and v-on. The v-bind instruction can be abbreviated as a colon, and the v-on instruction can be abbreviated as @ symbol.
2)v-model
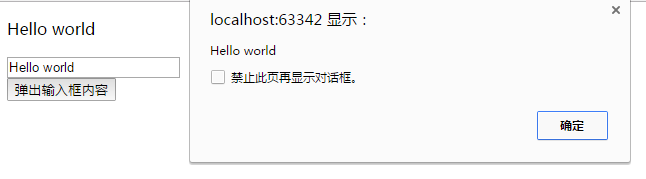
Vue provides v-model instructions to make bi-directional binding between form input and application state easy.
 1 <body>
 2     <div id="app">
 3         <p>{{ message }}</p>
 4         <input type="text" v-model="message">
 5         <button v-on:click="alertMessage">Pop-up input box content</button>
 6     </div>
 7
 8     <script type="text/javascript" src="lib/js/vue.js"></script>
 9     <script type="text/javascript">
10         var app = new Vue({
11             el: '#app',
12             data: {
13                 message: 'Hello Vue.js!'
14             },
15             // stay `methods` Defining methods in objects
16             methods: {
17                 alertMessage: function () {
18
19                     //In the method this point app
20                     alert(this.message);
21                 }
22             }
23         })
24     </script>
25 </body>
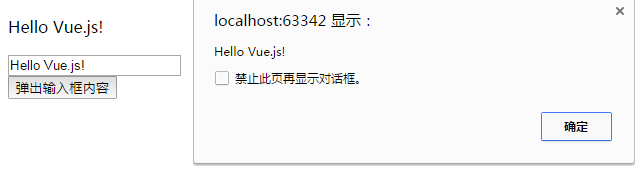
If you change the value of the input box, you will find that the value of the p tag above has also changed. Then click on the button, the bullet box will show the changed input box value, which is bidirectional data binding. (You can also change the values of input boxes and p tags through the console)
3. Basic usage knowledge of vue.js
Learn the built-in instructions of vue.js from the beginning. It is estimated that some people still don't understand the implementation of vue.js. Here's a brief explanation.
1. Constructor
Each Vue.js application is started by creating a root instance of Vue through the constructor Vue:
1 var vm = new Vue({
2   // option
3 })
Although not fully complied with. MVVM mode The design of Vue is undoubtedly inspired by it. Therefore, the variable name vm (short for ViewModel) is often used in documents to represent Vue instances.
When instantiating Vue, you need to pass in an option object that can contain options such as data, templates, mount elements, methods, lifecycle hooks, and so on.

(This is what I drew with mind mapping tool xMind, the last three are not listed specifically, more specific content can be in Official API View.)
data and methods are already used in the built-in instructions in Section 2. The rest is explained in a systematic way.
In addition, Vue constructors can be extended to create reusable component constructors with predefined options:
1 var MyComponent = Vue.extend({
2   // Extension options
3 })
4 // Be-all `MyComponent` Instances will be created with predefined extension options
5 var myComponentInstance = new MyComponent()
All Vue.js components are actually extended Vue instances.
2. Attributes and Methods
Each Vue instance proxies all attributes in its data object:
 1 var data = { a: 1 }
 2 var vm = new Vue({
 3   data: data
 4 })
 5 vm.a === data.a // -> true
 6 // Setting properties also affects raw data
 7 vm.a = 2
 8 data.a // -> 2
 9 // ... Vice versa
10 data.a = 3
11 vm.a // -> 3
Note that only these proxied attributes are responsive. If new attributes are added to the instance after it is created, it does not trigger view updates.
In addition to data attributes, Vue instances expose some useful instance attributes and methods. These attributes and methods have a prefix of $, which distinguishes them from the data attributes of the proxy.
 1 var data = { a: 1 }
 2 var vm = new Vue({
 3   el: '#example',
 4   data: data
 5 })
 6 vm.$data === data // -> true
 7 vm.$el === document.getElementById('example') // -> true
 8 // $watch Is an example method
 9 vm.$watch('a', function (newVal, oldVal) {
10   // This callback will be `vm.a`  Call after change
11 })
3. Instance Life Cycle
Each Vue instance goes through a series of initialization processes before it is created. For example, instances need to configure data observers, compile templates, mount instances to DOM, and then update DOM when data changes. In this process, instances also call some lifecycle hooks, which gives us the opportunity to execute custom logic. For example, the created hook is called after the instance is created:
var vm = new Vue({
  data: {
    a: 1
  },
  created: function () {
    // `this` point vm Example
    console.log('a is: ' + this.a)
  }
})
// -> "a is: 1"
There are also some other hooks that are called at different stages of the instance life cycle, such as mounted, updated, destroyed. this of the hook points to the Vue instance that calls it. Some users may ask whether Vue.js has a concept of "controller"? The answer is No. The custom logic of components can be distributed among these hooks.
Life cycle diagram:

4. Practical Cases
1. Forms
(Source code: demo1/table.html on github)
html:
 1 <table id="myTable"  class="table table-striped">
 2         <thead>
 3             <tr>
 4                 <th>Full name</th>
 5                 <th>Gender</th>
 6                 <th>Age</th>
 7             </tr>
 8         </thead>
 9        <tbody>
10            <tr v-for="item in items">
11                <td>{{item.name}}</td>
12                <td>{{item.sex}}</td>
13                <td>{{item.age}}</td>
14            </tr>
15        </tbody>
16     </table>
js:
var vm = new Vue({
            el:'#myTable',
            data:{
                items:[
                    {
                        name:'Zhang Shan',
                        sex:'female',
                        age:'42'
                    },
                    {
                        name:'Li Si',
                        sex:'male',
                        age:'33'
                    },
                    {
                        name:'Wang Wu',
                        sex:'male',
                        age:'58'
                    }
                ]
            }
        });
The v-for is nested in the tr tag so that the following table can be generated. The case is relatively simple.

2. Real-time table editing
(Source code: demo1/editTable.html on github)
First, let's decide what we need to do:
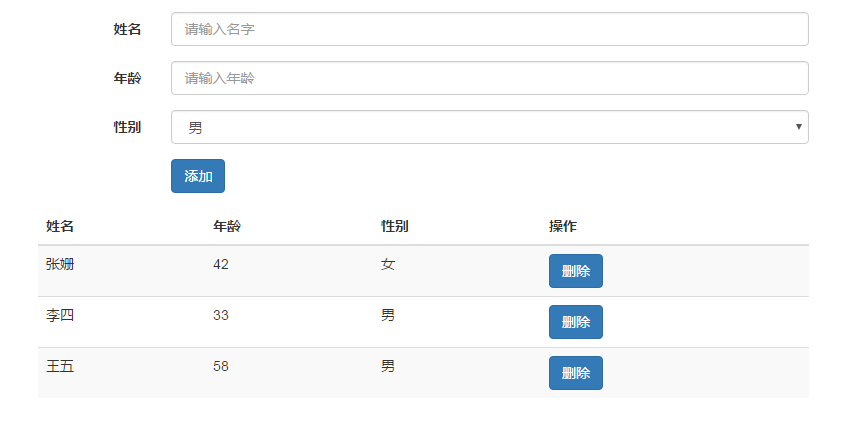
We can enter the specific content of the table rows to be added in the form above, and then click the Add button to add a row to the table.
Click the Delete button after each row of the table to delete the table row.
1) Layout
Before realizing the function, we use HTML to implement the form module and the form module. In order to save time, we use bootstrap framework directly.
 1 <form class="form-horizontal" role="form">
 2         <div class="form-group">
 3             <label for="name" class="col-sm-2 control-label">Full name</label>
 4             <div class="col-sm-10">
 5                 <input type="text" class="form-control" id="name" placeholder="Please enter your name.">
 6             </div>
 7         </div>
 8         <div class="form-group">
 9             <label for="age" class="col-sm-2 control-label">Age</label>
10             <div class="col-sm-10">
11                 <input type="text" class="form-control" id="age" placeholder="Please enter age">
12             </div>
13         </div>
14         <div class="form-group">
15             <label for="sex" class="col-sm-2 control-label">Gender</label>
16             <div class="col-sm-10">
17                 <select name="" id="sex" class="form-control">
18                     <option value="male">male</option>
19                     <option value="female">female</option>
20                 </select>
21             </div>
22         </div>
23         <div class="form-group">
24             <div class="col-sm-offset-2 col-sm-10">
25                 <button type="button" class="btn btn-primary">Add to</button>
26             </div>
27         </div>
28     </form>
29
30     <table id="editTable" class="table table-striped">
31         <thead>
32             <tr>
33                 <th>Full name</th>
34                 <th>Age</th>
35                 <th>Gender</th>
36                 <th>operation</th>
37             </tr>
38         </thead>
39         <tbody>
40             <tr v-for="item in items">
41                 <td>{{item.name}}</td>
42                 <td>{{item.age}}</td>
43                 <td>{{item.sex}}</td>
44                 <td><button type="button" class="btn btn-primary">delete</button></td>
45             </tr>
46         </tbody>
47     </table>
2) Data binding
Next, we use v-model to bind the form input box to the data layer.
First create a new object in the data - newItem, which is used to store the new table rows:

Then the data is bound to the input box, such as:

3) Add new button event

Define a function called createItem:
1 methods:{
2                 creatItem:function () {
3                     this.items.push(this.newItem);  //this point data
4                     // Added newItem After the object, reset newItem object
5                     this.newItem = {name: '', age: 0, sex: 'female'}
6                 }
7             }
4) Add delete button event

Define a function called deleteItem and pass in the index of the table row as a parameter.
 1 //event processing
 2             methods:{
 3                 /**
 4                  * Delete the table row based on the index of the table row
 5                  * @param  {[number]} index [Index of table rows]
 6                  * @return
 7                  */
 8                 deleteItem:function (index) {
 9                     this.items.splice(index,1);
10                 }
11             }
Complete code:
https://github.com/zwl-jasmine95/Vue_test/blob/master/demo1/editTable.html
  1 <!DOCTYPE html>
  2 <html lang="en">
  3 <head>
  4     <meta charset="UTF-8">
  5     <title>Real-time table editing</title>
  6     <link rel="stylesheet" href="../lib/css/bootstrap.min.css">
  7     <style>
  8         body{
  9             padding:50px;
 10         }
 11     </style>
 12 </head>
 13 <body>
 14     <div id="editTable">
 15         <form class="form-horizontal" role="form">
 16             <div class="form-group">
 17                 <label for="name" class="col-sm-2 control-label">Full name</label>
 18                 <div class="col-sm-10">
 19                     <input type="text" class="form-control" id="name" placeholder="Please enter your name." v-model="newItem.name">
 20                 </div>
 21             </div>
 22             <div class="form-group">
 23                 <label for="age" class="col-sm-2 control-label">Age</label>
 24                 <div class="col-sm-10">
 25                     <input type="text" class="form-control" id="age" placeholder="Please enter age" v-model="newItem.age">
 26                 </div>
 27             </div>
 28             <div class="form-group">
 29                 <label for="sex" class="col-sm-2 control-label">Gender</label>
 30                 <div class="col-sm-10">
 31                     <select name="" id="sex" class="form-control" v-model="newItem.sex">
 32                         <option value="male">male</option>
 33                         <option value="female">female</option>
 34                     </select>
 35                 </div>
 36             </div>
 37             <div class="form-group">
 38                 <div class="col-sm-offset-2 col-sm-10">
 39                     <button type="button" class="btn btn-primary" v-on:click="creatItem">Add to</button>
 40                 </div>
 41             </div>
 42         </form>
 43
 44         <table class="table table-striped">
 45             <thead>
 46             <tr>
 47                 <th>Full name</th>
 48                 <th>Age</th>
 49                 <th>Gender</th>
 50                 <th>operation</th>
 51             </tr>
 52             </thead>
 53             <tbody>
 54             <tr v-for="(item,index) in items">
 55                 <td>{{item.name}}</td>
 56                 <td>{{item.age}}</td>
 57                 <td>{{item.sex}}</td>
 58                 <td><button type="button" class="btn btn-primary" v-on:click="deleteItem(index)">delete</button></td>
 59             </tr>
 60             </tbody>
 61         </table>
 62     </div>
 63
 64     <script type="text/javascript" src="../lib/js/vue.js"></script>
 65     <script type="text/javascript">
 66         var vm = new Vue({
 67             el:'#editTable',
 68             data:{
 69                 newItem:{
 70                     name:'',
 71                     sex:'female',
 72                     age:'0'
 73                 },
 74                 items:[
 75                     {
 76                         name:'Zhang Shan',
 77                         sex:'female',
 78                         age:'42'
 79                     },
 80                     {
 81                         name:'Li Si',
 82                         sex:'male',
 83                         age:'33'
 84                     },
 85                     {
 86                         name:'Wang Wu',
 87                         sex:'male',
 88                         age:'58'
 89                     }
 90                 ]
 91             },
 92             //event processing
 93             methods:{
 94                 creatItem:function () {
 95                     this.items.push(this.newItem);  //this point data
 96                     // Added newItem After the object, reset newItem object
 97                     this.newItem = {name: '', age: 0, sex: 'female'}
 98                 },
 99
100                 /**
101                  * Delete the table row based on the index of the table row
102                  * @param  {[number]} index [Index of table rows]
103                  * @return
104                  */
105                 deleteItem:function (index) {
106                     this.items.splice(index,1);
107                 }
108             }
109
110         });
111     </script>
112 </body>
113 </html>