Using css preprocessor in the project can improve the efficiency of css development, reasonably apply the characteristics of preprocessor, and improve the maintainability of css code.
Common at present There are three kinds of css preprocessors: less, scss(sass upgrade), and stylus. No matter which kind, the most basic variables, extend, mixin and import are available, but the specific usage and writing methods are different. You can choose your favorite preprocessor according to your preferences.
I chose scss. The specific reason is that scss is used in the theme chat of element UI If scss is also used in the project, it will be very easy to change the theme color of the element UI later. Of course, without using scss, you can change the theme color of the element UI or use a custom theme, but I think it's more troublesome. Therefore, scss is directly selected here.
Basic functions of scss
1. Nesting
// scss writing method
.container{
  width: 100%;
  height: 100%;
  .wrap{
    max-width: 1200px
  }
}

// The above code is written in css
.container{
  width: 100%;
  height: 100%;
}
.container .wrap{
  max-width: 1200px;
}

// scss writing method
.container{
  width: 100%;
  height: 100%;
  background: #409eff;
  &:hover{
    background: #42b983;
  }
}
// The above code is written in css
.container{
  width: 100%;
  height: 100%;
  background: #409eff;
}
.container:hover{
  background: #42b983;
}
// scss writing method
.title {
  font: {
    family: fantasy;
    size: 20px;
    weight: bold;
  }
}
// The above code is written in css
.title{
  font-family: fantasy;
  font-size: 20px;
  font-weight: bold;
}
2. Variables$
$color = #2E98FE

.container{
    width: 100%;
    height: 100%;
    background: $color
}
3. @mixin and @ include
@mixin title-text {
  font: {
    size: 20px;
    weight: bold;
  }
  color: #2c3e50;
}
.card__title{
  width: 100%;
  height: 40px;
  @include title-text
}
4. @extend
// scss @extend
.error {
  border: 1px #f00;
  background-color: #fdd;
}
.seriousError {
  @extend .error;
  border-width: 3px;
}

// The above code is finally compiled into
.error, .seriousError {
  border: 1px #f00;
  background-color: #fdd;
}
.seriousError {
  border-width: 3px;
}
5. @import
@import "foo.scss";
Use of scss in projects
If scss is not installed when creating a project using scaffolding, you can execute the following installation commands:
npm install node-sass --save-dev
npm install sass-loader --save-dev
1. Create a scss folder in the assets folder to store all scss files
Specific documents are as follows: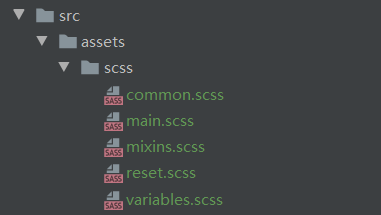
common.scss Common foundation style
main.scss Entry file
mixins.scss Blend in style
reset.scss reset file
variables.scss variable
Generally, each system has its own style. We can define a set of variables according to the design specification, and then use variables to write css styles in actual development. What are the benefits of this writing? That is, when your project is half developed or has been developed and entered the testing stage, the boss comes to you and says, why is the system blue? Change it to red. At this time, you no longer need to modify the style of a file. You only need to modify a variable in variables.
2. Global introduction of variables.scss and mixins.scss file
After the variables.scss file is defined, it can be used in two ways: local import and global import.
The mixins.scss file is similar.
Local import: import in specific files.
// App.vue

<style lang="scss" scoped>
@import './assets/scss/variables.scss';
.container{
  width: 100%;
  height: 100%;
  background: $background-color;
}
</style>
Local import, variables can only be used in the imported file. Usually, variables are used in most files. If it is a little troublesome to introduce them in each file, you can consider introducing them globally at this time.
Global import: once imported, it can be used everywhere.
// vue.config.js

module.exports = {
  publicPath: './',
  outputDir: process.env.VUE_APP_OUTPUT,
  css: {
    loaderOptions: {
      sass: {
        prependData: `
          @import "@/assets/scss/variables.scss";
          @import "@/assets/scss/mixins.scss";
        `
      }
    }
  }
}
It should be noted that the attribute names of prependData in loaderOptions are different due to different sass loader versions.
- Sass loader v8-, the attribute name is "data"
- In sass loader V8, the attribute name is "prependData"
- Sass loader V10 +, the attribute name is "additionalData"
3. Import other files into the entry file
// main.scss

@import "./reset.scss";
@import "./common.scss";
Note the import order of files here.
// main.js

import Vue from 'vue'
import App from './App.vue'
import './registerServiceWorker'
import router from './router'
import store from './store'

import './assets/scss/main.scss'

Vue.config.productionTip = false
The above is the scheme that I use scss in the project.