Last night at 23:00, Vue, officially fired the first shot! In three and a half years, we will move forward to the whole stack, strive to become an architect within three years, and become the mainstay of the world's top 500 companies. fighting never stops. Come on!

1, Introduction
Vue (pronunciation / vju ː /, similar to view) is a set of progressive JavaScript framework for building user interface. Unlike other frameworks, Vue is designed for bottom-up, layer by layer applications. Vue's core library only focuses on visual layers, which facilitates integration with third-party libraries or existing projects. On the other hand, Vue is fully capable of driving complex single page applications developed with single file components and libraries supported by Vue ecosystem.
Vue.js The goal is to implement the data binding and combined view components of the response through the simplest possible API.
II Vue.js Implement hello world
<!DOCTYPE html>
<html lang="en">
<head>
    <meta charset="UTF-8">
    <meta name="viewport" content="width=device-width, initial-scale=1.0">
    <title>Document</title>
</head>
<body>
    <div id="app">
        <!--Interpolation expressions, binding vue In data data-->
        {{message}}
    </div>
    <script src="vue.min.js"></script>
    <script>
        //1. Create a vue object
        new Vue({
            el: '#app',//2. Scope of binding vue
            data: {//3. Define the model data displayed in the page
                message: 'hello vue!'
            }
        })
    </script>
</body>
</html>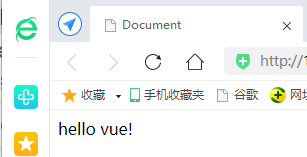
3, Create code snippets
File = > Preferences = > user code snippet = > new global / folder code snippet: vue-html.code-snippets
{
    "vue htm": {
        "scope": "html",
        "prefix": "vuehtml",
        "body": [
            "<!DOCTYPE html>",
            "<html lang=\"en\">",
            "",
            "<head>",
            "    <meta charset=\"UTF-8\">",
            "    <meta name=\"viewport\" content=\"width=device-width, initial-scale=1.0\">",
            "    <meta http-equiv=\"X-UA-Compatible\" content=\"ie=edge\">",
            "    <title>Document</title>",
            "</head>",
            "",
            "<body>",
            "    <div id=\"app\">",
            "",
            "    </div>",
            "    <script src=\"vue.min.js\"></script>",
            "    <script>",
            "        new Vue({",
            "            el: '#app',",
            "            data: {",
            "                $1",
            "            }",
            "        })",
            "    </script>",
            "</body>",
            "",
            "</html>",
        ],
        "description": "my vue template in html"
    }
}
4, Basic grammar
1. One way binding data v-bind
The v-bind feature you see is called an instruction. Instruction with prefix V -
In addition to using the interpolation expression {}} for data rendering, you can also use the v-bind instruction, which is abbreviated as a colon (:)
2. Two way binding data v-model
data: {
    searchMap:{
        keyWord: 'Suxiaonuan'
    }
}
<!-- v- bind:value Only one-way data rendering -- >
<input type="text" v-bind:value="searchMap.keyWord">
<! -- V-model can perform bidirectional data binding -- >
<input type="text" v-model="searchMap.keyWord">
<p>What you want to query is:{{ searchMap.keyWord }}</p>3. methods
4. Modifier
Modifiers are special suffixes indicated by half a period (.) to indicate that an instruction should be bound in a special way.
For example, the. prevent modifier tells the v-on instruction to call the triggered event event.preventDefault():
That is, prevent the default behavior of the event
5. Conditional rendering
v-if: conditional instruction
<input type="checkbox" v-model="ok">Consent to license agreement
<!-- v:if Conditional instruction: and v-else,v-else-if High switching cost -->
<h1 v-if="ok">if: Lorem ipsum dolor sit amet.</h1>
<h1 v-else>no</h1>
v-show: conditional instruction
Use v-show to complete the same functions as above
<!-- v:show The initial rendering cost of conditional instruction is large -->
<h1 v-show="ok">show: Lorem ipsum dolor sit amet.</h1>
<h1 v-show="!ok">no</h1>
- v-if is "true" conditional rendering because it ensures that event listeners and subcomponents within the conditional block are properly destroyed and rebuilt during the switch.
- v-if is also inert: if the condition is false at the time of initial rendering, nothing is done - the conditional block will not start rendering until the condition first becomes true.
- v-show, by contrast, is much simpler - no matter what the initial conditions are, elements are always rendered and simply switched based on CSS.
- In general, v-if has higher switching overhead, while v-show has higher initial rendering overhead. Therefore, if you need to switch very frequently, it's better to use v-show; if the conditions rarely change at runtime, it's better to use v-if.
6. List rendering
v-for: List loop instruction
Example 1: simple list rendering
<! -- 1. Simple list rendering -- >
<ul>
    <li v-for="n in 10">{{ n }} </li>
</ul>
<ul>
    <! -- if you want to get the index, use the index keyword. Note that the index in parentheses must be placed after -- >
    <li v-for="(n, index) in 5">{{ n }} - {{ index }} </li>
</ul>
Example 2: traversing the data list
data: {
    userList: [
        { id: 1, username: 'helen', age: 18 },
        { id: 2, username: 'peter', age: 28 },
        { id: 3, username: 'andy', age: 38 }
    ]
}
<!-- 2,Traverse data list -->
<table border="1">
<!-- <tr v-for="item in userList"></tr> -->
<tr v-for="(item, index) in userList">
<td>{{index}}</td>
<td>{{item.id}}</td>
<td>{{item.username}}</td>
<td>{{item.age}}</td>
</tr>
</table>V. components
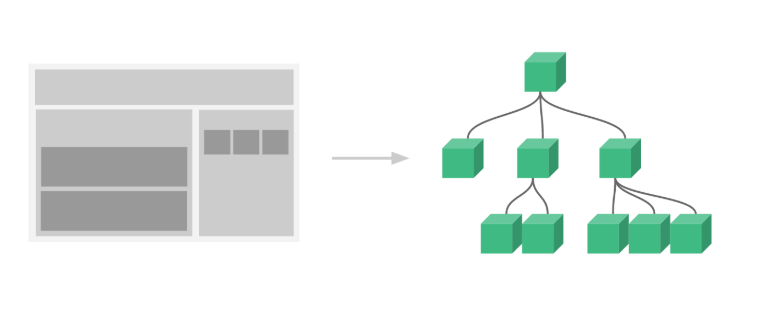
Component is Vue.js One of the most powerful features.
Components can extend HTML elements and encapsulate reusable code.
Component system allows us to build large-scale applications with independent and reusable small components. Almost any type of application interface can be abstracted as a component tree:
1. Local components
var app = new Vue({
    el: '#app',
    // Define local components, where multiple local components can be defined
    components: {
        //Name of component
        'Navbar': {
            //Content of component
            template: '<ul><li>home page</li><li>Student management</li></ul>'
        }
    }
})
Using components
<div id="app">
    <Navbar></Navbar>
</div>
2. Global components
Define global components: components/Navbar.js
// Define global components
Vue.component('Navbar', {
    template: '<ul><li>home page</li><li>Student management</li><li>Instructor management</li></ul>'
})
<div id="app">
<Navbar></Navbar>
</div>
<script src="vue.min.js"></script>
<script src="components/Navbar.js"></script>
<script>
var app = new Vue({
el: '#app'
})
</script>Vi. life cycle
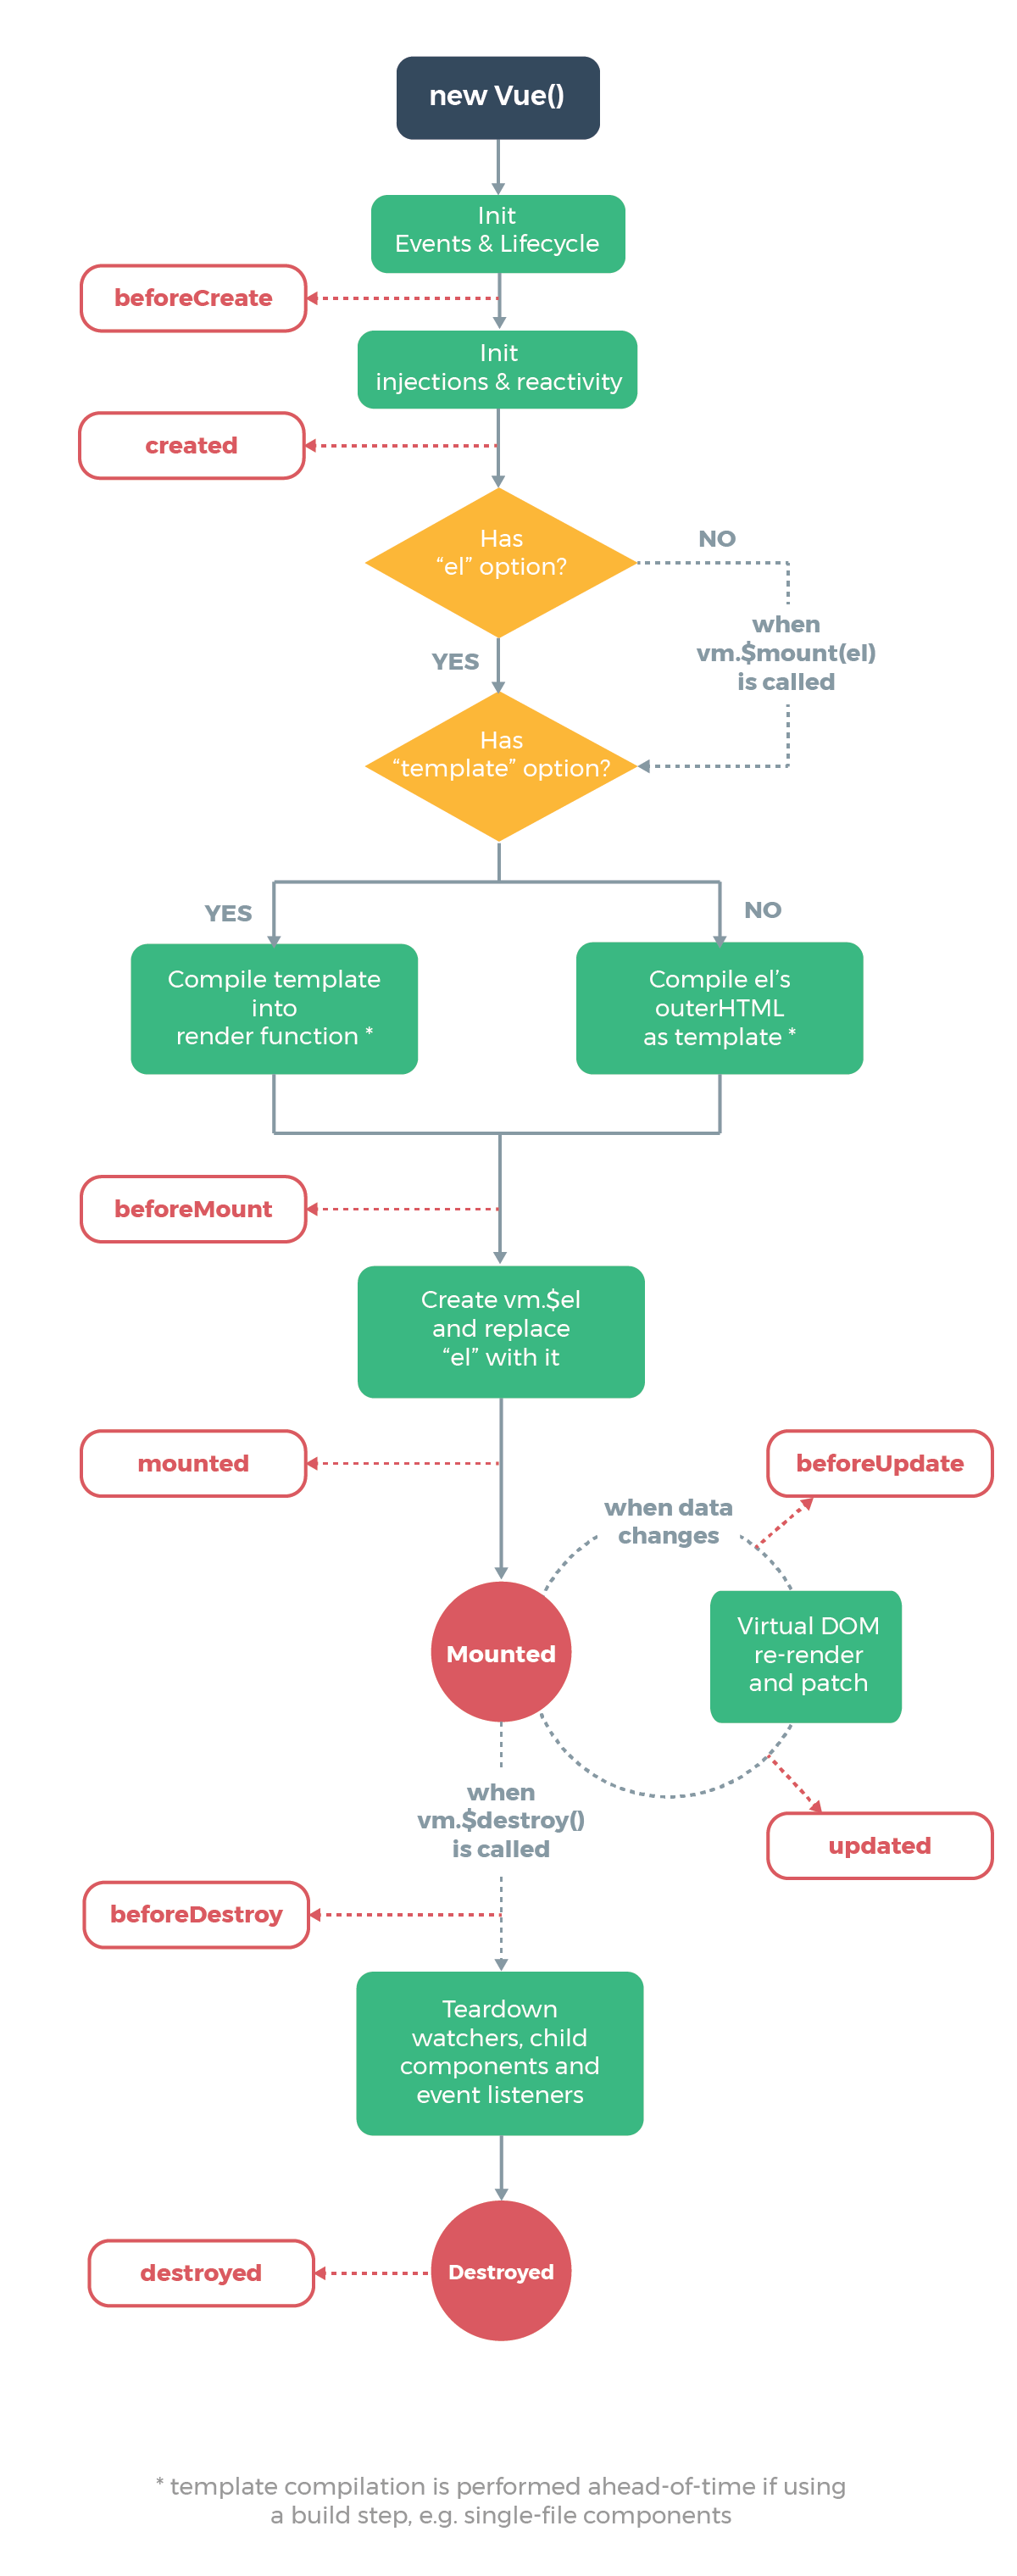
Analyze execution timing of life cycle related methods
//===Four events at creation time
beforeCreate() { // The first hook method to be executed: execute before the instance is created
    console.log(this.message) //undefined
    this.show() //TypeError: this.show is not a function
    // When beforeCreate is executed, the data in data and methods have not been initialized
},
created() { // Second hook method executed
    console.log(this.message) //abed, I see a silver light
    this.show() //Execute show method
    // When created is executed, both data and methods have been initialized!
    // If you want to call methods in methods or operate data in data, you can only operate in created
},
beforeMount() { // The third hook method to be executed
    console.log(document.getElementById('h3').innerText) //{{ message }}
    // When beforeMount is executed, the template has been edited in memory and has not been rendered to the page
},
mounted() { // The fourth hook method to be executed
    console.log(document.getElementById('h3').innerText) //abed, I see a silver light
    // The template in memory has been rendered to the page, and the user can see the content
},
//===Two events in operation
beforeUpdate() { // The moment before data update
    console.log('Contents of the interface:' + document.getElementById('h3').innerText)
    console.log('data In message The data are:' + this.message)
    // When beforeUpdate is executed, the data in memory has been updated, but the page has not been rendered
},
updated() {
    console.log('Contents of the interface:' + document.getElementById('h3').innerText)
    console.log('data In message The data are:' + this.message)
    // When updated is executed, the data in memory has been updated and the page has been rendered
}
VII. Route
Vue.js Routing allows us to access different content through different URL s.
Through Vue.js single page web application (SPA) with multiple views can be realized.
Vue.js Route needs to be loaded into Vue router Library
1. Introducing js
<script src="vue.min.js"></script>
<script src="vue-router.min.js"></script>
2. Write html
<div id="app">
    <h1>Hello App!</h1>
    <p>
        <! -- use the router link component to navigate. -- >
        <! -- specify the link by passing in the 'to' attribute. -- >
        <! -- < router link > will be rendered as a ` < a > ` tag by default -- >
        < router link to = "/" > Home Page < / router link >
        < router link to = "/ student" > member management < / router link >
        < router link to = "/ teacher" > instructor management < / router link >
    </p>
    <! -- route exit -- >
    <! -- the components to which the route matches will be rendered here -- >
    <router-view></router-view>
</div>
3. Write js
<script>
    // 1. Define (route) components.
    // You can import from other files
    const Welcome = { template: '<div>welcome</div>' }
    const Student = { template: '<div>student list</div>' }
    const Teacher = { template: '<div>teacher list</div>' }

    // 2. Define route
    // Each route should map a component.
    const routes = [
        { path: '/', redirect: '/welcome' }, //Set default path to
        { path: '/welcome', component: Welcome },
        { path: '/student', component: Student },
        { path: '/teacher', component: Teacher }
    ]
    // 3. Create router instance, and then transfer it to 'routes' configuration
    const router = new VueRouter({
        routes // (abbreviation) equivalent to routes: routes
    })
    // 4. Create and mount the root instance.
    // So that the whole application has routing function
    const app = new Vue({
        el: '#app',
        router
    })
    // Now, the app has started!
</script>