vsftpd overview
vsftpd is the abbreviation of "very secure FTP daemon". Security is one of its biggest characteristics. vsftpd is the name of a server running on a UNIX like operating system. It can run on systems such as Linux, BSD, Solaris, HP UNIX, etc. it is a completely free, open source FTP server software that supports many features that are not supported by other FTP servers.
Characteristic
Very high security requirements, bandwidth restrictions, good scalability, virtual user creation, IPv6 support, high speed
 Small and light, safe and easy to use.
The differences among ftp, sftp, vsftp and vsftpd
-
ftp is the abbreviation of File Transfer Protocol, File Transfer Protocol. It is a set of standard protocol for file transfer on the network, using client / server mode. It belongs to the application layer of network transmission protocol.
-
sftp is the abbreviation of SSH File Transfer Protocol, which is a secure file transfer protocol;
-
vsftp is a kind of ftp server software used in Unix like system published based on GPL. Its full name is Very Secure FTP. From this name, we can see that the author's original intention is code security;
- vsftpd is the abbreviation of very secure ftp day, and security is one of its biggest characteristics. vsftpd is the name of a server running on a UNIX like operating system. It can run on systems such as Linux, BSD, Solaris, HP UNIX, etc. it is a free and open source ftp server software;
First, anonymous users log in to ftp (file in / var/ftp)
1. Install vsftpd service
[root@localhost ~]# yum install vsftpd -y   ##Installation service
[root@localhost ~]# cd /etc/vsftpd/    ##This directory is the profile directory
[root@localhost vsftpd]# ls
ftpusers  user_list  vsftpd.conf  vsftpd_conf_migrate.sh
[root@localhost vsftpd]# systemctl start vsftpd     ##Start vsftpd service
[root@localhost vsftpd]# systemctl stop firewalld.service    ##Turn off firewall
[root@localhost vsftpd]# setenforce 0    ##Turn off enhancements
[root@localhost vsftpd]# ls /var/ftp/        ##Switch to ftp directory
pub
[root@localhost vsftpd]# echo "this is test" > /var/ftp/test.txt   ##Add a text file
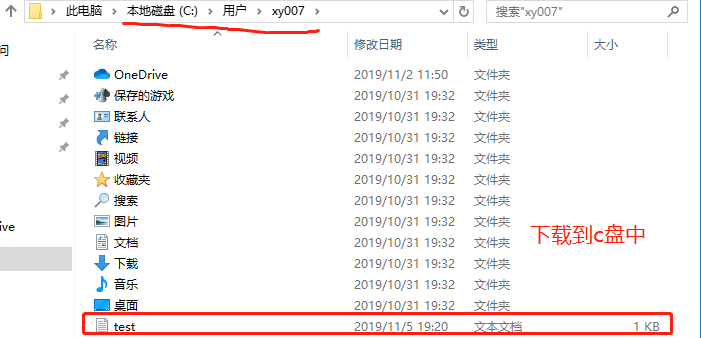
2. Use the tester cmd to access the vsftpd service (cmd connects to ftp) and download the file
C:\Users\xy007>ftp 192.168.13.140    ##Access to ftp services
//Connect to 192.168.13.140.
220 (vsFTPd 3.0.2)
200 Always in UTF8 mode.
//User (192.168.13.140:(none)): ftp anonymous access
331 Please specify the password.
//Password: no return
230 Login successful.
ftp> pwd            ##View current path
257 "/"               ##Root directory of ftp service
ftp> ls -a           ##View content in catalog
200 PORT command successful. Consider using PASV.
150 Here comes the directory listing.
.
..
pub
test.txt               ##Files in server
226 Directory send OK.
ftp: Received 25 bytes, time 0.00 Second 25000.00 KByte/Seconds.
ftp> get test.txt  ##Download the file to the local (the access to which disk is the download location, you can switch the disk to download e:)
200 PORT command successful. Consider using PASV.
150 Opening BINARY mode data connection for test.txt (13 bytes).
226 Transfer complete.
ftp: Received 13 bytes, time 0.00 Second 13000.00 KByte/Seconds.
ftp> put test1.txt   ##Create a test1.txt in Disk c and upload it to Linux
200 PORT command successful. Consider using PASV.
550 Permission denied.    ##Permission is limited at this time
3. Modify the vsftpd configuration file to enable anonymous access
[root@localhost ftp]# cd /etc/vsftpd/
[root@localhost vsftpd]# vim vsftpd.conf
##Look in the configuration file to turn on the following options
anonymous_enable=YES       ##Open anonymous user
local_enable=YES    ##Local users
write_enable=YES    ##Write permission
local_umask=022     ##Local user unmask
anon_upload_enable=YES   ##Upload permission on
anon_mkdir_write_enable=YES   ##Enable create directory and write
anon_other_write_enable=YES   ##Add other's rename and delete permissions

[root@localhost vsftpd]# systemctl restart vsftpd  ##Restart service
[root@localhost vsftpd]# cd /var/ftp/    ##Switch to ftp directory
[root@localhost ftp]# ls
pub  test.txt
[root@localhost ftp]# ls -l
//Total dosage 4
drwxr-xr-x. 2 root root  6 10 Month 312018 pub
-rw-r--r--. 1 root root 13 11 Month 519:14 test.txt
[root@localhost ftp]# chmod 777 pub   ##Give the maximum permission to the pub directory. Note that you cannot directly give the maximum permission to the ftp directory
4. Use the test machine cmd to access ftp and upload the local file to Linux
C:\Users\xy007>ftp 192.168.13.140   ##Access to ftp services
//Connect to 192.168.13.140.
220 (vsFTPd 3.0.2)
200 Always in UTF8 mode.
//User (192.168.13.140:(none)): ftp
331 Please specify the password.
//Password:
230 Login successful.
ftp> cd pub/                             ##Switch to the pub directory
250 Directory successfully changed.
ftp> put test1.txt                      ##Upload files
200 PORT command successful. Consider using PASV.
150 Ok to send data.
226 Transfer complete.
ftp: Send 13 bytes, time 0.03 Second 0.41 KByte/Seconds.
ftp> by     ##Sign out
221 Goodbye.
##You can also use delete to delete files
5. View the uploaded file
[root@localhost ftp]# cd /var/ftp/pub  ##Switch to the pub directory
[root@localhost pub]# ls     ##View uploaded files
test1.txt
Second, use local users to log in ftp (file at home directory)
Prevent local users from accessing system directory and restrict access to user home directory only
1. Create system user
[root@localhost pub]# useradd zhangsan   ##Create user and set user password
[root@localhost pub]# passwd zhangsan
[root@localhost pub]# useradd lisi   ##Create user and set user password
[root@localhost pub]# passwd lisi
2. On the test machine, cmd uses the user to log in to ftp
C:\Users\xy007>ftp 192.168.13.140   ##Log in to ftp service
//Connect to 192.168.13.140.
220 (vsFTPd 3.0.2)
200 Always in UTF8 mode.
//User (192.168.13.140:(none)): zhangsan use local user
331 Please specify the password.
//Password:
230 Login successful.
ftp> ls /       ##View the directory file under user / directly to the root directory of the system
200 PORT command successful. Consider using PASV.
150 Here comes the directory listing.
/bin
/boot
/dev
/etc
/home
/lib
/lib64
/media
/mnt
/opt
/proc
/root
/run
/sbin
/srv
/sys
/tmp
/usr
/var
226 Directory send OK.
ftp: Received 126 bytes, time 0.02 Second 7.88 KByte/Seconds.
3. Prevent local users from accessing the system directory and restrict access to only the user's home directory
[root@localhost pub]# vim /etc/vsftpd/vsftpd.conf    ##Modify profile

chroot_local_user=YES   ##Turn on the restrict local access system directory module
allow_writeable_chroot=YES ##Add write permission

[root@localhost pub]# systemctl restart vsftpd   ##Restart service
4. Test machine cmd access
C:\Users\xy007>ftp 192.168.13.140   ##Visit ftp
//Connect to 192.168.13.140.
220 (vsFTPd 3.0.2)
200 Always in UTF8 mode.
//User (192.168.13.140:(none)): zhangsan user
331 Please specify the password.
//Password:
230 Login successful.
ftp> cd /    ##Switch to system root
250 Directory successfully changed.
ftp> ls     ##Check whether it is found in the user's home directory, unable to access other directories of the system, and enhanced security
200 PORT command successful. Consider using PASV.
150 Here comes the directory listing.
226 Directory send OK.
Set allow to deny the specified user access to ftp
1. Set user list to allow or deny specific users to log in to ftp
[root@localhost pub]# cd /etc/vsftpd/  ##Switch to the vsftpd configuration file directory
[root@localhost vsftpd]# vim vsftpd.conf

userlist_enable=YES ##Confirm user list is on

[root@localhost vsftpd]# ls
ftpusers  user_list  vsftpd.conf  vsftpd_conf_migrate.sh
[root@localhost vsftpd]# echo "zhangsan" >> user-list   ##Add zhangsan users to the list
[root@localhost vsftpd]# systemctl restart vsftpd    ##Restart service
2. Test with tester cmd
C:\Users\xy007>ftp 192.168.13.140
 Connect to 192.168.13.140.
220 (vsFTPd 3.0.2)
200 Always in UTF8 mode.
User (192.168.13.140:(none)): zhangsan login with zhangsan
530 Permission denied.
Login failed ##Deny login directly
ftp>
3. Set the list to allow only
[root@localhost ftp]# cd /etc/vsftpd/
[root@localhost vsftpd]# vim vsftpd.conf  ##Configure the vsftpd configuration file
userlist_enable=YES
userlist_deny=NO   ##Add list allow

[root@localhost vsftpd]# systemctl restart vsftpd   ##Restart service
4. cmd test of tester
C:\Users\xy007>ftp 192.168.13.140
//Connect to 192.168.13.140.
220 (vsFTPd 3.0.2)
200 Always in UTF8 mode.
//User (192.168.13.140:(none)): zhangsan login with zhangsan
331 Please specify the password.
//Password:
230 Login successful.        ##Login successfully
ftp> by
221 Goodbye.

C:\Users\xy007>ftp 192.168.13.140
//Connect to 192.168.13.140.
220 (vsFTPd 3.0.2)
200 Always in UTF8 mode.
//User (192.168.13.140:(none)): lisi ා log in with lisi
530 Permission denied.
//Login failed ##Login failed
Third, establish a virtual user account to use ftp (the file is in the user's home directory of the system)
1. Create a virtual user file
[root@localhost vsftpd]# cd /etc/vsftpd/  ##Switch to the profile directory
[root@localhost vsftpd]# vim vuser      ##Create a virtual user file

lisa           ##Odd behavior user name
123123    ##Even behavior password
tom
123123
2. Convert database files and set security permissions
[root@localhost vsftpd]# db_load -T -t hash -f vuser vuser.db    ##Convert vuser to database file
##T conversion, T type, f specifies file
[root@localhost vsftpd]# chmod 600 vuser      ##For security, don't let others see, set permissions
[root@localhost vsftpd]# chmod 600 vuser.db
3. Edit pam authentication module to support virtual user login
[root@localhost vsftpd]# useradd -d /opt/vuser -s /sbin/nologin vuser
##Create system user, specify home directory, unable to log in
[root@localhost vsftpd]# vim /etc/pam.d/vsftpd.vu   ##Compile pam authentication module

auth required pam_userdb.so db=/etc/vsftpd/vuser    ##Identify converted database files
account required pam_userdb.so db=/etc/vsftpd/vuser   ##Connected password service
4. Enable the virtual user and log in with pam module authentication
[root@localhost vsftpd]# vim vsftpd.conf  ##Modify profile
##Big G to last line
#pam_service_name=vsftpd   ##Notes
##Add the following three lines
guest_enable=YES           ##Enable guest user access
guest_username=vuser      ##Use vuser user name
pam_service_name=vsftpd.vu   ##pam module
[root@localhost vsftpd]# systemctl restart vsftpd   ##Restart service
5. Test machine cmd
C:\Users\xy007>ftp 192.168.13.140
//Connect to 192.168.13.140.
220 (vsFTPd 3.0.2)
200 Always in UTF8 mode.
//User (192.168.13.140:(none)): tom ා log in with virtual user tom
331 Please specify the password.
//Password:
230 Login successful.
ftp> put test1.txt      ##Upload a file
200 PORT command successful. Consider using PASV.
150 Ok to send data.
226 Transfer complete.
ftp: Send 13 bytes, time 0.00 Second 13000.00 KByte/Seconds.
##The permission to view files is 600
[root@localhost vsftpd]# ls -l /opt/vuser/
//Total dosage 4
-rw-------. 1 vuser vuser 13 11 Month 522:51 test1.txt
6. Individual user configuration, specifying the upload file permission 644
[root@localhost vsftpd]# vim vsftpd.conf
##Add last line of big G
user_config_dir=/etc/vsftpd/vu_dir   ##Individual user configuration folder

[root@localhost vsftpd]# mkdir vu_dir  ##create folder
[root@localhost vsftpd]# cd vu_dir/
[root@localhost vu_dir]# vim lisa     ##Create user profile in configuration folder

anon_umask=022  ##Specify permission to upload files

[root@localhost vu_dir]# systemctl restart vsftpd  ##Restart service
7. The tester cmd uses lisa user to log in and view the upload file permission
C:\Users\xy007>ftp 192.168.13.140
//Connect to 192.168.13.140.
220 (vsFTPd 3.0.2)
200 Always in UTF8 mode.
//User (192.168.13.140:(none)): lisa login
331 Please specify the password.
//Password:
230 Login successful.
ftp> put 111.txt        ##Upload files
200 PORT command successful. Consider using PASV.
150 Ok to send data.
226 Transfer complete.
ftp: Send 13 bytes, time 0.00 Second 13000.00 KByte/Seconds.

[root@localhost vu_dir]# ls -l /opt/vuser/   ##Permission to view uploaded files
//Total dosage 8
-rw-r--r--. 1 vuser vuser 13 11 Month 522:58 111.txt    ##lisa upload file permissions 644
-rw-------. 1 vuser vuser 13 11 Month 522:51 test1.txt  ##tom upload file permission 600