Catalog
Step 1: install VSCode application
Open up VSCode official website , download the corresponding installation package and install by default (note here: the installation path can be modified)
Step 2: install related plug-ins
.
Note: Here I choose my native language as the editor language, so I will install an additional Chinese plug-in!
Install Chinese plug-in
open VSCode, input "Chinese" in plug-in search input box, and search plug-in "Chinese (Simplified) Language Pack for Visual Studio Code". Click Install to install the plug-in.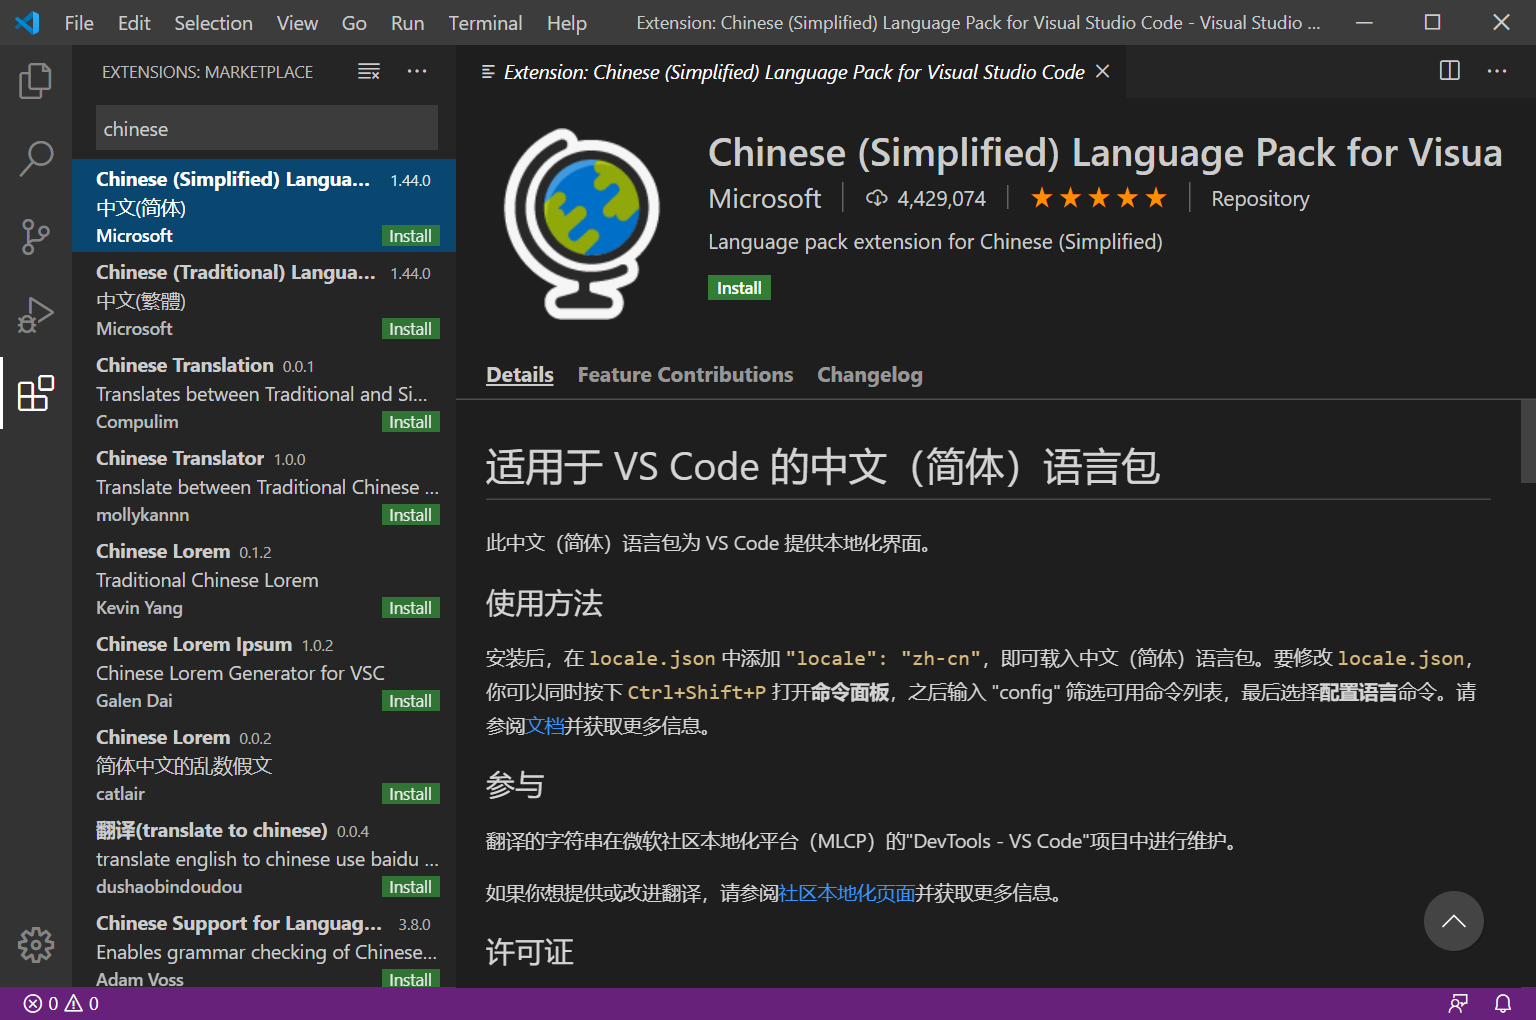
Install the C + + editor plug-in
enter "C++" in the plug-in search input box, and search the plug-in "C/C++ for Visual Studio Code". Click Install to install the plug-in.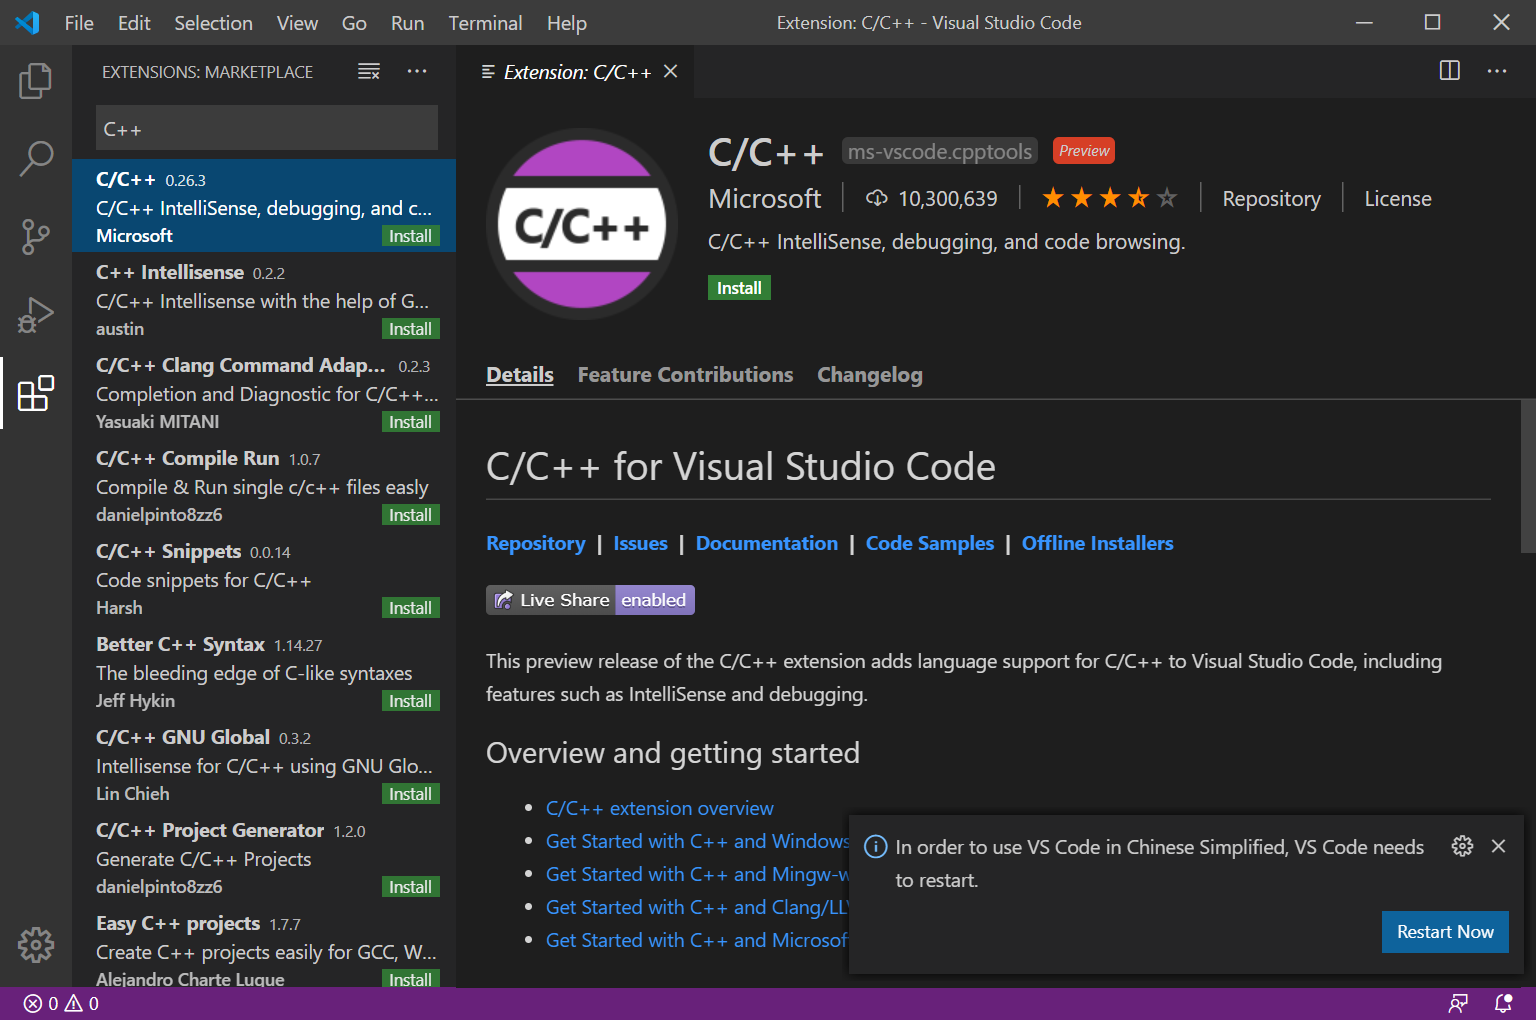
Step 3: write configuration file
!
! Please see the appendix if necessary-- C/C + + compiler environment configuration
create a new folder where you write your code and name it ". vscode". Then create three new files under the ". vscode" folder, which are:
1. tasks.json
2. launch.json
3. c_cpp_properties.json
Reference resources: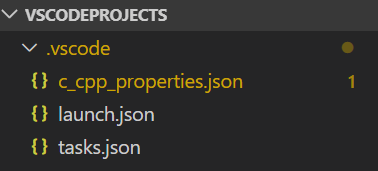
Write tasks.json file
this file tells VS Code how to build (compile) a program.
{
    "version": "2.0.0",
    "command": "g++",
    "args": [
        "-g",
        "${file}",
        "-o",
        "${fileBasenameNoExtension}.exe"
    ], // Compile command parameters
    "problemMatcher": {
        "owner": "cpp",
        "fileLocation": [
            "relative",
            "${workspaceFolder}"
        ],
        "pattern": {
            "regexp": "^(.*):(\\d+):(\\d+):\\s+(warning|error):\\s+(.*)$",
            "file": 1,
            "line": 2,
            "column": 3,
            "severity": 4,
            "message": 5
        }
    }
}
Edit the launch.json file
this file is responsible for configuring VS Code.
{
    "version": "0.2.0",
    "configurations": [
        {
            "name": "(gdb) Launch", // The configuration name will be displayed in the drop-down menu of the startup configuration
            "type": "cppdbg", // Configuration type, only cppdbg can be used here
            "request": "launch", // Request configuration type, which can be launch or attach
            "program": "${workspaceFolder}/${fileBasenameNoExtension}.exe", // Path to the program to be debugged
            "args": [], // The command line parameter passed to the program during program debugging, which is usually set to null
            "stopAtEntry": false, // When set to true, the program will be suspended at the program entrance, which is generally set to false
            "cwd": "${workspaceFolder}", // The working directory when debugging the program is ${workspaceRoot}, that is, the directory where the code is located, workspaceRoot, has been discarded. Now it is changed to workspaceFolder
            "environment": [],
            "externalConsole": true, // Whether to display the console window during debugging. Generally, it is set to true to display the console
            "MIMode": "gdb",
            "miDebuggerPath": "E:\\MinGW\\bin\\gdb.exe", // The path of miDebugger. Note that this corresponds to the path of MinGw
            "preLaunchTask": "g++", // The tasks to be executed before the start of the debugging session are generally compiler, c + + is g++, c is gcc
            "setupCommands": [
                {
                    "description": "Enable pretty-printing for gdb",
                    "text": "-enable-pretty-printing",
                    "ignoreFailures": false
                }
            ]
        }
    ]
}
Edit the C? CPP? Properties.json file
this file is used to further control C / C + + extensions. It will allow you to change settings such as compiler path, include path, C + + standard (default is C ++ 17), etc.
!
{
    "configurations": [
        {
            "name": "Win32",
            "includePath": ["${workspaceFolder}/**"],
            "defines": ["_DEBUG", "UNICODE", "_UNICODE"],
            "compilerPath": "E:\\MinGW\\bin\\gcc.exe",
            "cStandard": "c11",
            "cppStandard": "c++17",
            "intelliSenseMode": "clang-x86"
        }
    ],
    "version": 4
}
appendix
Obtaining the path of includePath in the file C ﹣ CPP ﹣ properties.json
Open the CMD command line tool and enter gcc -v -E -x c + + -.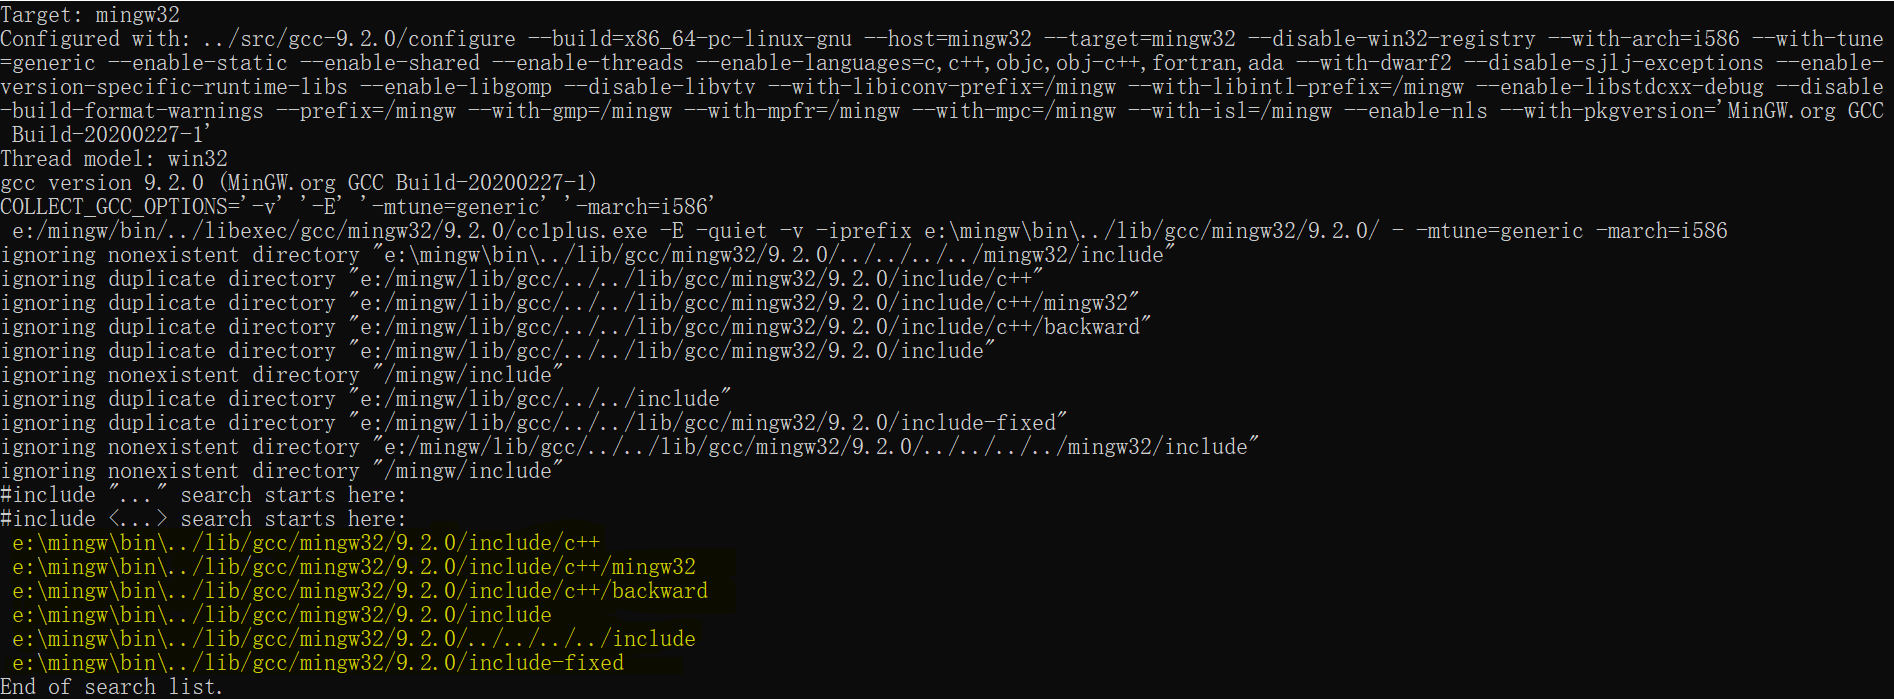
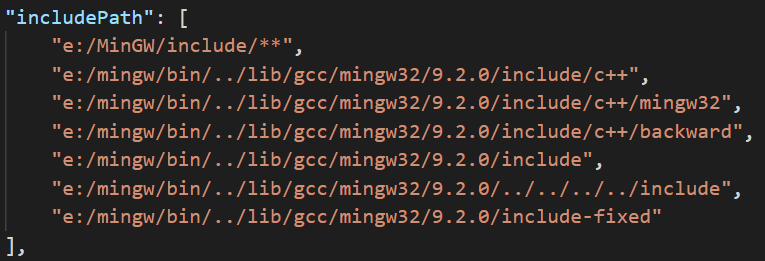
Note: the first line of includePath is configured with the include folder under the root directory of MinGW.
C / C + + compiler environment configuration
1. go MinGW official website Download the installer and install by default.
Note: the installation path can be modified.
2. Start the program and install the basic library file after the installation.
Reference resources: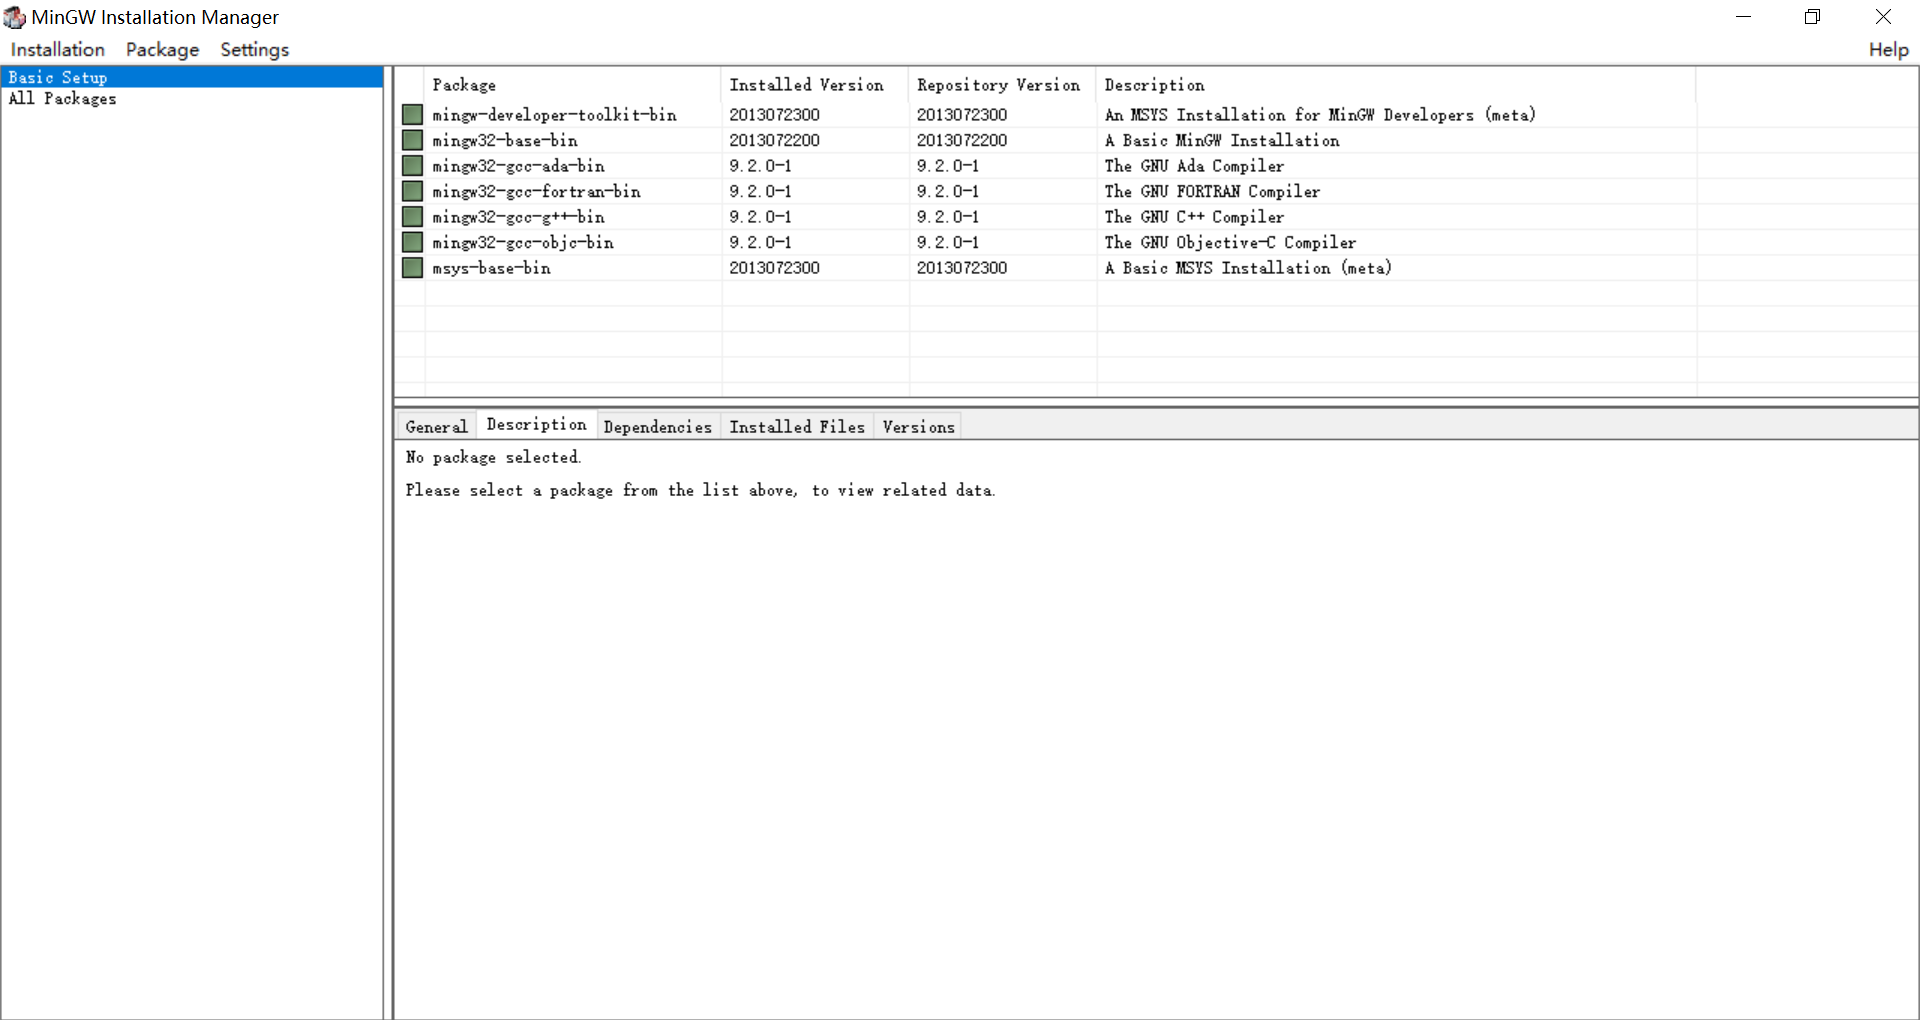
3. Add the bin folder Path under the root directory of the MinGW installation in the system (or user) environment variable Path, for example: E:\MinGW\bin
4. Enter gcc -v in the CMD command line tool to see if the installation is successful.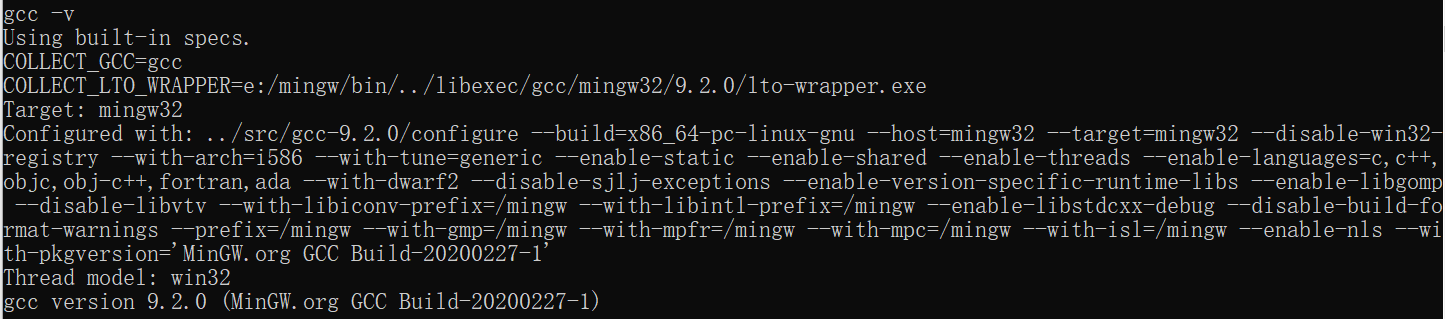
Reference articles
Getting started with C + + and Mingw-w64 in Visual Studio Code
Copyright notice
Author: Seaver
If you want to reprint, please make sure to indicate the source!
Original address: https://www.cnblogs.com/seafever/p/12571272.html