I did not find what I wanted on the Internet. I made a great success. I hereby record it for your reference.
Vscode download and installation are very simple, smart you will see. This paper focuses on how to use vscode in the same c + + project to freely switch between using Microsoft msvc's cl.exe and MingW's g++.exe compiler to compile and debug, so as to facilitate learning the differences between different compilers. I only use these two compilers. Other compilers may have the same setting method.
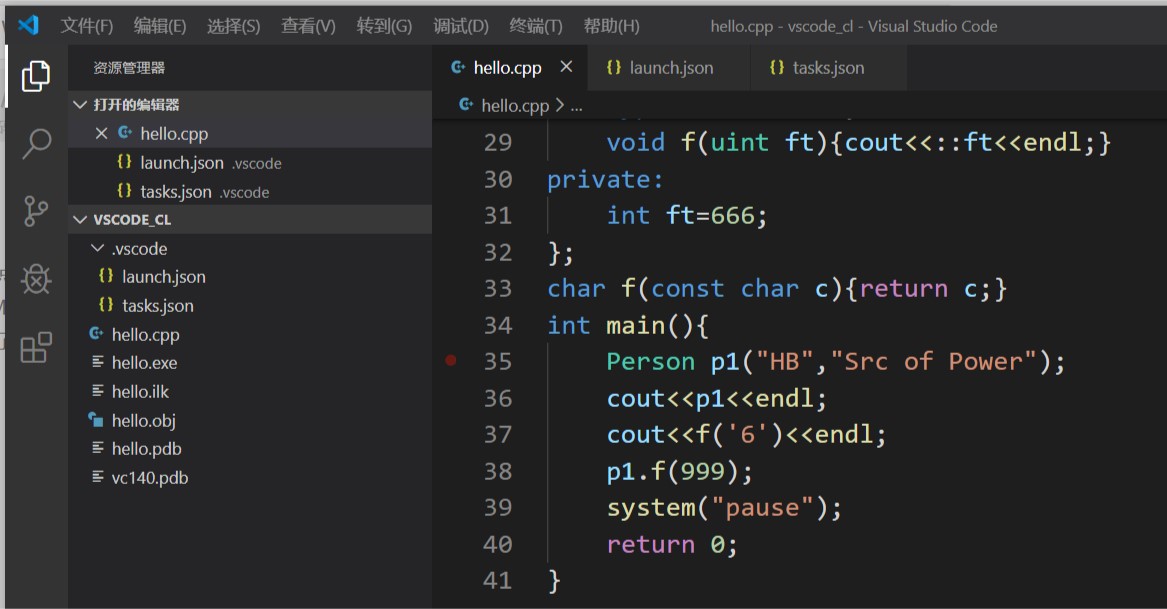
Final effect: This is a CPP source file hello.cpp and all other files compiled by both compilers. The content of hello.cpp is not important. It's a small exercise for me to learn CPP...
 This is the compilation effect of cl.exe
 This is the compilation effect of the same project with g++.exe
Key points of operation:
0. The basic premise is that you need cl.exe (vs2019 or earlier), g++.exe (codeblocks, devcpp, or MingW).
1. Due to the complexity of cl, every time you open a c + + project, you must use vs's command-line editor to open vs Code with the code project folder, such as If not, the cl compiler may not be available and g + + is not affected.
2. Modify tasks.json and launch.json in your c + + project, and add corresponding codes respectively:
tasks.json:
{
    "tasks": [
        {	// Corresponding cl.exe
            "type": "shell",
            "label": "cl.exe build active file",
            "command": "cl.exe",
            "args": [	// Compile options of cl, set by yourself
                "/Zi",
                "/EHsc",
                "/Fe:",
                "${fileDirname}\\${fileBasenameNoExtension}.exe",
                "${file}"
            ],
            "group": {
                "kind": "build",
                "isDefault": true
            },
            "presentation": {
                "reveal": "always"
            },
            "problemMatcher": "$msCompile"
        },
        {	// Corresponding to g++.exe
            "type": "shell",
            "label": "g++.exe build active file",
            "command": "D:\\Program Files (x86)\\CodeBlocks\\MinGW\\bin\\g++.exe",
            "args": [	// Compile options of g + +, set by yourself
                "-g",
                "${file}",
                "-o",
                "${fileDirname}\\${fileBasenameNoExtension}.exe",
                "-std=c++11",
                "-Wall",
                "-Weffc++",
                "-Wextra",
                "-pedantic"
            ],
            "options": {
                "cwd": "D:\\Program Files (x86)\\CodeBlocks\\MinGW\\bin"		// Change to your own path
            }
        }
    ],
    "version": "2.0.0"
}
launch.json:
{
    // Use IntelliSense for properties.
    // Hover to view the description of an existing property.
    // For more information, please visit: https://go.microsoft.com/fwlink/?linkid=830387
    "version": "0.2.0",
    "configurations": [
        {   // Corresponding cl.exe
            "name": "cl.exe build and debug active file",
            "type": "cppvsdbg",
            "request": "launch",
            "program": "${fileDirname}\\${fileBasenameNoExtension}.exe",
            "args": [],
            "stopAtEntry": false,
            "cwd": "${workspaceFolder}",
            "environment": [],
            "externalConsole": true,
            "preLaunchTask": "cl.exe build active file"
        },
        {   // Corresponding to g++.exe
            "name": "g++.exe build and debug active file",
            "type": "cppdbg",
            "request": "launch",
            "program": "${fileDirname}\\${fileBasenameNoExtension}.exe",
            "args": [],
            "stopAtEntry": false,
            "cwd": "${workspaceFolder}",
            "environment": [],
            "externalConsole": true,
            "MIMode": "gdb",
            "miDebuggerPath": "D:\\Program Files (x86)\\CodeBlocks\\MinGW\\gdb32\\bin\\gdb32.exe",	// Change to the path of your own gdb32.exe
            "setupCommands": [
                {
                    "description": "by gdb Enable neat printing",
                    "text": "-enable-pretty-printing",
                    "ignoreFailures": true
                }
            ],
            "preLaunchTask": "g++.exe build active file"
        }
    ]
}
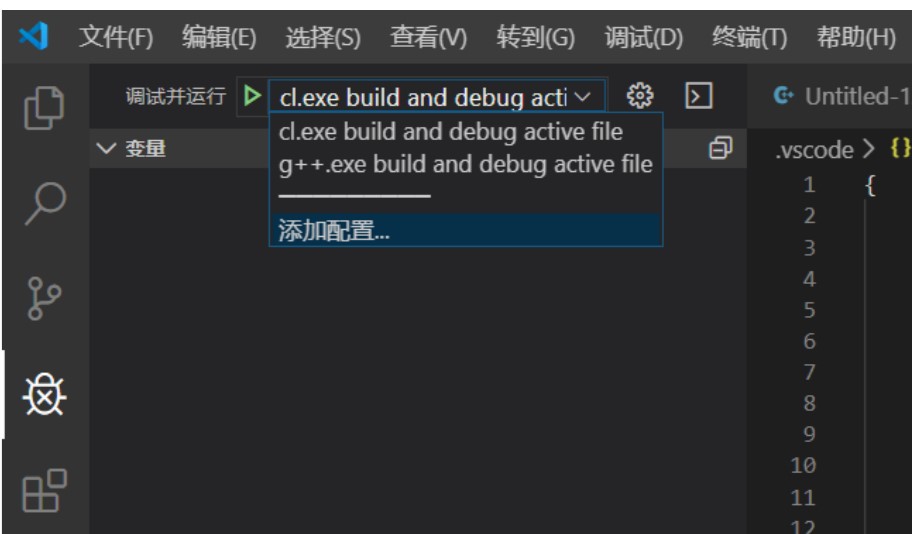
After the above two files are saved respectively, the corresponding compilation configuration will appear in the compilation and debugging bar of vscode:
Summary of operation steps:
1. Modify tasks.json and launch.json according to the requirements of operation point 2
2. Open vscode according to the requirements of operation point 1
3. Arbitrarily switch cl or g + + to compile and debug c + + Project
This is my first blog post. I hope it can help you

