1. Install Visual Studio Code
1.1 Download Visual Studio Code
The official download address for vscode is: https://code.visualstudio.com/Download
There are two versions, one for the user and one for the system, as shown in the following figure:
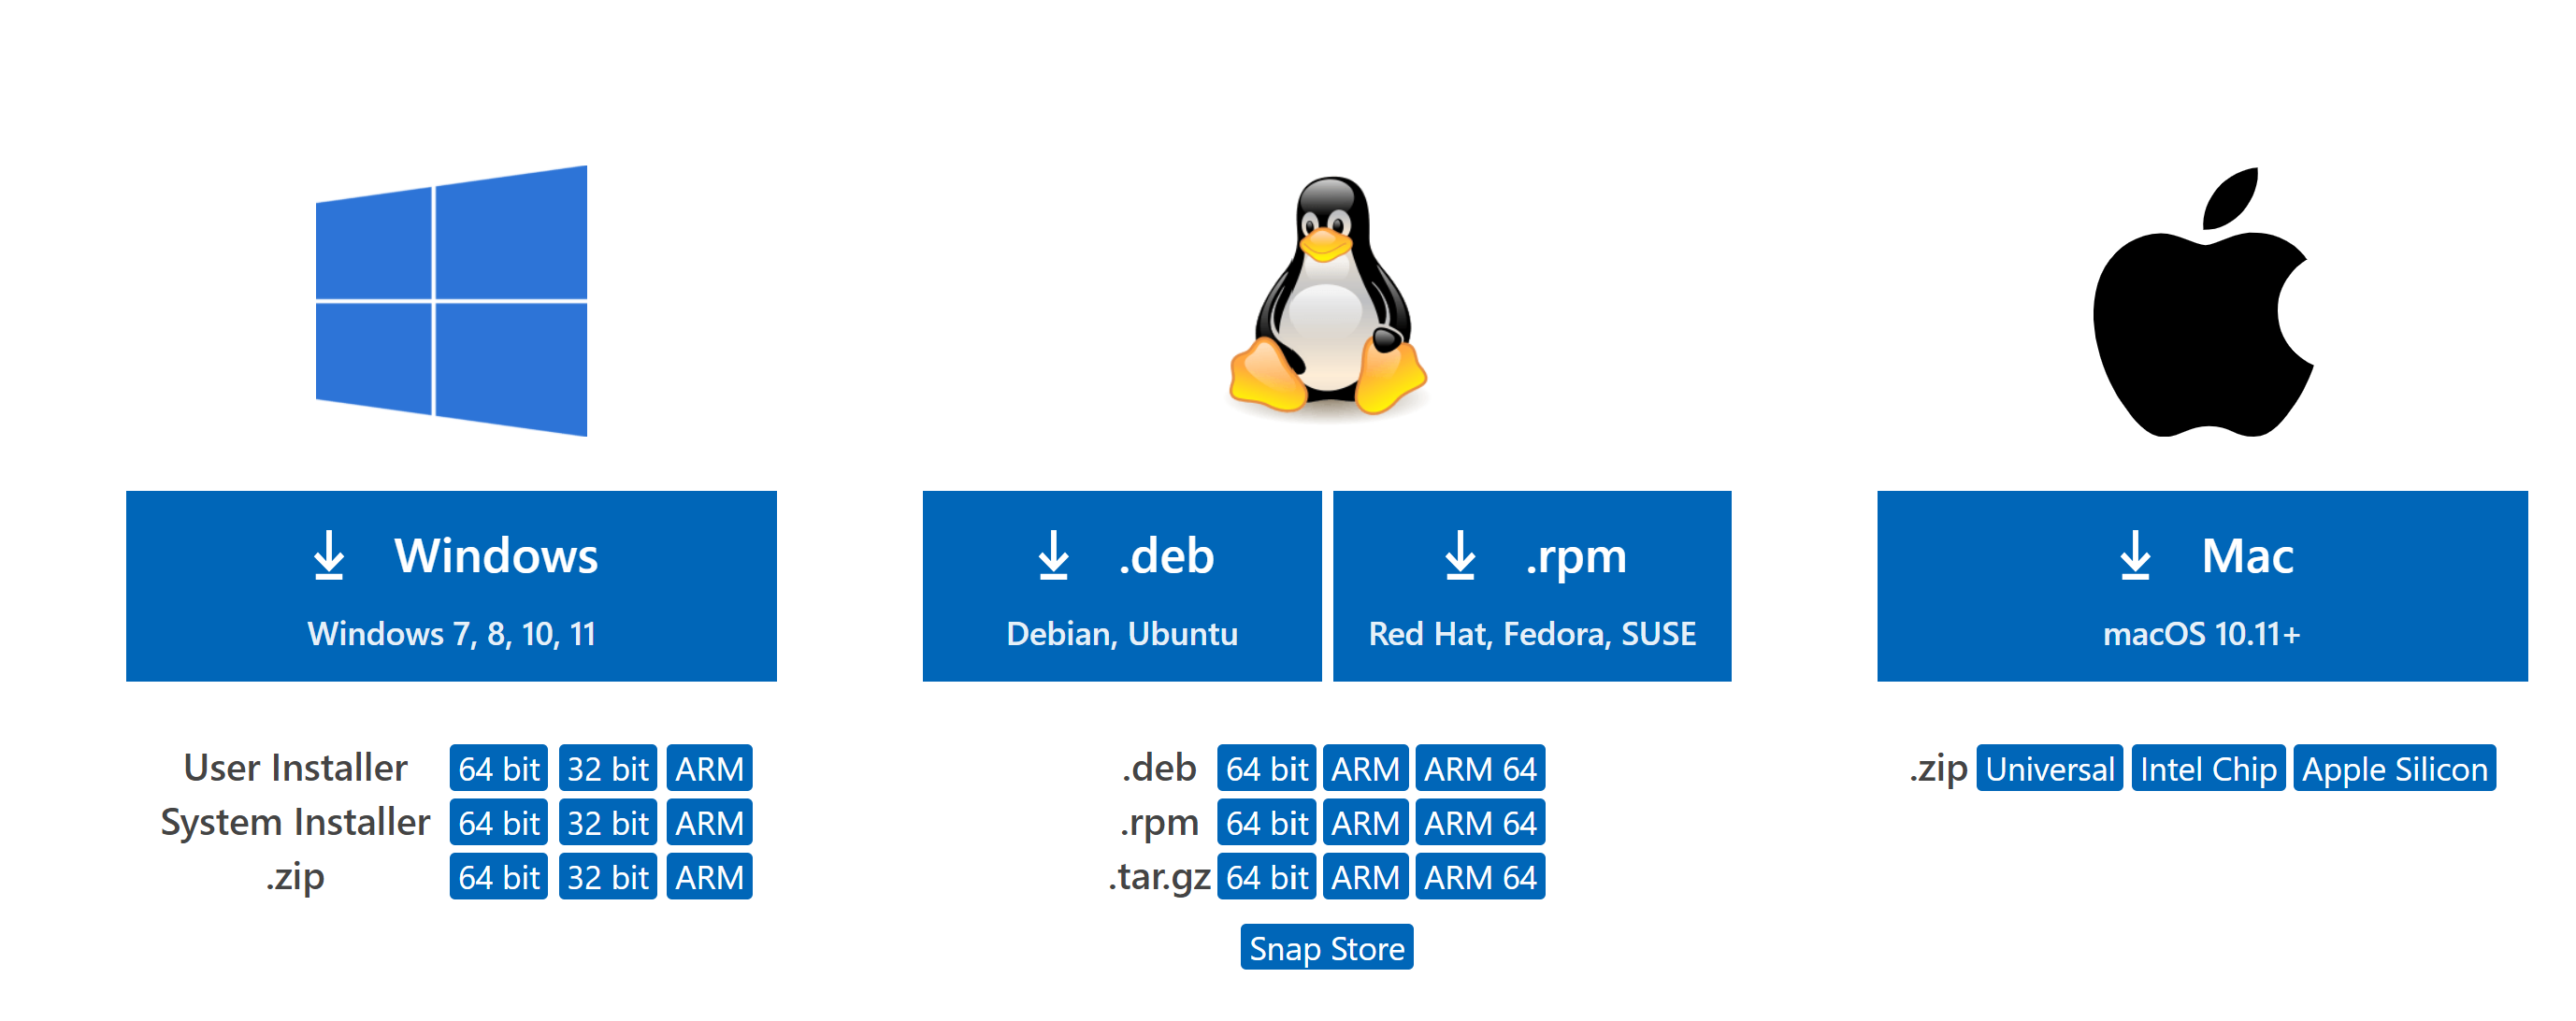
The author chose 64-bit system version, you can choose according to your own situation.
1.2 VsCode Installation
After downloading, open the file, select I agree to the agreement, and the following interface:

The last configuration path must be checked, others can be chosen according to your needs.
Start configuring the C++ environment after installation:
2. Configure System C++ Environment
2.1 Download MinGw
Download address: https://sourceforge.net/projects/mingw-w64/files/mingw-w64/mingw-w64-release/
Mouse slides down to find the compressed package in the picture and download it.

After the download is complete, unzip and move to the directory you want to install. I move to the root directory of drive D.
2.2 Configure System Path
Find the directory for g++.exe and add it to your system path. My catalog looks like the following:

Add directory D:/mingw64/bin to the system environment variable PATH as shown in the following figure:

After adding, detect if the environment is successfully configured.
2.3 Test Environment Configuration
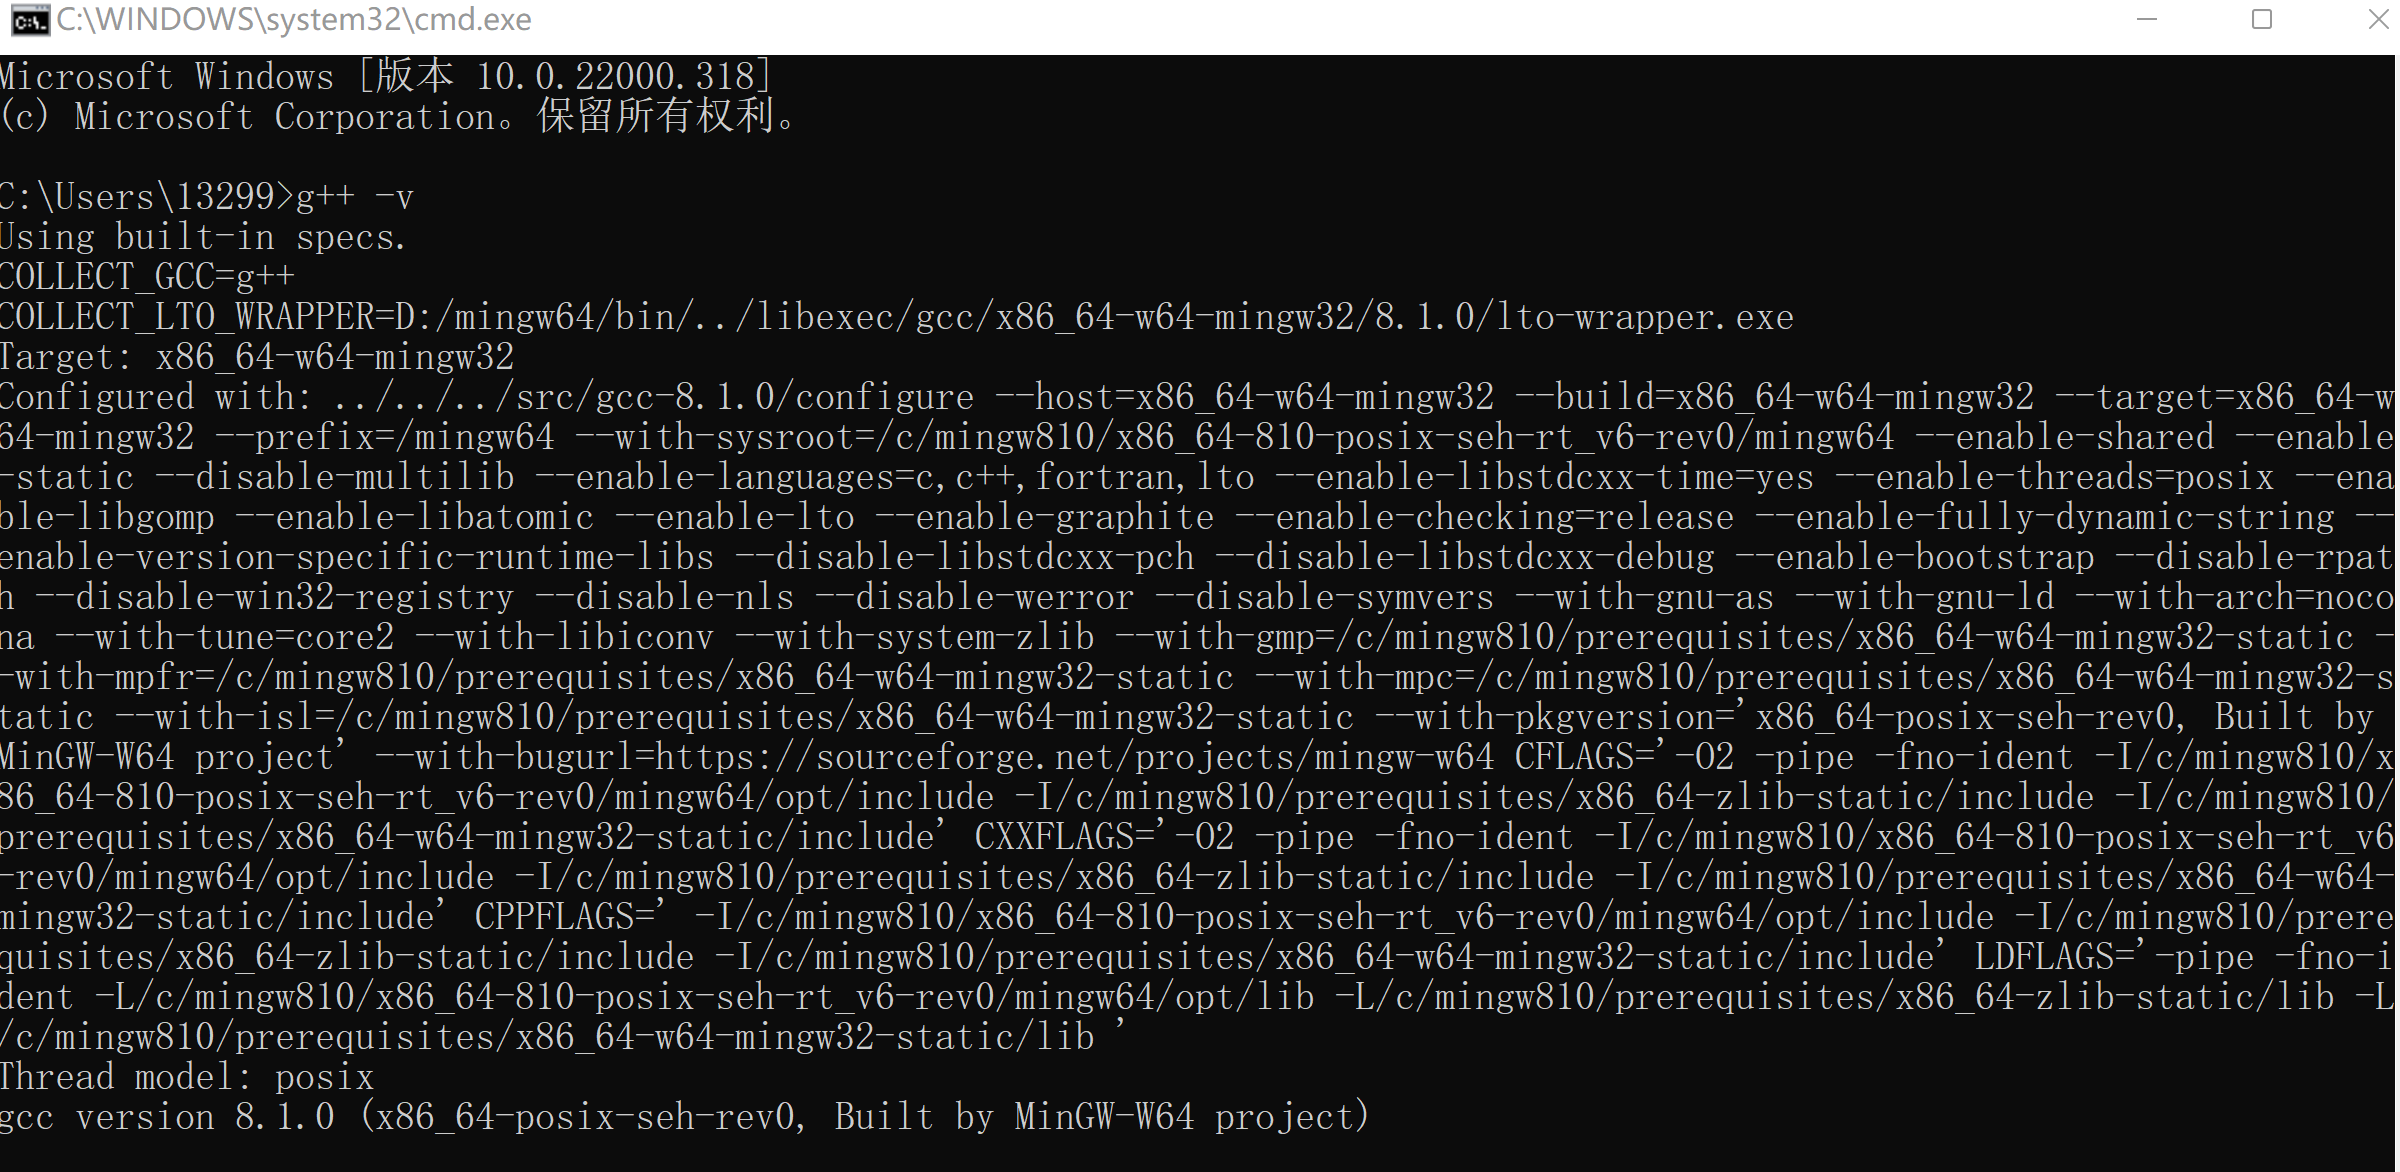
Open the cmd window and type g++ -v. If the following figure is shown, the environment is configured successfully and proceed to the next step, otherwise check that the system variables are configured correctly.
3 Install C++ Extensions
Open VsCode and create a C++ directory. The following image was created by the author and can be used as a reference:

Install the C++ plug-in, click on the left plug-in icon, the second to last, search for c, and install the c++ extender as shown in the following figure:

4 Configure the VsCodeC++ environment
4.1 Configuration Compiler
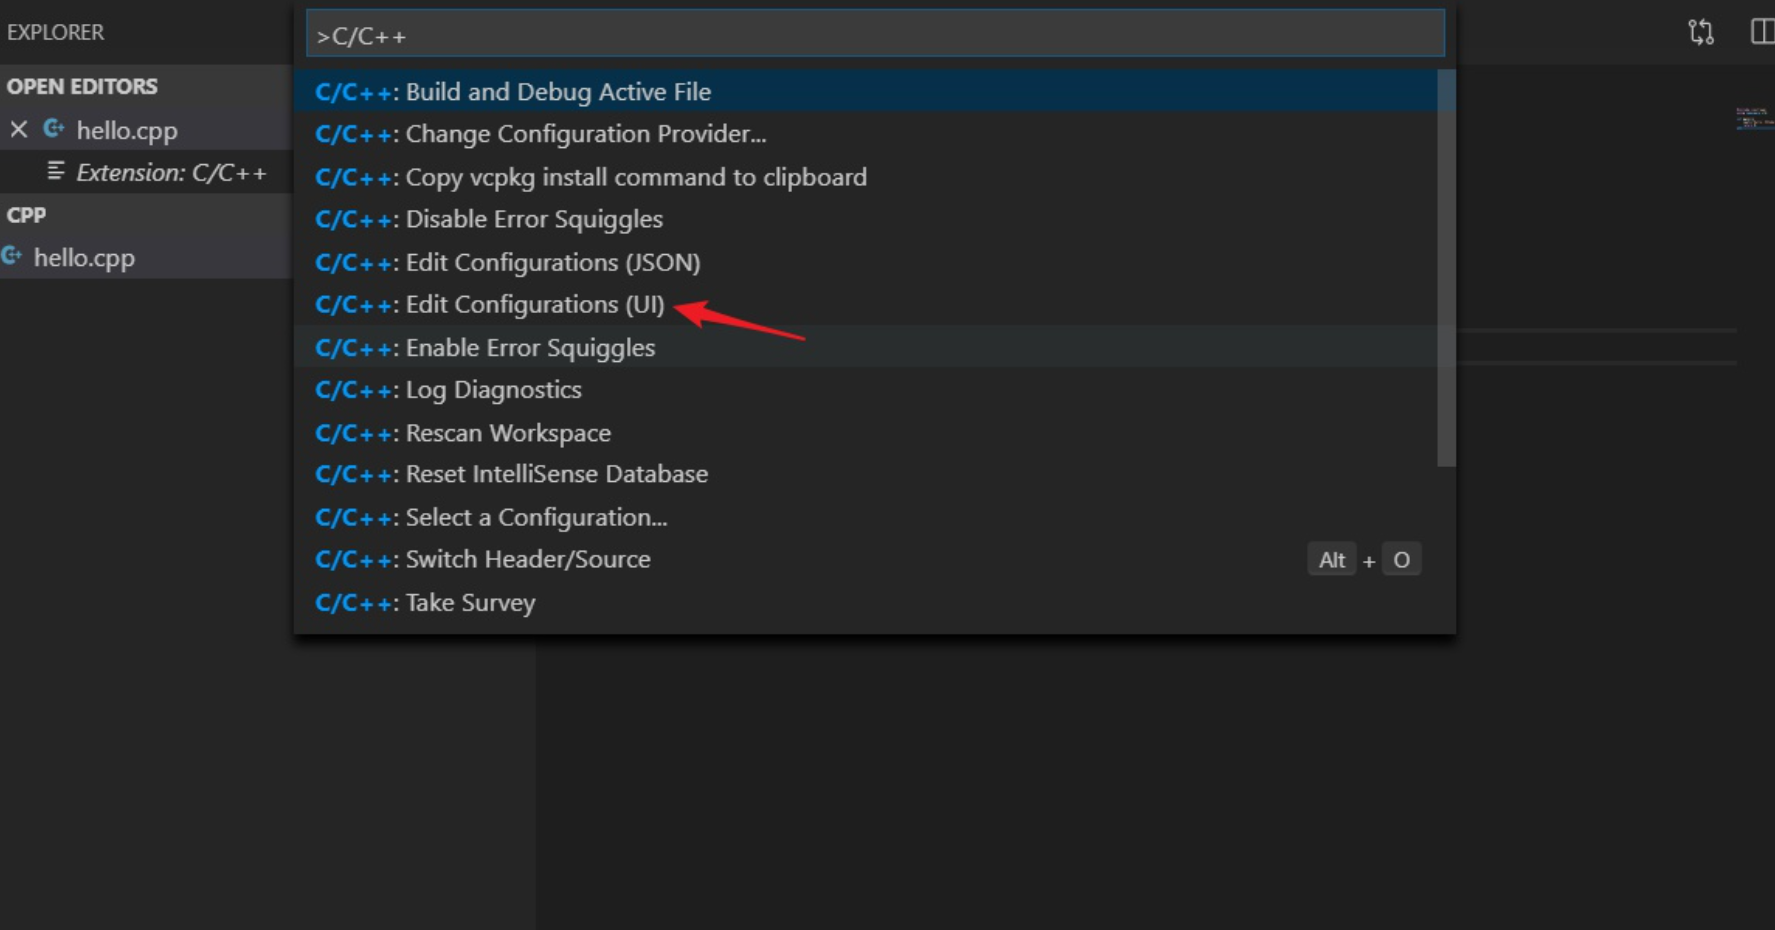
Configure the compiler path, call up the command panel by shortcut crtl+shift+p, enter C/C++, and select Edit Configurations(UI) to enter the configuration.
There are two properties to configure here, one is the compiler path: Author D:/mingw64/bin/g++.exe, which you configure according to your installation, and the other is IntelliSense mode: select gcc-x64(legacy), as shown in the following figure:

After successful configuration, you can see that there is one more.vscode folder on the left side and one more c_ Cpp_ The properties.json file. This compiler configuration is complete;
4.2 Configuration Build Tasks
Next, create a tasks.json file to tell VS Code how to build (compile) the program. This task calls the g++ compiler to create an executable based on the source code. Press the shortcut key Ctrl+Shift+P to bring up the command panel, enter tasks, and select Tasks:Configure Default Build Task:

Continue to select C/C++:g++.exe build active file

A configuration file named tasks.json appears as follows:
{
	"version": "2.0.0",
	"tasks": [
		{
			"type": "cppbuild",
			"label": "C/C++: g++.exe Generate Active File",
			"command": "D:/mingw64/bin/g++.exe",
			"args": [
				"-fdiagnostics-color=always",
				"-g",
				"${file}",
				"-o",
				"D:\\code\\C++\\exe\\${fileBasenameNoExtension}.exe"
			],
			"options": {
				"cwd": "D:/mingw64/bin"
			},
			"problemMatcher": [
				"$gcc"
			],
			"group": {
				"kind": "build",
				"isDefault": true
			},
			"detail": "Compiler: D:/mingw64/bin/g++.exe"
		}
	]
}
4.3 Configure debugging settings
The main purpose of this step is to generate a launch.json file in the.vscode folder to configure debugging information and write a hello C++ in C++! Program.
#include<iostream>
int main()
{
    using namespace std;
    cout << "Hello C++!";
}
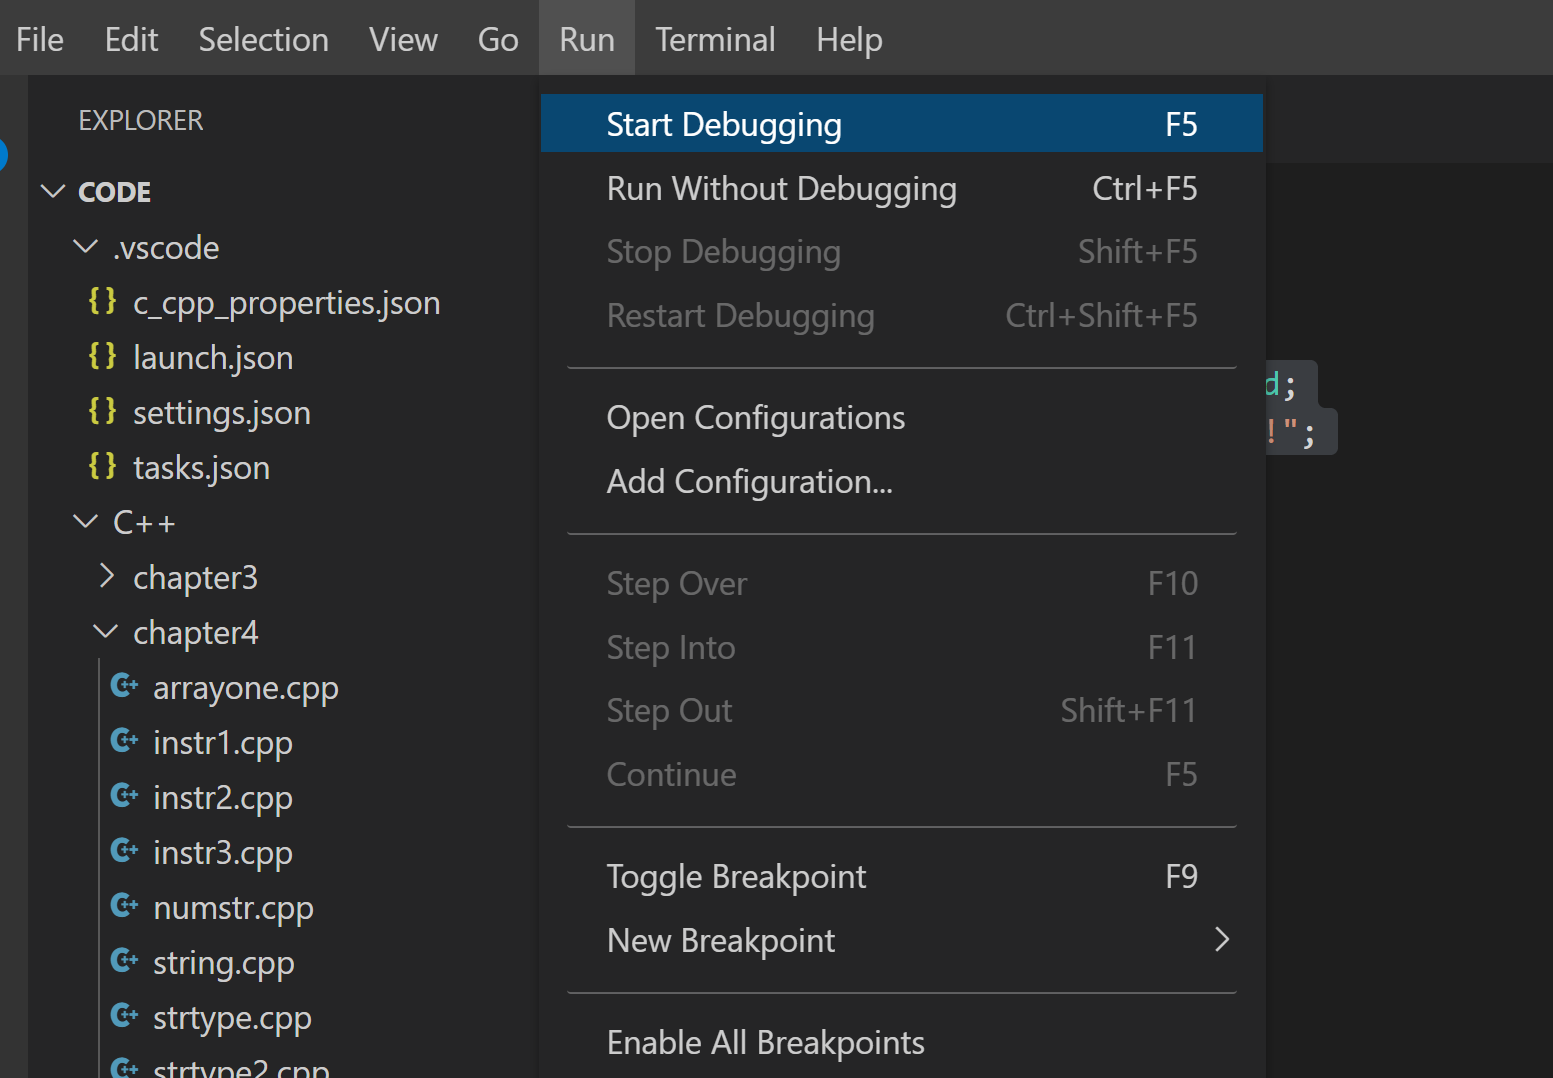
Then click on the menu bar Debug-->Start Debugging:
Select C++(GDB/LLDB):

Next, a launch.json appears with the following contents:
{
    // Use IntelliSense to learn about possible attributes.
    // Hover to view descriptions of existing attributes.
    // For more information, visit: https://go.microsoft.com/fwlink/?linkid=830387
    "version": "0.2.0",
    "configurations": [
        {
            "name": "g++.exe - Generate and debug active files",
            "type": "cppdbg",
            "request": "launch",
            "program": "D:\\code\\C++\\exe\\${fileBasenameNoExtension}.exe",
            "args": [],
            "stopAtEntry": false,
            "cwd": "D:/mingw64/bin",
            "environment": [],
            "externalConsole": false,
            "MIMode": "gdb",
            "miDebuggerPath": "D:\\mingw64\\bin\\gdb.exe",
            "setupCommands": [
                {
                    "description": "by gdb Enable neat printing",
                    "text": "-enable-pretty-printing",
                    "ignoreFailures": true
                }
            ],
            "preLaunchTask": "C/C++: g++.exe Generate Active File"
        }
    ]
}
Now that the configuration is successful, you can explore VsCode according to your own situation. I hope you can program smoothly. If you have any questions, you can ask them in the comments below.