
Source address: https://gitee.com/bingqilinpeishenme/Java-Tutorials
Preface
In the first three articles, the concepts related to microservices, spring cloud and service governance are introduced in large vernacular, and the development of spring cloud code starts from this article.
Spring cloud project environment construction
All demo s of spring cloud will adopt the method of multi Module development. The parent project restricts all Module versions of the whole project. If you don't know what is multi Module development, please read my article: SpringBoot multi Module development https://mp.weixin.qq.com/s/CDWnG0wr6hk6TvDYIELIaQ
Create parent project constraint version
The biggest function of the parent project is to constrain the version. Please follow the tutorial strictly for all steps, and there will be a comprehensive screenshot
1. Create a maven project in IDEA
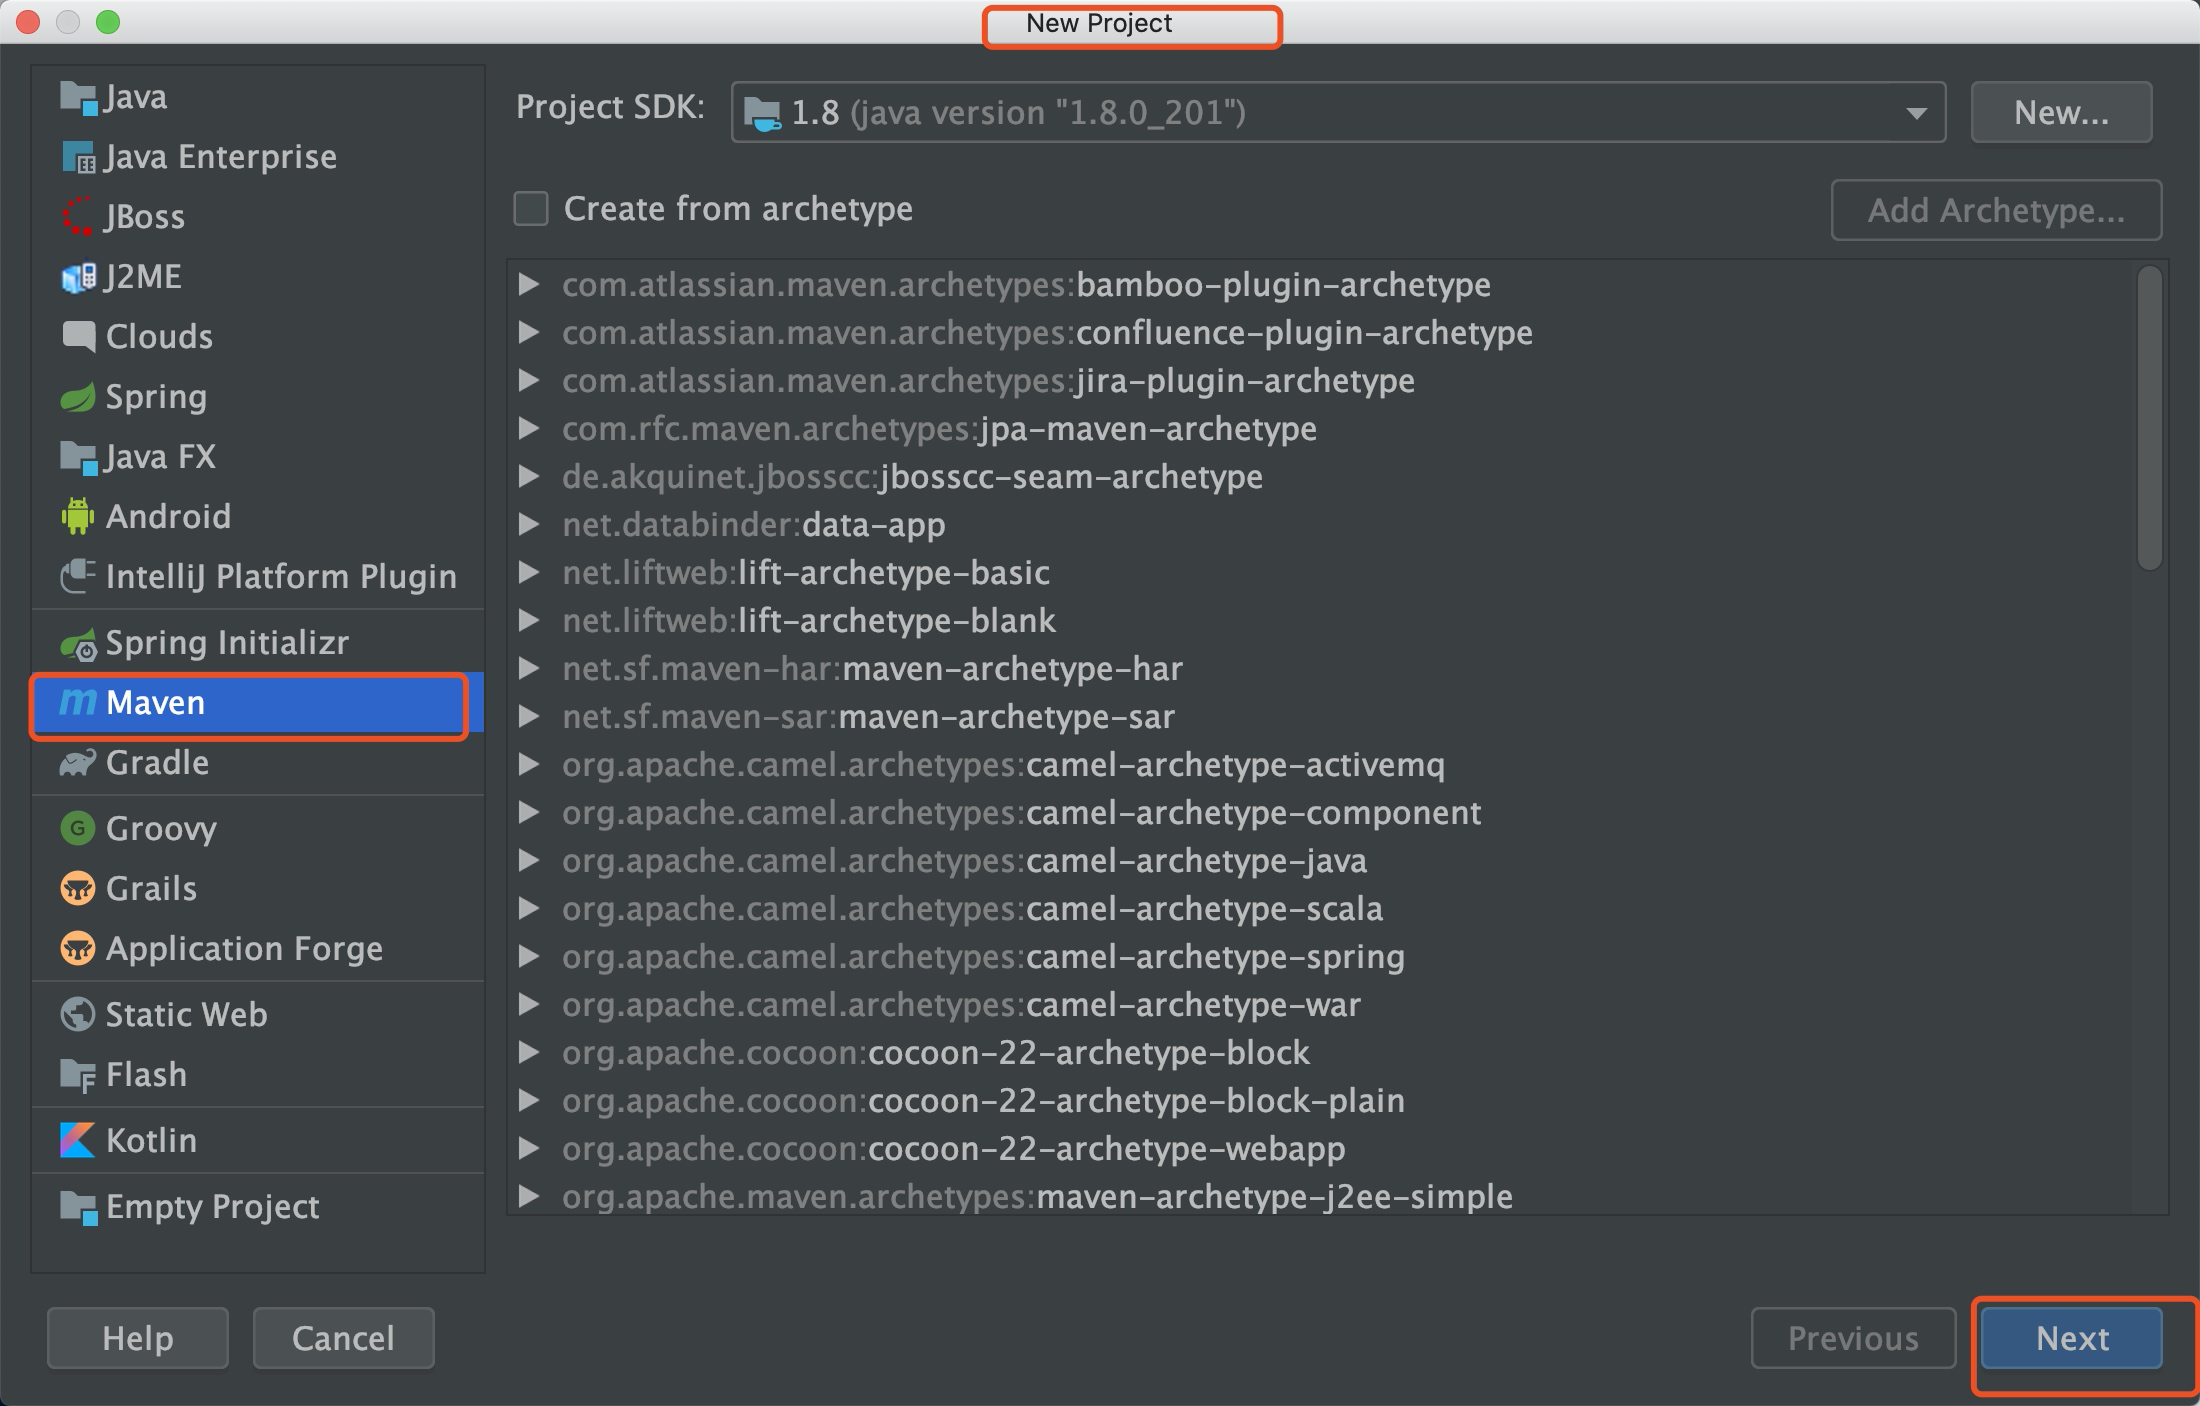

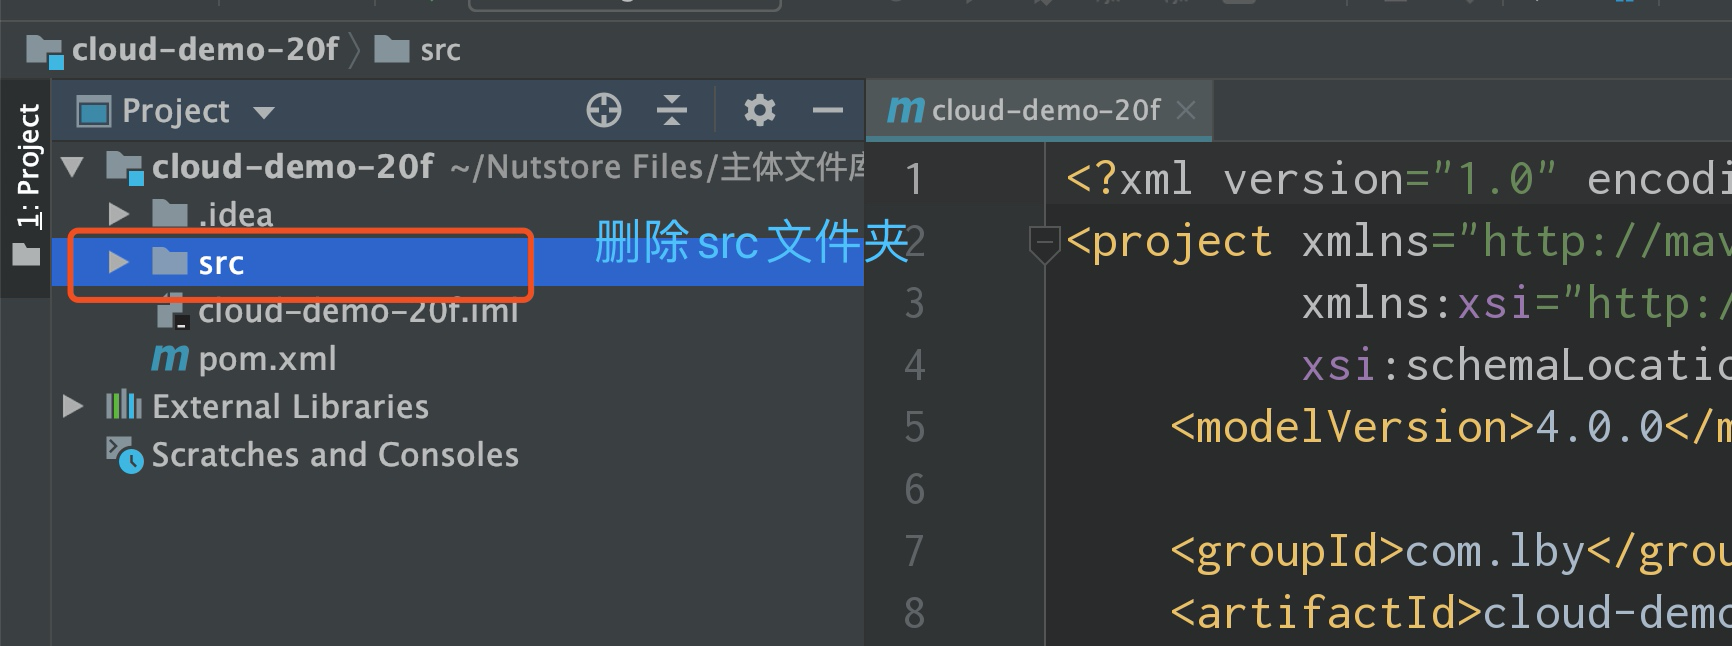
2. Modify pom file
Spring cloud version selection: Finchley.SR2, spring boot version selection: 2.0.3.RELEASE
The pom file is as follows:
<?xml version="1.0" encoding="UTF-8"?>
<project xmlns="http://maven.apache.org/POM/4.0.0"
         xmlns:xsi="http://www.w3.org/2001/XMLSchema-instance"
         xsi:schemaLocation="http://maven.apache.org/POM/4.0.0 http://maven.apache.org/xsd/maven-4.0.0.xsd">
    <modelVersion>4.0.0</modelVersion>


    <!--Finchley Versions SpringCloud Rely on 2.0.X Of SpringBoot -->
    <parent>
        <groupId>org.springframework.boot</groupId>
        <artifactId>spring-boot-starter-parent</artifactId>
        <version>2.0.3.RELEASE</version>
        <relativePath/> <!-- lookup parent from repository -->
    </parent>


    <groupId>com.lby</groupId>
    <artifactId>cloud-demo-20f</artifactId>
    <version>1.0-SNAPSHOT</version>
    <!--    Parent project use pom-->
    <packaging>pom</packaging>

    <properties>
        <java.version>1.8</java.version>
        <!--        Definition SpringCloud Version number-->
        <spring-cloud.version>Finchley.SR2</spring-cloud.version>
    </properties>

    <!--    Constrains the SpringCloud Edition-->
    <dependencyManagement>
        <dependencies>
            <dependency>
                <groupId>org.springframework.cloud</groupId>
                <artifactId>spring-cloud-dependencies</artifactId>
                <version>${spring-cloud.version}</version>
                <type>pom</type>
                <scope>import</scope>
            </dependency>
        </dependencies>
    </dependencyManagement>

    <!--    Plug-in configuration-->
    <build>
        <plugins>
            <plugin>
                <groupId>org.springframework.boot</groupId>
                <artifactId>spring-boot-maven-plugin</artifactId>
            </plugin>
        </plugins>
    </build>

</project>
Eureka registration center develops "stand alone version"
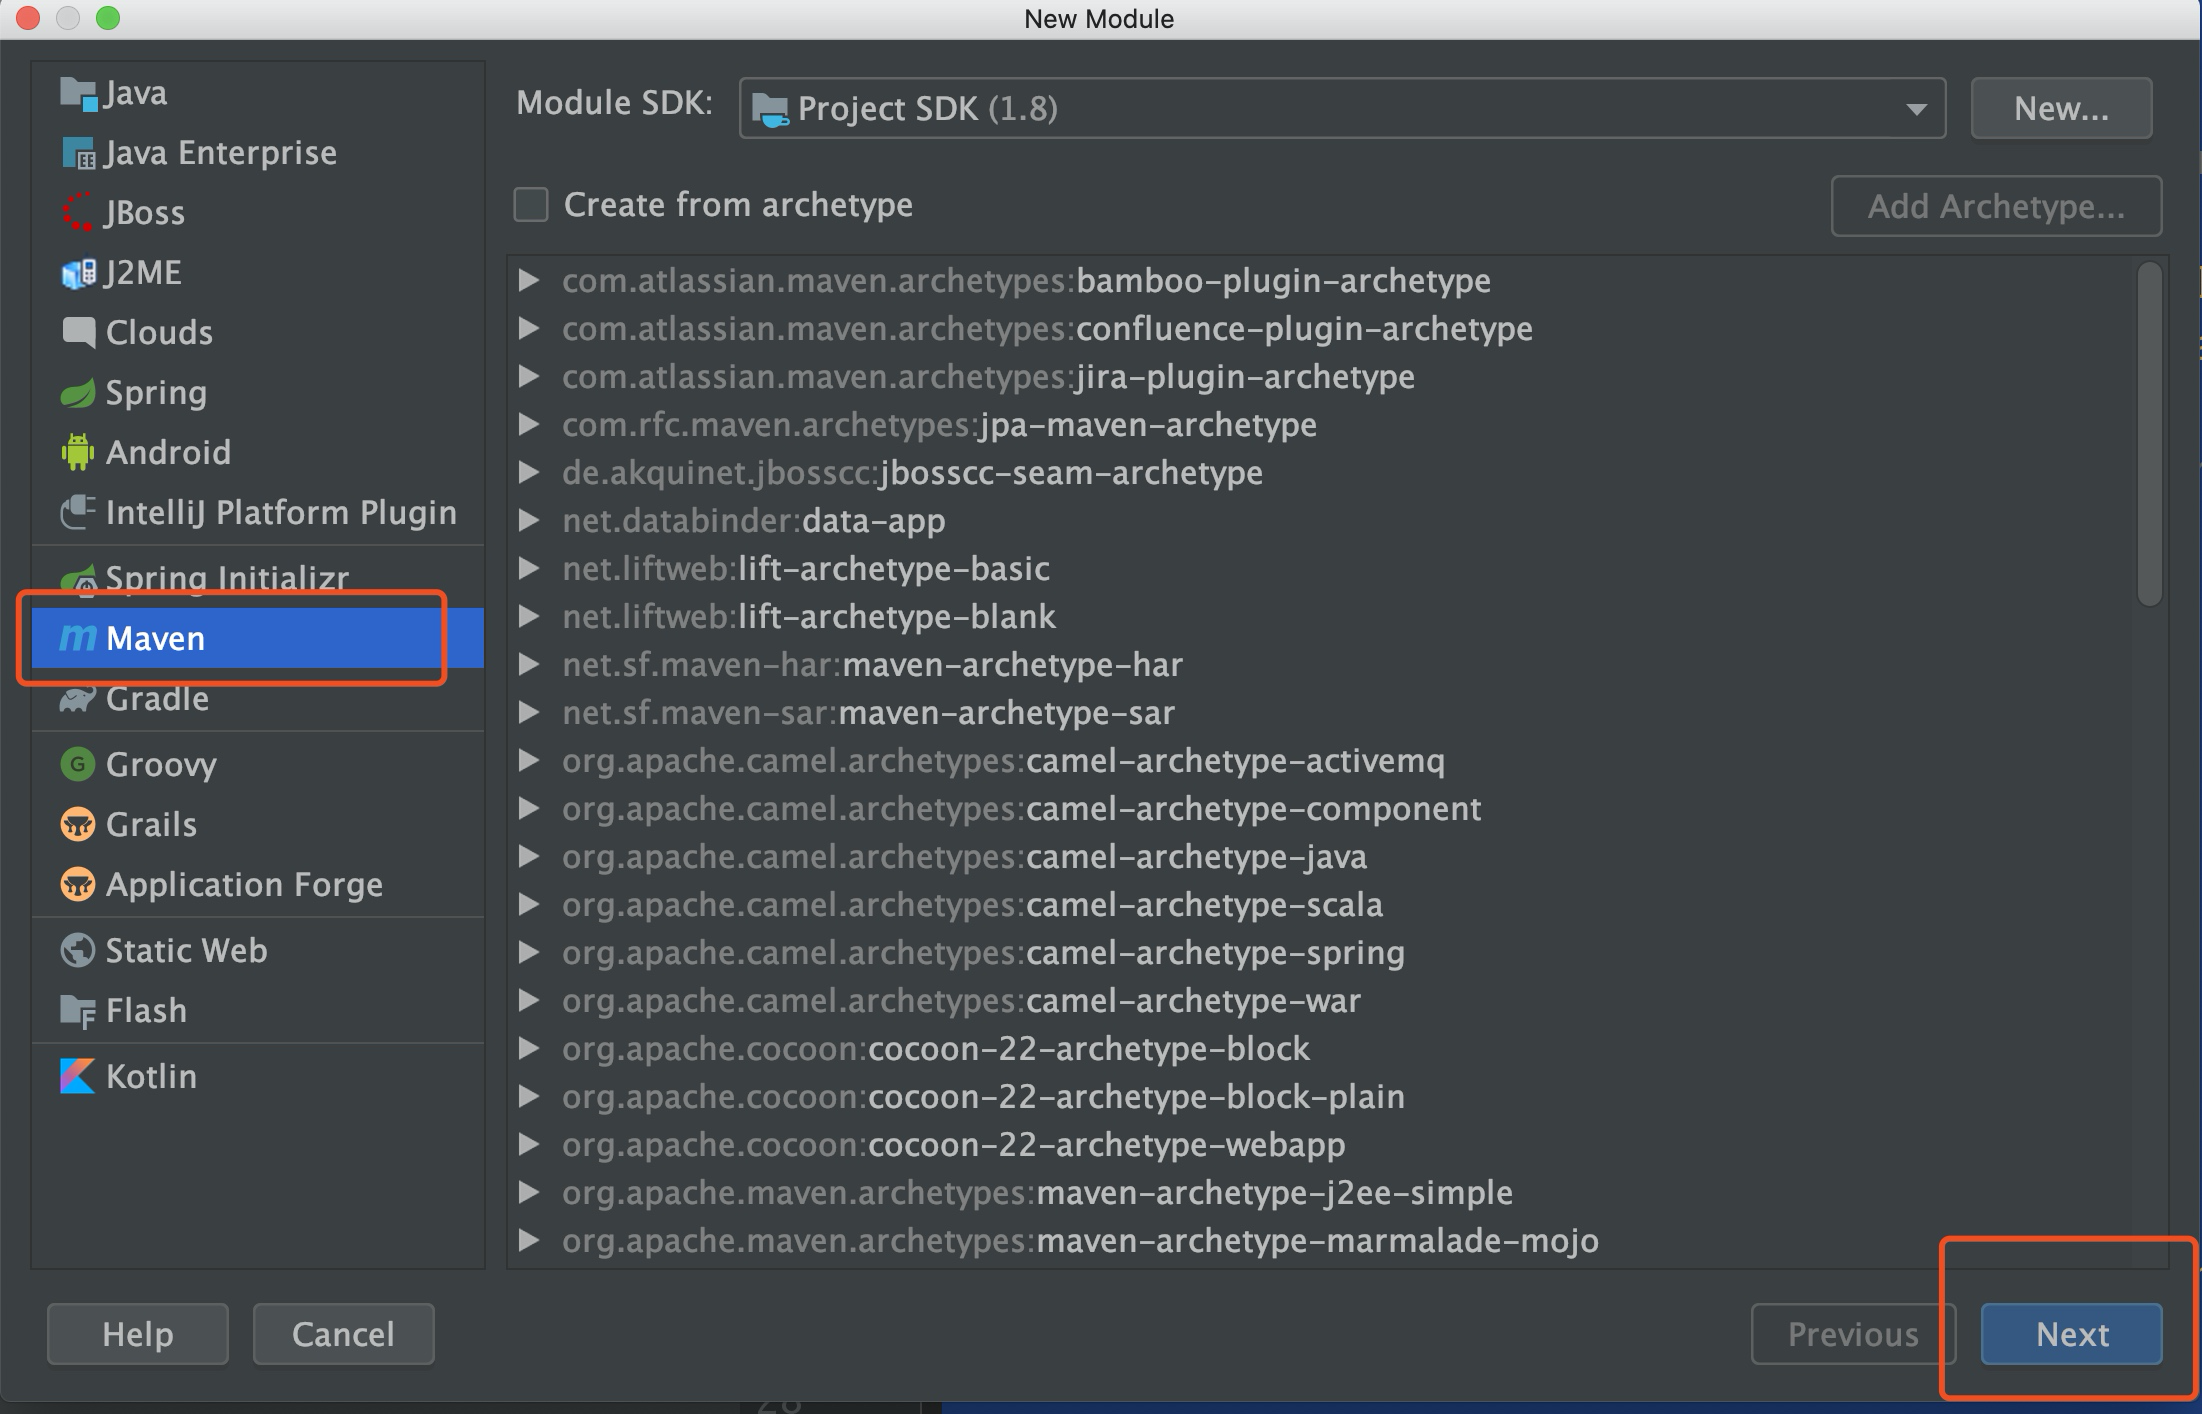
1. Create a new Module based on Project

As for the skeleton, don't choose any skeleton. maven or Spring Initializr mainly depends on personal habits. I choose maven.


2. Modify pom file of eureka-server-8801 project
Looking at the pom file, we can see that the eureka-server-8801 project has automatically inherited the parent project
Full pom configuration of the registry:
<?xml version="1.0" encoding="UTF-8"?>
<project xmlns="http://maven.apache.org/POM/4.0.0"
         xmlns:xsi="http://www.w3.org/2001/XMLSchema-instance"
         xsi:schemaLocation="http://maven.apache.org/POM/4.0.0 http://maven.apache.org/xsd/maven-4.0.0.xsd">
<!--    adopt maven You can see that the parent project has been automatically inherited from the project created by the
    Just configure dependencies
-->
    <parent>
        <artifactId>cloud-demo-20f</artifactId>
        <groupId>com.lby</groupId>
        <version>1.0-SNAPSHOT</version>
    </parent>
    <modelVersion>4.0.0</modelVersion>

    <artifactId>eureka-server-8801</artifactId>

    <dependencies>
<!--        Import registry dependencies-->
        <dependency>
            <groupId>org.springframework.cloud</groupId>
            <artifactId>spring-cloud-starter-netflix-eureka-server</artifactId>
        </dependency>
    </dependencies>

</project>
3. Create the startup class of SpringBoot and add comments
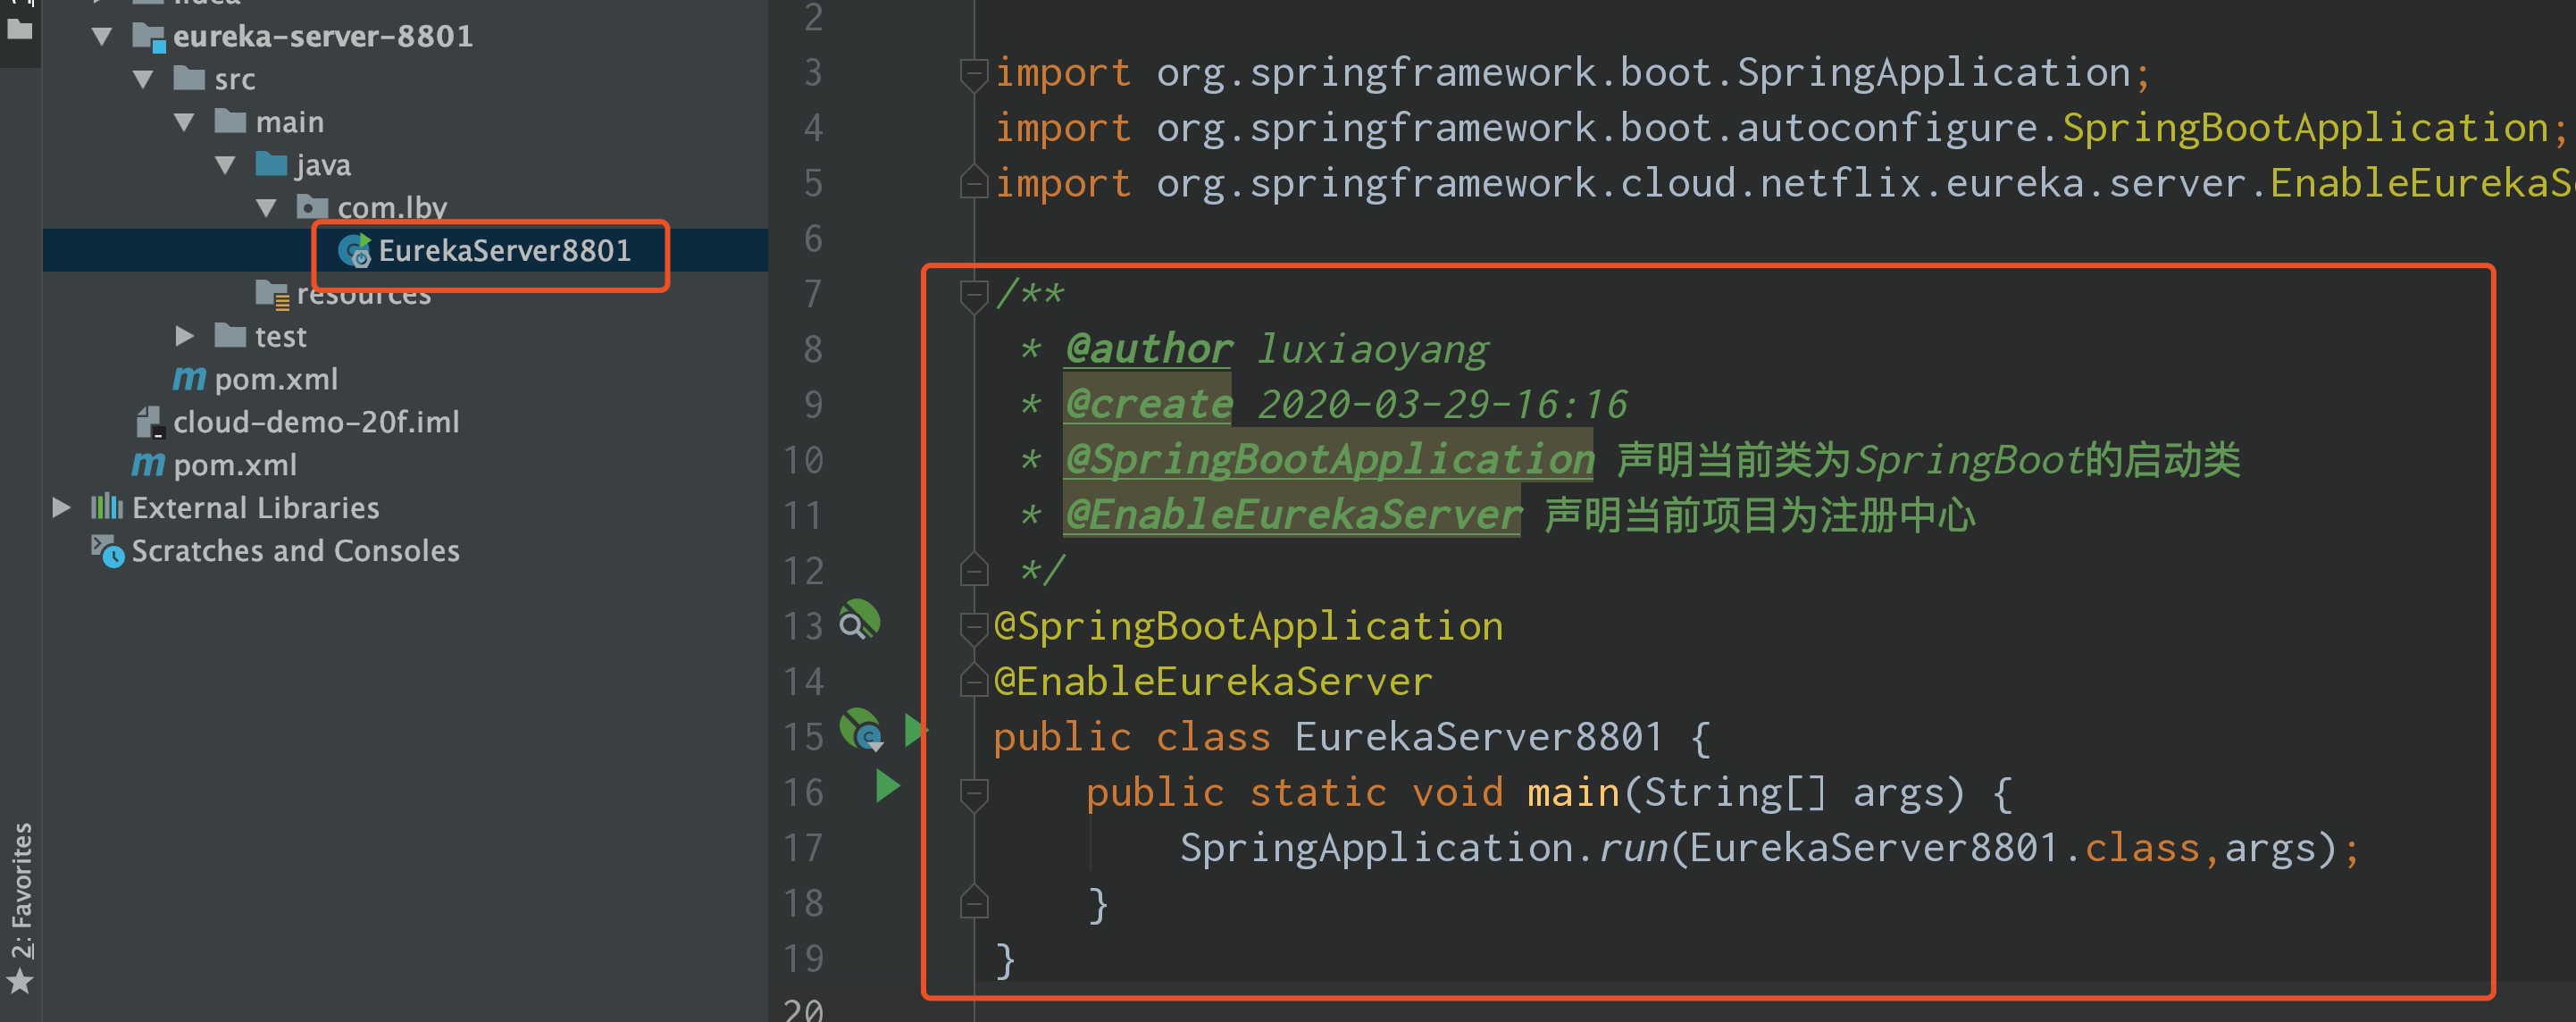
The code is as follows:
package com.lby;

import org.springframework.boot.SpringApplication;
import org.springframework.boot.autoconfigure.SpringBootApplication;
import org.springframework.cloud.netflix.eureka.server.EnableEurekaServer;

/**
 * @author luxiaoyang
 * @create 2020-03-29-16:16
 * @SpringBootApplication Declare that the current class is the startup class of SpringBoot
 * @EnableEurekaServer Declare the current project as a registry
 */
@SpringBootApplication
@EnableEurekaServer
public class EurekaServer8801 {
    public static void main(String[] args) {
        SpringApplication.run(EurekaServer8801.class,args);
    }
}
4. Create a configuration file and write the configuration to the registry
server:
  port: 8801

eureka:
  client:
    #    By default, the service registry will also try to register itself as a client, so we need to disable its client registration behavior
    #     Because the current service is that the registry does not need to register with anyone
    #    Eureka.client. Register with Eureka: since the app is a registry, setting it to false means that you will not register yourself with the registry
    registerWithEureka: false
    #    Eureka. Client. Fetch registry: since the registry is responsible for maintaining service instances, it does not need to retrieve services, so it is also set to false.
    #      Don't take the initiative to discover others
    fetchRegistry: false
    #    Address of declaration Center
    serviceUrl:
      defaultZone: http://localhost:8801/eureka/
Through the above four steps to complete the construction of the registration center
5. Start the project and visit http://localhost:8801 to access the administration page of the registration center
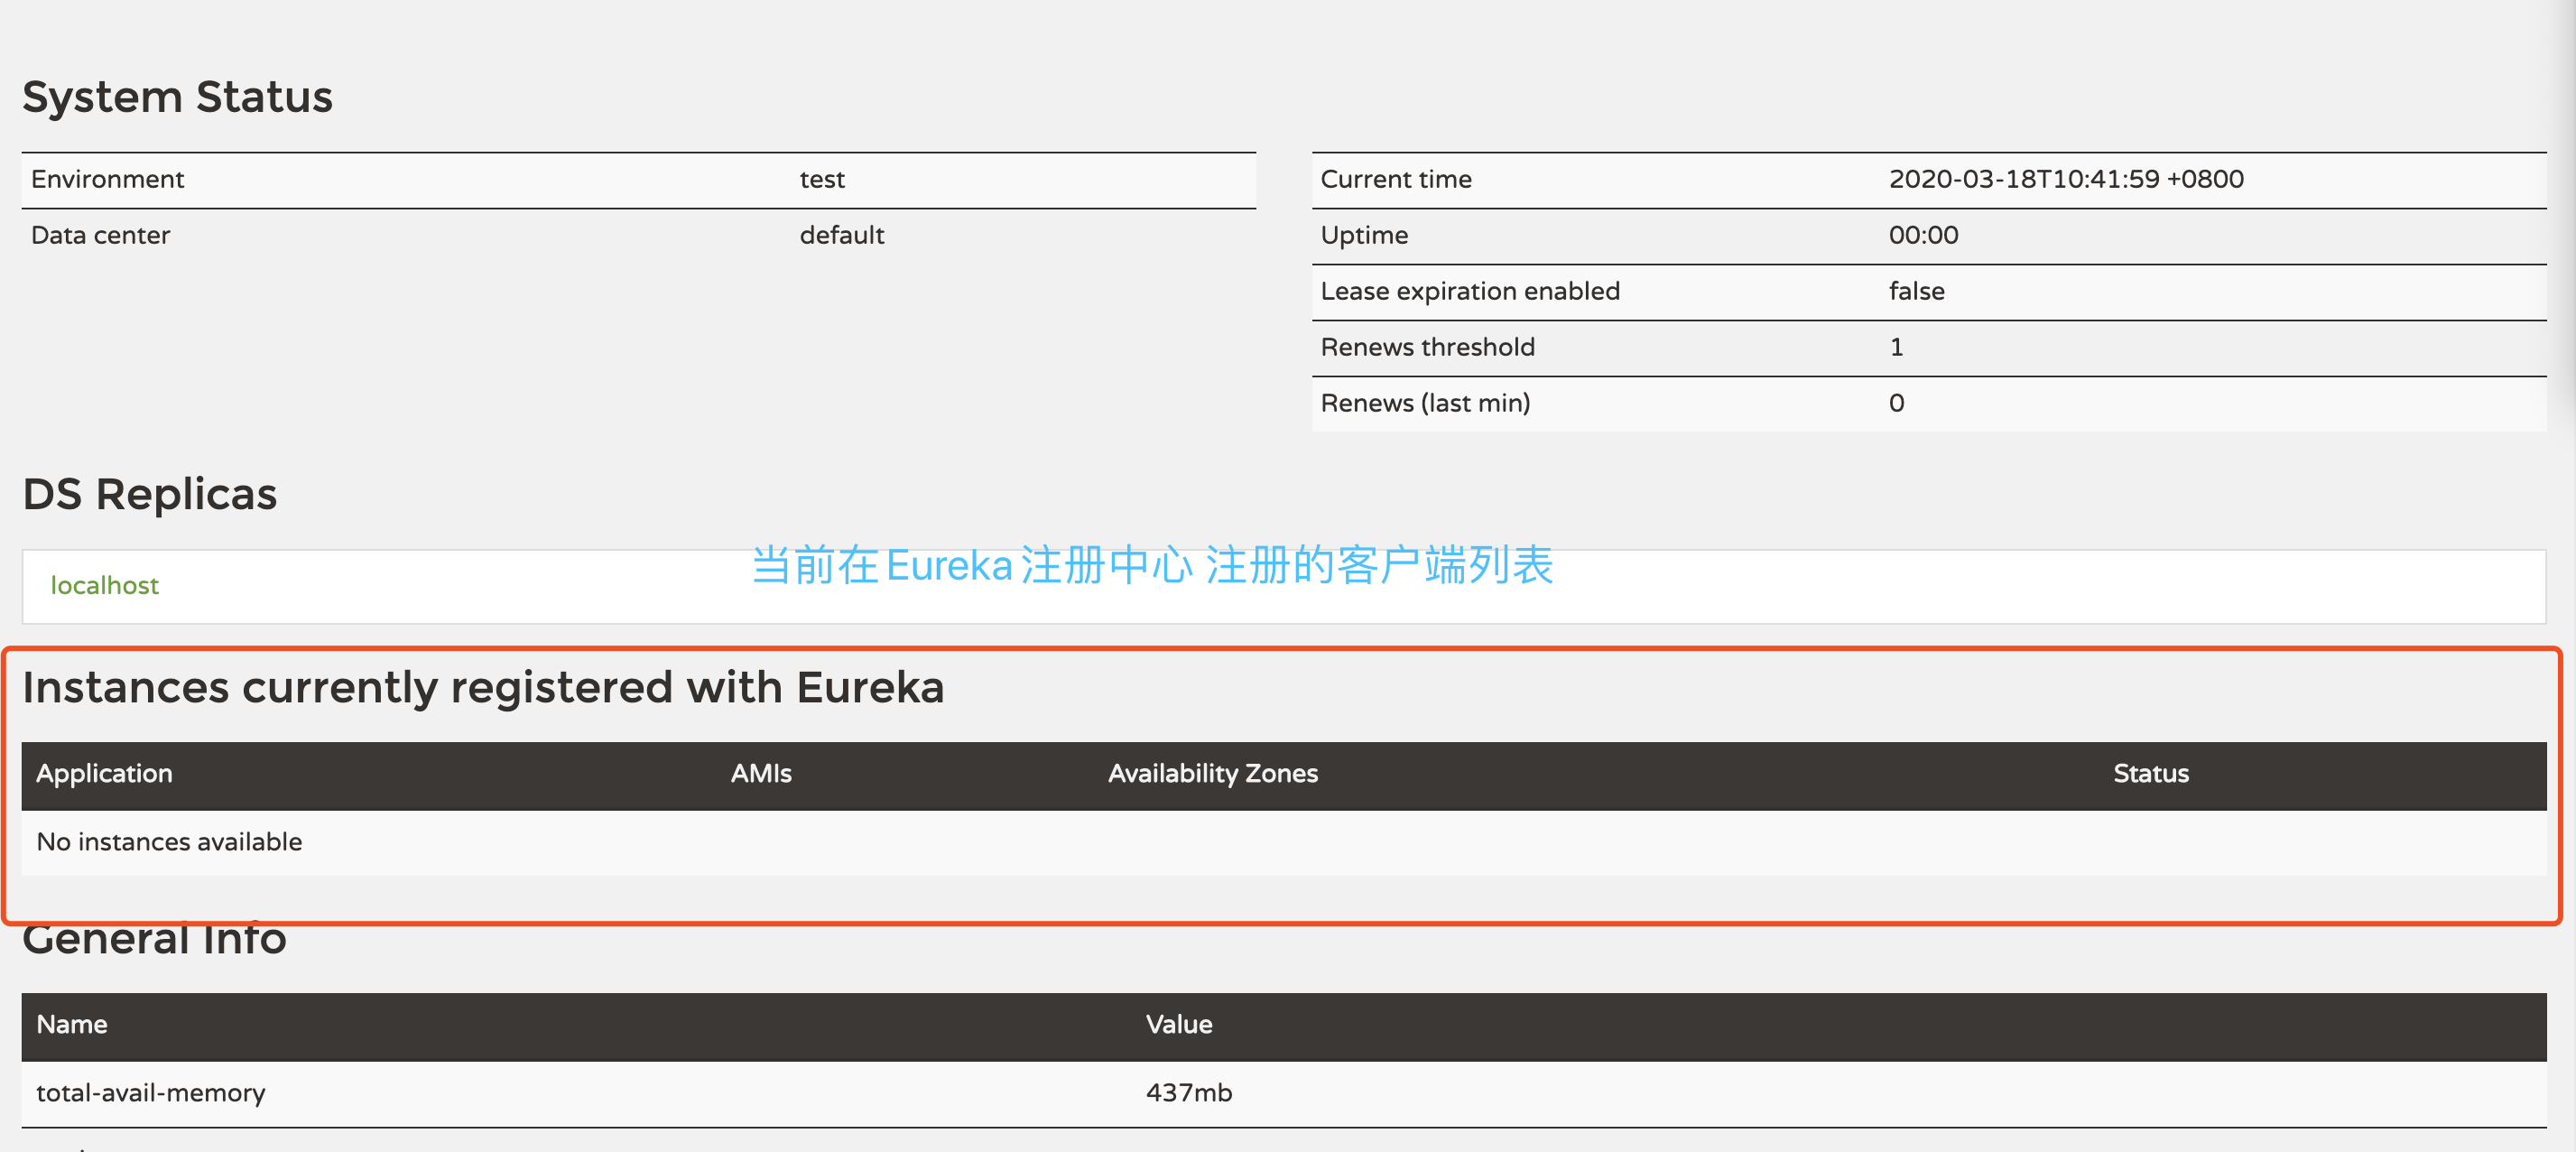
No application available currently no client is registered in the registry
Eureka client development
Instead of closing the registry, create a client to register the client with the registry
The steps for creating a client are similar to those for a registry
- Create project structure
- Modify pom
- Modify startup class
- Modify configuration file
1. Create the client project eureka-client-8803


2. Modify pom file and import dependency
<?xml version="1.0" encoding="UTF-8"?>
<project xmlns="http://maven.apache.org/POM/4.0.0"
         xmlns:xsi="http://www.w3.org/2001/XMLSchema-instance"
         xsi:schemaLocation="http://maven.apache.org/POM/4.0.0 http://maven.apache.org/xsd/maven-4.0.0.xsd">
    <parent>
        <artifactId>cloud-demo-20f</artifactId>
        <groupId>com.lby</groupId>
        <version>1.0-SNAPSHOT</version>
    </parent>
    <modelVersion>4.0.0</modelVersion>

    <artifactId>eureka-client-8803</artifactId>

    <dependencies>
        <!--        Eureka Client dependency-->
        <dependency>
            <groupId>org.springframework.cloud</groupId>
            <artifactId>spring-cloud-starter-netflix-eureka-client</artifactId>
        </dependency>

        <!--        web Dependence-->
        <dependency>
            <groupId>org.springframework.boot</groupId>
            <artifactId>spring-boot-starter-web</artifactId>
        </dependency>

        <!--        Test dependency-->
        <dependency>
            <groupId>org.springframework.boot</groupId>
            <artifactId>spring-boot-starter-test</artifactId>
            <scope>test</scope>
        </dependency>
    </dependencies>
</project>
3. Create startup class
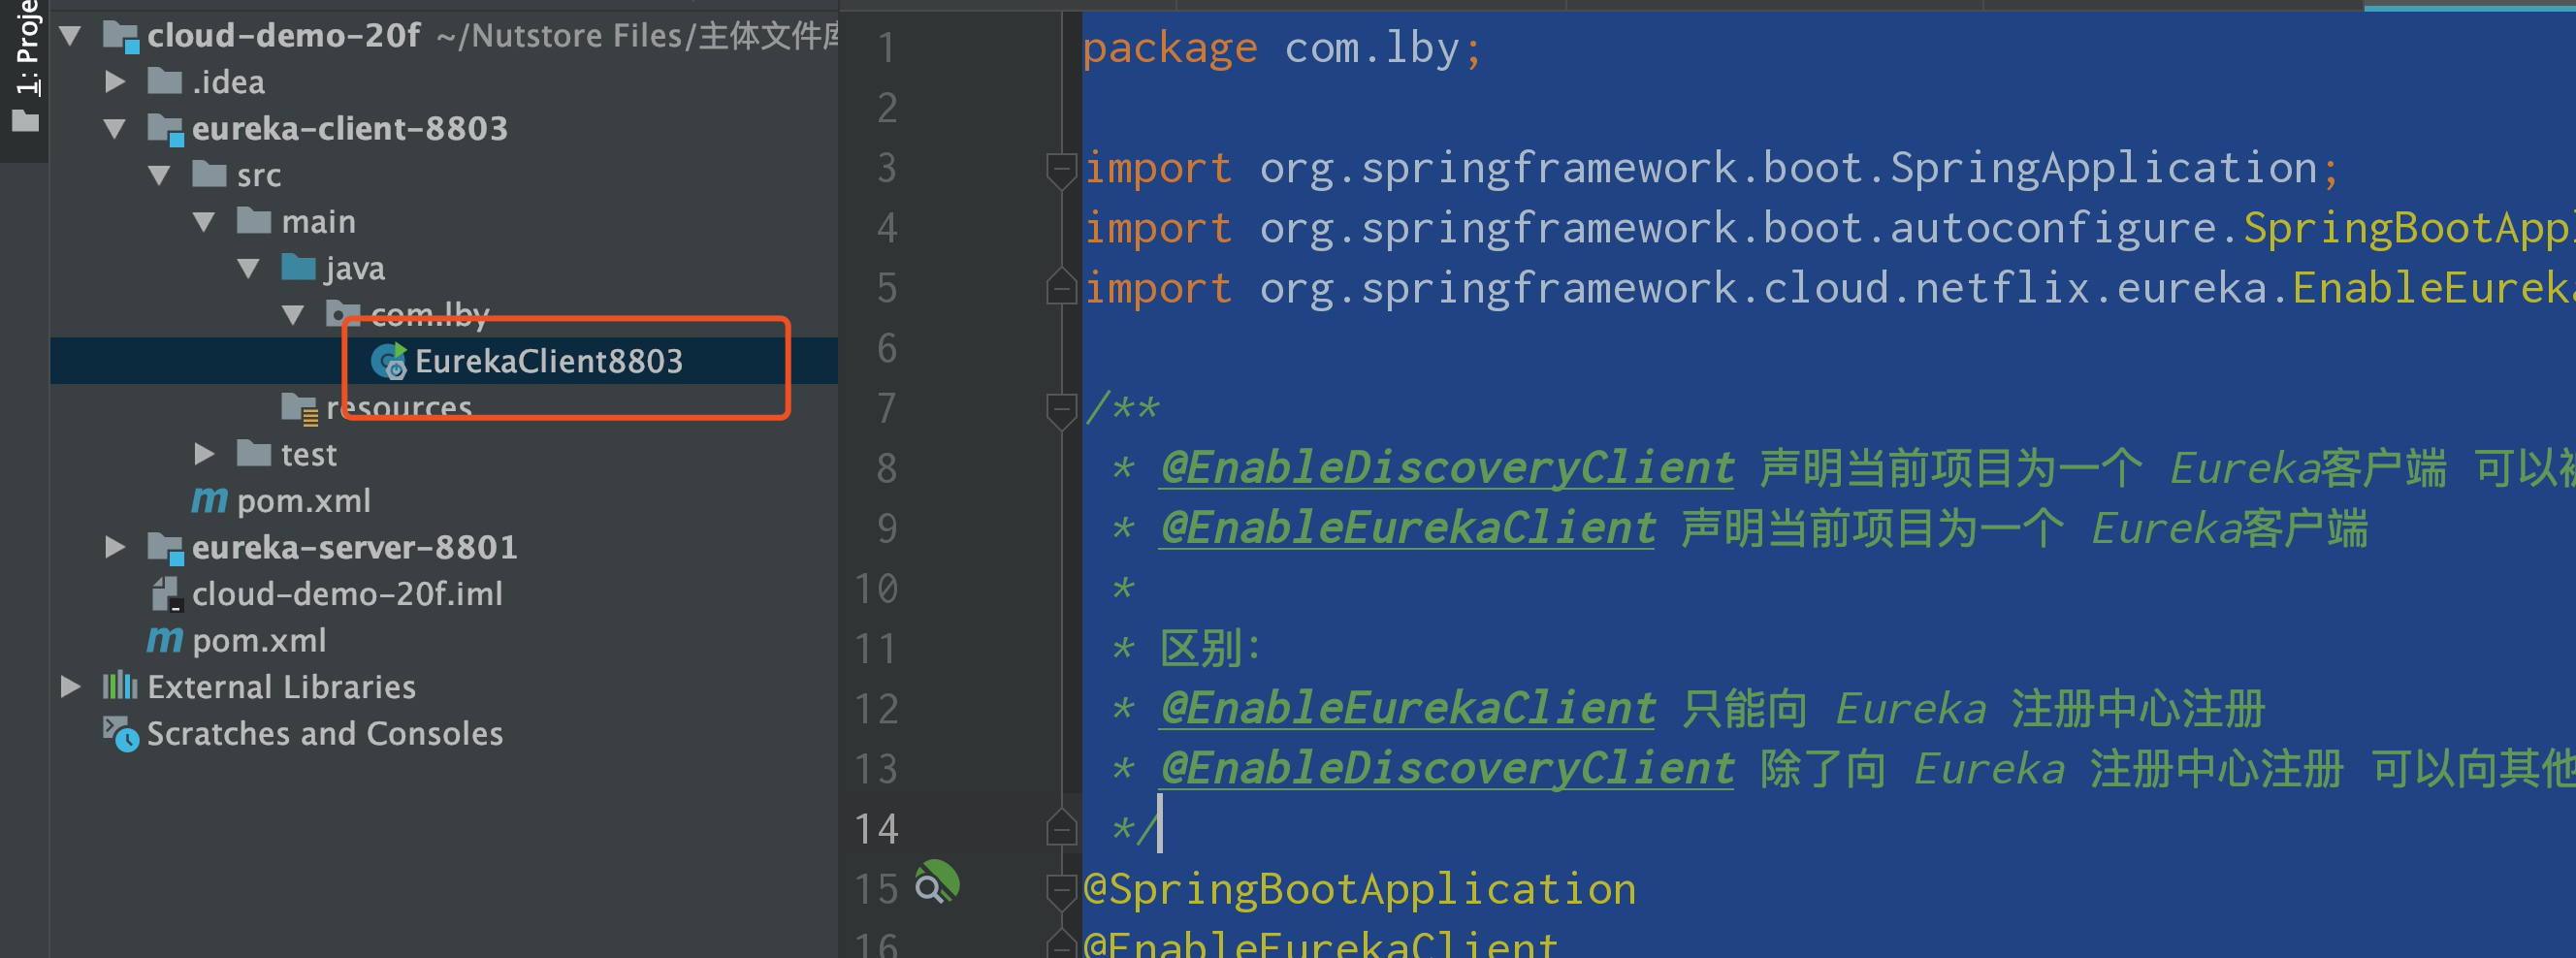
package com.lby;

import org.springframework.boot.SpringApplication;
import org.springframework.boot.autoconfigure.SpringBootApplication;
import org.springframework.cloud.netflix.eureka.EnableEurekaClient;

/**
 * @EnableDiscoveryClient Declare the current project as an Eureka client that can be found
 * @EnableEurekaClient Declare the current project as an Eureka client
 *
 * Difference:
 * @EnableEurekaClient You can only register with Eureka registry
 * @EnableDiscoveryClient In addition to registering with Eureka, you can register zookeeper consumer with other registries
 */
@SpringBootApplication
@EnableEurekaClient
public class EurekaClient8803 {
    public static void main(String[] args) {
        SpringApplication.run(EurekaClient8803.class,args);
    }
}
4. Create and modify the configuration file
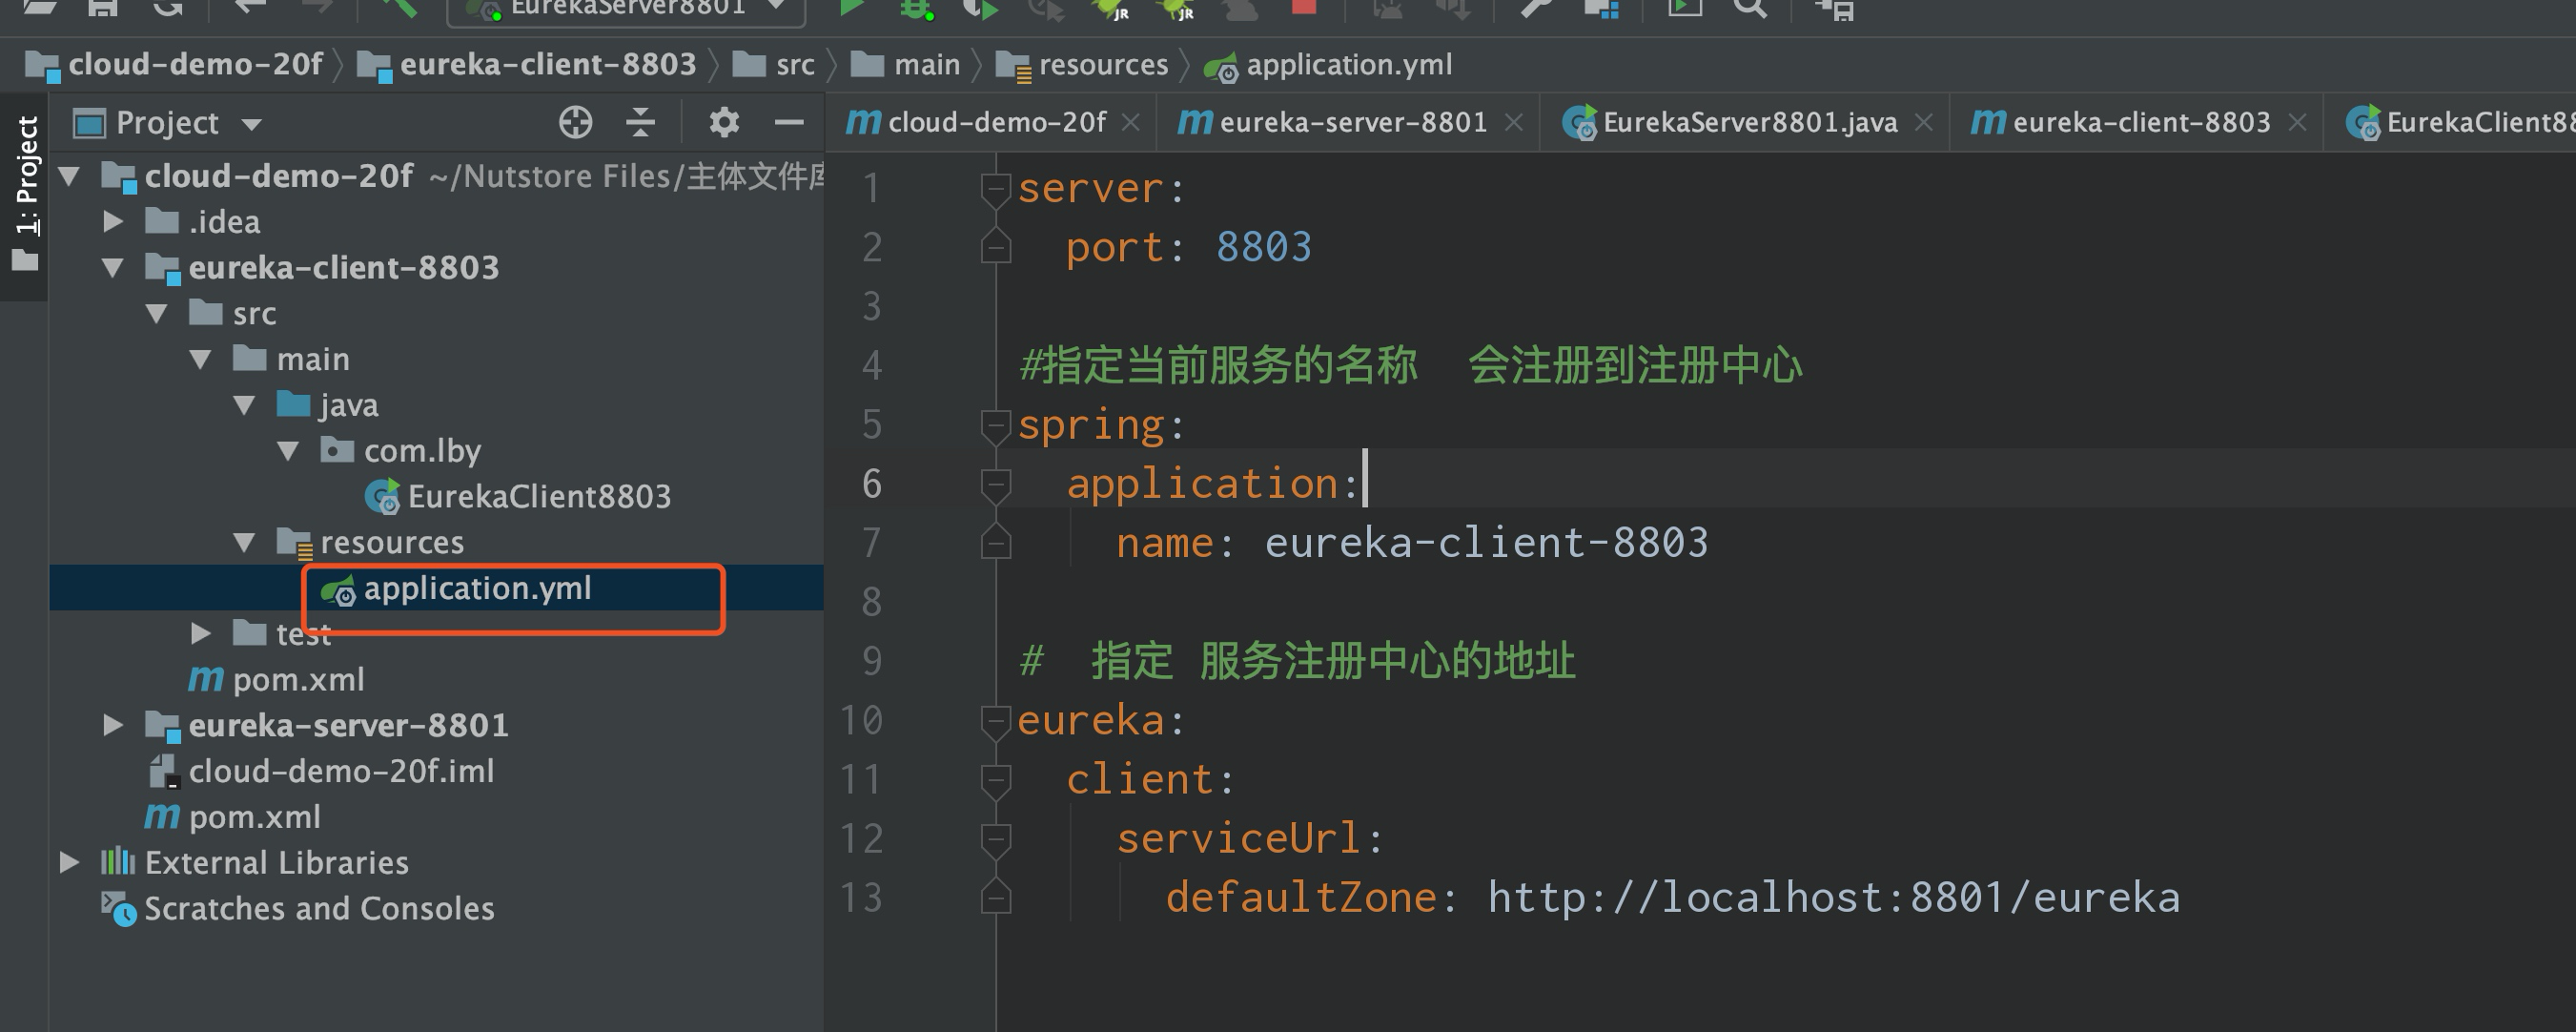
Through the above four steps, the setup of an Eureka client is completed
5. Start the project and observe the monitoring page of the registration center to see if there is any service registered in the registration center
Make sure the registry and client are up
You can see the website of the registration center at http://localhost:8803
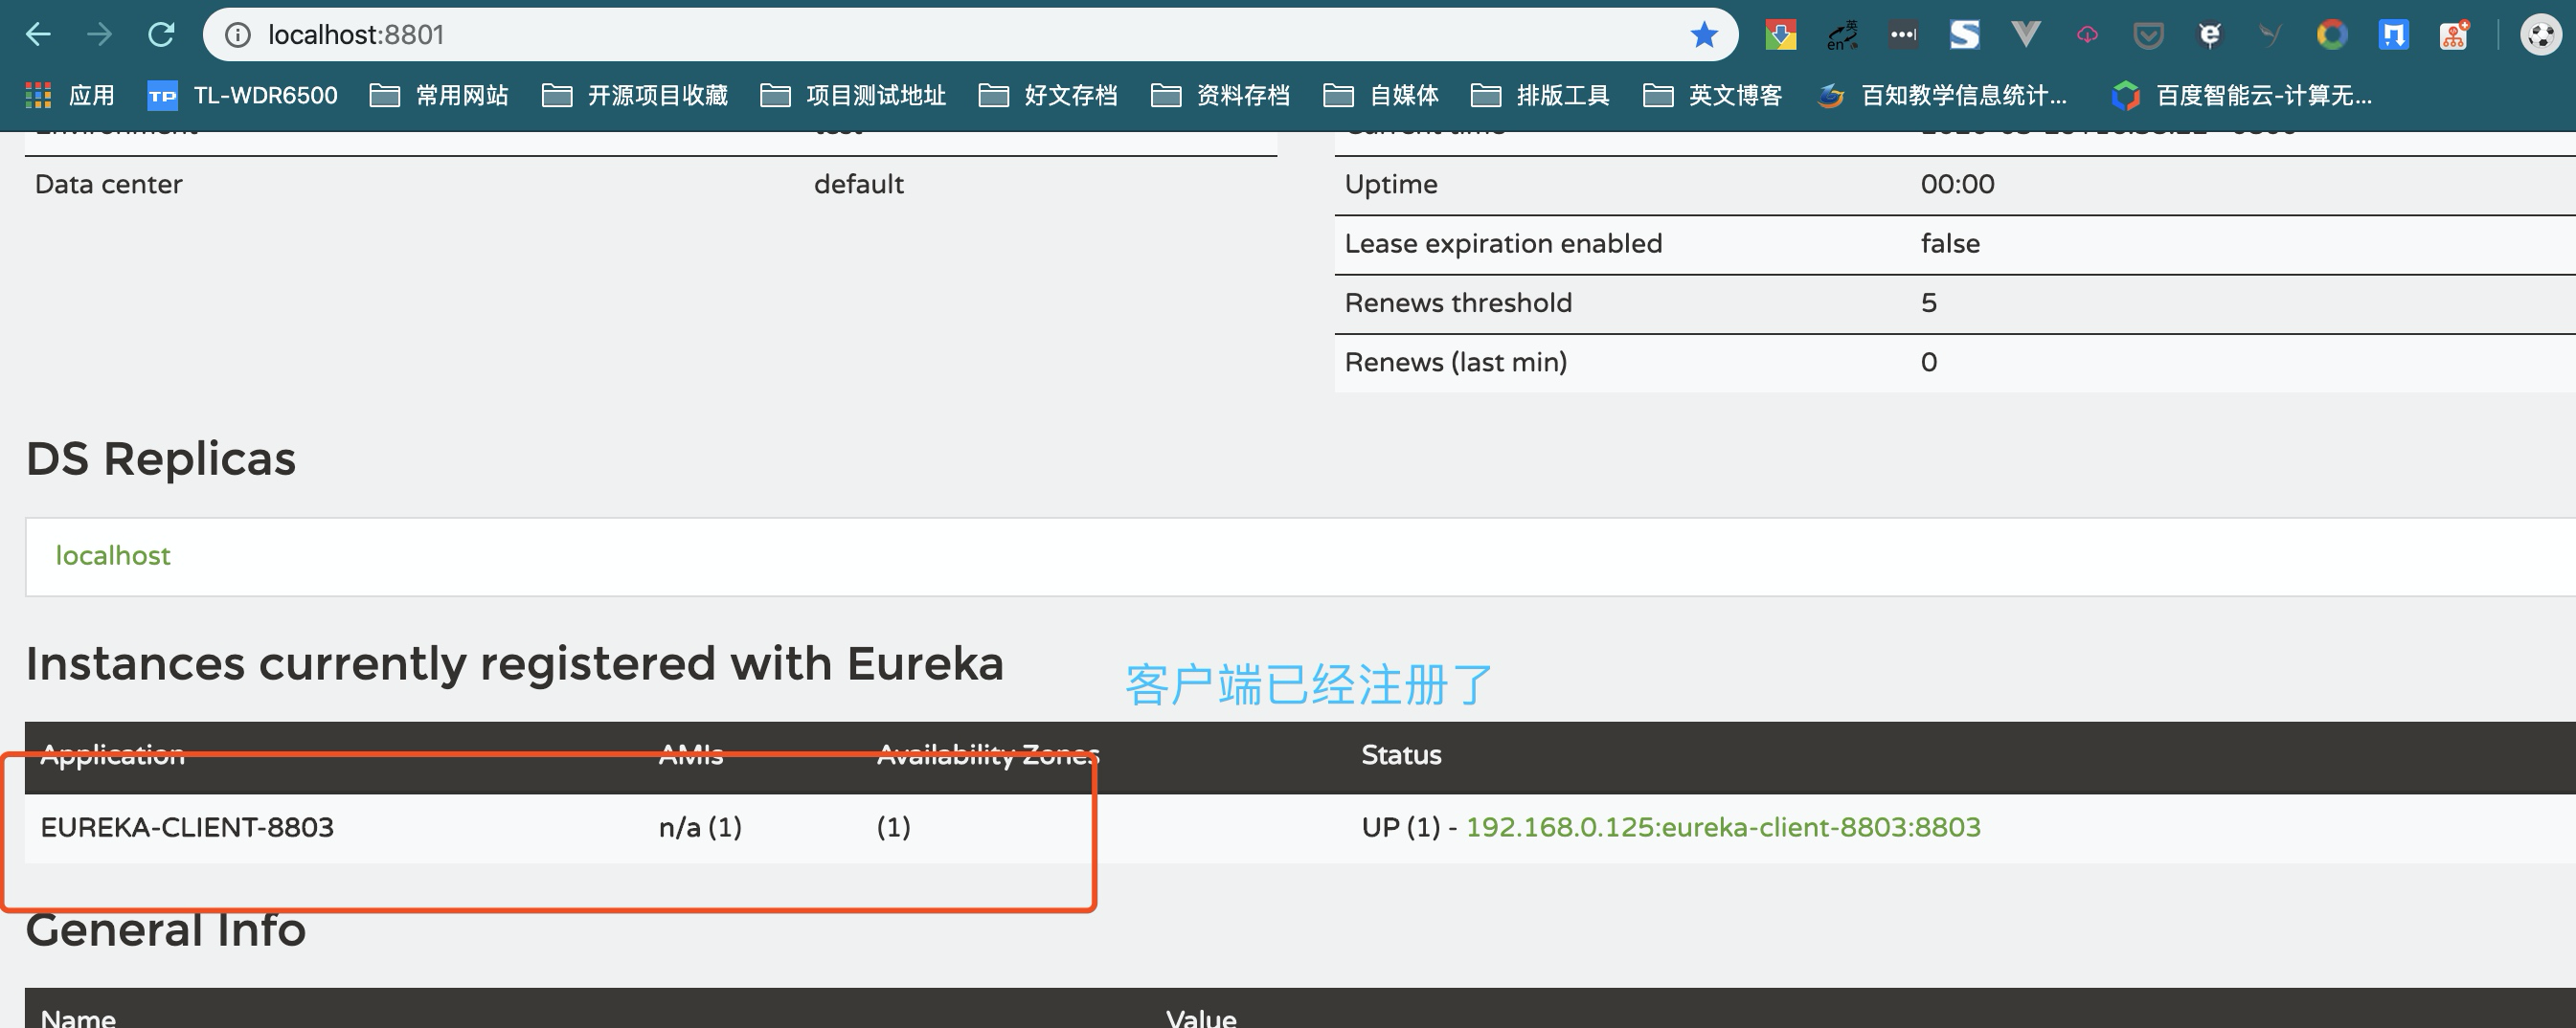
Through the above steps, we have completed the development of the most basic registry and client
summary
Source address: https://gitee.com/bingqilinpeishenme/Java-Tutorials
Through spring cloud for microservice development, almost all components of spring cloud are four axes, whether it is a registry, a client, or a gateway
- Import dependency
- Annotate startup class
- Write profile
- Direct use
Congratulations on the completion of this chapter, applaud for you! If this article is helpful to you, please like it, comment and forward it. It's very important for the author. Thank you.

To learn more about spring cloud usage, stay tuned for this series of tutorials.
For attention, for approval, for forwarding
Welcome to my official account: Mr. Lu's Java notes will be updated in Java technology tutorials and video tutorials, Java learning experience, Java interview experience and Java practical development experience.