Articles Catalogue
Before completing this article, the communication between V-REP and Python must be completed. Joint simulation of Python and V-REP
V-REP End Operation
1. Open scene
UR5plusRG2_PickAndPlaceDemo1.ttt
2. Add vision sensor
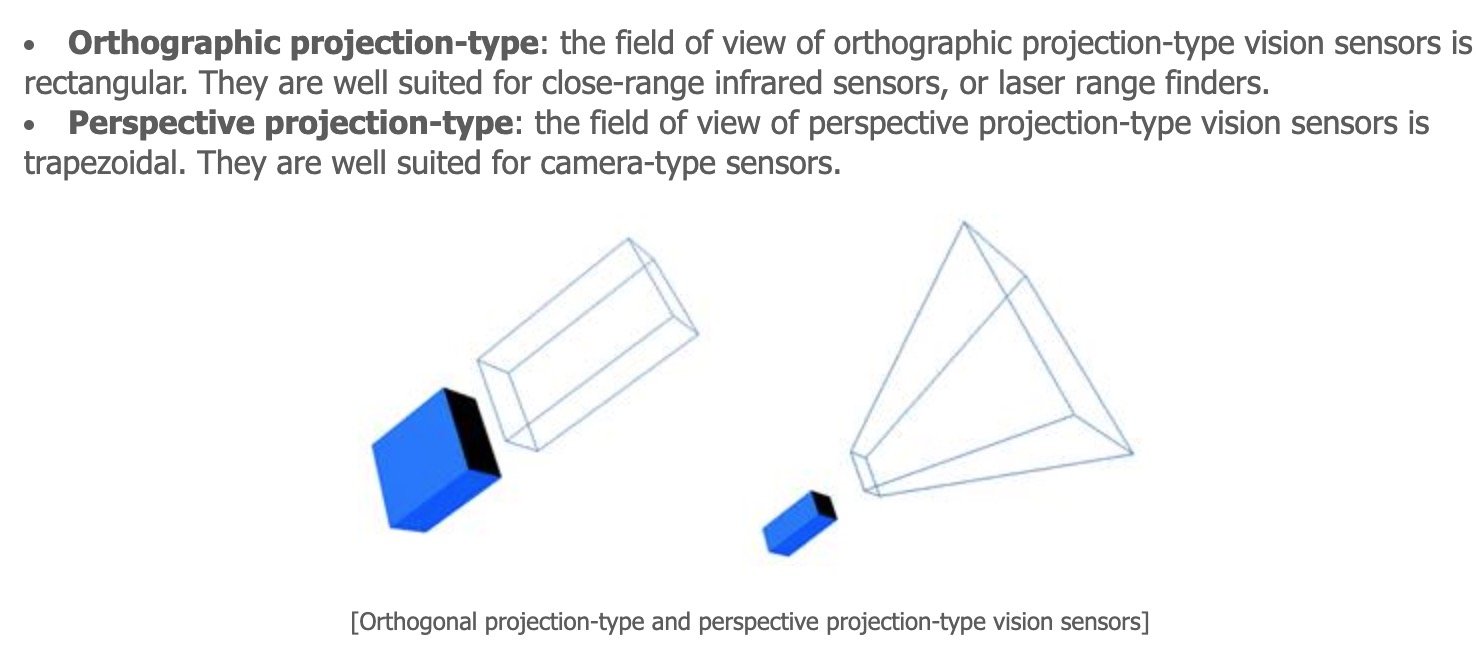
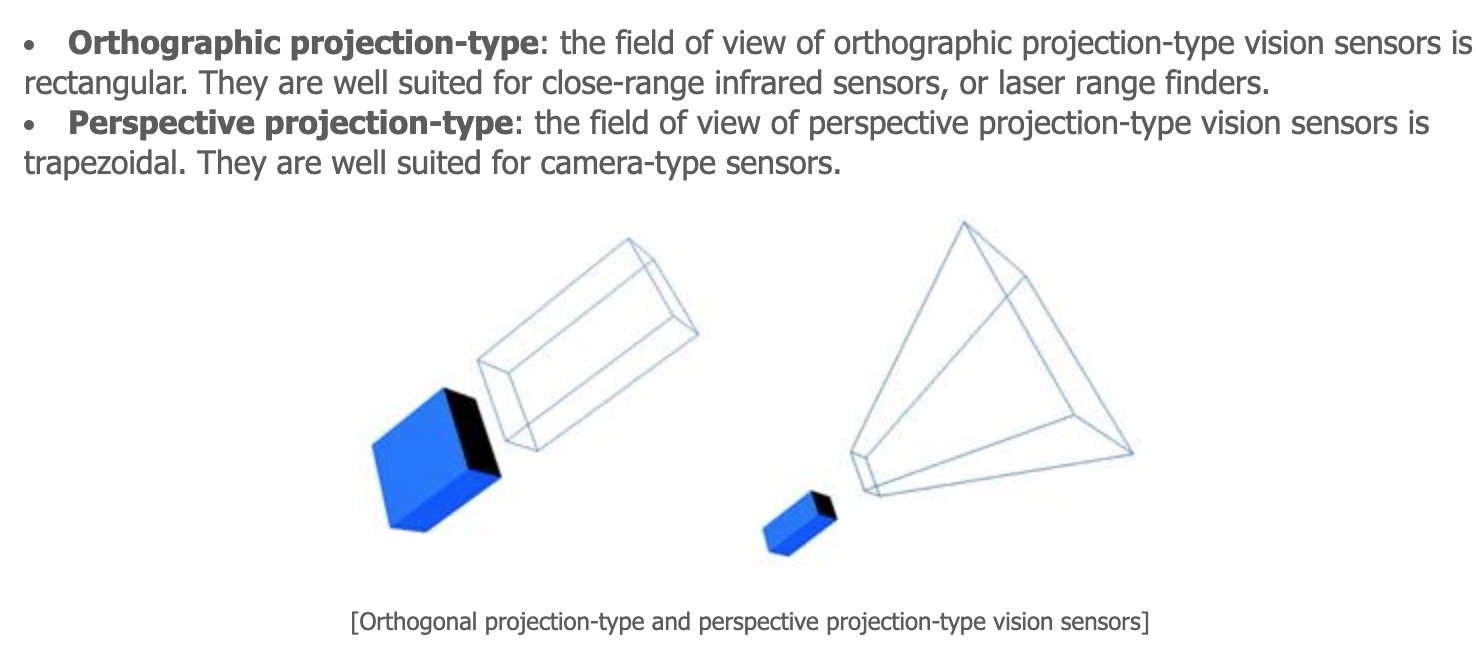
View interface right-click add-vision sensor-Perspective projection-type
The difference between the two types of vision sensor is as follows:
3. Add Floating View
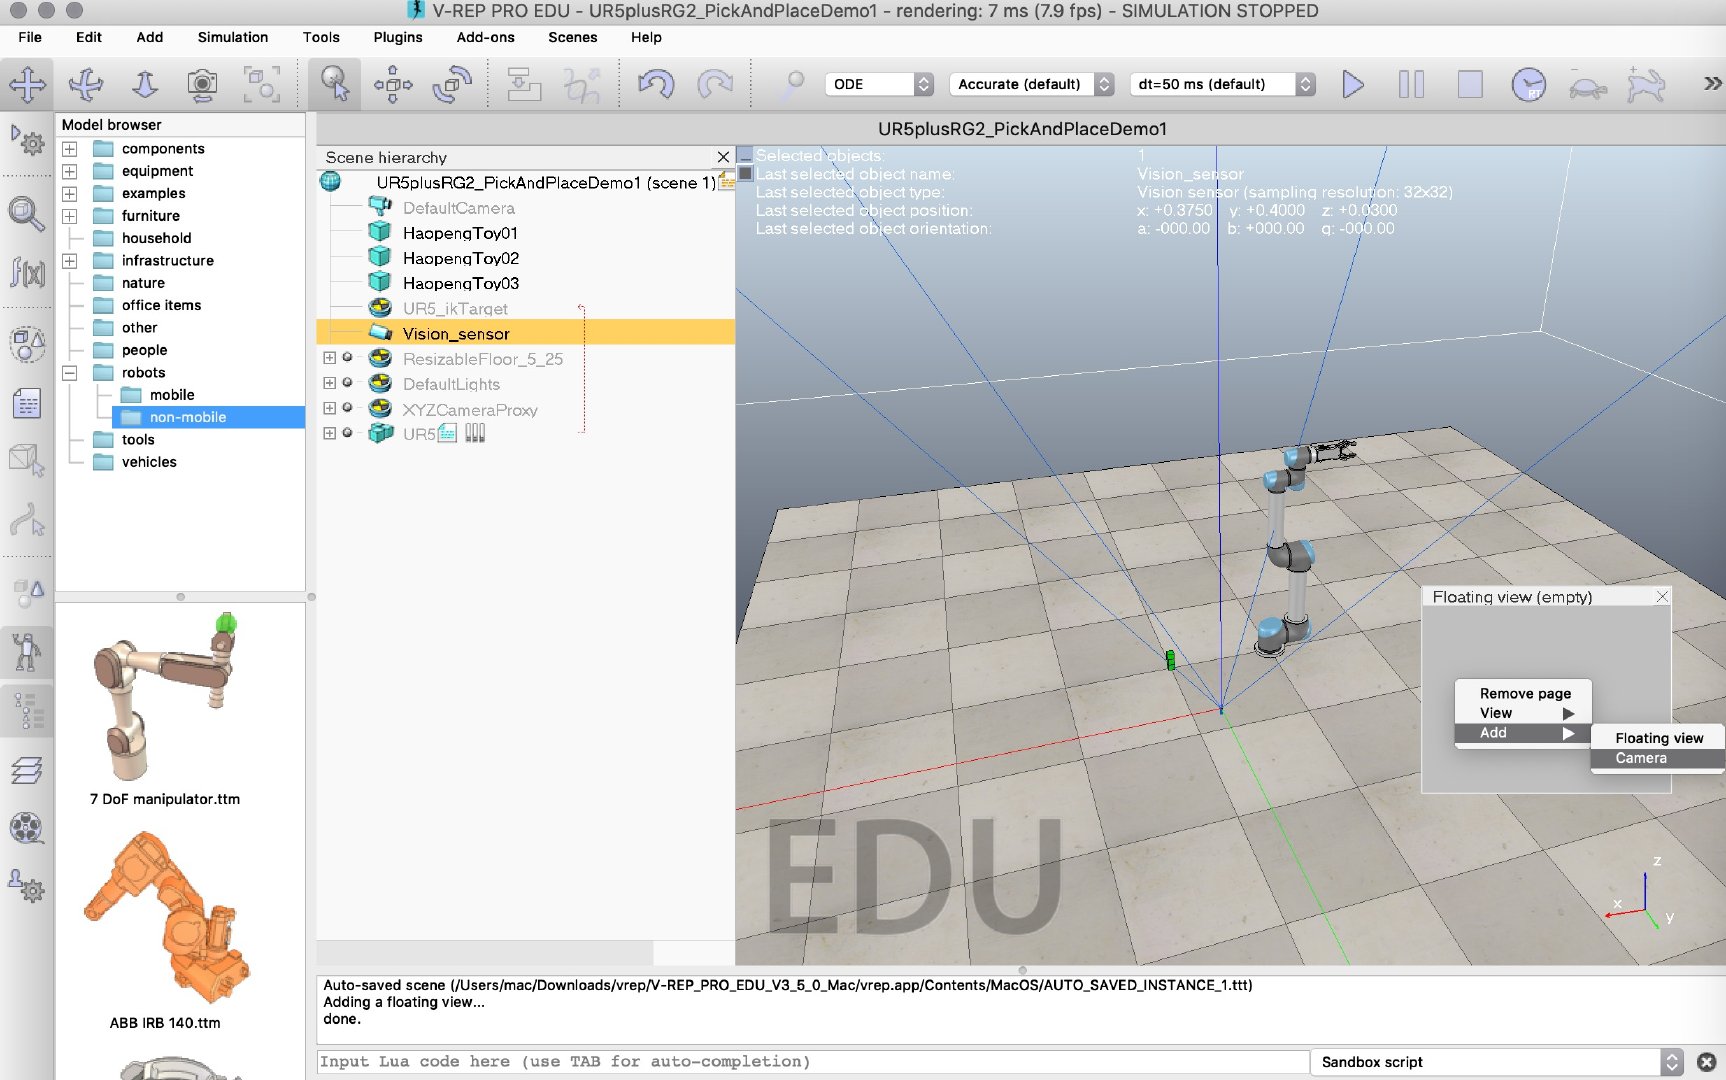
Right-click on the simulation interface, add-Floating View
4.Associate Vison_sensor
The operation is as follows
5. Modify vision sensor parameters
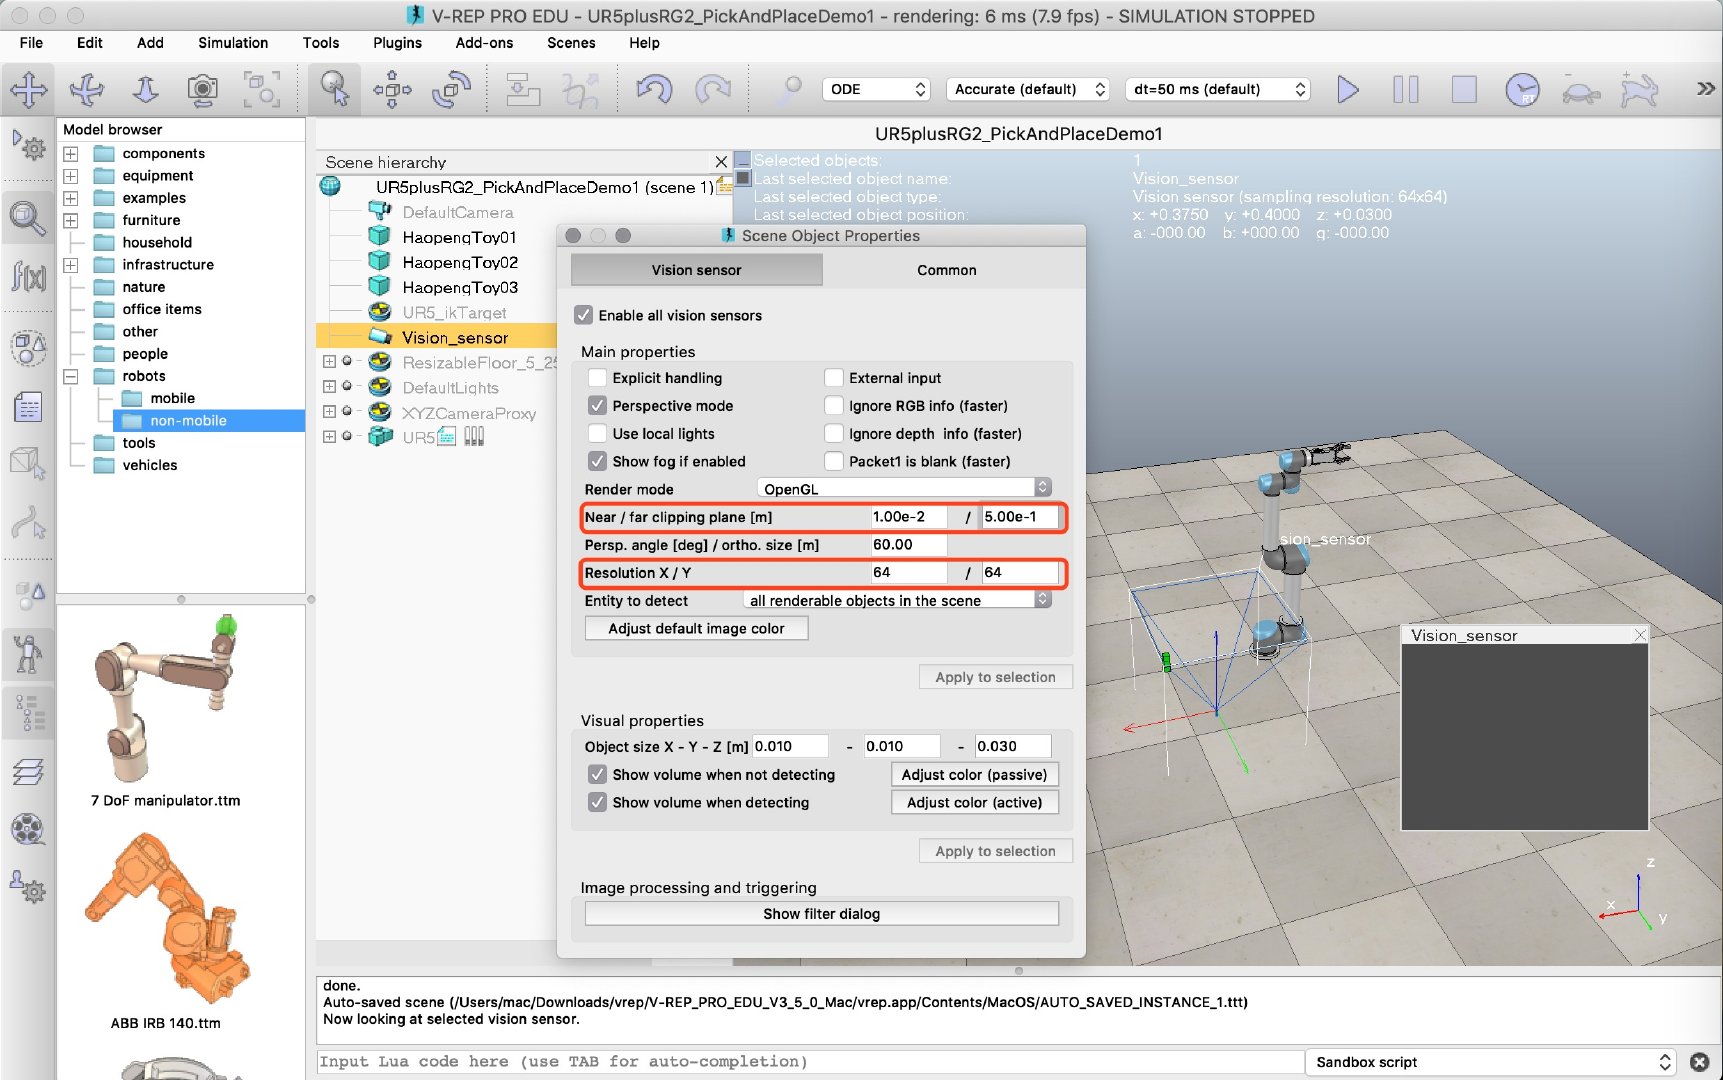
Near/far clipping plane s represent the size of the detection range
Resolution is resolution
6. Mobile and Rotating Sensors
Click the Move button to drag the animal directly.
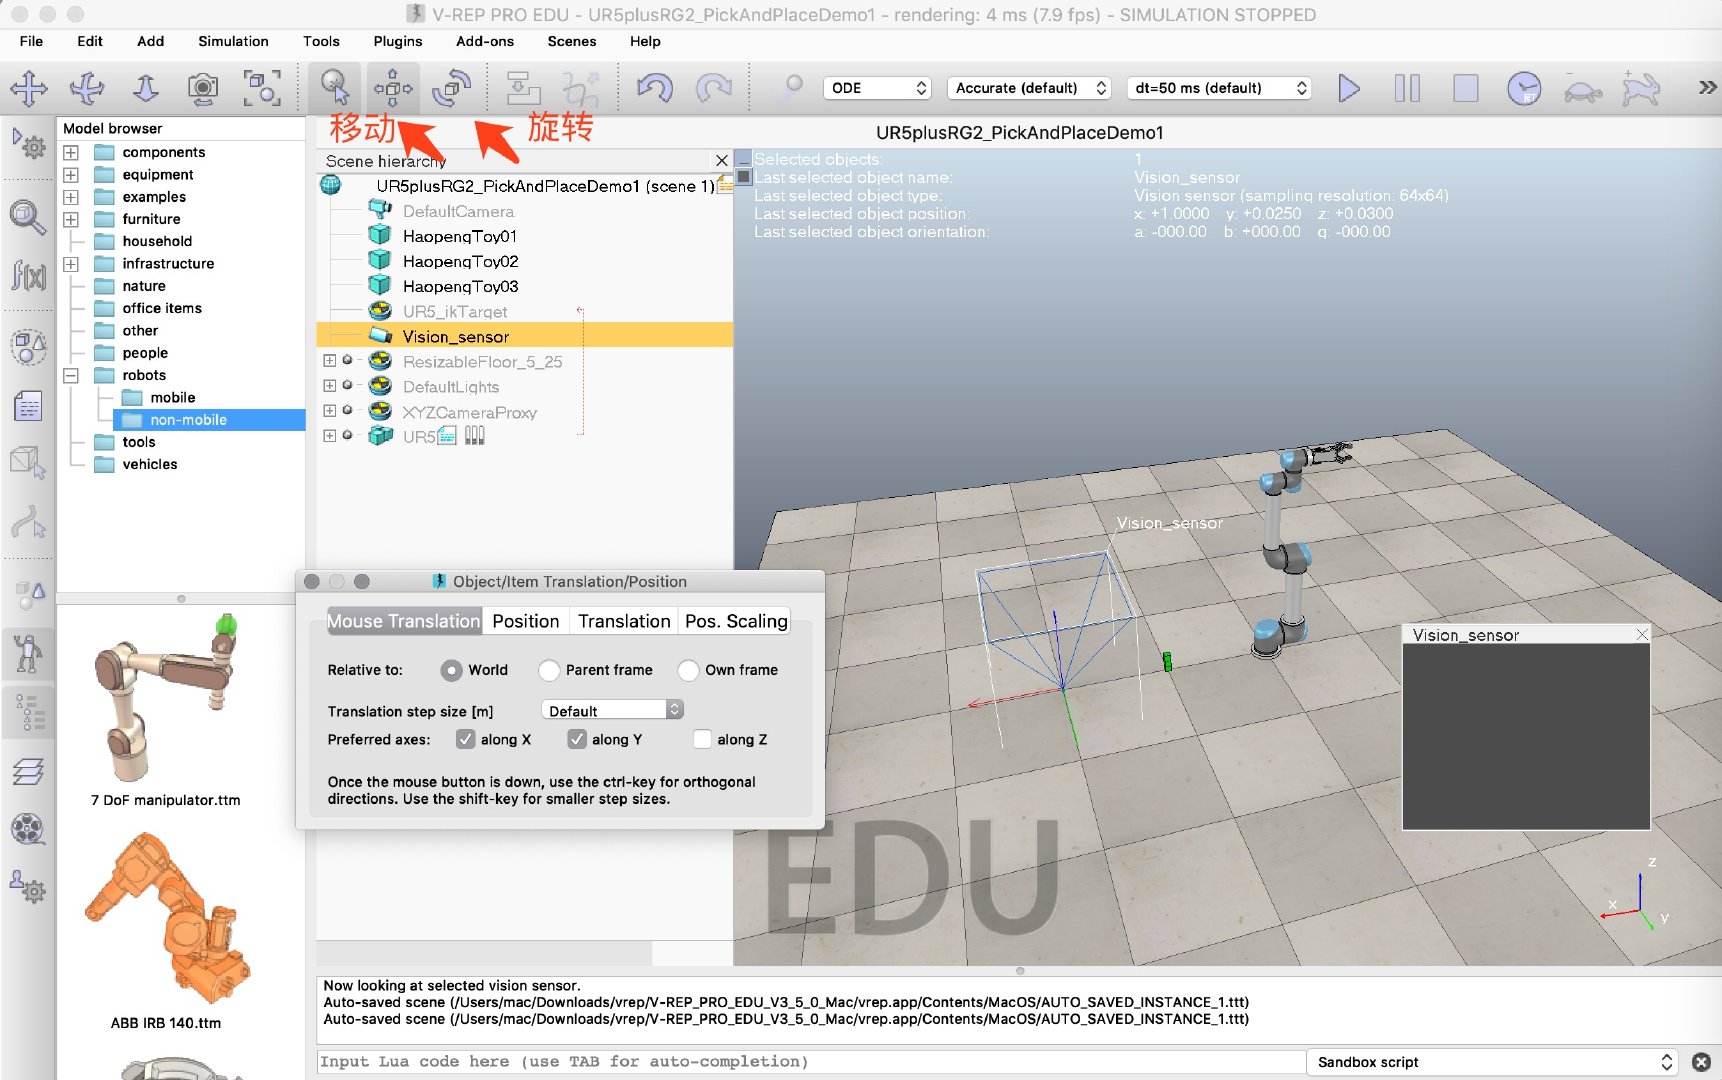
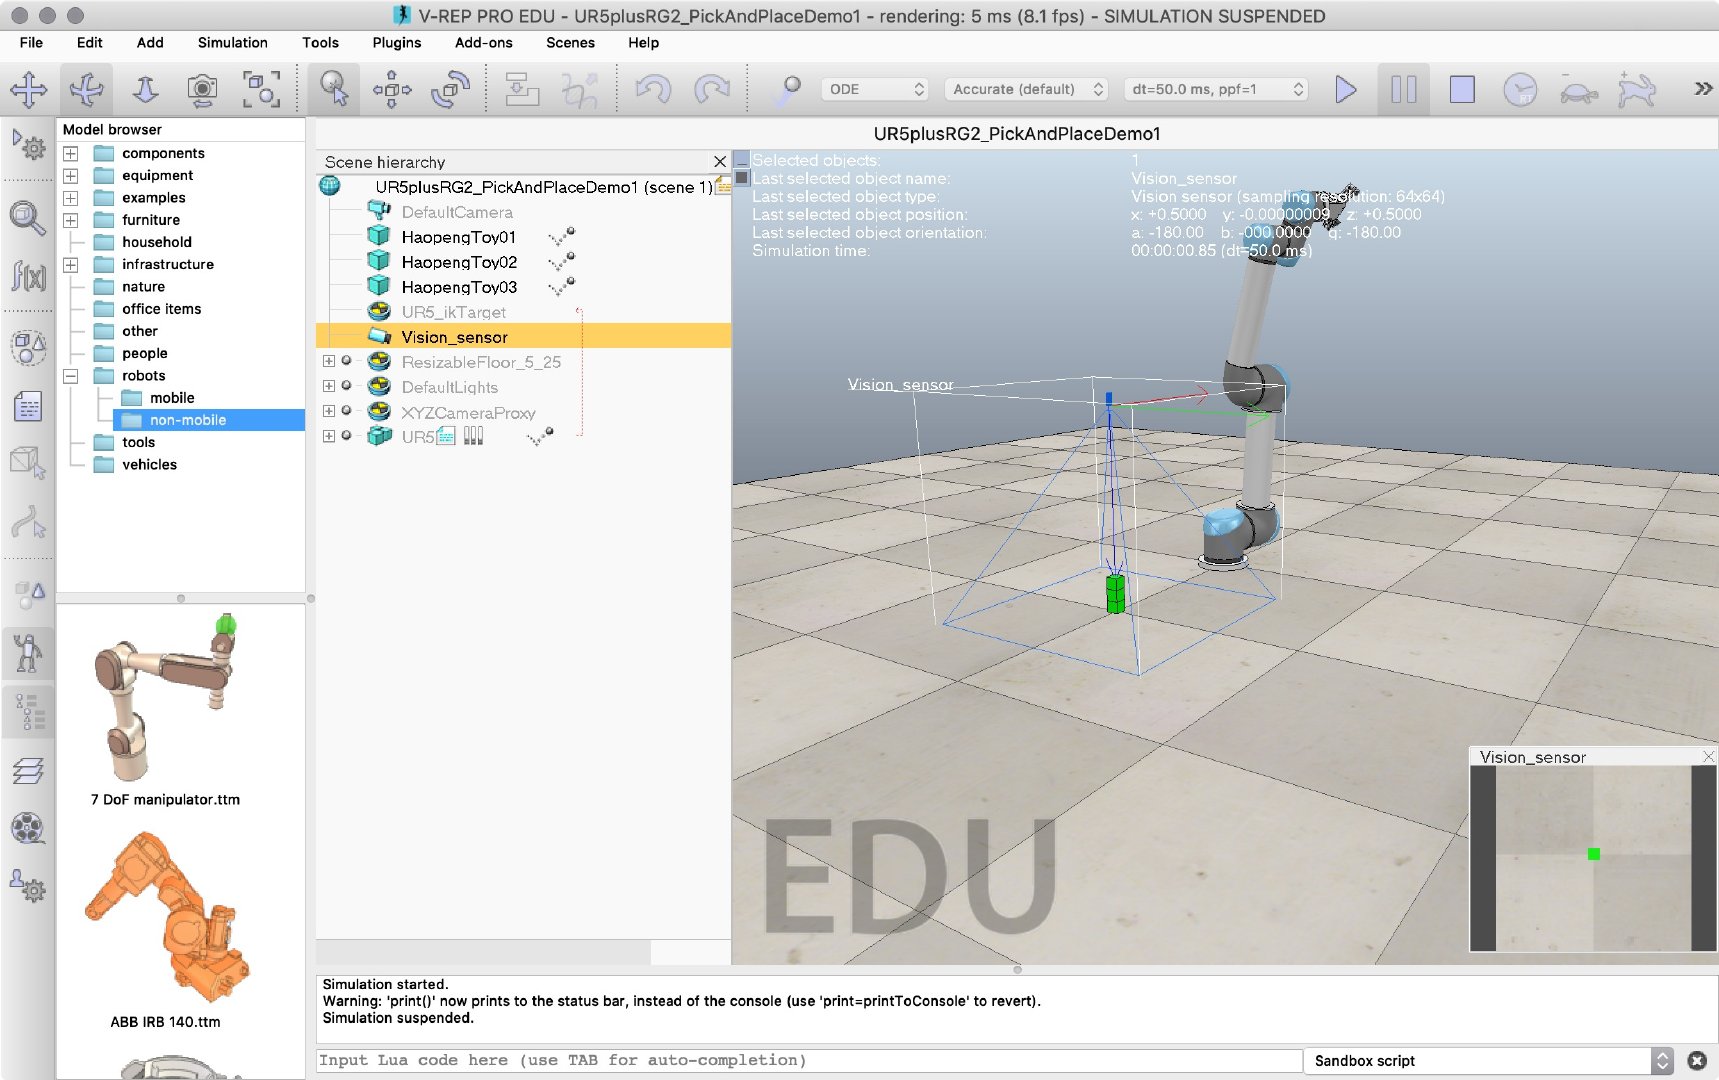
Rotate a certain angle, run simulation can see the following green dots, Vison sensor V-REP terminal configuration completed.
Python-side operations
Code
#!/usr/bin/env python
# encoding: utf-8

"""
Enable the vision sensor in V-REP,Python
use the scene: VisionSensorDemo.ttt

@Author: Zane
@Contact: ely.hzb@gmail.com
@File: VisionSensorDemo.py
@Time: 2019-07-23 15:55
"""
import vrep
import sys
import numpy as np
import math
import matplotlib.pyplot as mpl
import time

class Usage(Exception):
    def __init__(self, msg):
        self.msg = msg

def main(argv=None):
    if argv is None:
        argv = sys.argv

    #Python connect to the V-REP client
    vrep.simxFinish(-1)

    clientID = vrep.simxStart('127.0.0.1', 19999, True, True, 5000, 5)

    if clientID != -1:
        print("Connected to remote API server")
    else:
        print("Connection not successful")
        sys.exit("Connected failed,program ended!")

    #Get the handle of vision sensor
    errorCode,visionSensorHandle = vrep.simxGetObjectHandle(clientID,'Cam',vrep.simx_opmode_oneshot_wait)

    #Get the image of vision sensor
    errprCode,resolution,image = vrep.simxGetVisionSensorImage(clientID,visionSensorHandle,0,vrep.simx_opmode_streaming)
    time.sleep(0.1)
    errprCode,resolution,image = vrep.simxGetVisionSensorImage(clientID,visionSensorHandle,0,vrep.simx_opmode_buffer)

    #Process the image to the format (64,64,3)
    sensorImage = []
    sensorImage = np.array(image,dtype = np.uint8)
    sensorImage.resize([resolution[0],resolution[1],3])

    #Use matplotlib.imshow to show the image
    mpl.imshow(sensorImage,origin='lower')


if __name__ == "__main__":
    sys.exit(main())
test result
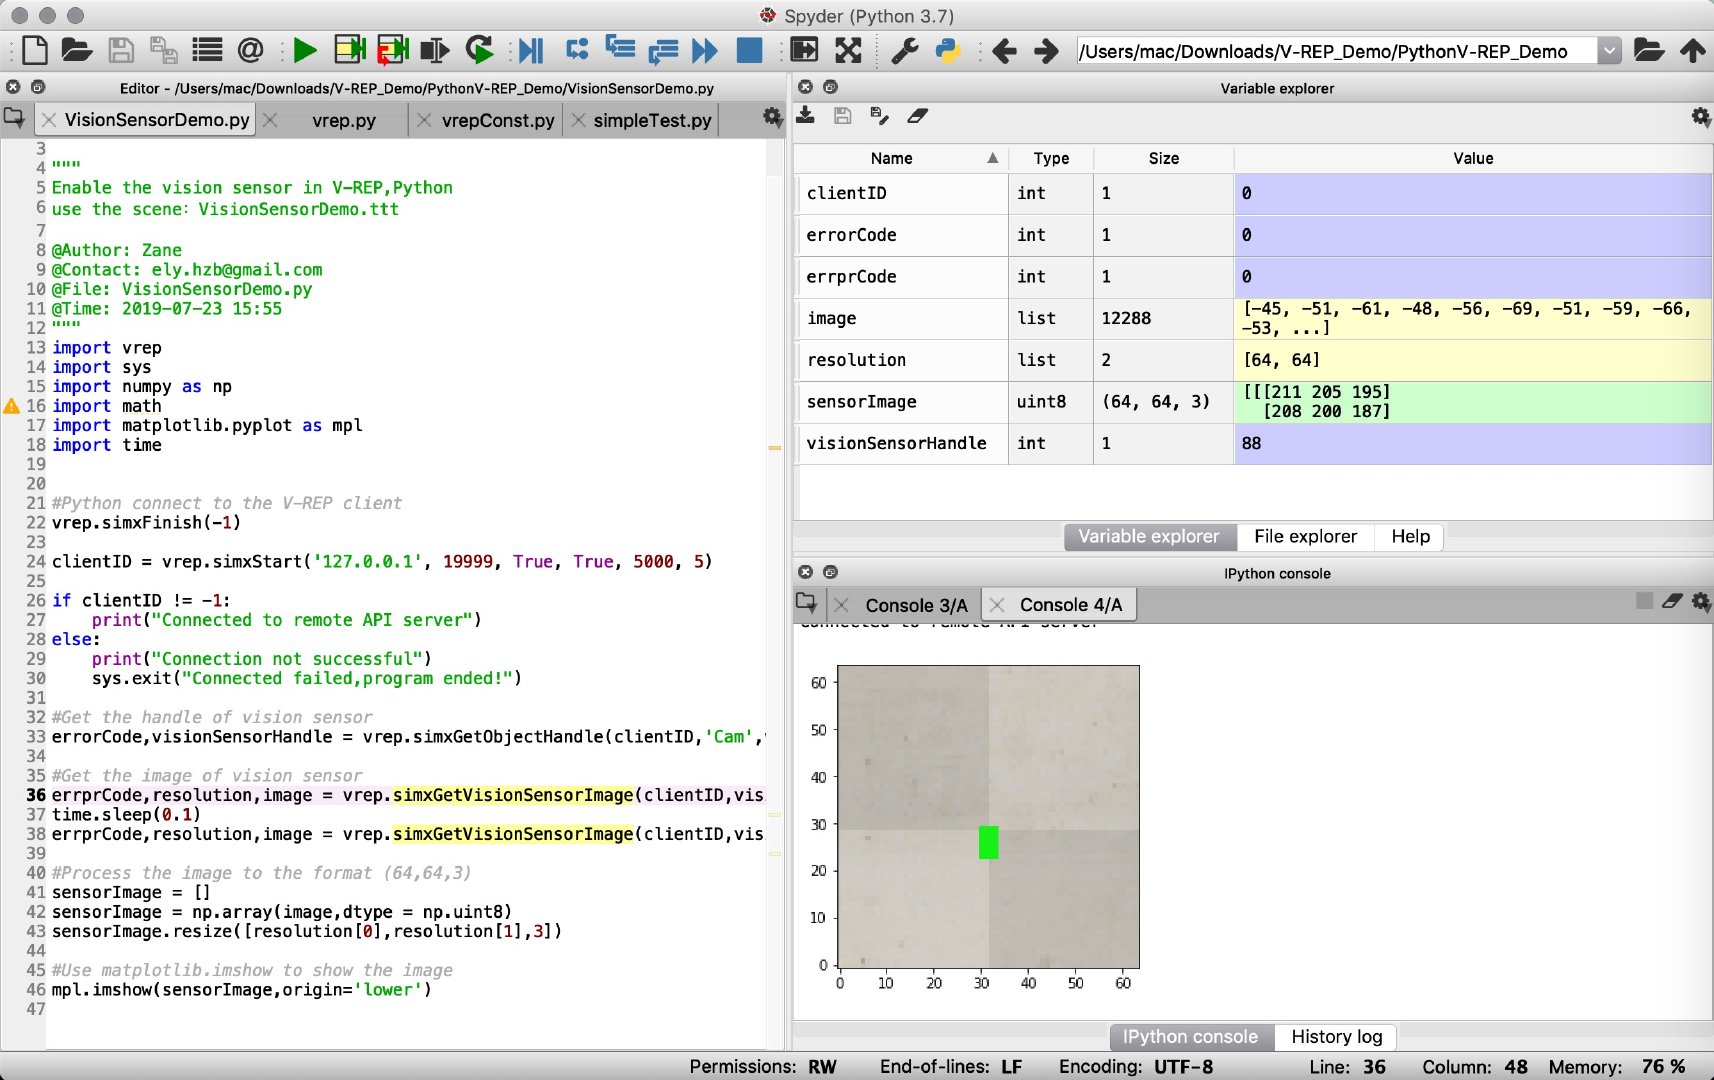
The results are as follows. Real-time images of Vison Sensor can be captured in python
annotation
Note 1:
vrep.simxFinish(-1)
clientID = vrep.simxStart('127.0.0.1', 19999, True, True, 5000, 5)
Each time you restart the simulation, you need to rerun these two pieces of code to get a new clientID
Note 2:
errorCode,visionSensorHandle = vrep.simxGetObjectHandle(clientID,'Cam',vrep.simx_opmode_oneshot_wait)
Here Cam corresponds to the VisionSensor naming in V-REP
If the handle name is wrong, errorCode=8 will appear, as shown in error Code:[V-REP Constant] (file://Users/mac/Downloads/vrep/V-REP_PRO_EDU_V3_5_0_Mac/helpfiles/en/remoteApiConstants.htm)
Note 3:
errprCode,resolution,image = vrep.simxGetVisionSensorImage(clientID,visionSensorHandle,0,vrep.simx_opmode_streaming)
time.sleep(0.1)
errprCode,resolution,image = vrep.simxGetVisionSensorImage(clientID,visionSensorHandle,0,vrep.simx_opmode_buffer)
Resolution is the previously set image size, where you install resolution = [64, 64]
To get the image, you need to use simxGetVisionSensorImage twice, simx_opmode_streaming for the first time and simx_opmode_buffer for the second time. The third parameter is set to 0, representing the capture of RGB mode images.
time.sleep(0.1) must be added after testing. If you do not pause and run simxGetVisionSensorImage twice at the same time, you will not be able to read the image.
Note 4:
mpl.imshow(sensorImage,origin='lower')
The actual image will be inverted to the top and bottom received in the V-REP. origin='lower'restores the original image.