1. What is and how to use Picture-in-Picture
UWP offers a new view mode CompactOverlay after Windows 10 Creators Update, which translates Chinese into a compact overlay?Anyway, most of the time we call it Picture-in-Picture mode.

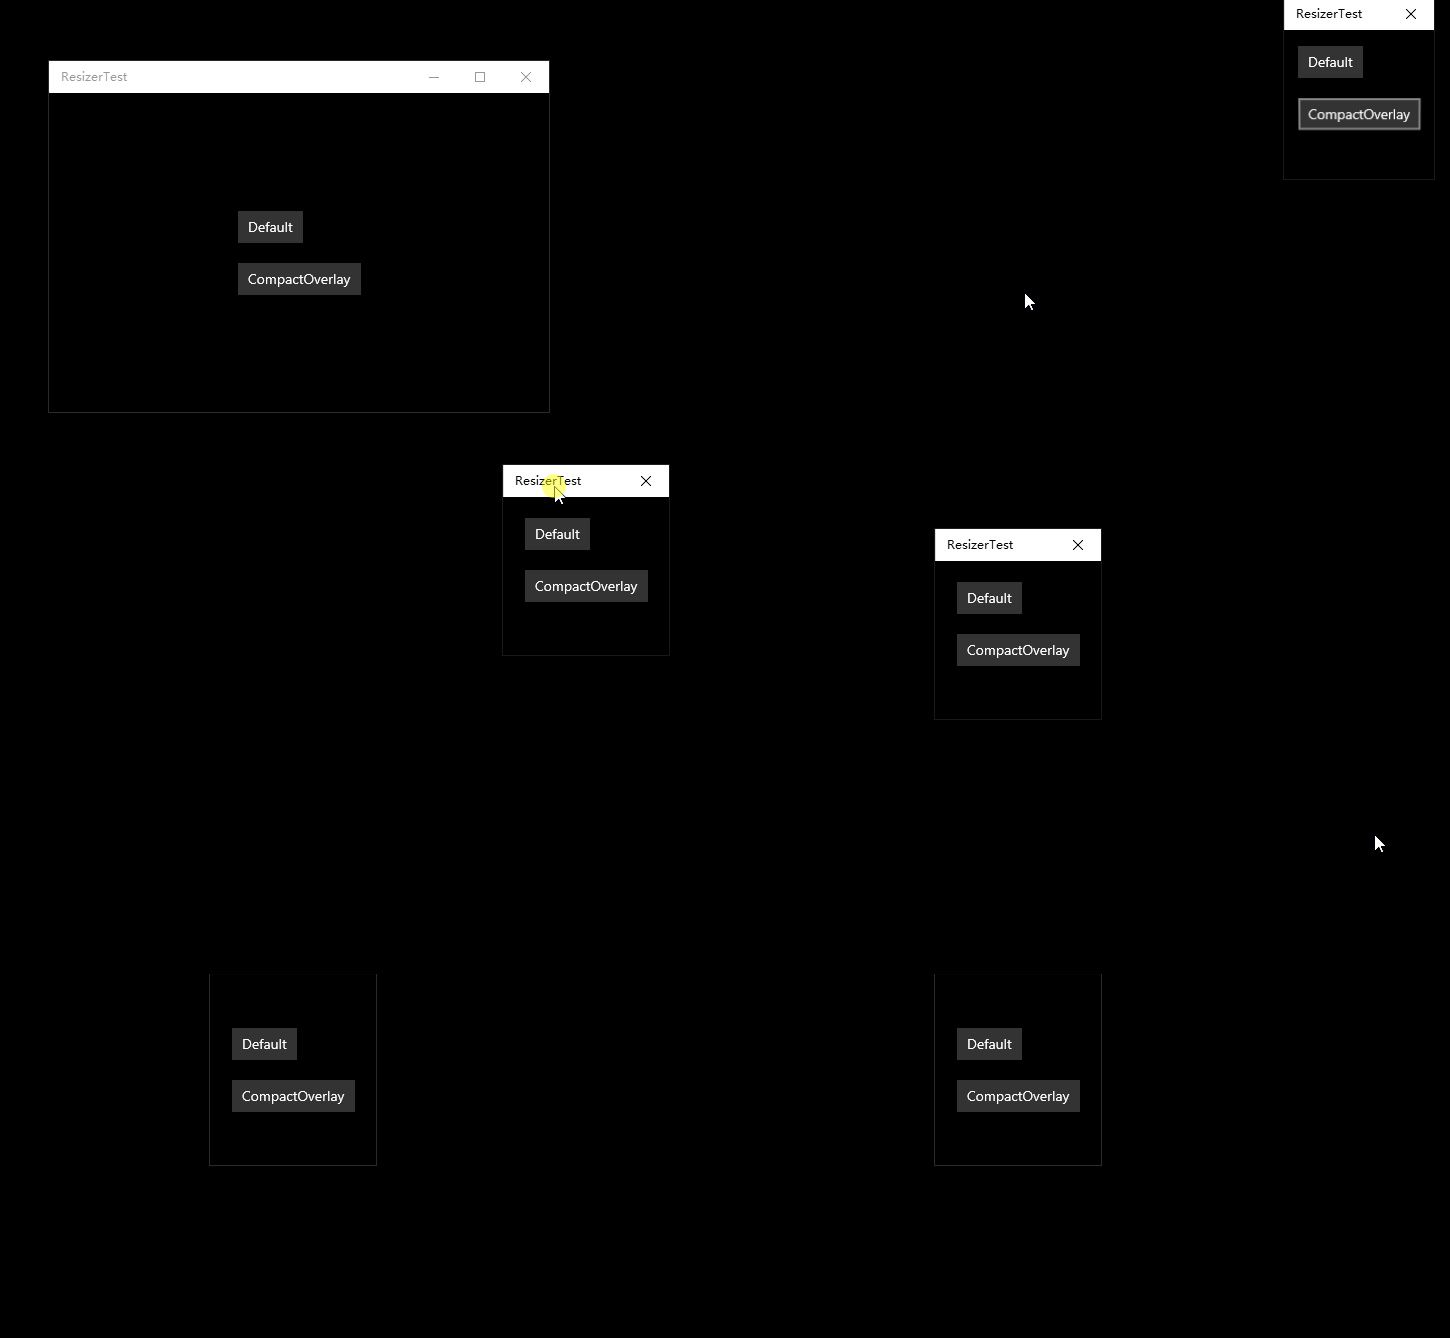
The upper right corner of the above image is the Microsoft Movie and TV application that enters Picture-in-Picture mode.
Can be called ApplicationView.TryEnterViewModeAsync Function enters or exits CompactOverlayer mode:
//Enter CompactOverlay mode
await ApplicationView.GetForCurrentView().TryEnterViewModeAsync(ApplicationViewMode.CompactOverlay);

//Return to default mode
await ApplicationView.GetForCurrentView().TryEnterViewModeAsync(ApplicationViewMode.Default);
You can also use ViewModePreferences to control the size of the window when entering CompactOverlay:
//Enter CompactOverlay mode and set the form to 200 x 200 pixels
var preferences = ViewModePreferences.CreateDefault(ApplicationViewMode.CompactOverlay);
preferences.CustomSize = new Windows.Foundation.Size(200, 200);
await ApplicationView.GetForCurrentView().TryEnterViewModeAsync(ApplicationViewMode.CompactOverlay, preferences);

//Return to default mode
var preferences = ViewModePreferences.CreateDefault(ApplicationViewMode.Default);
await ApplicationView.GetForCurrentView().TryEnterViewModeAsync(ApplicationViewMode.Default, preferences);
After entering CompactOverlay mode, the form first zooms out and moves to the upper right of the screen, and behaves as follows:
* Window on top;
* Maximize and Minimize buttons disappear;
* The title bar disappears a few seconds after it loses focus and the mouse leaves;
* Content that is set as a title bar element using `Window.Current.SetTitleBar` also disappears when the mouse leaves;
* You can change the window size, but only between 150 x 150 and 500 x 500;
* Although the title bar disappears, the three borders on the bottom left and right are still there;
Because of size limitations, ViewModePreferences.CustomSize over 150 x 150 to 500 x 500 will not work and will take the closest value.For example, using 700 x 500 will result in a 500 x 500 window.

2. Customize StateTrigger Response Picture-in-Picture mode
The last article described how to use the AdaptiveTrigger for responsive layouts, and CompactOverlay is even more extreme because it can suddenly change from 1920 x 1050 to 150 x 150.To cope with this situation, I customized a StateTrigger based on ApplicationView.ViewMode The value of the determines whether the current State is activated.This class inherits from StateTriggerBase and calls SetActive to change the active state of State in the Size Changed event of the monitored FrameworkElement.The code and how to use it are as follows:
public class IsCompactOverlayModeTrigger : StateTriggerBase
{
    private FrameworkElement _targetElement;

    public FrameworkElement TargetElement
    {
        get
        {
            return _targetElement;
        }
        set
        {
            if (_targetElement != null)
            {
                _targetElement.SizeChanged -= OnSizeChanged;
            }
            _targetElement = value;
            _targetElement.SizeChanged += OnSizeChanged;
        }
    }

    private void OnSizeChanged(object sender, SizeChangedEventArgs e)
    {
        var view = ApplicationView.GetForCurrentView();
        SetActive(view.ViewMode == ApplicationViewMode.CompactOverlay);
    }
}
<VisualStateManager.VisualStateGroups>
<VisualStateGroup>
<VisualState>
<VisualState.StateTriggers>
<helpers:IsCompactOverlayModeTrigger TargetElement="{x:Bind}" />
</VisualState.StateTriggers>
<VisualState.Setters>
<Setter Target="CompactView.Opacity"
Value="1" />
<Setter Target="CompactView.IsHitTestVisible"
Value="True" />
<Setter Target="NormalView.Opacity"
Value="0" />
<Setter Target="NormalView.IsHitTestVisible"
Value="False" />
</VisualState.Setters>
</VisualState>
</VisualStateGroup>
</VisualStateManager.VisualStateGroups>Although the previous article described changing views with Visibility, changing Visibility with ImplicitAnimation triggers animations, so sometimes I use Opacity and IsHitTestVisible to show/hide UI elements.
3. Or simply navigate to a new page
After all, using StateTrigger is cumbersome and most of the time requires the use of Picture-in-Picture mode. CompactOverlay's views are fixed, so you can navigate directly to a new page.
private async void OnEnterDefault(object sender, RoutedEventArgs e)
{
    var preferences = ViewModePreferences.CreateDefault(ApplicationViewMode.Default);
    await ApplicationView.GetForCurrentView().TryEnterViewModeAsync(ApplicationViewMode.Default, preferences);
}

private async void OnEnterCompactOverlay(object sender, RoutedEventArgs e)
{
    var preferences = ViewModePreferences.CreateDefault(ApplicationViewMode.CompactOverlay);
    preferences.CustomSize = new Windows.Foundation.Size(150, 150);
    await ApplicationView.GetForCurrentView().TryEnterViewModeAsync(ApplicationViewMode.CompactOverlay, preferences);
    Frame.Navigate(typeof(CompactPage), null, new SuppressNavigationTransitionInfo());
}
Remember to use it at this time SuppressNavigationTransitionInfo Pause the transition animation of navigation, otherwise it will be ugly.
4. Conclusion
CompactOverlay mode – aka Picture-in-Picture
The article above also gives more useful code on how to determine if CompactOverlay is supported and how to use it in multi-view mode.But I won't repeat it if I don't use it. I'm interested in referring to this article.
Picture-in-Picture mode is important for my tomato clock application.Although I like to use the tomato clock on the second screen, not to occupy my work area, and to remind others that I'm focused on my work without interruption, the PIP mode is more practical for many users with only one screen.More information about Picture-in-Picture mode can be found on the website given below.
5. Reference
ApplicationView Class (Windows.UI.ViewManagement) - Windows UWP applications Microsoft Docs
ApplicationViewMode Enum (Windows.UI.ViewManagement) - Windows UWP applications Microsoft Docs