1, What is Vue cli
vue cli is an official scaffold for building single page applications
At present, Vuecli feels like a new project tool integrated in Idea, through which I can quickly create a project file with some basic functions. The description of scaffold is very similar. But this thing is used on the command line.
2, Install Vue cli
The premise of installing Vue cli is that you have installed npm. To install npm, you can directly download the node installation package for installation. You can type npm -v in the command line tool to check if you have npm installed and the version. The version number indicates that you have installed npm and node.
npm is OK. Next, we can use npm command to install Vue cli. Enter the following command at the command line:
npm install vue-cli -g
- -g: represents a global installation. If you make an error in the installation, it is usually a network problem. You can try to install it with jnpm (Jingdong image) and cnpm (Taobao image). After installation, you can use vue
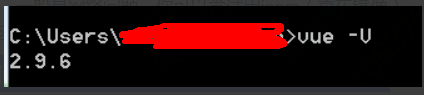
- -V to view the version number of Vue cli. Notice that V is capitalized here. My version number is 2.9.6
If the command of vue-v works, it means that we have successfully installed Vue cli into our computer.
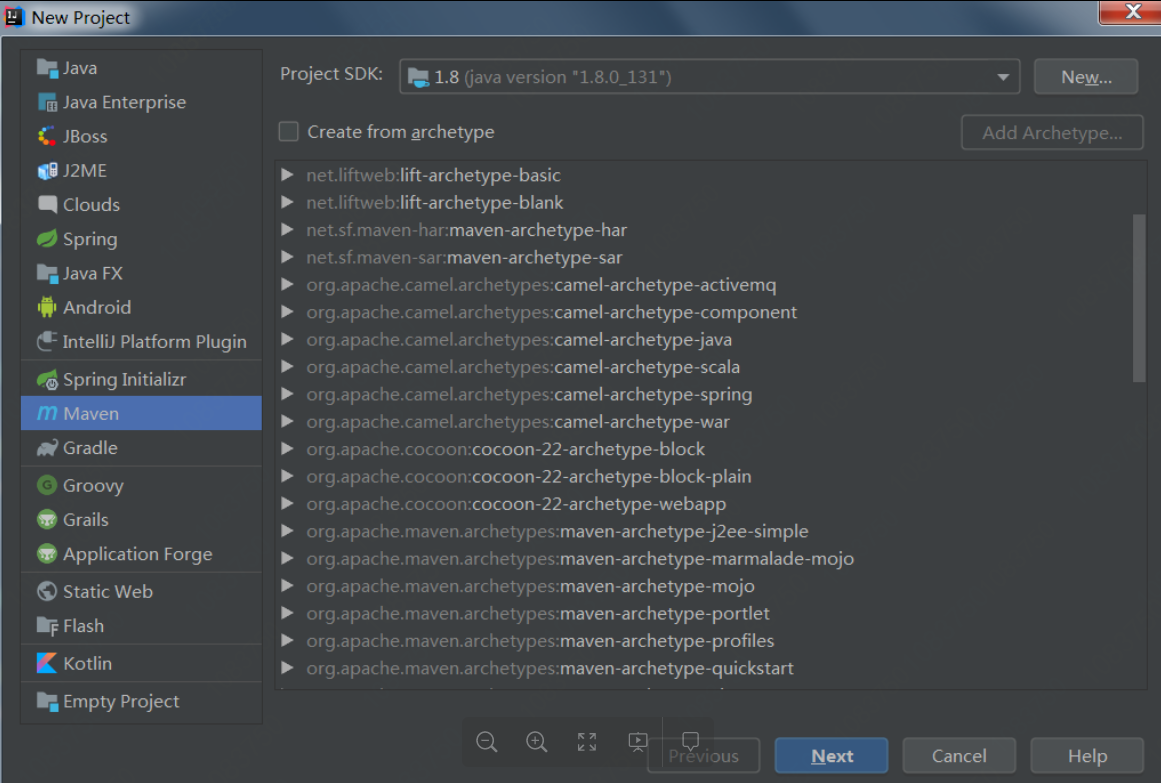
3, Using scaffolding to create new projects
We use the vue init command to initialize the project. Let's see how to use this command.
vue init <template-name> <project-name>
init: indicates that I want to initialize the project with Vue cli
< template name >: indicates the template name. Vue cli officially provides us with five templates,
-
Web pack - a comprehensive web Pack + Vue loader template with functions including hot load, linking, detection and CSS extension.
-
Webpack simple - a simple webpack + vue loader template, does not contain other functions, allowing you to quickly build the vue development environment.
-
Browserify - a comprehensive Browserify+vueify template, including hot loading, linking, and unit detection.
-
Browserify simple - a simple Browserify+vueify template, does not contain other functions, so that you can quickly build the vue development environment.
-simple - the simplest single page application template.
< project name >: identify the project name, which you can name according to your own project.
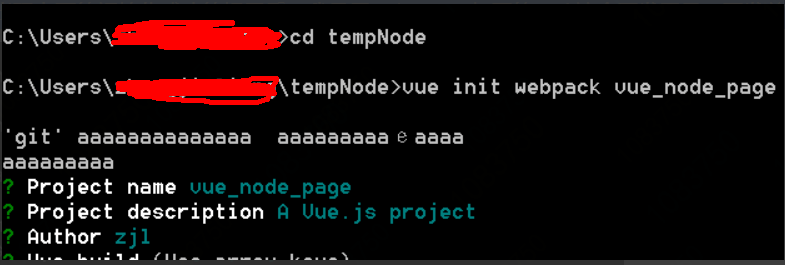
In the actual development, we usually use the template of webpack. Then we also install the template here. Enter the following command at the command line:
vue init webpack vue_node_page
After entering the command, we will be asked a few simple options, we can fill in according to our own needs.
- Project name: Project name. If you don't need to change it, you can enter directly. Note: uppercase is not allowed here (why do I start Vue here_ node_ Page is the ghost name, because I created the project first, and this document is added later...)
- Project description: Project description, default is a Vue.js Project, enter directly, no need to write.
- Author: author, if you have the author who configures git, he will read it.
- Install vue router? Do you want to install the routing plug-in of vue? We need to install it here, so select Y
- Use ESLint to lint your code. We don't need to enter n here. If you are a large team developer, it's better to configure.
- Setup unit tests with Karma+Mocha? Do you need to install the unit test tool Karma+Mocha? We don't need it here, so enter n.
- Setup e2e tests with Nightwatch? Do you want to install e2e for user behavior simulation tests? We don't need it here, so enter n.
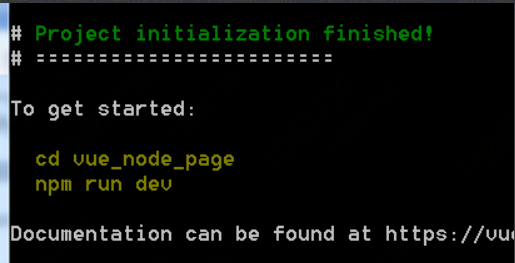
This page shows that our initialization has been successful, and now we can play happily.
PS:
However, it should be noted that under which folder you currently execute the command, the project file will be created. So I created a new folder like this. Created under the custom folder tempNode. After the above prompt of successful initialization appears, I opened it with webStorm. (this development tool and front-end are also very useful)
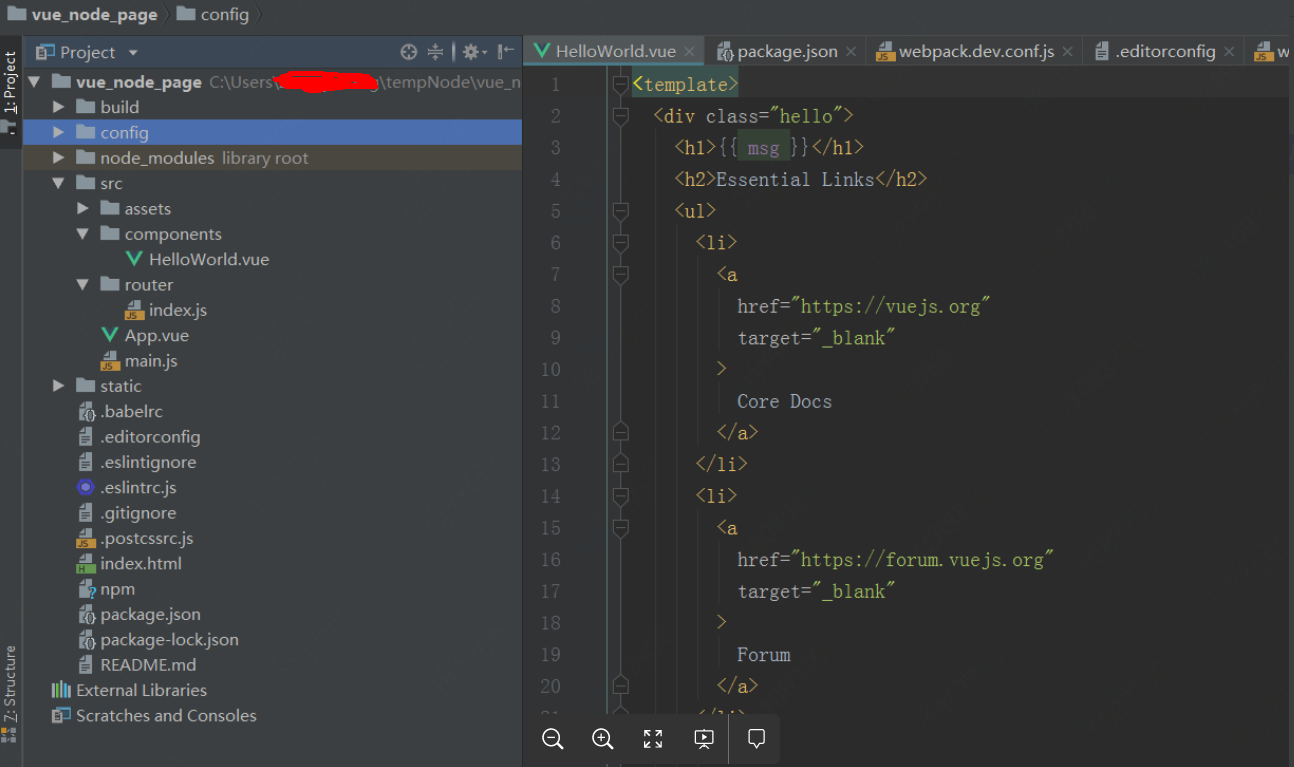
4, Detailed explanation of Vue cli project structure
Vue cli scaffolding tool is to build the environment for our development, which saves us a lot of energy. It's necessary to be familiar with this environment. Let's start with the structure of the project.
Ps: due to the difference between the version real-time update and the installation you choose (here is the directory structure with the template as webpack), what you see may be different from the following.
|-- build // Code related to project build

| |-- build.js // Production environment build code

| |-- check-version.js // Check node, npm and other versions

| |-- dev-client.js // Hot and heavy load related

| |-- dev-server.js // Build the local server (this file is not available in the new version of Vue, and is replaced and integrated into webpack dev- conf.js Medium)

| |-- utils.js // Build tools related

| |-- webpack.base.conf.js // Basic configuration of webpack

| |-- webpack.dev.conf.js // Configuration of Web pack development environment

| |-- webpack.prod.conf.js // webpack production environment configuration

|-- config // Project development environment configuration

| |-- dev.env.js // Development environment variables

| |-- index.js // Some configuration variables of the project

| |-- prod.env.js // Production environment variables

| |-- test.env.js // Test environment variables

|-- src // Source directory

| |-- components // vue common components

| |-- store // State management of vuex

| |-- App.vue // Page entry file

| |-- main.js // Program entry file, loading various public components

|-- static // Static files, such as some pictures, json data, etc

| |-- data // Data from group chat analysis is used for data visualization

|-- .babelrc // ES6 syntax compilation configuration

|-- .editorconfig // Define code format

|-- .gitignore // File formats to be ignored for git upload

|-- README.md // Project description

|-- favicon.ico

|-- index.html // Entry page

|-- package.json // Basic information of the project
My appearance is different from some of the files in this blog I read, but it doesn't matter much. The key is the same.

Explanation of important documents:
1,package.json
package.json The file is a file in the root directory of the project, which defines various modules required for the development of the project and some project configuration information (such as project name, version, description, author, etc.).
package.json The scripts field, which defines the commands you can run with npm. In the development environment, running npm run dev in the command line tool is equivalent to executing node build/dev-server.js . in other words, a development line recommendation server written by node is opened. It can be seen that the script field is an abbreviation used to specify npm related commands.
"scripts": {
"dev": "node build/dev-server.js",
"build": "node build/build.js"
},
2. dependencies field and devdpendencies field
- The dependencies field refers to the modules that the project depends on when it runs;
- The devdendependences field specifies the modules that the project depends on during development;
Running the npm install command on the command line automatically installs the modules in the dependencies and devDempendencies fields. (this file will be updated automatically) package.json There are also many related configurations. If you want to have a comprehensive understanding, you can go to Baidu specifically to learn about them.
3,dev-server.js
Although there is no such file in the current version, it's still good to see the old configuration explanation, which can help us understand
/ inspect Node and npm edition
require('./check-versions')()

// Get config/index.js  Default configuration for
var config = require('../config')

// If the environment of Node cannot judge whether it is currently a dev / product environment
// use config.dev.env.NODE_ENV as the current environment
if (!process.env.NODE_ENV) process.env.NODE_ENV = JSON.parse(config.dev.env.NODE_ENV)

// Use the file path tool of NodeJS
var path = require('path')

// Using express
var express = require('express')

// Using webpack
var webpack = require('webpack')

// A plug-in that can force the browser to open and jump to the specified url
var opn = require('opn')

// Using proxyTable
var proxyMiddleware = require('http-proxy-middleware')

// webpack configuration using dev environment
var webpackConfig = require('./webpack.dev.conf')


// default port where dev server listens for incoming traffic

// If no run port is specified, use the config.dev.port  As operation port
var port = process.env.PORT || config.dev.port


// Define HTTP proxies to your custom API backend
// https://github.com/chimurai/http-proxy-middleware

// use config.dev.proxyTable  As proxy configuration of proxytable
var proxyTable = config.dev.proxyTable


// Start a service with express
var app = express()


// Start webpack for compilation
var compiler = webpack(webpackConfig)


// Start webpack dev middleware and store the compiled files in memory
var devMiddleware = require('webpack-dev-middleware')(compiler, {

publicPath: webpackConfig.output.publicPath,
stats: {
colors: true,
chunks: false
}
})


// Start webpack hot middleware, which we often call hot reload
var hotMiddleware = require('webpack-hot-middleware')(compiler)

// force page reload when html-webpack-plugin template changes
compiler.plugin('compilation', function (compilation) {
compilation.plugin('html-webpack-plugin-after-emit', function (data, cb) {
hotMiddleware.publish({ action: 'reload' })
cb()
})
})


// proxy api requests
// Hang the request configuration in proxyTable on the started express service
Object.keys(proxyTable).forEach(function (context) {
var options = proxyTable[context]
if (typeof options === 'string') {
options = { target: options }
}
app.use(proxyMiddleware(context, options))
})


// handle fallback for HTML5 history API
// Use connect history API fallback to match resources and redirect to the specified address if they don't match
app.use(require('connect-history-api-fallback')())


// serve webpack bundle output
// Hang the compiled web pack file temporarily stored in memory on the express service
app.use(devMiddleware)


// enable hot-reload and state-preserving
// compilation error display

// Hang hot reload on the express service
app.use(hotMiddleware)

// serve pure static assets
// Static resource path for splicing static folders
var staticPath = path.posix.join(config.dev.assetsPublicPath, config.dev.assetsSubDirectory)

// Provide response services for static resources
app.use(staticPath, express.static('./static'))

// Let's listen to the request of port in this express service, and use this service as dev-server.js  Interface exposure of
module.exports = app.listen(port, function (err) {
if (err) {
console.log(err)
return
}

var uri = 'http://localhost:' + port
console.log('Listening at ' + uri + '\n')


// when env is testing, don't need open it
// If it is not a test environment, automatically open the browser and jump to our development address

if (process.env.NODE_ENV !== 'testing') {
opn(uri)
}
})
4, webpack.base.confg Basic configuration file for. JS webpack
...
...

module.export = {
// Compile entry file
entry: {},

// Compile output path
output: {},

// Some solution configurations
resolve: {},
resolveLoader: {},

module: {
// Various file loader configurations
loaders: {
...
...

// Using babel to transcode js files
{
test: /\.js$/,

loader: 'babel',

include: projectRoot,

// Which files do not need transcoding
exclude: /node_modules/
},

...
...
}
},

// Some configuration of vue file
vue: {}
5,.babelrc
The configuration files of the Babel interpreter are stored in the root directory. Babel is a transcoder, which needs to be used in the project to convert ES6 code to ES5 code. If you want to know more, you can check out Babel's knowledge.
{
//Set transcoding rules
"presets": [
["env", { "modules": false }],
"stage-2"
],
//Plug in for transcoding
"plugins": ["transform-runtime"],
"comments": false,
//Yes, BABEL_ENV or NODE_ENV specifies different environment variables for different compilation operations
"env": {
"test": {
"presets": ["env", "stage-2"],
"plugins": [ "istanbul" ]
}
}
}
6,.editorconfig
This file defines the coding specification of the project, and the compiler's behavior will be consistent with that defined in the. editorconfig file, and its priority is higher than the compiler's own setting, which is very useful and necessary when multiple people cooperate to develop the project.
root = true

[*] // Apply the following rules to all files
charset = utf-8 // utf-8 for coding rules
indent_style = space // Indent with space
indent_size = 2 // Indent 2 spaces
end_of_line = lf // Line break format
insert_final_newline = true // Insert a blank line at the end of the file
trim_trailing_whitespace = true // Delete space at end of line
5, Interpretation of Vue cli's template
Let's take a look at the template operations of Vue cli, including adding templates, modifying templates, and the basic structure of a regular template.
1. npm run build command
Some students may have questions, how to put the written Vue web page on the server? In fact, the main command is to use the npm run build command. After we input the npm run build command in the command line, Vue cli will automatically publish and package the project. you are here package.json As can be seen from the scripts field of the file, the npm run build command you execute is relative to the node build you execute/ build.js .
package.json scripts field for:
"scripts": {
"dev": "node build/dev-server.js",
"build": "node build/build.js"
},
After executing the npm run build command, create the dist folder in your project root directory, which is the file we want to transfer to the server.
The directory under dist folder includes:
- index.html Homepage file: because we are developing a single page web application, there is generally only one HTML file.
- Static static resource folder: js, CSS and some pictures inside.
2, main.js Document interpretation
main.js Is the entry file of the whole project, under the src folder:
import Vue from 'vue'
import App from './App'
import router from './router'

Vue.config.productionTip = false //The production environment prompt is set to false

/* eslint-disable no-new */
new Vue({
el: '#app',
router,
template: '<App/>',
components: { App }
})
3, App.vue File:
<template>
<div id="app">
<img src="./assets/logo.png">
<router-view></router-view>
</div>
</template>

<script>
export default {
name: 'app'
}
</script>

<style>
#app {
font-family: 'Avenir', Helvetica, Arial, sans-serif;
-webkit-font-smoothing: antialiased;
-moz-osx-font-smoothing: grayscale;
text-align: center;
color: #2c3e50;
margin-top: 60px;
}
</style>
app.vue We can interpret the document in three parts,
- The content of the < template > < template > tag package: This is the HTML DOM structure of the template. A picture and the < router View > < router View > tag are introduced. The < router View > tag indicates that the routing mechanism is used. We will come up with an article about Vue router in the future.
- The < script > < script > tag includes js content: you can have some page dynamic effects and Vue logic code here.
- The content of CSS wrapped by < style > < style > tag: This is the CSS style you usually write. It is used to decorate the page appearance. It should be noted that you can use < style scoped > < style > to declare that these CSS styles only work in this template.
4,router/index.js Routing files
Citations in app.vue We see the routing file in. Although there are many router contents, let's take a brief look at it first.
import Vue from 'vue'
import Router from 'vue-router'
import Hello from '@/components/Hello'


Vue.use(Router)

export default new Router({
routes: [
{
path: '/',
name: 'Hello',
component: Hello
}
]
})
We can see the sentence "import Hello from '@ / components/Hello". The file introduces / components/Hello.vue Documents. A route is configured in this file, which is displayed to us when we visit the website Hello.vue Content of.
5, Hello.vue Document interpretation:
This file is also divided into three parts, < template > < script > < style >. Most of our work in the future is to write these. vue end files. Now we can try to change something and preview it.
Some content from other blogs, thank you!