Traditional Kubernetes application building
Create Namespace
In a Kubernetes cluster, you can create multiple namespaces for "environment isolation". When there are many projects and personnel, you can consider dividing different namespaces according to the actual situation of the project (such as production, testing and development).
Create a Namespace named "nginx":
[root@localhost~]# kubectl create ns nginx

namespace "nginx" created
View the created namespaces in the cluster:
[root@localhost~]# kubectl get ns

NAME          STATUS   AGE
default       Active   35d
kube-public   Active   35d
kube-system   Active   35d
nginx         Active   19s
Create Deployment
Deployment provides declarative updates for pod and Replica Set (next generation Replication Controller). Just describe the desired target state in the deployment, and the Deployment Controller will help developers change the actual state of pod and ReplicaSet to the target state. Developers can define a new deployment to create a ReplicaSet or delete an existing deployment and create a new one to replace it. Pod can be managed more easily with deployment, including capacity expansion, capacity reduction, pause, rolling update, rollback, etc. In Choerodon, deployment is presented by means of examples, and diversified functions such as online upgrade, stop and delete are supported.
Typical application scenarios include:
- Define Deployment to create Pod and ReplicaSet
- Rolling upgrade and rollback application
- Expansion and contraction
- Pause and resume Deployment
Write a file named dp.yaml, which reads as follows:
apiVersion: apps/v1beta1
kind: Deployment
metadata:
  name: nginx-deployment
  namespace: nginx
  labels:
    app: nginx
spec:
  replicas: 1
  template:
    metadata:
      labels:
        app: nginx
    spec:
      containers:
      - name: nginx
        image: nginx:1.13.5-alpine
        ports:
        - containerPort: 80
        readinessProbe:
          httpGet:
            path: /
            port: 80
After saving, deploy with kubectl command:
[root@localhost~]# kubectl apply -f dp.yaml

deployment.apps"nginx-deployment"created
You can execute the following command to view the deployed Deployment:
[root@localhost~]# kubectl get deployment -n nginx

NAME                 DESIRED   CURRENT   UP-TO-DATE   AVAILABLE   AGE
inx-deployment     1         1         1            1           51s
You can execute the following command to view the Pod created by Deployment:
[root@localhost~]# kubectl get pod -n nginx -o wide

NAME                                 READY    STATUS    RESTARTS   AGE     IP                 NODE
nginx-deployment-866d7c64c7-8rnd5    1/1      Running   0          3m      10.233.68.248      clusternode11
The status of the Pod is Running, which indicates that it is working normally and can be accessed through the Pod IP in the cluster:
[root@localhost~]# curl 10.233.68.248

<!DOCTYPE html>
<html>
<head>
<title>Welcome to nginx!</title>
<style>
    body{
        width:35em;
        margin:0 auto;
        font-family:Tahoma,Verdana,Arial,sans-serif;
    }
</style>
</head>
<body>
<h1>Welcome to nginx!<h1>
<p>If you see this page,the nginx web server is successfully installed and working. Further configuration is required.</P>

<p>For online documentation and support please refer to
<a href="http://nginx.org/">nginx.org</a>.<br/>
Commercial support is available at
<a href="http://nginx.com/">nginx.com</a>.</p>

<p><em>Thank you for uesing nginx.</em></p>
</body>
</html>
For more information about Deployment, please refer to here: https://kubernetes.io/docs/concepts/workloads/controllers/deployment/
Create Service
Kubernetes pods have a life cycle. They can be created or destroyed, but once destroyed, their life ends forever. Pod can be created and destroyed dynamically through Deployment. Each pod will obtain its own IP address. However, these IP addresses are not stable and fixed. These IP addresses will also be recycled when the pod is destroyed. This will lead to a problem: in the kubernetes cluster, if a group of pods (called backends) provide services for other pods (called frontends), how should those frontends find and connect to which backends in this group of pods?
Here we would like to solemnly invite Service to solve this problem.
Write a file named svc.yaml, which reads as follows:
apiVersion: v1
kind: Service
metadata:
  namespace: nginx
  name: nginx-service
spec:
  selector:
    app: nginx
  ports:
  - name: http
    protocol: TCP
    port: 80
    targetPort: 80
Deploy using the kubectl command:
[root@localhost~]# kubectl apply -f svc.yaml

service "nginx-service"created
You can execute the following command to view the deployed services:
[root@localhost~]# kubectl get svc -n nginx

NAME            TYPE          CLUSTER-IP       EXTERNAL-IP      PORT(S)     AGE
nginx-service   ClusterIP    10.233.47.128     <none>           80/TCP      56s
You can see that the Service corresponding to the Pod has been built, and this "correspondence" depends on the mapping between the Selector in the Service and the Labels of the Pod (that is, the contents of the Selector and the Labels of the Pod must be consistent). Nginx can now be accessed inside the cluster through this Service. Choerodon provides visual Service creation operation, which makes it more convenient to create a network:
[root@localhost~]# curl 10.233.47.128

<!DOCTYPE html>
<html>
<head>
<title>Welcome to nginx!</title>
<style>
    body{
        width:35em;
        margin:0 auto;
        font-family:Tahoma,Verdana,Arial,sans-serif;
    }
</style>
</head>
<body>
<h1>Welcome to nginx!<h1>
<p>If you see this page,the nginx web server is successfully installed and working. Further configuration is required.</P>

<p>For online documentation and support please refer to
<a href="http://nginx.org/">nginx.org</a>.<br/>
Commercial support is available at
<a href="http://nginx.com/">nginx.com</a>.</p>

<p><em>Thank you for uesing nginx.</em></p>
</body>
</html>
For more information about Service, please refer to here: https://kubernetes.io/docs/concepts/services-networking/service/
Create Ingress
At this time, only the host inside the cluster and the host can access Nginx. To enable other hosts outside the node to access, you need to create ingress. Ingress can provide services with URL, load balancing, SSL termination, HTTP routing and other functions for external access to the cluster. Ingres corresponds to the domain name in Choerodon. In addition to domain name management, Choerodon also adds domain name certificate management to support online application and import.
Write a file called ing.yaml, which reads as follows:
apiVersion: extensions/v1beta1
kind: Ingress
metadata:
  name: nginx-ingress
  namespace: nginx
spec:
  rules:
  - host: nginx.example.local #This domain name needs to be resolved to k8s cluster load host IP
    http:
      paths:
      - backend:
          serviceName: nginx-service
          servicePort: 80
        path: /
Deploy using the kubectl command:
[root@localhost~]# kubectl apply -f ing.yaml

ingress.extensions "nginx-ingress" created
You can execute the following command to view the deployed progress:
[root@localhost~]# kubectl get ingress -n nginx

NAME             HOSTS                    ADDRESS    PORTS     AGE
nginx-ingress    nginx.example.local                 80        1m
At this point, you can access Nginx using the defined URL in the browser:
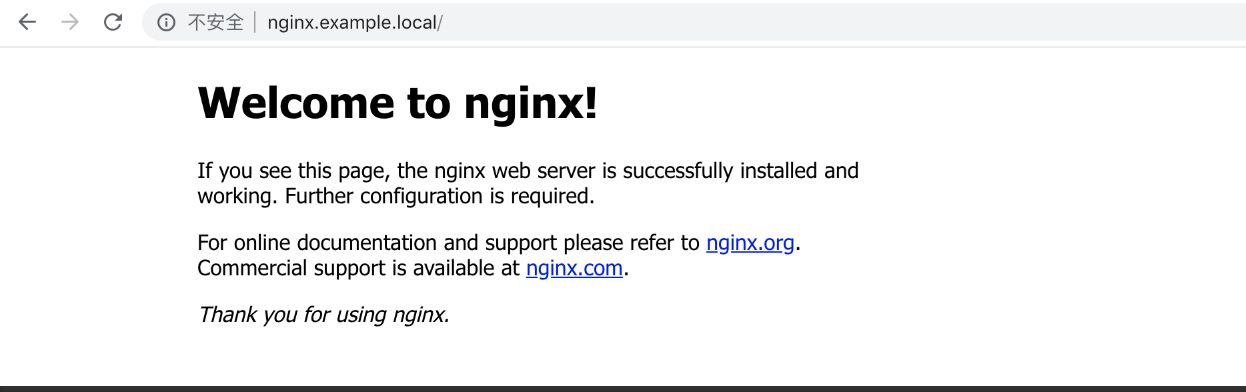
For more information about Ingress, please refer to here: https://kubernetes.io/docs/concepts/services-networking/ingress/
After watching the application building of traditional Kubernetes, let's take a look at how to build applications in Choerodon.
Application building based on Choerodon
One click deployment
The application deployment in Choerodon is simple and clear. It constructs a set of objects of environment, instance, service and domain name to map the basic objects of Kubernetes, and provides a visual operation interface for the creation and modification of the basic objects of Kubernetes.
To deploy an application on the Choerodon pig toothed fish platform, you only need to click "create application" on the "application management" page, create a branch in the "development pipeline", submit the code and publish the application, select the application to be deployed, version, target environment and deployment mode on the "deployment pipeline" page, and set the network and domain name to complete the application deployment.
What did Choerodon do behind the construction of the application? I have to mention GitOps.
GitOps
Choerodon uses Kubernetes as the basic platform, packages the application through Helm Chart, and abstracts Helm Release into Kubernets custom object. In this way, the state of the deployment application system of the whole environment can be described through Kubernetes resource object file. In Choerodon, the yaml file finally generated by the application build is stored in GitLab in the form of configuration library. The build status of the application is judged by comparing the changes of the configuration yaml file, so as to realize the separation of business code and configuration code.
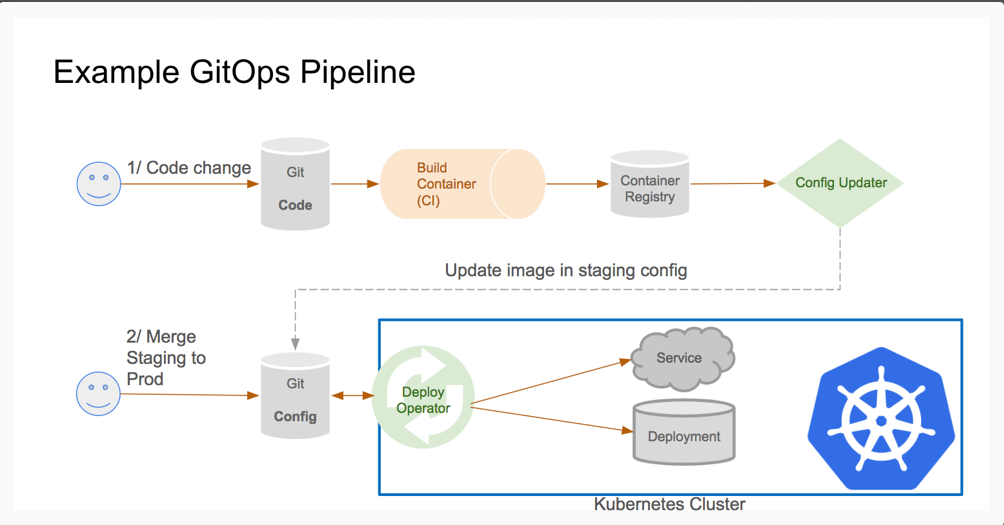
At the same time, when creating an environment in the platform, the user will synchronously create a Git warehouse corresponding to the environment to store the deployment configuration file. Then all relevant operations deployed in the environment will be transformed into the operations of deploying the configuration file in the Git library, and the Choerodon deployment service will be triggered to record the status, After the application status record, the Agent of Choerodon in Kubernetes is triggered for application deployment. Finally, the whole process of application deployment can be explained according to the configuration library, Choerodon deployment service status record and Choerodon Agent.
summary
As can be seen from the above steps, K8S provides basic objects such as namespace, deployment, service and progress from the builder to external access. On this basis, Choerodon pig toothed fish platform constructs a set of environment, instance, service and domain name objects for mapping, including rolling upgrade, fault tolerance improvement and service test, and manages them with friendly UI interface management, so that users can simply operate Kubernetes objects through the page, so as to create their own applications.
Choerodon pig toothed fish platform not only realizes one click deployment, but also provides complete test management for testing newly released applications. The knowledge management module provides an information sharing platform within the enterprise, while the report module can provide more detailed development and iteration information. Choerodon pig toothed fish platform improves K8S's ability of continuous integration and continuous deployment, making each basic platform more coupled and more suitable for enterprise practice DevOps.
This article is original by the technical team of pig toothed fish. Please indicate the source for reprint