It feels like it has helped Windows 10 IoT open up again, so write a blog in the Eight Classics. Actually, I wanted to write it about half a year ago. At that time, I wanted to make a car based on Windows 10 IoT, but Raspberry Pie didn't support PWM. Baidu can't find it, so I went around GitHub and found Lightning at @ms-iot. Look at the last update date, it's mid-2016... Windows 10 IoT is so tragic in China that no one has written a tutorial for such a long time... Don't talk nonsense...
The example address of this article: https://github.com/ZhangGaoxing/windows-iot-demo/tree/master/RgbLed
Lightning Project Address: https://github.com/ms-iot/lightning
Effects:
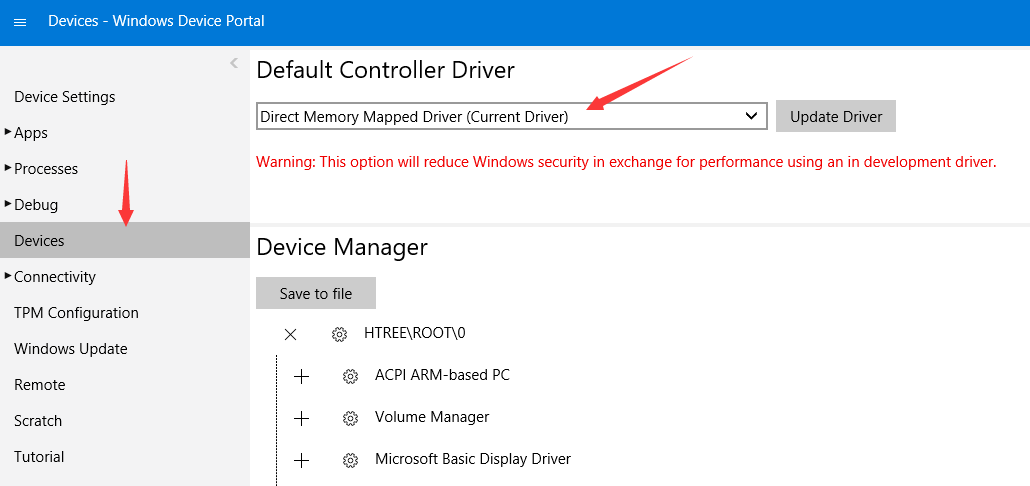
1. Changing the default controller driver
Open the Windows Device Portal of raspberry pie, and change the default Inbox Driver to Direct Memory Mapped Driver in the Default Controller Driver option on the Devices menu, and restart.
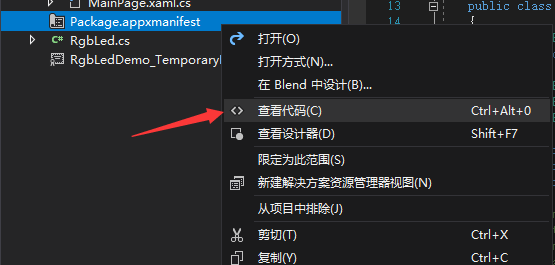
Change Package.appxmanifest configuration
A new UWP project is called RgbLedDemo in this article. Open Package.appxmanifest as View Code.
Add a namespace under the Package tag and change the Ignorable Namespaces property.
xmlns:iot="http://schemas.microsoft.com/appx/manifest/iot/windows10"
IgnorableNamespaces="uap mp iot"
Add the following to Capabilities
<iot:Capability Name="lowLevelDevices" />
<DeviceCapability Name="109b86ad-f53d-4b76-aa5f-821e2ddf2141"/>
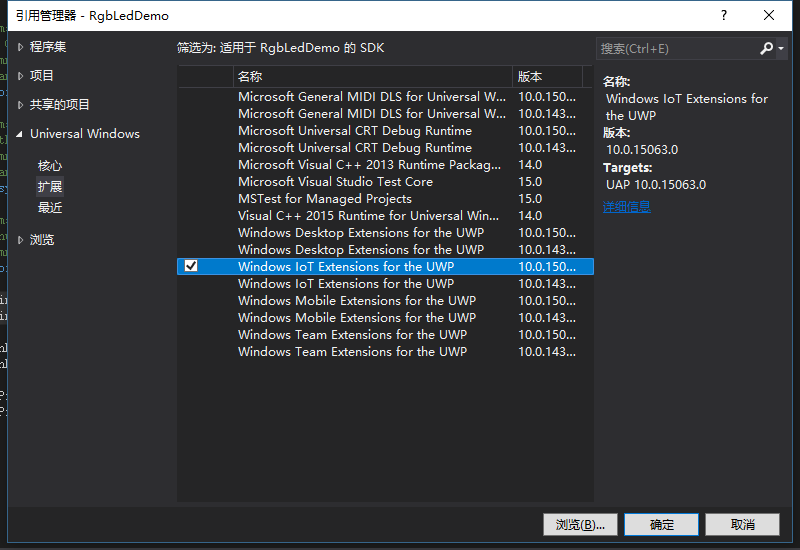
Citation of Microsoft.Iot.Lightning
Search Lightning under NuGet Package Manager.

Windows IoT Extensions for the UWP
4. Use Lightning
Note the citation
using Windows.Devices.Pwm;
using Microsoft.IoT.Lightning.Providers;
1. Judging the Enlightenment of Lightning
This step is necessary because Lightning must turn off the default controller driver of the system and throw an exception if it is not enabled.
if (!LightningProvider.IsLightningEnabled)
{
    throw new NullReferenceException("Lightning isn't enabled !");
}
2. Acquiring Software PWM Controller
It's time to get the software PWM controller in Lightning under all normal conditions. Lightning also integrates other hardware PWM controllers, so when calling PwmController. GetController sAsync (), it returns a collection, the second of which is the software PWM controller we need. After getting the controller, we need to set the frequency of the PWM. The frequency range of the software PWM controller is between 40 - 1000Hz (low pitiful...). Numbers that are not in this range throw exceptions.
PwmController controller = (await PwmController.GetControllersAsync(LightningPwmProvider.GetPwmProvider()))[1];
controller.SetDesiredFrequency(1000);
3. Setting PWM pins
Take Red pin for example. Firstly, the pin is opened by the controller. Here is the pin at the position of GPIO 17. Then you need to set up Duty Cycle Percentage, popular point is the proportion of voltage, between 0 - 1 decimal.
PwmPin redPin = controller.OpenPin(17);
redPin.SetActiveDutyCyclePercentage(0);
redPin.Start();
Next, to change the brightness of the LED, or to change the value of SetActive Duty Cycle Percentage (value).
If released, turn off the PWM first.
redPin.Stop();
redPin.Dispose();
5. Attention
After using Lightning, the SPI code will report errors based on I2C written by default controller driver. However, Lightning integrates I2C, SPI, GPIO and other controllers, which can be replaced.
The project analysis part of this article is over. Here is a breathing lamp test code, I use a common cathode RGB LED. The code is in the GitHub project.
/// <summary>
/// Breathing LED
/// </summary>
/// <param name="delay">Delay Time</param>
public async Task BreathingAsync(int delay)
{
    double red = 255;
    double green = 0;
    double blue = 0;

    while (red != 0 && green != 255)
    {
        redPin.SetActiveDutyCyclePercentage(red / 255.0);
        greenPin.SetActiveDutyCyclePercentage(green / 255.0);

        red--;
        green++;
        await Task.Delay(delay);
    }

    while (green != 0 && blue != 255)
    {
        greenPin.SetActiveDutyCyclePercentage(green / 255.0);
        bluePin.SetActiveDutyCyclePercentage(blue / 255.0);

        green--;
        blue++;
        await Task.Delay(delay);
    }

    while (blue != 0 && red != 255)
    {
        bluePin.SetActiveDutyCyclePercentage(blue / 255.0);
        redPin.SetActiveDutyCyclePercentage(red / 255.0);

        blue--;
        red++;
        await Task.Delay(delay);
    }
}