API is a good choice when using cross platform applications. In addition to the website, your product may also have Android and iOS applications. In this case, the API is just as good because you can write different front ends without changing any back-end code. When using the API, just click GET, POST or other types of requests with some parameters, and the server will return some data in JSON (JavaScript Object Notation) format, which is processed by the client application.
Explain
Let's write down our application details and features first. We will use JWT authentication to build the basic user product list in laravel using the restful API.
A User will use the following functions
- Sign up and create a new account
- Sign in to their account
- Unregister and discard token s and leave the application
- Get login user details
- Retrieve a list of products available to users
- Find specific products by ID
- Add new product to user product list
- Edit existing product details
- Remove an existing product from the user list
A User required
- name
- password
A Product is required
- name
- price
- quantity
Create a new project
By running the following command, we can start and create a new Laravel project.
composer create-project --prefer-dist laravel/laravel jwt
This creates a new Laravel project in a directory called jwt.
Configure JWT extension package
We will use the tymondesigns / JWT auth extension package to let us use JWT in Laravel.
Installing the tymon / JWT auth extension package
Let's install the extension package in the Laravel application. If you are using Laravel 5.5 or above, run the following command to get the JWT package for dev development:
composer require tymon/jwt-auth:dev-develop --prefer-source
If you are using Laravel 5.4 or later, run this command:
composer require tymon/jwt-auth
For applications with Laravel version lower than 5.5, you also need to set the service provider and alias in the config/app.php file.
'providers' => [
 ....
 Tymon\JWTAuth\Providers\JWTAuthServiceProvider::class,
 ....
],
'aliases' => [
 ....
 'JWTAuth' => Tymon\JWTAuth\Facades\JWTAuth::class,
 'JWTFactory' => 'Tymon\JWTAuth\Facades\JWTFactory',
 ....
],
If your Laravel version is 5.5 or above, Laravel will perform package autodiscover.
Publish profile
For Laravel 5.5 or later, use this command to publish the configuration file:
php artisan vendor:publish --provider="Tymon\JWTAuth\Providers\LaravelServiceProvider"
For previous versions of Laravel, you should run the following command:
php artisan vendor:publish --provider="Tymon\JWTAuth\Providers\JWTAuthServiceProvider"
The above command generates the config/jwt.php configuration file. Remove the comment section and the profile will look like this:
<?php
return [
 'secret' => env('JWT_SECRET'),
 'keys' => [
 'public' => env('JWT_PUBLIC_KEY'),
 'private' => env('JWT_PRIVATE_KEY'),
 'passphrase' => env('JWT_PASSPHRASE'),
 ],
 'ttl' => env('JWT_TTL', 60),
 'refresh_ttl' => env('JWT_REFRESH_TTL', 20160),
 'algo' => env('JWT_ALGO', 'HS256'),
 'required_claims' => [
 'iss',
 'iat',
 'exp',
 'nbf',
 'sub',
 'jti',
 ],
 'persistent_claims' => [
 // 'foo',
 // 'bar',
 ],
 'lock_subject' => true,
 'leeway' => env('JWT_LEEWAY', 0),
 'blacklist_enabled' => env('JWT_BLACKLIST_ENABLED', true),
 'blacklist_grace_period' => env('JWT_BLACKLIST_GRACE_PERIOD', 0),
 'decrypt_cookies' => false,
 'providers' => [
 'jwt' => Tymon\JWTAuth\Providers\JWT\Lcobucci::class,
 'auth' => Tymon\JWTAuth\Providers\Auth\Illuminate::class,
 'storage' => Tymon\JWTAuth\Providers\Storage\Illuminate::class,
 ],
];
Generate JWT key
The JWT token is issued with an encrypted key. For Laravel 5.5 or later, run the following command to generate the key for issuing the token.
php artisan jwt:secret
If the Laravel version is lower than 5.5, run:
php artisan jwt:generate
This tutorial uses Laravel 5.6. The next steps in the tutorial were tested only in 5.5 and 5.6. May not work with Laravel 5.4 or later. You can read the documentation for older versions of Laravel.
Register Middleware
The JWT authentication extension package comes with middleware that allows us to use. Register auth.jwt Middleware in app/Http/Kernel.php:
protected $routeMiddleware = [
 ....
 'auth.jwt' => \Tymon\JWTAuth\Http\Middleware\Authenticate::class,
];
The middleware verifies the authentication of the user by checking the token attached to the request. If the user is not authenticated, the middleware will throw an unauthorized httpexception.
Set route
Before we start, we will route all the points discussed in this tutorial. Open routes/api.php and copy the following routes to your file.
Route::post('login', 'ApiController@login');
Route::post('register', 'ApiController@register');
Route::group(['middleware' => 'auth.jwt'], function () {
Route::get('logout', 'ApiController@logout');
Route::get('user', 'ApiController@getAuthUser');
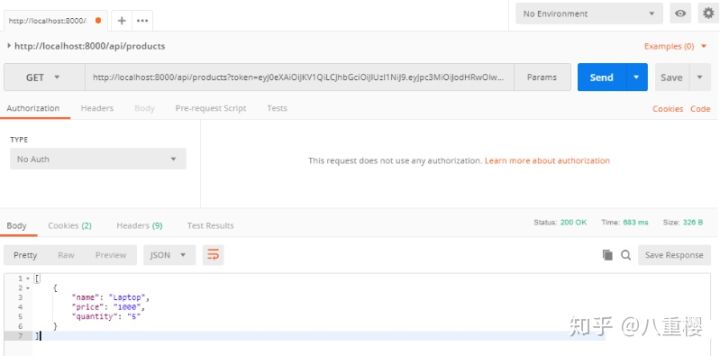
Route::get('products', 'ProductController@index');
Route::get('products/{id}', 'ProductController@show');
Route::post('products', 'ProductController@store');
Route::put('products/{id}', 'ProductController@update');
Route::delete('products/{id}', 'ProductController@destroy');
});
Update User model
JWT needs to implement the Tymon\JWTAuth\Contracts\JWTSubject interface in the User model. This interface needs to implement two methods, getJWTIdentifier and getJWTCustomClaims. Update app/User.php with the following.
<?php
namespace App;
use Illuminate\Foundation\Auth\User as Authenticatable;
use Illuminate\Notifications\Notifiable;
use Tymon\JWTAuth\Contracts\JWTSubject;
class User extends Authenticatable implements JWTSubject
{
 use Notifiable;
 /**
 * The attributes that are mass assignable.
 *
 * @var array
 */
 protected $fillable = [
 'name', 'email', 'password',
 ];
 /**
 * The attributes that should be hidden for arrays.
 *
 * @var array
 */
 protected $hidden = [
 'password', 'remember_token',
 ];
 /**
 * Get the identifier that will be stored in the subject claim of the JWT.
 *
 * @return mixed
 */
 public function getJWTIdentifier()
 {
 return $this->getKey();
 }
 /**
 * Return a key value array, containing any custom claims to be added to the JWT.
 *
 * @return array
 */
 public function getJWTCustomClaims()
 {
 return [];
 }
}
JWT authentication logic
Let's write the Restful API logic in laravel using JWT authentication.
Users need a name, email address and password to register. So, let's create a form request to validate the data. Create a form request named RegisterAuthRequest by running the following command:
php artisan make:request RegisterAuthRequest
It will create the RegisterAuthRequest.php file in the app/Http/Requests directory. Paste the following code into the file.
<?php
namespace App\Http\Requests;
use Illuminate\Foundation\Http\FormRequest;
class RegisterAuthRequest extends FormRequest
{
 /**
 * Determine if users are authorized to make this request
 *
 * @return bool
 */
 public function authorize()
 {
 return true;
 }
 /**
 * Get the validation rules applied to the request
 *
 * @return array
 */
 public function rules()
 {
 return [
 'name' => 'required|string',
 'email' => 'required|email|unique:users',
 'password' => 'required|string|min:6|max:10'
 ];
 }
}
Run the following command to create a new ApiController:
php artisan make:controller ApiController
This will create the ApiController.php file in the app/Http/Controllers directory. Paste the following code into the file.
<?php
namespace App\Http\Controllers;
use App\Http\Requests\RegisterAuthRequest;
use App\User;
use Illuminate\Http\Request;
use JWTAuth;
use Tymon\JWTAuth\Exceptions\JWTException;
class ApiController extends Controller
{
 public $loginAfterSignUp = true;
 public function register(RegisterAuthRequest $request)
 {
 $user = new User();
 $user->name = $request->name;
 $user->email = $request->email;
 $user->password = bcrypt($request->password);
 $user->save();
 if ($this->loginAfterSignUp) {
 return $this->login($request);
 }
 return response()->json([
 'success' => true,
 'data' => $user
 ], 200);
 }
 public function login(Request $request)
 {
 $input = $request->only('email', 'password');
 $jwt_token = null;
 if (!$jwt_token = JWTAuth::attempt($input)) {
 return response()->json([
 'success' => false,
 'message' => 'Invalid Email or Password',
 ], 401);
 }
 return response()->json([
 'success' => true,
 'token' => $jwt_token,
 ]);
 }
 public function logout(Request $request)
 {
 $this->validate($request, [
 'token' => 'required'
 ]);
 try {
 JWTAuth::invalidate($request->token);
 return response()->json([
 'success' => true,
 'message' => 'User logged out successfully'
 ]);
 } catch (JWTException $exception) {
 return response()->json([
 'success' => false,
 'message' => 'Sorry, the user cannot be logged out'
 ], 500);
 }
 }
 public function getAuthUser(Request $request)
 {
 $this->validate($request, [
 'token' => 'required'
 ]);
 $user = JWTAuth::authenticate($request->token);
 return response()->json(['user' => $user]);
 }
}
Let me explain what happened in the code above.
In the register method, we receive RegisterAuthRequest. Create a user using the data in the request. If the loginAfterSignUp property is true, log in for the user by calling the login method after registration. Otherwise, a successful response will be returned with the user data.
In the login method, we get a subset of the request, which contains only email and password. Call JWTAuth::attempt() with the entered value as the parameter, and the response is saved in a variable. If false is returned from the attempt method, a failure response is returned. Otherwise, a successful response will be returned.
In the logout method, verify that the request contains token validation. Invalidate the token by calling the invalidate method and return a successful response. If a JWTException exception exception is caught, a failed response is returned.
In the getAuthUser method, verify that the request contains a token field. It then calls the authenticate method, which returns the authenticated user. Finally, a response with the user is returned.
The authentication section is now complete.
Build product part
To create the Product part, we need the Product model, controller and migration file. Run the following commands to create Product models, controllers, and migration files.
php artisan make:model Product -mc
It will create a new database migration file in the database/migrations directory, create "products" table.php, and change the up method.
public function up()
{
 Schema::create('products', function (Blueprint $table) {
 $table->increments('id');
 $table->integer('user_id');
 $table->string('name');
 $table->integer('price');
 $table->integer('quantity');
 $table->timestamps();
 $table->foreign('user_id')
 ->references('id')
 ->on('users')
 ->onDelete('cascade');
 });
}
Add the fillable property to the Product model. Open the Product.php file in the app directory and add properties.
protected $fillable = [
 'name', 'price', 'quantity'
];
Now set up the database credentials in the. env file and migrate the database by running the following command.
php artisan migrate
Now we have to add a relationship to the User model to retrieve the relevant products. Add the following methods to app/User.php.
public function products()
{
 return $this->hasMany(Product::class);
}
Open the ProductController.php file in the app/Http/Controllers directory. Add the use directive at the beginning of the file to overwrite the previous one.
use App\Product;
use Illuminate\Http\Request;
use JWTAuth;
Now we will implement five methods.
index to obtain a list of all products for authenticated users
show, get specific products according to ID
Store to store new products in the product list
Update, update product details according to ID
destroy, delete the product from the list according to the ID
Add a constructor to get the authenticated user and save it in the user property.
protected $user;
public function __construct()
{
 $this->user = JWTAuth::parseToken()->authenticate();
}
parseToken will parse the token from the request, and authenticate will authenticate the user through the token.
Let's add the index method.
public function index()
{
 return $this->user
 ->products()
 ->get(['name', 'price', 'quantity'])
 ->toArray();
}
The above code is very simple. We just use Eloquent's method to get all the products, and then make an array of the results. Finally, we return this array. Laravel will automatically convert it to JSON and create a response code of 200 success.
Continue to implement the show method.
public function show($id)
{
 $product = $this->user->products()->find($id);
 if (!$product) {
 return response()->json([
 'success' => false,
 'message' => 'Sorry, product with id ' . $id . ' cannot be found'
 ], 400);
 }
 return $product;
}
It's also very easy to understand. We just need to find the product by ID. If the product does not exist, a 400 failure response is returned. Otherwise, an array of products is returned.
Next is the store method
public function store(Request $request)
{
 $this->validate($request, [
 'name' => 'required',
 'price' => 'required|integer',
 'quantity' => 'required|integer'
 ]);
 $product = new Product();
 $product->name = $request->name;
 $product->price = $request->price;
 $product->quantity = $request->quantity;
 if ($this->user->products()->save($product))
 return response()->json([
 'success' => true,
 'product' => $product
 ]);
 else
 return response()->json([
 'success' => false,
 'message' => 'Sorry, product could not be added'
 ], 500);
}
In the store method, verify that the request contains the name, price, and quantity. Then, use the data in the request to create a new product model. If the product is successfully written to the database, a successful response will be returned, otherwise a customized 500 failure response will be returned.
Implement the update method
public function update(Request $request, $id)
{
 $product = $this->user->products()->find($id);
 if (!$product) {
 return response()->json([
 'success' => false,
 'message' => 'Sorry, product with id ' . $id . ' cannot be found'
 ], 400);
 }
 $updated = $product->fill($request->all())
 ->save();
 if ($updated) {
 return response()->json([
 'success' => true
 ]);
 } else {
 return response()->json([
 'success' => false,
 'message' => 'Sorry, product could not be updated'
 ], 500);
 }
}
In the update method, we get the product by id. If the product does not exist, a 400 response is returned. Then, we use the fill method to fill the data in the request into the product details. Update the product model and save it to the database. If the record is successfully updated, a 200 success response will be returned. Otherwise, a 500 internal server error response will be returned to the client.
Now, let's implement the destroy method.
public function destroy($id)
{
 $product = $this->user->products()->find($id);
 if (!$product) {
 return response()->json([
 'success' => false,
 'message' => 'Sorry, product with id ' . $id . ' cannot be found'
 ], 400);
 }
 if ($product->delete()) {
 return response()->json([
 'success' => true
 ]);
 } else {
 return response()->json([
 'success' => false,
 'message' => 'Product could not be deleted'
 ], 500);
 }
}
In the destroy method, we get the product according to the ID. if the product does not exist, we return a 400 response. We then delete the product and return the appropriate response based on the success status of the delete operation.
The controller code is now complete, and the complete controller code is here.
test
Let's test the authentication first. We will use the serve command to start the Web service on the development machine. You can also use the virtual host instead. Run the following command to start the Web service.
php artisan serve
It will listen to localhost:8000
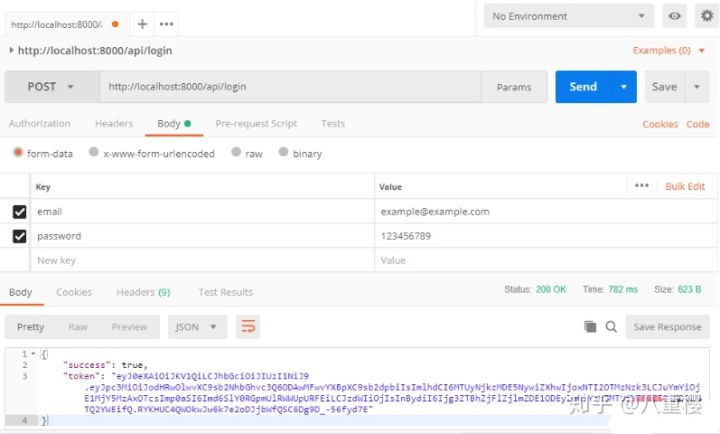
To test restful API's, we use Postman. After filling in the request body, we request the register route.
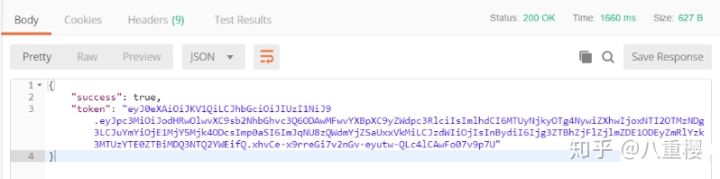
Send the request and you will get the token.
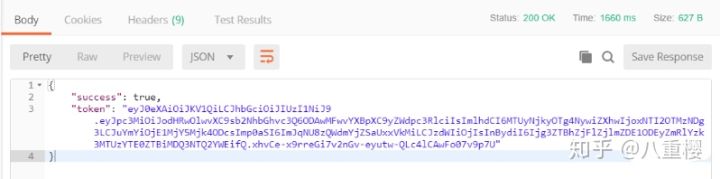
Our users are now registered and authenticated. We can send another request to detect the login route, and the result will return 200 and token.
Get user details

Test authentication completed. Next, test the product section, and first create a product.
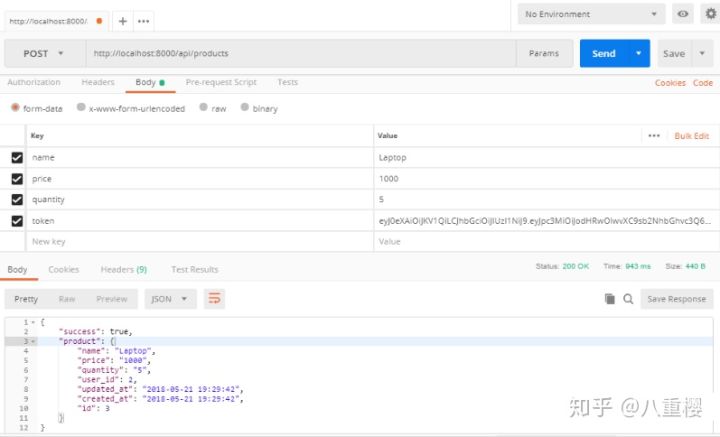
Now, get the product by requesting the index method.
You can test other routes and they will all work.